- Company Articles
- Products and Technology
- Installation And Maintenance
- Installation Guide for 85 Steel Roller Track Systems

Installation Guide for 85 Steel Roller Track Systems
Related Product
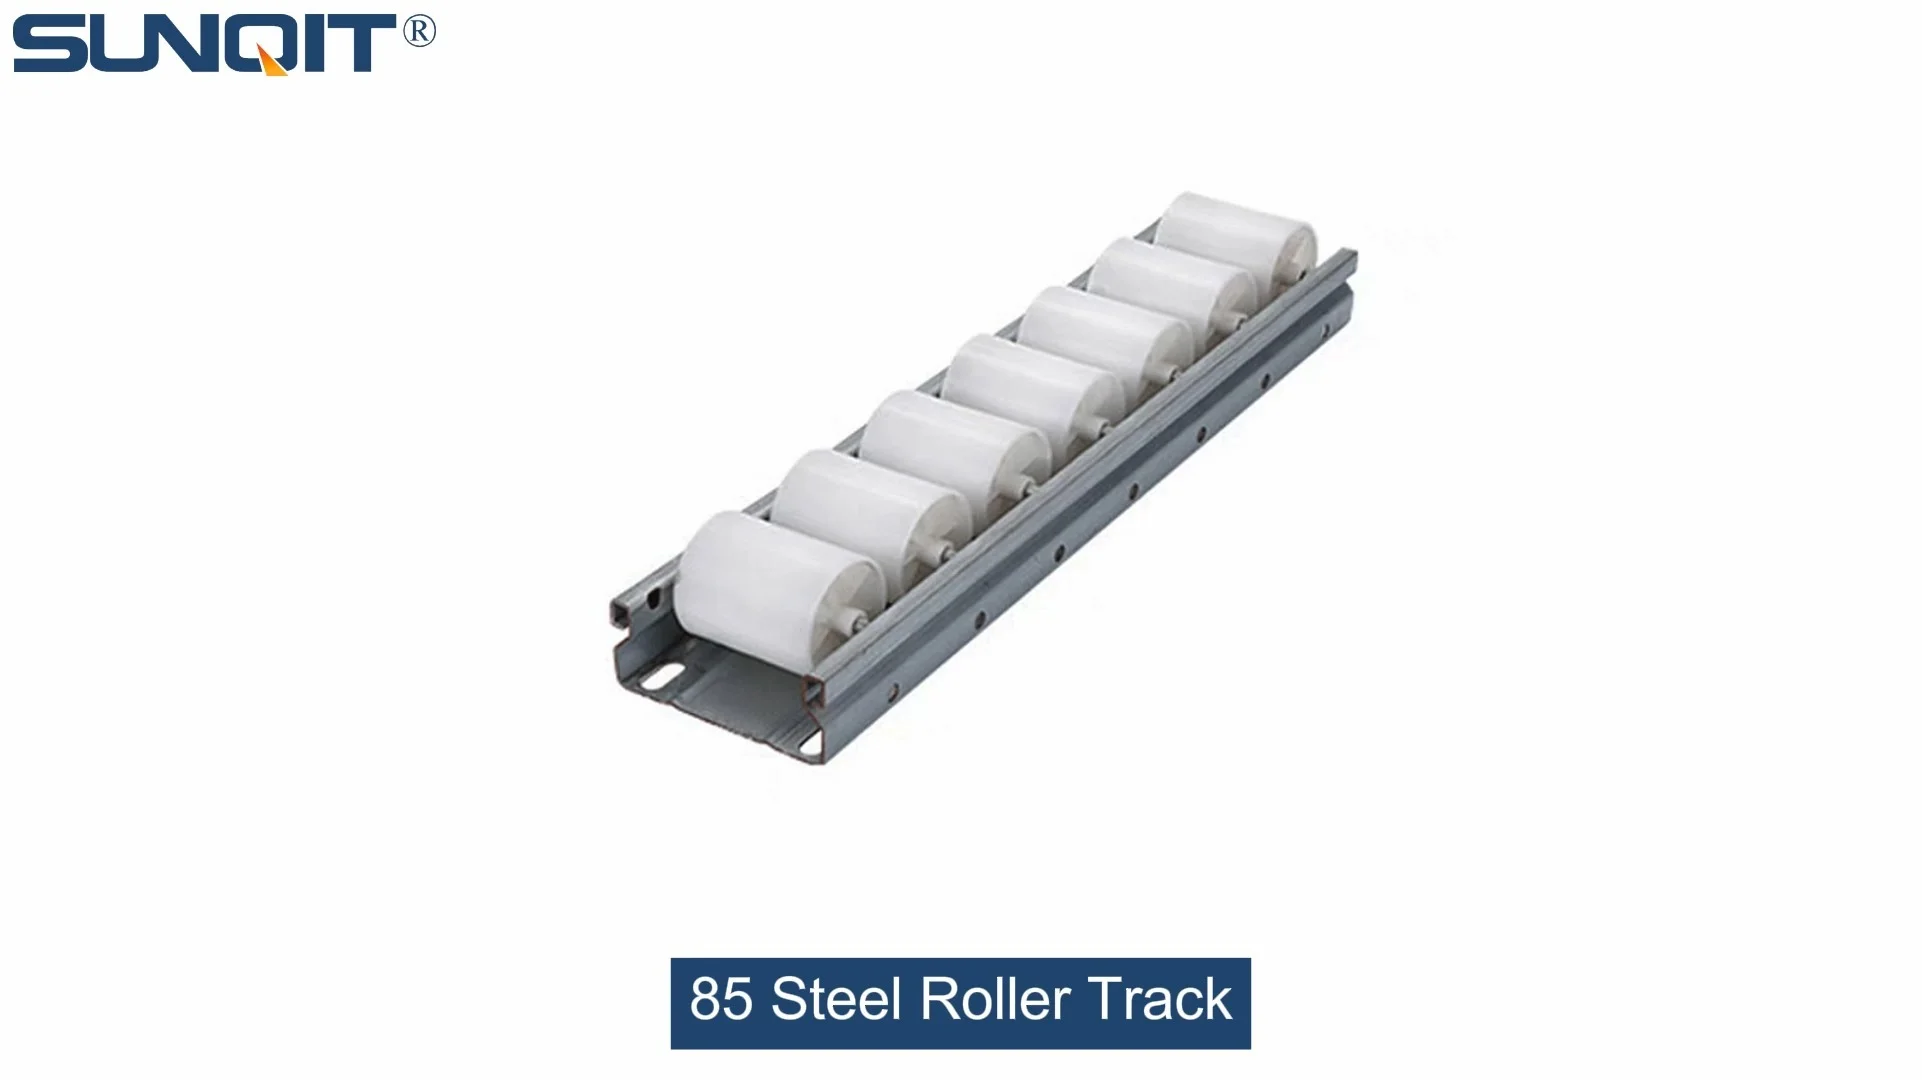
85 Steel Roller Track
85 heavy duty modular system roller track.Its use is focused on the transport of heavy products. Its implantation is carried out by creating a slope for the product to move under the force of gravity.
If you've ever walked through a well-organized manufacturing floor, you've probably noticed how smoothly materials glide from one workstation to the next—no bottlenecks, no delays, just a steady flow that keeps production humming. A big part of that magic? Systems like the 85 Steel Roller Track. Designed to move parts, boxes, and components with minimal effort, this roller track isn't just a piece of equipment; it's the backbone of efficient material handling in lean manufacturing setups. Whether you're integrating it into a new production line or upgrading an existing one, getting the installation right is key to unlocking its full potential. Let's walk through how to do it step by step, with tips to ensure safety, durability, and that satisfying "effortless roll" you need for your workflow.
Before You Start: Prep Work Matters
Installing roller track might seem straightforward, but rushing into it without prep is a common mistake. Let's cover the basics first to avoid headaches later.
1. Safety First—Always
Before you touch a single bolt, take a minute to set up a safe workspace. Wear work gloves to protect your hands from sharp edges on steel components, and slip on closed-toe shoes—dropping a metal bracket on your foot is no fun. If you're working in a busy area, use caution tape or cones to mark off the installation zone, so others know to keep clear. And don't forget: if you're lifting heavy sections (those steel tracks can get weighty!), ask for help. Teamwork beats strained muscles.
2. Plan Your Layout Like a Pro
Your 85 Steel Roller Track doesn't exist in a vacuum—it's part of a bigger ecosystem, maybe feeding into a conveyor, sitting alongside a workbench, or connecting two stations in your lean solution. Grab a tape measure and sketch out your space first. Mark where the track will start and end, and check for obstacles: Are there floor drains or uneven surfaces that might throw off alignment? Will operators need to walk around it? Measure twice, install once—this step saves you from redoing work later.
Pro Tip:
If this track is part of a larger lean solution, double-check how it interacts with other equipment. For example, if it feeds into a conveyor system, the height and angle need to match perfectly to avoid jams. A quick sketch with dimensions (height, length, slope) will keep everyone on the same page.
3. Unbox and Inspect Everything
There's nothing worse than getting halfway through installation and realizing a connector is missing. Lay out all your components on a clean, flat surface—a workbench works great here. You should have: 85 steel roller track sections, end supports, connectors, mounting brackets (often made with durable aluminum profile for strength), screws, and maybe side guides or stop blocks. Check each part for dents, bent rollers, or cracked plastic (if your track has plastic guides). If something looks off, contact your supplier before starting—better to wait for a replacement than force a damaged part into place.
Tools & Materials You'll Need
Gather these tools before you start, so you're not running back and forth to the toolbox. Here's your checklist:
| Tool/Material | Why You Need It | Pro Tip |
|---|---|---|
| Tape measure (25ft+) | For precise layout and alignment | Use a retractable one for easy one-person use |
| Spirit level (2ft or longer) | To ensure the track is perfectly horizontal | Magnetic levels stick to steel tracks—handy! |
| Cordless drill with bits | Driving screws into brackets and aluminum profile | Charge the battery overnight—you don't want it dying mid-job |
| Wrench set (socket or adjustable) | Tightening nuts on connectors | Socket wrenches give more torque than adjustable ones |
| Pencil and masking tape | Marking installation points on the floor/wall | Masking tape won't leave residue on floors |
| Rubber mallet | Gently tapping sections into place (no brute force!) | Avoid metal hammers—they can dent steel tracks |
| Safety glasses and gloves | Protecting eyes from debris and hands from sharp edges | Cut-resistant gloves are worth the investment |
| 85 Steel Roller Track components | The track sections, connectors, brackets, etc. | Sort parts by size before starting—saves time |

Step-by-Step Installation: Let's Build It
Now for the fun part—putting it all together. Follow these steps, and you'll have a smooth-rolling track in no time.
Step 1: Build the Support Frame (If Needed)
Most 85 Steel Roller Tracks mount to a frame, often made of aluminum profile for lightweight strength. If your setup uses a frame:
- Assemble the vertical posts: Cut aluminum profile to your desired height (measure from the floor to the bottom of the track). Use corner brackets to connect vertical posts to horizontal base rails—this keeps the frame from wobbling.
- Add cross-braces for stability: Diagonal braces between posts prevent sway, especially if you're mounting the track at waist height or higher. Screw them into the profile using T-slot bolts (they slide into the aluminum profile's grooves for a secure fit).
- Level the frame: Stand the frame upright and use your spirit level on the top rails. Adjust the feet (many aluminum profile frames have adjustable leveling feet) until the frame is perfectly vertical and horizontal. Tighten the feet once level—you don't want it shifting later.
Heads Up:
If you're mounting the track directly to the floor (common for low-height setups), skip the frame and use floor brackets. Just make sure the floor is flat! Fill any cracks or dips with epoxy if needed—uneven floors = wonky tracks.
Step 2: Mount the Track Base Rails
The base rails are the "backbone" that holds the roller track sections. Here's how to secure them:
- Mark the mounting points: Lay the base rails on your frame (or floor) where the track will go. Use a pencil to mark where the screws will go—space them every 12-18 inches for strength. If mounting to aluminum profile, align the rail holes with the profile's T-slots.
- Pre-drill (if needed): If you're drilling into steel or thick aluminum, pre-drill small pilot holes to make screwing easier. Skip this for pre-threaded holes in brackets—just screw directly in.
- Attach the rails: Use the supplied screws (or bolts for heavier loads) to fasten the base rails to the frame. Tighten them snug, but don't overdo it—stripping threads is a pain. Check with your level again—rails must be horizontal, or materials will roll too fast (or not at all).
Step 3: Connect the Roller Track Sections
Now it's time to add the star of the show: the roller track sections themselves. These are usually 3-4ft long and connect end-to-end.
- Start at one end: Lay the first track section on the base rails. Align its mounting holes with the holes on the base rail—most tracks have pre-drilled holes for this.
- Secure with connectors: Use the track's end connectors to link sections together. Slide the connector into the end of one track, then bolt it to the next section. Make sure the rollers line up evenly—no gaps or overlaps, or materials will get stuck.
- Check for straightness: Stand back and look along the track—does it curve left or right? Adjust the sections until they're in a straight line. A string line (stretched between two stakes at each end) can help here—align the track edges with the string.
Step 4: Add Side Guides and Stop Blocks
Side guides keep materials centered on the track, and stop blocks prevent them from rolling off the end. Install them like this:
- Side guides: Slide plastic or metal guides into the track's side channels (most 85 Steel Roller Tracks have slots for this). Position them so there's 1/2 inch of space between the guide and your typical material width—enough to let items roll freely, but not so much they wiggle.
- Stop blocks: At the end of the track (or at stations where materials should pause), attach stop blocks. These can be spring-loaded (for gentle stopping) or fixed (for hard stops). Screw them into the base rail, making sure they're tall enough to block your materials but not so tall they scrape the bottom of boxes.
Step 5: Test the Roll (And Adjust as Needed)
You're almost done! Now it's time to test if everything works. Grab a sample box or part (similar to what you'll run on the track) and place it at the start. Give it a gentle push—how does it roll?
- Too slow? The track might be sloping upward slightly. Check with your level and adjust the base rails to a tiny downward slope (1/8 inch per foot is ideal—enough to let gravity do the work, but not so steep items fly off).
- Too fast? Reverse the slope slightly, or add friction pads under the track (rubber strips work) to slow things down.
- Jumpy or stuck? Check for bent rollers—replace any that don't spin freely. Also, make sure track sections are aligned—even a 1/4 inch misalignment can cause jams.
Pro Test:
Roll multiple items at once (if your track is wide enough) to simulate real-world use. Do they stay centered? Do they bump into each other? Adjust side guides if needed to keep the flow smooth.

Safety & Performance Tips to Keep in Mind
Your track is installed—now keep it running well and safely for years.
1. Don't Overload It
Every 85 Steel Roller Track has a weight limit (check the specs from your supplier—usually 50-100 lbs per linear foot). Exceeding it bends rollers, warps rails, and turns your "effortless flow" into a broken system. Post the weight limit near the track as a reminder for your team.
2. ESD Protection (If You Need It)
If you're using the track in an ESD-sensitive area (like electronics assembly with ESD workstations), make sure it's grounded. Some 85 Steel Tracks come with conductive rollers or grounding tabs—connect these to your facility's ESD ground system. No grounding = static electricity that can fry sensitive components.
3. Keep It Clean
Dust, oil, and debris love to build up in roller tracks. Wipe down the rollers and rails weekly with a dry cloth, and use compressed air to blow out gunk from between rollers. For sticky residues (like tape or glue), use a mild degreaser—avoid harsh chemicals that can damage plastic parts.

Troubleshooting Common Issues
Even with perfect installation, problems happen. Here's how to fix the most common ones:
- Rollers won't spin: Likely dirt or rust. Clean the rollers with a wire brush, then add a drop of light machine oil to the axles. Avoid heavy oil—it attracts more dirt.
- Track sags in the middle: Not enough support. Add extra brackets under the sagging section, spaced closer together (every 6-8 inches).
- Materials slide instead of roll: Rollers are too smooth (common with plastic rollers) or the slope is too steep. Add rubber grippers to the rollers (for plastic) or reduce the slope.
- Connectors loosen over time: Vibration from rolling materials can loosen screws. Check all bolts monthly and tighten as needed—this prevents sections from separating.
Wrapping Up: Your Track, Your Lean Solution
Installing 85 Steel Roller Track isn't just about bolting metal together—it's about building a workflow that works for your team. When done right, this track becomes a quiet hero, moving materials so smoothly that your operators can focus on building great products, not wrestling with heavy boxes. Take the time to level carefully, tighten those screws, and test thoroughly—your future self (and your production metrics) will thank you.
And remember: this track is part of your larger lean solution. Pair it with conveyors to extend the flow, workbenches to create efficient stations, and aluminum profile frames to customize the setup as your needs change. Lean manufacturing is all about adaptability, and a well-installed roller track is a flexible tool that grows with you.
Now go fire up that track—and enjoy the sound of materials rolling right where they need to be, when they need to be there. That's the sound of efficiency.