- Company Articles
- Products and Technology
- Installation And Maintenance
- Installation Guide: How to Properly Fit a T-Slot Rubber Seal Cover on Material Rack B

Installation Guide: How to Properly Fit a T-Slot Rubber Seal Cover on Material Rack B
Related Product
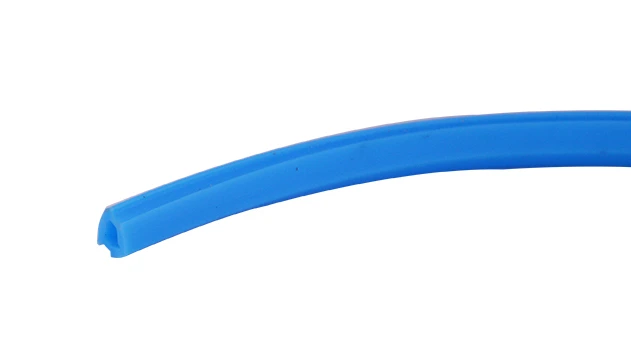
T-slot Rubber Seal Cover
The rubber T-slot seal cover prevents dust and debris buildup, covers wires in the T-slot channel, and adds an extra layer of protection to applications. It rolls into the T-slot, making it easy to assemble.
If you've spent any time in a warehouse, production line, or even a busy workshop, you know that the little things often make the biggest difference. Take Material Rack B, for example—the 3-row, 3-floor workhorse that keeps your materials organized, accessible, and ready to roll when your team needs them. But even the sturdiest racks can benefit from a simple upgrade: the T-slot rubber seal cover. These unassuming strips of rubber might seem trivial, but they're the unsung heroes of protecting your aluminum profiles, reducing noise, and keeping your workflow smooth. Today, I'm going to walk you through exactly how to install one properly, step by step. Whether you're a seasoned facility manager or new to lean system setups, this guide will turn you into a pro in no time.
Why Bother with T-Slot Rubber Seal Covers?
Before we dive into the "how," let's talk about the "why." Material Rack B is built with aluminum profiles—durable, lightweight, and designed to stand up to daily use. But those aluminum T-slots (the grooves running along the edges of the profiles) can be rough on both your materials and your team. Ever had a box snag on an exposed T-slot, tearing the packaging? Or heard the (that's "ear-piercing" in workshop terms) scrape of metal against metal when sliding a part across the rack? That's where the T-slot rubber seal cover comes in. It cushions the edges, smooths out the surface, and even keeps dust and debris from gunking up the slots over time. Think of it as a protective hug for your rack's aluminum bones—small, but essential for long-term performance.
And let's not forget about safety. Exposed T-slots can have sharp edges, especially if the rack has been in use for a while. A rubber seal covers those edges, reducing the risk of cuts when loading or unloading materials. Plus, in lean system environments, where efficiency is king, anything that prevents delays (like a torn box or a stuck part) is worth investing 15 minutes of your time. Trust me—I've seen facilities skip this step, and they always end up regretting it when they're replacing damaged profiles or cleaning out jammed T-slots six months later.
Tools You'll Need (And Why Each One Matters)
You don't need a toolbox full of fancy gear for this job—just a few basics. Here's what I recommend gathering before you start, along with a quick note on why each tool is non-negotiable:
| Tool | Purpose | Pro Tip |
|---|---|---|
| Rubber mallet | Tapping the seal into place without damaging the aluminum profile | Opt for a soft rubber head—hard plastic can scratch the aluminum. |
| Measuring tape | Ensuring your T-slot rubber seal is cut to the exact length of the T-slot | Measure twice, cut once! Aluminum profile rubber strips often come in standard lengths, so you'll want to avoid wasting material. |
| Utility knife with a fresh blade | Trimming excess seal for a clean, snug fit | Dull blades tear rubber instead of cutting it—swap in a new blade if you feel resistance. |
| Lint-free cloth (dry or slightly damp) | Cleaning the T-slot before installation | A damp cloth works better for sticky residue, but dry the slot thoroughly afterward—rubber and moisture don't mix well during installation. |
| Work gloves | Protecting your hands from sharp edges or rough aluminum profile surfaces | Nitrile gloves are best—they grip better than latex and won't slip when handling the rubber seal. |

Step 1: Prep Your Material Rack B—Clean the T-Slots
First things first: your Material Rack B's T-slots need to be spotless. I'm talking no dust, no metal shavings, no old bits of tape, and definitely no mystery sticky residue from that time someone tried to "fix" a loose label with super glue (we've all been there). Even tiny debris can prevent the T-slot rubber seal from seating properly, leaving gaps that defeat the whole purpose of installing it.
Start by grabbing your dry lint-free cloth and wiping down the T-slot from end to end. This will pick up most of the loose dust and dirt. If there's stubborn grime—like oil from a spilled lubricant or dried-on paint—dampen the cloth with a little water (or rubbing alcohol for extra tough spots) and gently scrub the area. Be careful not to soak the slot, though—aluminum profiles are corrosion-resistant, but standing water isn't its friend. Once you're done, let the slot air-dry for 5–10 minutes, or pat it dry with a clean cloth. The goal is a smooth, debris-free surface where the rubber seal can cling tight.
Pro move: While you're cleaning, take a quick look at the T-slot edges. Are there any burrs or sharp nicks from years of use? If so, grab a fine-grit sandpaper (220-grit works) and gently smooth them out. A rough edge will tear the rubber seal over time, so this extra 2 minutes will save you from redoing the job later.

Step 2: Measure Twice, Cut Once—Sizing Your T-Slot Rubber Seal
Now that your T-slot is clean, it's time to size up your aluminum profile rubber strip. Material Rack B's T-slots are consistent, but it's always smart to measure the exact length you need before cutting. Grab your measuring tape and stretch it along the T-slot from one end to the other. Jot down the measurement—let's say it's 120 cm for argument's sake. Now, check the length of your rubber seal. Most aluminum profile accessories suppliers sell these seals in 2-meter or 3-meter rolls, so you'll likely need to trim it to fit.
Lay the rubber seal flat on a workbench (a clean, flat surface is key here—no wobbly tables!). Use your measuring tape to mark the length you need with a pencil (a light mark is all you need; rubber erases easily). Then, line up a straightedge (a metal ruler or even a long, flat piece of scrap wood) along the mark. Hold the straightedge firmly with one hand, and with the other, score the rubber seal with your utility knife. Apply gentle pressure—you're not trying to cut through in one go. Score it 2–3 times, and it should snap cleanly along the line. If it doesn't, score a few more times until it does. Trust me, a clean cut here means a snug fit later.
Heads up: If your T-slot has corners or curves (unlikely on Material Rack B, but possible on custom setups), you'll need to make angled cuts. For 90-degree corners, measure the length of each straight section, cut two separate pieces, and overlap them slightly at the corner. It's not as tricky as it sounds—just take your time, and the seal will conform to the shape once installed.
Step 3: Align and Press—Getting the Seal Started
With your seal cut to size, it's time to start fitting it into the T-slot. This part is all about patience—rushing the alignment will lead to a crooked seal, and nobody wants that. Start by holding one end of the rubber seal up to the start of the T-slot. The seal should have a "lip" that fits into the T-slot's groove—make sure that lip is facing down into the slot, not sticking up. Gently press the end of the seal into place with your thumb. You should feel it "catch" slightly—that means it's seated in the groove.
Now, slowly walk the seal along the T-slot, pressing it in with your fingers as you go. Keep your eyes on the alignment—if it starts to veer to one side, gently nudge it back straight. It's okay if it's a little loose at this stage; we'll snug it up with the rubber mallet next. The key here is to get the entire length of the seal sitting in the T-slot before tapping—this prevents kinks or bubbles that are hard to fix later.
Pro tip: If you're installing a long seal (over 2 meters), enlist a helper. Have them hold one end steady while you guide the other—two sets of hands make alignment a breeze, especially on Material Rack B's taller sections where reaching can be tricky.
Step 4: Tap It In—Securing the Seal with a Rubber Mallet
Now comes the satisfying part: tapping the seal into place. Grab your rubber mallet and hold it at a slight angle (about 45 degrees) to the seal. Start at the end you already pressed in, and give it a light tap—just enough to set it firmly. Then, move along the seal, tapping gently every 5–10 cm. The goal is to work your way from one end to the other, ensuring the seal seats evenly into the T-slot. Avoid hammering hard in one spot—this can stretch or tear the rubber, or even dent the aluminum profile (and we don't want that).
As you tap, you'll feel the seal "click" into place—it should sit flush with the top of the aluminum profile, no gaps or bulges. If you notice a section that's not seating, don't force it. Pull the seal back a few centimeters, realign it, and try tapping again. Sometimes, a tiny piece of debris (yes, even after cleaning!) can get in the way—blow on the slot or wipe it again if needed.
A quick check: Run your hand along the installed seal. It should feel smooth and consistent, with no raised edges. If you feel a bump, that's a sign the seal isn't fully seated—go back and tap that spot gently until it flattens out.
Step 5: Trim Excess and Inspect—The Final Touches
If you measured correctly, your seal should fit perfectly, but sometimes you'll end up with a tiny overhang at the end (no judgment—we've all been there). Grab your utility knife and straightedge again, and trim the excess. Hold the straightedge flush with the end of the T-slot, score the seal a few times, and snap it off. For a super clean edge, you can also use scissors, but a utility knife gives a straighter cut on rubber.
Now, let's inspect your handiwork. Stand back and look at the entire length of the seal—does it run straight along the T-slot? Are there any gaps between the seal and the aluminum profile? Run a soft cloth over the seal to remove any fingerprints or smudges (yes, even rubber needs a little shine). Then, test it out! Grab a small box or bin and slide it along the rack—you should hear a smooth, quiet glide instead of the usual scrape. That's the sound of a job well done.
Troubleshooting Common Hiccups
Even with careful prep, things can go sideways. Here are a few common issues and how to fix them:
- Seal keeps popping out: This usually means it wasn't tapped in far enough. Go back with the rubber mallet and tap along the entire length again, focusing on the sections that popped out. If it still won't stay, check the T-slot for damage—sometimes a bent edge can prevent the seal from seating. Gently bend the edge back with pliers (wrapped in cloth to avoid scratches) and try again.
- Seal is too tight to fit: Rubber can stiffen in cold temperatures. If your workspace is chilly, warm the seal with your hands for a minute (or set it in a sunny spot for 10 minutes) to make it more pliable. Never stretch the seal to fit—that will weaken it over time.
- Gaps between the seal and T-slot: Gaps mean debris will sneak in, defeating the purpose. Most likely, the seal was misaligned during installation. Peel it back a few inches, realign, and tap it in again. If the gap is tiny (less than 1mm), it might close up as the seal settles—give it 24 hours and check again.
Maintaining Your T-Slot Rubber Seal Cover
Your seal will last for years with a little care. Every month or so, wipe it down with a damp cloth to remove dust and grime. If you notice cracks or tears, replace it ASAP—damaged seals can't protect your aluminum profiles or reduce noise effectively. And when it's time to replace, just repeat these steps! Most aluminum profile accessories suppliers carry these seals in bulk, so keeping a few spares on hand is a smart move.
Wrapping Up
Installing a T-slot rubber seal cover on Material Rack B might seem like a small task, but it's a perfect example of how lean system principles work—focusing on small, impactful improvements to boost efficiency, safety, and longevity. In 15–20 minutes, you've protected your aluminum profiles, quieted your workspace, and made your team's daily tasks a little smoother. And hey, the next time someone asks how you keep your Material Rack B looking (and working) like new, you can smile and say, "It's all in the details."
Now go forth and seal those T-slots—your rack (and your team) will thank you.