- Company Articles
- Products and Technology
- Installation And Maintenance
- Installation Guide: How to Set Up 60 Aluminum Roller Track Small Wheel Systems

Installation Guide: How to Set Up 60 Aluminum Roller Track Small Wheel Systems
Related Product
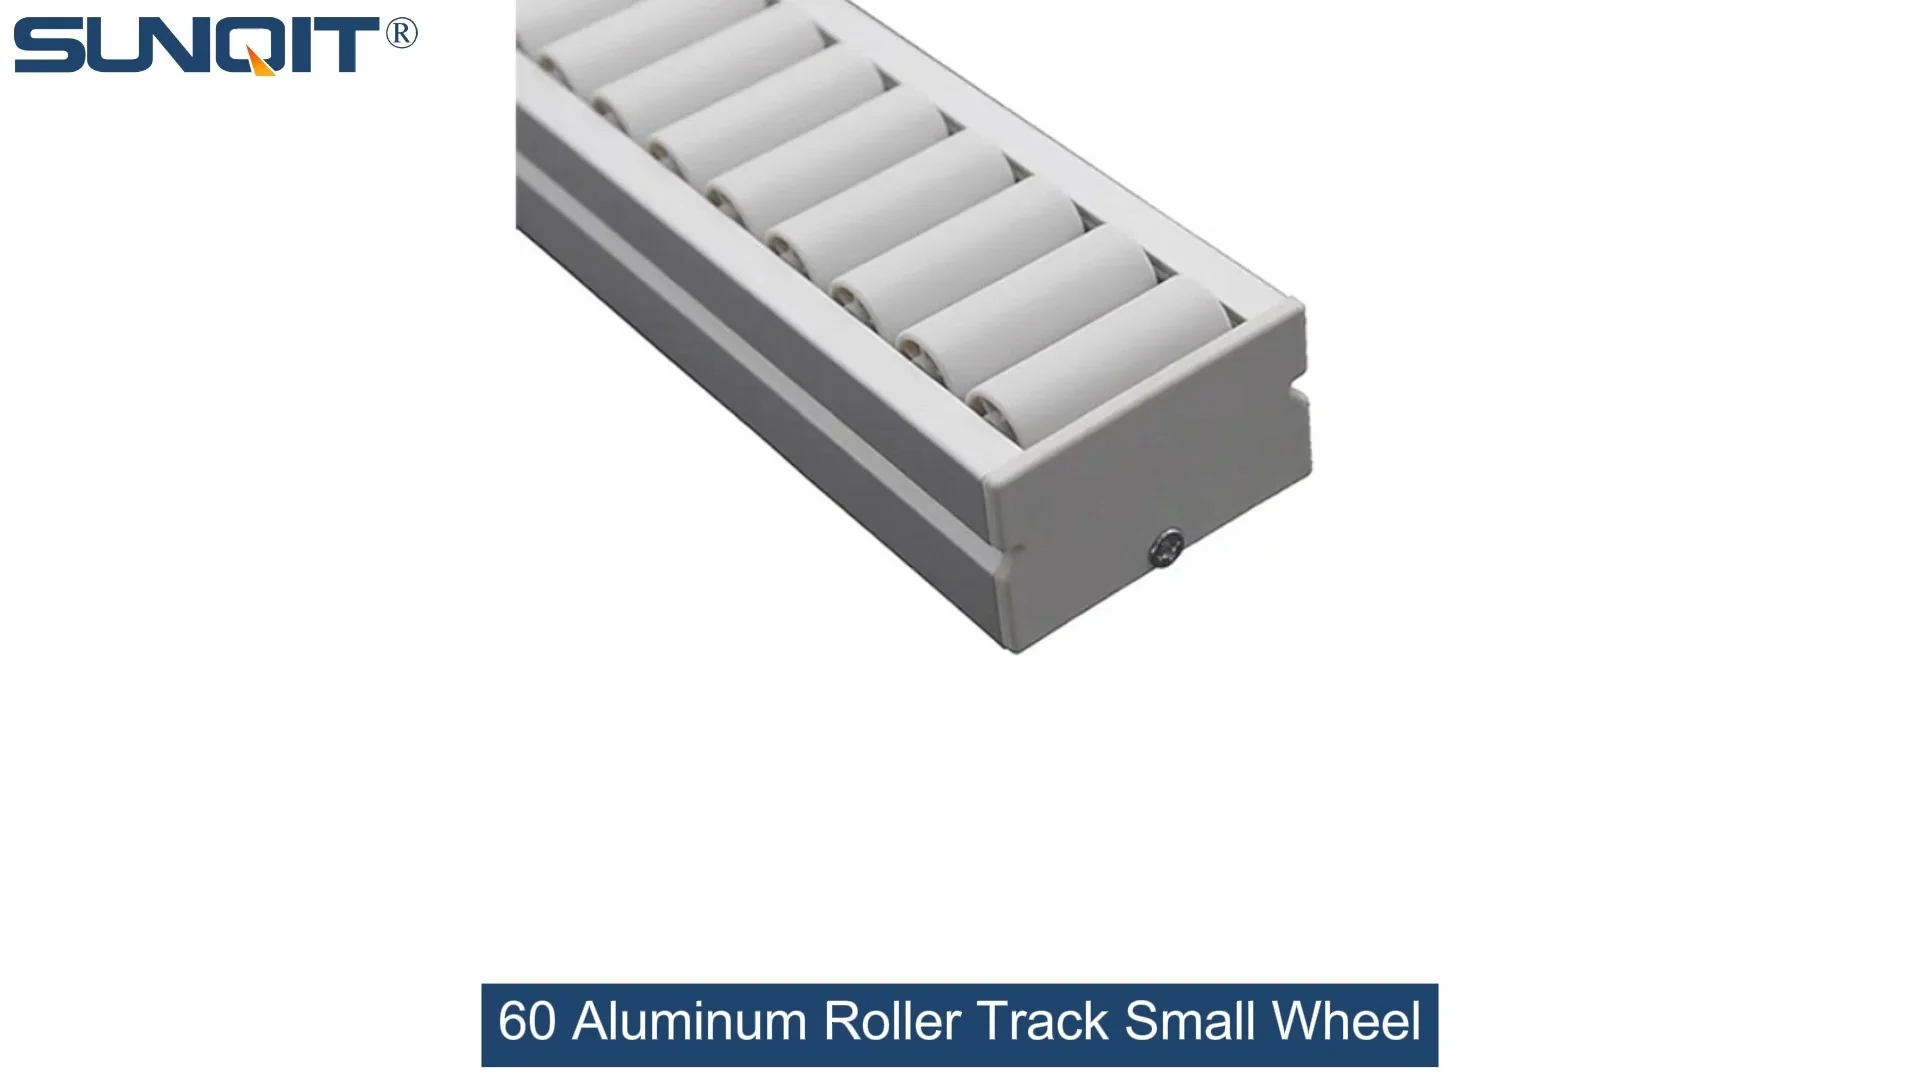
60 Aluminum Roller Track Small Wheel
Modular system roller tracks aluminum gravity roller tracks are an excellent solution for transporting materials within industrial environments, warehouses and distribution centres.
Installation Guide: How to Set Up 60 Aluminum Roller Track Small Wheel Systems
Why This Guide Matters for Your Lean System
If you're looking to boost efficiency in your production line or warehouse, the 60 Aluminum Roller Track Small Wheel System is a game-changer. It's not just a piece of equipment—it's a core component of a well-oiled lean system, designed to reduce waste, speed up material flow, and keep your operations running smoothly. Whether you're setting up a new flow rack for parts storage or upgrading an existing production assemble line, this guide will walk you through every step with clear, actionable tips.
We'll cover everything from pre-installation prep to troubleshooting common issues, so you can get your roller track up and running without hassle. Plus, we'll share insights on how to maintain it for long-term performance—because a lean system only works if every part is in top shape.
Pre-Installation: Get Ready for Success
Tools You'll Need
Before you start, gather these tools to make the process easy:
- Allen wrench set (sizes 3mm, 4mm, and 5mm—most parts use these)
- Phillips-head screwdriver (medium size)
- Tape measure (10ft or longer)
- Level (2ft spirit level works best)
- Rubber mallet (to tap parts into place without damaging them)
- Work gloves (to protect your hands from sharp edges)
- Safety goggles (for eye protection when handling metal parts)
Safety First: Don't Skip These Steps
1. Always wear gloves and goggles when handling aluminum parts—they can have sharp edges.
2. Don't force any connections; if a part doesn't fit, check alignment before applying more pressure.
3. Keep your workspace clean and free of clutter to avoid tripping hazards.
4. If you're working on a raised surface (like a workbench), make sure it's stable before starting.
2. Don't force any connections; if a part doesn't fit, check alignment before applying more pressure.
3. Keep your workspace clean and free of clutter to avoid tripping hazards.
4. If you're working on a raised surface (like a workbench), make sure it's stable before starting.
Parts Checklist: What You Should Have
Before unpacking, make sure you have all the parts listed below. If anything is missing or damaged, contact your supplier right away. Here's a quick checklist:
| Part Name | Typical Quantity (per 10ft track) | Key Notes |
|---|---|---|
| 60 Aluminum Roller Track Small Wheel Sections | 2 (5ft each) or 1 (10ft) | Choose length based on your layout; sections are easy to cut if needed (use a metal saw). |
| Roller Track Connector | 1 (for 2 sections) | Stainless steel connectors are recommended for durability and corrosion resistance. |
| Aluminum Profile Accessories (Angle Codes) | 4-6 | Use 3030 or 4040 aluminum profiles to build the frame; angle codes secure the track to the frame. |
| Plastic Roller Track Guide Rail (Yellow/Grey) | 2 | Guide rails prevent items from sliding off the track; pick yellow for high visibility or grey for a neutral look. |
| End Support Brackets | 2 | These stabilize the track at both ends, ensuring it doesn't wobble under load. |
| Caster Wheels (Optional) | 4 | If you want a mobile track system, add casters to the frame (make sure they're heavy-duty enough for your load). |
Step-by-Step Installation: Build Your Roller Track
Step 1: Unpack and Inspect All Parts
Start by unpacking all parts and laying them out on a flat, clean surface (like a sturdy workbench). Check each part for damage—look for dents, scratches, or bent edges that could affect performance. Pay special attention to the small wheels: they should spin freely without any resistance. If a wheel is stuck, gently tap it with a rubber mallet to loosen it (don't use a metal hammer, as this can break the wheel).
Next, verify the quantity of each part against your checklist. Missing parts can delay your installation, so it's better to catch this early.
Step 2: Build the Frame Using Aluminum Profile Accessories
The frame is the backbone of your roller track system. It holds the track in place and ensures it's level. Here's how to build it:
1. Measure the length of your roller track sections. Cut the aluminum profiles to match this length (if needed). For example, if your track is 10ft long, cut two 10ft profiles for the sides and two shorter profiles (1ft each) for the ends (to make a rectangular frame).
2. Use angle codes to connect the profiles. Align the end of one profile with the side of another (at a 90-degree angle). insert the angle code into the T-slot of the profile and tighten the screw with an Allen wrench. Repeat this for all four corners of the frame.
3. Place the frame on a level surface and use your spirit level to check if it's even. If one side is higher than the other, adjust the angle codes or add shims under the frame to level it. A level frame is critical—if it's uneven, items will slide to one side or get stuck on the track.
4. If you're using casters, attach them to the bottom of the frame. Line up the caster plate with the pre-drilled holes on the profile and tighten the screws with a screwdriver. Make sure all casters are facing the same direction (for easy movement).
Step 3: Connect Track Sections with Roller Track Connectors
If you're using multiple track sections, you'll need to join them with roller track connectors. Here's how:
1. Lay the track sections on the frame, aligning the ends. Make sure there are no gaps between the sections—gaps can cause items to get stuck.
2. insert the roller track connector into the end of one section. Push it until it clicks into place.
3. Slide the next section onto the connector. Use a rubber mallet to tap the sections together gently—this ensures a tight fit.
4. Tighten the screws on the connector with an Allen wrench. Don't over-tighten (you could strip the threads).
2. insert the roller track connector into the end of one section. Push it until it clicks into place.
3. Slide the next section onto the connector. Use a rubber mallet to tap the sections together gently—this ensures a tight fit.
4. Tighten the screws on the connector with an Allen wrench. Don't over-tighten (you could strip the threads).
Pro Tip: Apply a small amount of lubricant (like silicone spray) to the connector before inserting it—this makes it easier to slide into place.
Step 4: Install the Small Wheel Rollers
The small wheels are what make your track work, so it's important to install them correctly. Here's how:
1. Take one small wheel and align it with the slot on the track. Push it into the slot until it locks in place. You should hear a soft click.
2. Repeat this for all wheels, spacing them evenly along the track. Most 60 aluminum tracks have pre-marked slots for wheels, so follow those marks for consistency.
3. After installing all wheels, test each one to make sure it spins freely. If a wheel is stuck, check if it's aligned properly—adjust it if needed.
2. Repeat this for all wheels, spacing them evenly along the track. Most 60 aluminum tracks have pre-marked slots for wheels, so follow those marks for consistency.
3. After installing all wheels, test each one to make sure it spins freely. If a wheel is stuck, check if it's aligned properly—adjust it if needed.
Step 5: Attach Guide Rails and End Supports
Guide rails keep items from sliding off the track, and end supports add stability. Here's how to install them:
1. For guide rails: Align the plastic guide rail (yellow or grey) with the edge of the track. Use the small screws provided to attach it to the track frame. Make sure the guide rail runs the entire length of the track.
2. For end supports: Place the end support bracket at the end of the track. Line up the holes with the frame and tighten the screws with an Allen wrench. Repeat this for the other end.
3. If your track has a stop at the end (to prevent items from falling off), attach it to the end support bracket using the provided screws.
2. For end supports: Place the end support bracket at the end of the track. Line up the holes with the frame and tighten the screws with an Allen wrench. Repeat this for the other end.
3. If your track has a stop at the end (to prevent items from falling off), attach it to the end support bracket using the provided screws.
Step 6: Test the Track for Smooth Operation
Now it's time to test your track to make sure everything works. Here's what to do:
1. Place a test item (like a small box or a plastic bin) on the track. Push it gently—does it slide smoothly? If not, check for uneven sections or stuck wheels.
2. Test the track with different weights (from light to heavy) to see how it handles loads. The 60 aluminum track can typically hold up to 500lbs per linear foot, but make sure you don't exceed the recommended load limit.
3. If you have a mobile track (with casters), push it around to see if it moves easily. Check if the casters lock properly (if they have brakes).
2. Test the track with different weights (from light to heavy) to see how it handles loads. The 60 aluminum track can typically hold up to 500lbs per linear foot, but make sure you don't exceed the recommended load limit.
3. If you have a mobile track (with casters), push it around to see if it moves easily. Check if the casters lock properly (if they have brakes).
Troubleshooting Common Issues
Even with careful installation, you might run into a few issues. Here's how to fix them:
- Issue: Items get stuck at the track joints. Fix: Check if the roller track connector is tight. If not, tighten the screws. You can also add a small amount of lubricant to the joint to reduce friction.
- Issue: Wheels are stuck or don't spin. Fix: Remove the wheel and clean any debris from the slot. If the wheel is bent, replace it with a new one.
- Issue: Items slide to one side. Fix: Check if the frame is level. Use your spirit level to adjust the frame or add shims under the low side.
- Issue: Guide rails are loose. Fix: Tighten the screws holding the guide rail to the frame. If the screws are stripped, replace them with longer ones.
- Issue: Track wobbles when loaded. Fix: Check if the end supports are tight. You can also add extra angle codes to the frame for more stability.
Maintenance Tips: Keep Your Track Running for Years
A well-maintained roller track is key to a sustainable lean system. Follow these tips to keep it in top shape:
Daily Maintenance
1. Wipe the track with a dry cloth to remove dust and debris. This prevents wheels from getting stuck.
2. Check the wheels for any signs of wear (like cracks or flat spots). replace worn wheels immediately.
3. Test the track with a small item to ensure it slides smoothly.
2. Check the wheels for any signs of wear (like cracks or flat spots). replace worn wheels immediately.
3. Test the track with a small item to ensure it slides smoothly.
Weekly Maintenance
1. Tighten all screws (connectors, guide rails, end supports) with an Allen wrench. Loose screws can cause the track to wobble.
2. Lubricate the wheels and connectors with silicone spray. Avoid using oil—oil attracts dust and can cause buildup.
2. Lubricate the wheels and connectors with silicone spray. Avoid using oil—oil attracts dust and can cause buildup.
Monthly Maintenance
1. Check the frame for any signs of damage (like bent profiles). If the frame is bent, replace the damaged section.
2. Inspect the casters (if used) for wear. replace any casters that are stuck or have flat wheels.
3. Deep clean the track: Use a mild detergent and water to clean the track, then dry it thoroughly. This removes any stubborn dirt or grease.
2. Inspect the casters (if used) for wear. replace any casters that are stuck or have flat wheels.
3. Deep clean the track: Use a mild detergent and water to clean the track, then dry it thoroughly. This removes any stubborn dirt or grease.
How to Use Your Roller Track in Real-World Settings
The 60 Aluminum Roller Track Small Wheel System is versatile—here are some common ways to use it in your operations:
1. Production Assemble Lines
In production assemble lines (like 3C assembly or medical device manufacturing), this track is used to move sub-assemblies from one station to the next. For example, in a smartphone assembly line, the track can carry phone cases to the next station where workers add screens. The smooth movement reduces wait times and keeps the line moving efficiently.
2. Flow Racks for Warehouse Storage
Flow racks are a staple in lean warehouses. The roller track allows parts to slide to the front of the rack, making picking easier and faster. For example, in an auto parts warehouse, flow racks with this track can hold small parts like bolts or nuts—workers can pick parts from the front without reaching into the back of the rack.
3. Sorting Lines in Logistics
In logistics centers, this track is used in sorting lines to move packages from one area to another. The small wheels handle light to medium packages with ease, and the guide rails keep packages on track. This reduces manual handling and speeds up the sorting process.
4. Custom Lean Solutions
If you have a unique need (like a curved track or a track that connects to a conveyor), you can customize this system. For example, in a medical device factory, you might need a track that curves around a workstation—this system can be modified to fit that layout. The key benefit is that it's reusable and adaptable, so you can change it as your needs evolve.
Final Thoughts: Your Lean System Deserves the Best
Setting up a 60 Aluminum Roller Track Small Wheel System doesn't have to be complicated. With the right tools, prep work, and step-by-step guidance, you can build a track that boosts efficiency and supports your lean system goals. Remember to maintain your track regularly—this will keep it running smoothly for years and help you avoid costly downtime.
Whether you're using it in production assemble lines, flow racks, or custom solutions, this track is a reliable choice for any lean operation. So go ahead—get started, and watch your operations become more efficient and productive.