- Company Articles
- Products and Technology
- Installation And Maintenance
- Installation Guide: Properly Fitting Duplex Aluminum Pipe Joints

Installation Guide: Properly Fitting Duplex Aluminum Pipe Joints
Related Product
Duplex Aluminum Pipe Joint
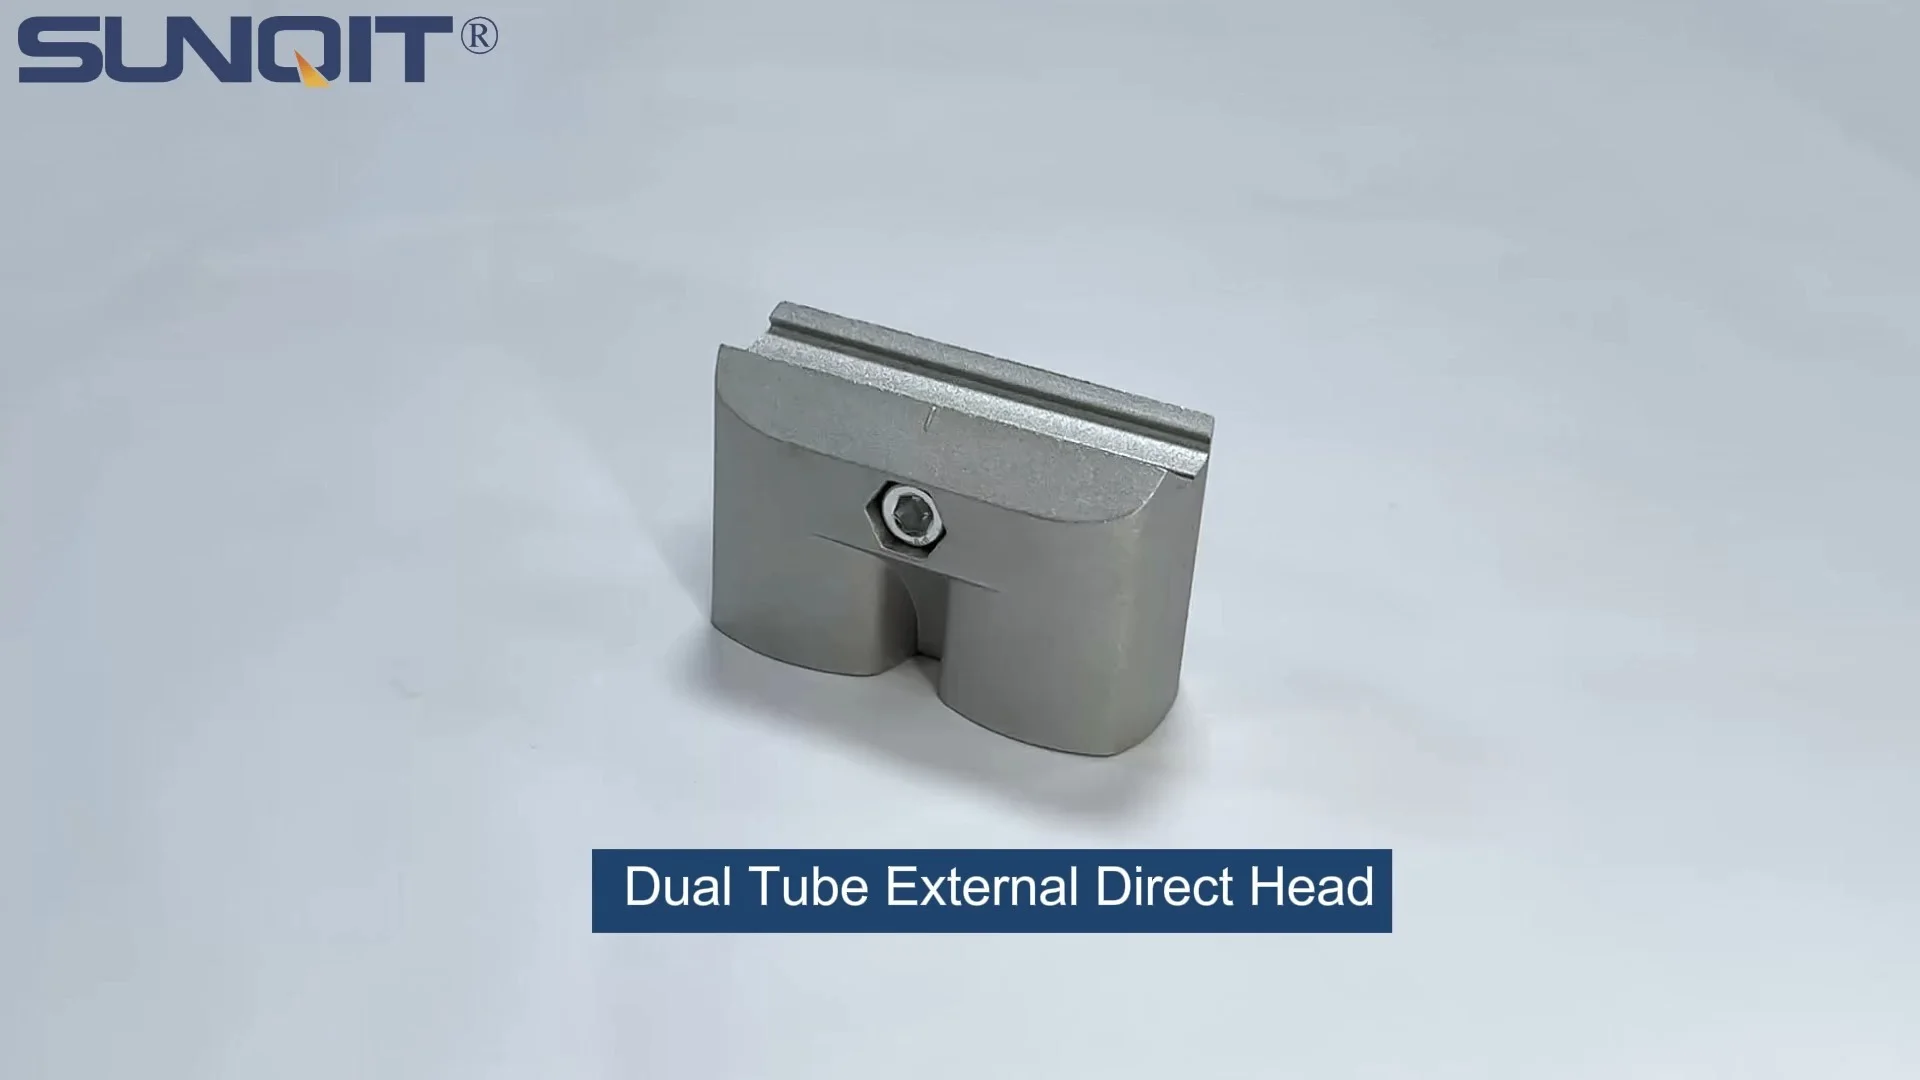
Duplex Aluminum pipe joint used for one pcs 28pcs aluminum pipe and one pcs of 28mm duplex pipe connection in straight angle.
If you've ever spent hours assembling a storage rack or workbench only to have it wobble like a newborn deer on ice, you know the frustration of shoddy connections. In the world of aluminum lean pipe systems—those versatile, modular setups used in workshops, factories, and even home garages—the secret to stability lies in the joints. And when it comes to heavy-duty, flexible connections, duplex aluminum pipe joints are the unsung heroes. These small but mighty components hold your aluminum pipe and accessories together, turning a pile of parts into a functional, reliable structure. But here's the thing: even the best joints won't perform if they're installed wrong. In this guide, we're breaking down everything you need to know to fit duplex aluminum pipe joints like a pro, from prepping your workspace to troubleshooting common hiccups. Let's dive in.
Understanding Duplex Aluminum Pipe Joints: What Makes Them Special?
Before we grab our wrenches, let's get clear on what duplex aluminum pipe joints actually are. Unlike basic plastic or single-piece metal joints, duplex joints are designed with two interlocking components that distribute weight evenly across your aluminum pipe. Think of them as the "double-security" option—they're built to handle heavier loads, resist corrosion, and stand up to the daily wear and tear of busy work environments. That's why they're a staple in lean manufacturing setups, where durability and adaptability are non-negotiable.
What really sets duplex joints apart is their compatibility. They play nice with standard aluminum pipe (usually 28mm or 30mm diameters, common in lean systems) and a wide range of aluminum pipe accessories, from brackets to shelf supports. Whether you're building a material rack, a workbench, or a conveyor system, these joints act as the glue that holds your vision together. But here's the catch: their strength is only as good as the installation. A half-tightened joint or misaligned pipe can turn a rock-solid structure into a safety hazard. So let's make sure you get it right the first time.
Tools and Materials You'll Need: Gearing Up for Success
You wouldn't bake a cake without a mixer (or at least a very strong spoon), and the same logic applies here. Having the right tools on hand will save you time, prevent stripped bolts, and ensure your joints fit snugly. Here's a breakdown of what you'll need, plus a few pro tips to make the process smoother:
| Tool/Material | Why You Need It | Pro Tip |
|---|---|---|
| Duplex Aluminum Pipe Joints | The star of the show—ensure they're compatible with your aluminum pipe diameter (check the packaging for specs!) | Buy a few extra joints. It's better to have spares than to pause mid-project for a trip to the supplier. |
| Aluminum Pipe | The backbone of your structure—opt for 6063-T5 aluminum for strength and lightweight handling. | Measure twice, cut once! Use a pipe cutter with a fine-tooth blade to avoid crushing the pipe ends. |
| Adjustable Wrench | Tightening the joint's locking bolts without damaging the aluminum finish. | A 10-inch wrench is the sweet spot—small enough for tight corners, strong enough for secure torque. |
| Rubber Mallet | Gently tapping pipes into joints without denting or scratching the aluminum. | Wrap the mallet head in a microfiber cloth for extra protection against scuffs. |
| Level (2-foot or longer) | Ensuring pipes are straight horizontally and vertically—critical for stability. | Magnetic levels stick to metal pipes, leaving your hands free to adjust joints. |
| Deburring Tool | Smoothing rough edges on cut aluminum pipe to prevent scratches and ensure a tight fit in joints. | Run the tool clockwise around the pipe end—this removes burrs without weakening the pipe wall. |
| Aluminum Pipe Accessories (Optional) | Items like end caps, gaskets, or bracket mounts that enhance joint performance. | Pre-fit accessories before tightening joints—some (like gaskets) add thickness that affects alignment. |
Pro Insight: Not all aluminum pipe is created equal! If you're using thin-walled pipe (less than 1.2mm thick), pair it with duplex joints labeled "light-duty" to avoid crushing the pipe when tightening. For heavy loads (think machinery or bulk storage), go for 1.5mm+ pipe and heavy-duty duplex joints—they'll distribute weight better and last longer.

Pre-Installation Prep: Setting Yourself Up for Smooth Sailing
Ever tried assembling furniture in a cluttered room? It's like trying to dance in a closet—frustrating and inefficient. The same goes for installing duplex aluminum pipe joints. Taking 10 minutes to prep your workspace and parts will save you hours of headaches later. Here's how to do it right:
1. Inspect Your Parts (Yes, All of Them)
Lay out all your duplex joints, aluminum pipe, and accessories on a flat surface (a workbench or even a clean floor works). Now, play detective: Check each joint for cracks, bent threads, or rough edges—even a tiny nick in the socket can prevent a pipe from seating properly. For aluminum pipe, roll it on the ground to spot bends (a warped pipe will wobble like a broken wheel). And don't forget the accessories: If you're using gaskets or washers, ensure they're the right size—too small, and they'll tear; too large, and they'll bulge out, weakening the connection.
2. Cut and Deburr Your Aluminum Pipe (If Needed)
Unless you're lucky enough to have pre-cut pipe, you'll need to trim it to length. Measure twice with a tape measure, mark the cut line with a pencil, then use a pipe cutter to make a straight, clean cut. Once you've cut, grab your deburring tool and run it along the inside and outside edges of the pipe end. Why? A sharp burr can scratch the inside of your duplex joint, creating friction that makes it hard to adjust later. It can also weaken the pipe over time, leading to cracks. Trust me—spending 30 seconds on this step beats replacing a bent pipe in six months.
3. Organize Your Workspace
Clear a space large enough to lay out your entire structure (or at least a section of it). If you're building a workbench, for example, mark the dimensions on the floor with masking tape to visualize where each joint and pipe will go. Keep your tools within arm's reach—a tool belt or small tray works wonders here. And if you're working alone, prop longer pipes against a wall or use clamps to hold them steady while you attach joints. No one needs a black eye from a swinging aluminum pipe.

Step-by-Step Installation: Fitting Duplex Aluminum Pipe Joints Like a Pro
Now for the main event: installing the joints. Follow these steps, and you'll have connections that are tight, aligned, and ready to handle whatever you throw at them.
Step 1: Align the Pipe and Joint Socket
Grab your first aluminum pipe and a duplex joint. Look at the joint—you'll notice two sockets (the "duplex" part) where the pipes will insert, plus a locking mechanism (usually a bolt or lever) that tightens the connection. Start by sliding the pipe into one socket until it hits the stop inside (you'll feel a slight resistance when it's fully seated). Now, hold the joint up to eye level and check: is the pipe straight, or is it angled to one side? If it's crooked, wiggle it gently until it sits flush. A misaligned pipe at this stage will throw off the entire structure later.
Common Mistake: Forcing the pipe into the joint. If it doesn't slide in easily, don't hammer it! Check for burrs or debris in the socket—even a tiny piece of sawdust can block the pipe. Use a can of compressed air to blow out the socket, then try again.
Step 2: Hand-Tighten the Locking Mechanism
Once the pipe is seated, it's time to secure it. Most duplex joints have a hex bolt or wing nut that tightens the socket around the pipe. Start by turning this by hand—you want it snug, but not so tight that you can't adjust later. The goal here is to hold the pipe in place while you align the second socket (if you're connecting two pipes) or attach the joint to another component (like a workbench leg). Think of it as a "temporary hold" before the final tightening.
Step 3: Attach the Second Pipe (or Component)
If you're building a straight section (like a shelf rail), insert the second aluminum pipe into the joint's other socket, repeating the alignment step from Step 1. For corners or T-joints, position the second pipe at the desired angle (most duplex joints swivel to 90°, 45°, or even 135°) and slide it into the socket. Now, grab your level: place it along the top of the pipes to check for horizontal straightness, and against the side to check vertical alignment. If things are off, loosen the hand-tightened bolt slightly, adjust the pipes, and retighten by hand. This is where patience pays off—rushing alignment now means wobbly shelves later.
Step 4: Final Tightening with a Wrench
With the pipes aligned, it's time to lock everything down. Take your adjustable wrench and fit it over the joint's locking bolt. Turn it clockwise, applying steady pressure—you want to feel resistance, but stop before the bolt starts to strip. A good rule of thumb: tighten until the bolt is snug, then give it a quarter-turn more. This ensures the socket grips the pipe without crushing it. If the joint has two bolts (some heavy-duty models do), tighten them alternately—half a turn on one, half a turn on the other—to distribute pressure evenly.
Once tightened, give the pipes a gentle shake. They should feel solid, with no movement where they meet the joint. If there's a wiggle, double-check the alignment and retighten the bolt. It's better to spend an extra minute here than to have the joint loosen after a week of use.
Step 5: Add Accessories (If Applicable)
Now that your duplex joints are secure, it's time to attach any aluminum pipe accessories—think brackets for shelves, casters for mobility, or end caps to protect sharp edges. Most accessories slide onto the pipe or bolt directly to the joint, so follow the manufacturer's instructions for your specific part. For example, if you're adding a caster wheel to a workbench leg, make sure the caster's mounting plate aligns with the joint's pre-drilled holes (if it has them) to avoid weakening the connection.

Troubleshooting: Fixing Common Duplex Joint Headaches
Even with careful installation, things can go wrong. Here are the most common issues and how to fix them:
Problem: The Joint Wobbles Even After Tightening
If your joint feels loose despite a tight bolt, the first thing to check is pipe diameter. Duplex joints are designed for specific pipe sizes—using a 28mm pipe with a 30mm joint will leave gaps, causing wobble. If the pipe size is correct, inspect the socket for wear. Over time, the inner grip of the joint can wear down, especially if the pipe was frequently adjusted. In that case, replace the joint—they're affordable, and it's better than risking a collapse.
Problem: The Bolt Strips When Tightening
Stripped bolts happen when you use too much force or a wrench that's too large. If the bolt is partially stripped, try using a rubber band over the wrench for extra grip—sometimes you can still tighten it enough to hold. For fully stripped bolts, you'll need to replace the joint. To prevent this in the future, use a wrench that fits the bolt snugly (no slipping!) and stop tightening when you feel significant resistance.
Problem: The Pipe Cracks at the Joint
Cracking usually means the joint was over-tightened, crushing the pipe wall. This is common with thin-walled aluminum pipe (less than 1.2mm). If the crack is small, you might be able to cut off the damaged section and reattach the joint. For larger cracks, replace the pipe entirely. Next time, opt for a light-duty duplex joint or thicker-walled pipe to prevent crushing.
Maintenance: Keeping Your Duplex Joints in Top Shape
Your work isn't done once the structure is built. To keep your duplex aluminum pipe joints (and the entire aluminum lean pipe system) working smoothly for years, follow these simple maintenance tips:
- Check Tightness Monthly: Vibrations from daily use can loosen bolts over time. Grab your wrench and give each joint's locking mechanism a quick quarter-turn to ensure it's still snug.
- Clean Joints Regularly: Dust, grease, and debris can build up in the socket, making adjustments hard. Wipe joints with a dry cloth weekly, and use a small brush (like a toothbrush) to clean out the socket if needed.
- Lubricate Moving Parts: If your duplex joints have swivel components, apply a drop of silicone lubricant (avoid oil-based lubes—they attract dust) every 3 months to keep them moving smoothly.
- replace Worn Parts Promptly: If a joint starts to stick, wobble, or show signs of corrosion, swap it out immediately. Waiting can lead to bigger issues, like a collapsed shelf or damaged pipe.
Wrapping Up: Why Proper Installation Matters
At the end of the day, fitting duplex aluminum pipe joints isn't just about turning bolts—it's about building something that works for you. A well-installed joint means a workbench that doesn't shake when you're using a drill, a material rack that holds heavy boxes without sagging, and a system that adapts as your needs change. By taking the time to align your pipes, tighten bolts correctly, and maintain your joints, you're not just avoiding frustration—you're investing in a setup that will serve you for years to come.
So the next time you unbox a pile of aluminum pipe and accessories, remember: the magic is in the joints. Treat them with care, follow these steps, and you'll be well on your way to a sturdy, reliable structure. Happy building!