- Company Articles
- Products and Technology
- Installation And Maintenance
- Installation Guide: Setting Up 40 Aluminum Roller Track Grey for Optimal Performance

Installation Guide: Setting Up 40 Aluminum Roller Track Grey for Optimal Performance
Related Product
40 Aluminum Roller Track Grey
Durable and smooth-running modular roller rails. The system is fully assembled. The roller rail profile contains plastic rollers mounted on steel axles. Aluminum frame with plastic wheel make it anti corrosion,and material convey more smooth.
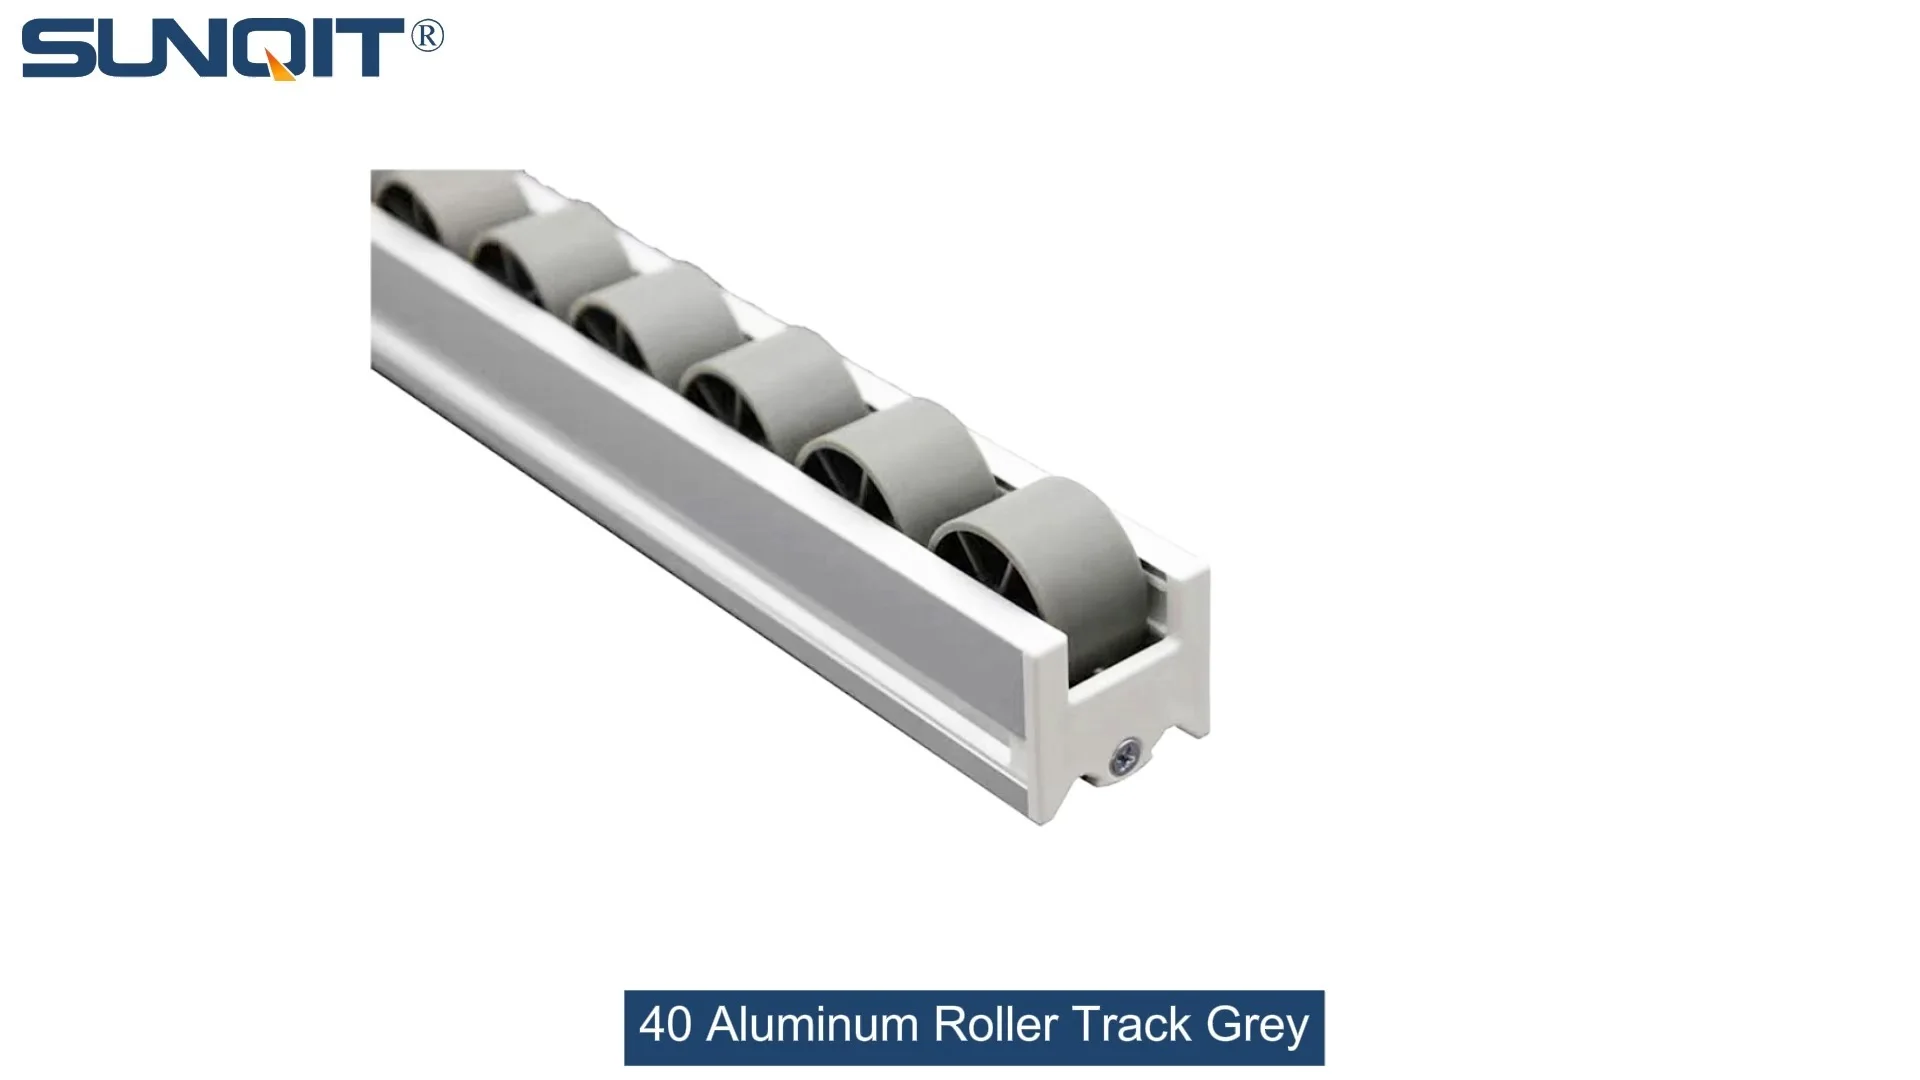
Whether you're revamping your workshop, streamlining a production line, or building a custom material handling system, the 40 aluminum roller track grey is a workhorse that deserves careful attention during setup. A well-installed roller track doesn't just move parts from A to B—it reduces friction, minimizes downtime, and keeps your entire operation running like a well-oiled machine. In this guide, we'll walk through every step of installing your 40 aluminum roller track grey, from prepping your workspace to testing the final setup. Let's dive in and make sure your track delivers the smooth, reliable performance you need.
Why Proper Installation Matters: Beyond Just "Putting It Together"
Before we grab our tools, let's talk about why installation quality matters. I've visited countless facilities where a rushed roller track setup led to daily headaches: parts getting stuck mid-roll, uneven wear on rollers, even safety hazards like jamming that caused workers to overexert themselves. The 40 aluminum roller track grey is designed for durability and efficiency, but those benefits only shine when it's installed with precision. Think of it like building a house—if the foundation is off, everything else wobbles. A well-installed track integrates seamlessly into your lean system, reducing waste (time, effort, materials) and keeping your workflow humming.
Aluminum's lightweight yet sturdy nature makes it ideal for roller tracks, but it's not invincible. Misalignment can stress the aluminum profile, leading to bending or cracking over time. Loose mounts might cause the track to shift, creating gaps between sections that catch on parts. And if the track isn't level? Heavier items might roll too fast, risking damage, while lighter ones might stall, bringing your line to a halt. Proper installation isn't just about following steps—it's about protecting your investment and your team's productivity.
Gathering Your Tools and Components: What You'll Need
Before you start, let's make sure you have everything on hand. There's nothing more frustrating than getting halfway through installation and realizing you're missing a critical tool or part. Here's a breakdown of what you'll need, organized by category to keep you organized:
| Tool/Component | Purpose | Pro Tip |
|---|---|---|
| 40 Aluminum Roller Track Grey (sections) | The main track itself, pre-cut to your required length | Unpack carefully—aluminum can scratch if dragged across rough surfaces. Lay them flat on a clean tarp to avoid dents. |
| Aluminum Profile (support frame) | Provides the structural base to mount the track | Check that the profile is straight—roll it on a flat surface to spot bends. |
| Roller Track Placon Mount for Aluminum Profile Flat | Mounts the track to the aluminum profile securely | These are specific to aluminum profiles—don't substitute with generic mounts, which might not fit the T-slot design. |
| End Support for Roller Track Placon Mount with Stop | Anchors the ends of the track to prevent shifting and adds a stop to prevent items from rolling off | Choose stops with rubber padding if you're handling delicate parts to avoid chipping. |
| Hex Key Set (metric) | Tightening bolts on mounts and supports (most aluminum profile hardware uses hex screws) | Magnetic hex keys save time—they hold screws in place while you align mounts. |
| Level (24-inch or longer) | Ensuring the track is horizontally level and vertically plumb | A digital level with a backlight is worth the investment for low-light workspaces. |
| Tape Measure and Pencil | Marking positions for mounts and ensuring straight alignment | Use a carpenter's pencil—its flat edge won't roll away while you work. |
| Rubber Mallet | Gently tapping sections together to align without damaging aluminum | Never use a steel hammer—aluminum dents easily! |
| Screwdriver (Phillips and flathead) | For any non-hex hardware, like end caps or additional brackets | Magnetic tips help with small screws that love to fall into tight spaces. |
| Clean Cloth and Mild Detergent | Wiping down tracks and profiles to remove dust, oil, or fingerprints | Aluminum shows smudges easily—clean before installation to avoid permanent marks. |
| Shims (plastic or metal) | Adjusting height for leveling on uneven surfaces | Keep a variety of thicknesses (1mm, 2mm, 5mm) to fine-tune alignment. |
Pro Move:
Lay out all components on a clean workbench or floor before starting. This lets you inspect for defects—like cracked rollers, bent brackets, or stripped threads—before you've already drilled holes or mounted parts. It's easier to swap a faulty placon mount now than after it's attached to the aluminum profile!

Step-by-Step Installation: From Prep to Testing
Now that you're prepped, let's walk through installation step by step. I'll break it down into clear, actionable stages, with plenty of tips to avoid common pitfalls. Take your time with each step—rushing here leads to rework later.
Step 1: Preparing Your Workspace
Clear the Area and Check the Surface
Start by clearing the installation area. Remove any debris, tools, or materials that might get in the way—you need plenty of space to maneuver the track sections and aluminum profile. If you're mounting the track to a bench or frame, ensure the surface is stable and level. A wobbly base will make even the most careful track installation unstable.
Use your level to check the mounting surface (e.g., the top of your workbench or the aluminum profile you'll attach to). If it's uneven, now's the time to fix it. For benchtops, shims under the legs can level things out. For freestanding aluminum profiles, adjust their feet or add shims between the profile and the floor. Remember: the track can only be as level as the surface it's mounted on.
Quick Check:
Roll a small, smooth object (like a metal nut) across the mounting surface. If it rolls straight, the surface is level enough. If it veers left or right, you've got work to do before installing the track!
Step 2: Unpacking and Inspecting Components
Check for Damage and Verify Lengths
Unpack your 40 aluminum roller track grey sections, placon mounts, end supports, and aluminum profile. Lay them out on a clean tarp or cardboard to avoid scratching. Inspect each track section for dents, bent rollers, or cracks—even small dents can catch on parts later. Spin the rollers with your finger; they should move freely without sticking or grinding. If a roller is stuck, it might be due to shipping—try gently tapping the axle with a rubber mallet to free it. If that doesn't work, contact your supplier for a replacement.
Next, verify that the track sections are cut to your ordered length. Measure each section with your tape measure—mistakes happen, and you don't want to start mounting only to find a section is too short (or too long). Also, check the roller track placon mount for aluminum profile flat—these small brackets are critical for attaching the track to the aluminum profile. Ensure they're not cracked and that their mounting holes align with the T-slots on your aluminum profile.
Step 3: Marking Mount Positions on the Aluminum Profile
Measure Twice, Drill (or Mark) Once
Now, it's time to mark where the placon mounts will attach to the aluminum profile. The spacing of the mounts depends on the length of your track sections and the weight of the items you'll be rolling. As a general rule, mounts should be placed every 12-18 inches for standard loads (up to 50 lbs per linear foot). For heavier loads, reduce spacing to 8-10 inches to prevent sagging.
Lay one track section on top of the aluminum profile, aligning the edges. Use a pencil to mark the position of the placon mounts—they should sit just inside the track's edges to avoid interfering with rollers. If your track has pre-drilled holes for mounts, align those with the T-slots on the aluminum profile. If not, measure 1 inch from each end of the track section and mark those as your first mount positions, then space additional mounts evenly between them.
Double-check your marks with a tape measure to ensure they're evenly spaced. Uneven mounts can cause the track to twist, leading to jams. Once marked, use a center punch to make a small indent at each mark—this helps keep your drill bit (if needed) from slipping. For aluminum profiles with T-slots, you might not need to drill—many placon mounts attach using T-slot bolts that slide into the slot and tighten with a hex key.
Step 4: Attaching Roller Track Placon Mounts to the Aluminum Profile
Secure the Brackets for a Stable Base
With your marks in place, it's time to attach the roller track placon mount for aluminum profile flat. Start by inserting T-slot bolts into the aluminum profile's slots at your marked positions. Slide the bolts to align with the placon mount's holes, then place the mount over the bolts. Add washers and nuts (if included) and tighten them finger-tight—you'll want to adjust the mounts later, so don't fully tighten yet.
If your placon mounts require drilling (e.g., for non-T-slot profiles), use a drill bit slightly smaller than the diameter of your bolts to create pilot holes. Aluminum drills easily, but go slow to avoid overheating the bit. Once holes are drilled, attach the mounts with bolts, washers, and nuts, again finger-tight for now.
After attaching all mounts for a track section, place a straightedge across the top of the mounts. They should all sit at the same height—if any are higher or lower, adjust the T-slot bolts or shim under the mounts until they're level. This step is crucial: uneven mounts will cause the track to warp, making rolling uneven.
Step 5: Mounting the 40 Aluminum Roller Track Grey to the Placon Mounts
Aligning and Securing the Track
Now, carefully lift the first section of 40 aluminum roller track grey and place it on top of the placon mounts. Align the track so that its edges are centered on the mounts—you don't want it hanging over one side, as this can cause uneven stress. Most tracks have pre-drilled holes that line up with holes on the placon mounts; if not, use a pencil to mark where to drill (or use self-tapping screws designed for aluminum).
insert bolts through the track's holes and into the placon mounts. Tighten them finger-tight first, then use your hex key to snug them down—don't over-tighten! Aluminum threads can strip easily, so stop when you feel resistance. Repeat this for each track section, ensuring that adjacent sections butt up tightly against each other. Gaps between sections are a common culprit for jams—even 1/16 of an inch can catch a part's edge.
Once all sections are mounted, use your straightedge again to check that the entire track is level along its length. Place the straightedge across the tops of the rollers—if there's a gap under the straightedge, a section is too low; if the straightedge rocks, a section is too high. Loosen the placon mount bolts, adjust the track, and retighten until the straightedge lies flat.
Pro Alignment Trick:
Use a laser level along the side of the track. The laser line should align with the edge of every roller—if a roller is off, adjust the track until it lines up. This ensures the track is straight, not just level!
Step 6: Installing End Supports and Stops
Prevent Shifting and Control Roll
End supports are critical for preventing the track from shifting under load. Attach the end support for roller track placon mount with stop to both ends of the track. These supports bolt to the aluminum profile (or mounting surface) and wrap around the track's ends, locking it in place. Make sure the stop (the raised lip at the end) is facing upward or outward, depending on your needs—its job is to keep items from rolling off the end of the track.
Tighten the end support bolts securely, but again, be gentle with aluminum threads. If your track is longer than 6 feet, consider adding intermediate supports between the ends to prevent sagging. Most manufacturers recommend a support every 4-5 feet for heavy loads. These intermediate supports can be simple brackets that bolt to the aluminum profile and cradle the track from below.
Step 7: Testing the Track for Smooth Operation
Roll, Adjust, Repeat
Now comes the moment of truth: testing the track! Start with a light item—a small box, a plastic part, or even a can of soda. Place it at the high end (if your track has a slight incline for gravity feeding) and let it roll. It should move smoothly, without jerking or stopping. Listen for unusual noises—grinding or squeaking means a roller is stuck or misaligned.
Next, test with a heavier item (close to the maximum load your track is rated for). Watch how it rolls—does it speed up too much? If so, you might need to adjust the incline (if applicable) or add a brake roller. If it stalls, check for levelness or loose mounts. Run the test several times with different items to ensure consistency.
If you notice any issues, stop and troubleshoot. Common problems at this stage include:
- Sticking Rollers: Clean the roller axles with a dry cloth and apply a drop of silicone lubricant (avoid oil-based lubes—they attract dust).
- Uneven Rolling: Recheck track levelness with your level and adjust placon mounts as needed.
- Gaps Between Sections: Loosen the track bolts, push sections together, and retighten.
- Track Shifting: Tighten end supports and intermediate supports to lock the track in place.
Don't rush this step—taking time to test and adjust now saves hours of frustration later.

Troubleshooting Common Issues: Fixing Problems on the Fly
Even with careful installation, issues can pop up. Let's tackle the most common problems and how to fix them quickly:
Problem: Items Roll Crooked or Get Stuck Mid-Track
This is usually caused by misalignment between track sections or uneven placon mounts. Start by checking the gap between adjacent track sections—if there's a visible space, loosen the mounts, push the sections together, and retighten. If the sections are aligned but items still veer, use your straightedge to check if the track is twisted. A twisted track can happen if mounts on one side are higher than the other. Loosen the mounts on the higher side, add a thin shim under them, and retighten until the track lies flat.
Another culprit: dirty or damaged rollers. Inspect each roller for debris (like dust or small pieces of plastic) and clean them with a cloth. If a roller is bent or cracked, replace it—most manufacturers sell replacement rollers separately, so you don't need to replace the entire track section.
Problem: Track Sags Under Heavy Loads
Sagging is often due to insufficient mount spacing. If you're rolling items heavier than 50 lbs, mounts should be no more than 10 inches apart. Add extra placon mounts between existing ones to support the weight. For extreme loads, consider upgrading to a thicker aluminum profile or reinforcing the track with a cross-brace under the middle section.
If sagging happens only in the middle of a long track, intermediate supports are the fix. Attach a bracket to the aluminum profile under the sagging area, then adjust it upward until it gently supports the track (don't over-tighten—you don't want to bow the track upward).
Problem: Rollers Are Noisy or Hard to Turn
Noisy rollers are typically a lubrication issue. Over time, dust and debris can build up on axles, causing friction. Clean each roller axle with a dry cloth, then apply a small amount of silicone-based lubricant (a spray lubricant works best for hard-to-reach axles). Spin the roller to distribute the lubricant, then wipe off excess to avoid attracting more dust.
If a roller is seized (won't turn at all), it might be due to a bent axle or rust (unlikely with aluminum, but possible if the track was stored in a damp area). Remove the roller by popping off the end caps (if present) and sliding the axle out. Inspect the axle for bending—if straight, clean and relubricate. If bent, replace the axle or the entire roller.

Maintaining Your 40 Aluminum Roller Track Grey: Keeping It Running Smoothly
Installation is just the start—regular maintenance keeps your track performing like new for years. Here's a simple routine to follow:
Daily Checks: Take 2 minutes each morning to visually inspect the track. Look for debris (like screws, plastic shavings, or packaging) that might jam rollers. Wipe down the track with a dry cloth to remove dust. Check that end stops are secure—loose stops can lead to parts falling off the track.
Weekly Maintenance: Test-roll items of different weights to ensure smooth operation. Clean roller axles with a cloth and apply a drop of silicone lubricant to each roller (focus on any that sound squeaky). Tighten any loose placon mount bolts or end support bolts—vibration from daily use can loosen them over time.
Monthly Deep Clean: Remove all items from the track and use a mild detergent (like dish soap) and a soft brush to clean the rollers and track surface. Rinse with a damp cloth and dry thoroughly to prevent water spots on aluminum. Inspect the aluminum profile for signs of bending or stress—if it's warped, you might need to reinforce it or replace it.
Quarterly Load Test: Test the track with its maximum rated load to ensure mounts and supports are holding up. If the track sags under load, add more mounts or supports as needed.
Longevity Hack:
Avoid rolling items with sharp edges or rough bottoms—they can scratch the aluminum track or damage rollers. If you must roll such items, add a protective plastic strip along the track (available at most hardware stores) to absorb impact.
Wrapping Up: Your Track, Your Success
Installing your 40 aluminum roller track grey might seem like a big task, but breaking it down into steps and focusing on precision makes it manageable. Remember: the time you invest in proper installation and maintenance pays off in smoother workflows, fewer headaches, and a track that lasts for years. Whether you're integrating it into a lean system, a production line, or a workshop, a well-installed roller track is more than just a tool—it's a silent partner in your team's success.
So go ahead—fire up that track, roll some parts, and enjoy the satisfaction of a job well done. And if you ever hit a snag, refer back to this guide or reach out to your supplier for support. Here's to smooth rolling and efficient days ahead!