- Company Articles
- Products and Technology
- Installation And Maintenance
- Installation Guide: Setting Up All Direction Roller Track in Your Facility

Installation Guide: Setting Up All Direction Roller Track in Your Facility
Related Product
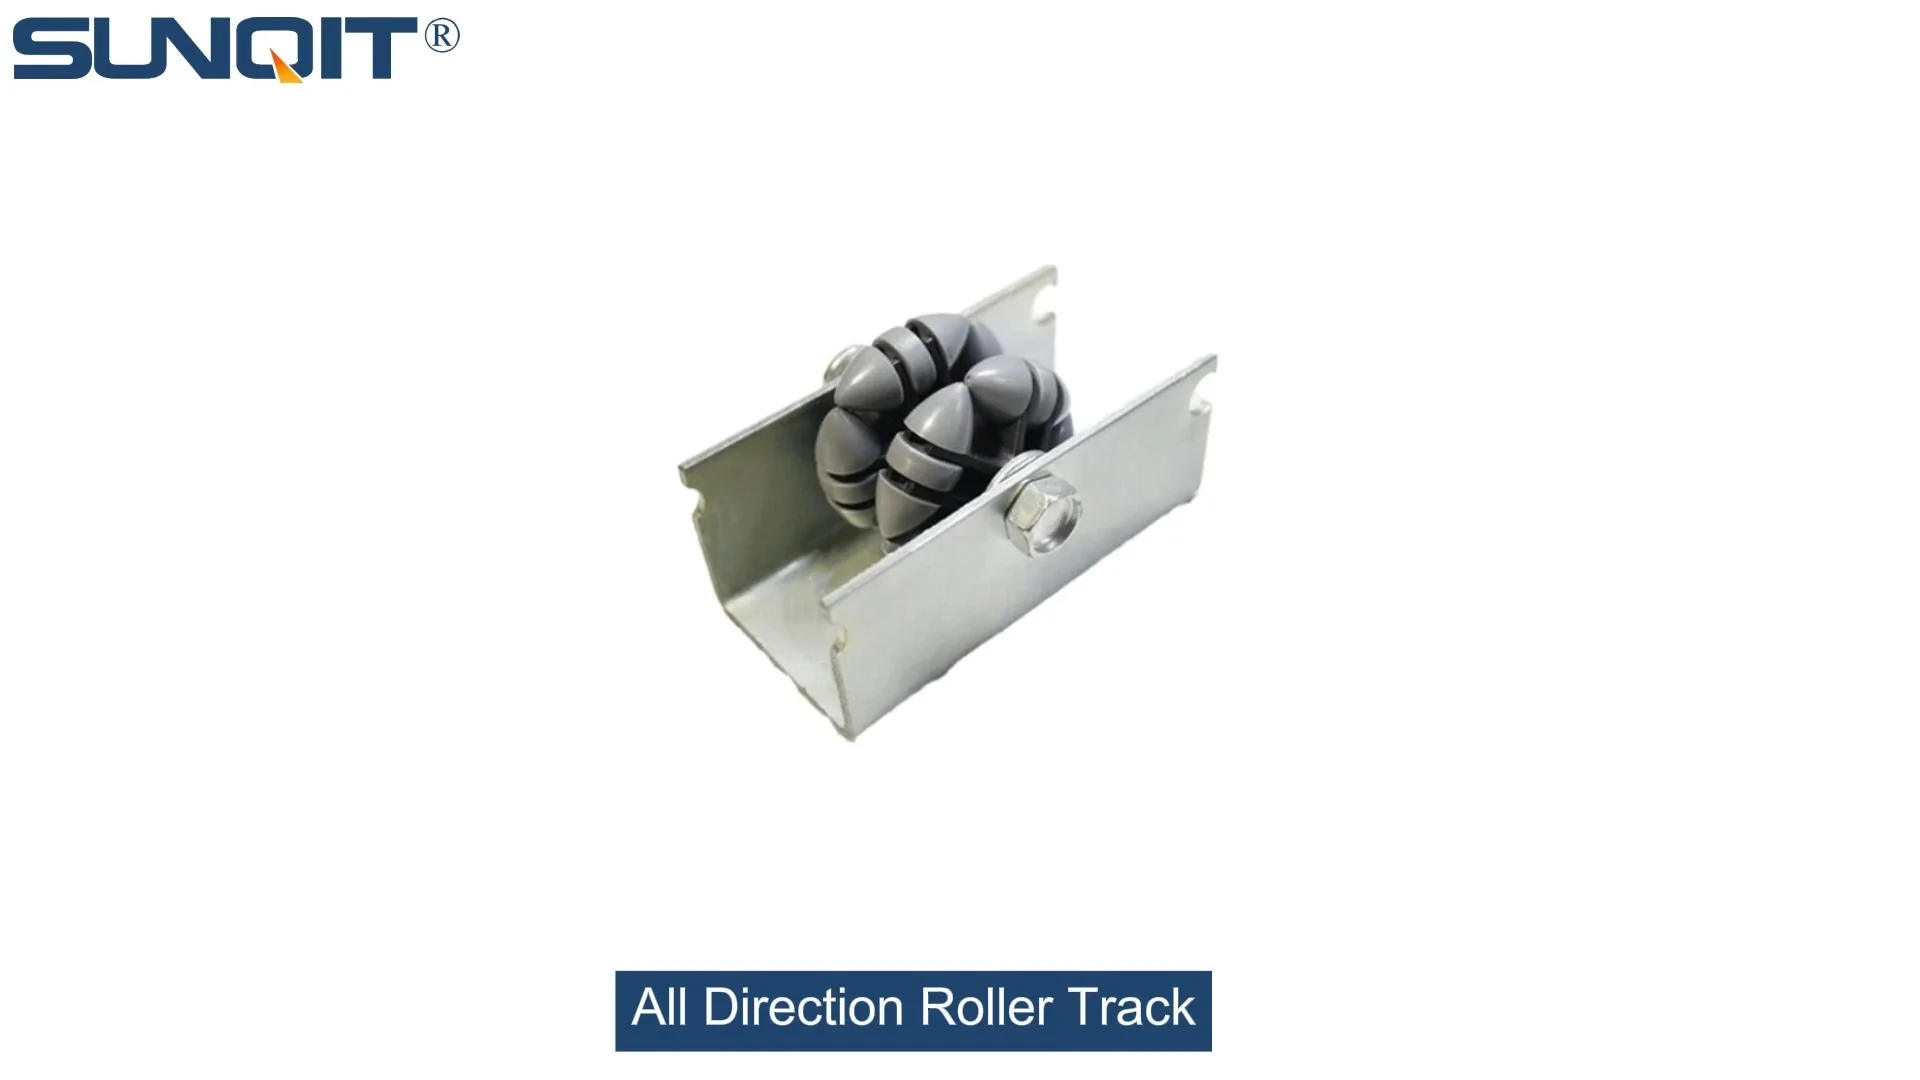
All Direction Roller Track
All direction roller track made of steel frame and multiple direction move wheel which will make boxes are always in contact with the rollers, reducing jams and enhancing flow reliability.
Whether you're managing a bustling automotive assembly line or streamlining workflows in a 3C manufacturing plant, all direction roller tracks are the backbone of efficient material flow. These unassuming components keep parts moving smoothly, reduce manual handling, and align perfectly with lean production principles. Let's walk through how to install them like a pro—step by step, with practical tips to ensure durability and peak performance.
1. Getting Ready: What You'll Need Before Starting
Rushing into installation without preparation is a recipe for delays. Let's break down the tools, materials, and safety checks to get you set up for success.
| Category | Items to Prepare | Why They Matter |
|---|---|---|
| Essential Tools | Adjustable wrench, tape measure (3m+), spirit level, rubber mallet, Phillips screwdriver, hex key set (metric), pencil/marker | Precision tools ensure alignment; a spirit level prevents uneven tracks that cause jams |
| Materials Checklist | All direction roller track units, aluminum profile brackets, roller track connectors, end supports with stops, mounting screws (M6/M8), anti-slip leveling feet | Verify part numbers match your order—mixing connectors (e.g., 40mm vs. 85mm) leads to weak joints |
| Safety Gear | Work gloves (cut-resistant), safety glasses, steel-toe boots (if handling heavy aluminum profile) | Aluminum edges can be sharp; gloves prevent cuts during assembly |
Pro Tip: Lay out all components on a clean workbench (like Workbench E from your lean system) before starting. This helps spot missing parts early—nothing kills momentum like pausing to hunt for a roller track placon mount bracket!
2. Step-by-Step Installation: From Layout to Testing
Follow these stages to build a roller track system that handles daily wear and tear while keeping materials flowing effortlessly.
Step 1: Plan Your Track Path (15–20 Minutes)
Start by mapping where the roller track will go. Will it connect a conveyor to a workbench? Or bridge two stations in a U-shaped assembly line? Use your tape measure to mark the route on the floor, accounting for:
- Clearance: Leave 60cm minimum on both sides for workers to pass—cramped spaces lead to accidental bumps that misalign tracks.
- Slope: For gravity-fed flow, a 1–2° incline works best (measure with your spirit level). Avoid steep slopes—parts might slide too fast and damage!
- Turns: If your track has curves, use flexible aluminum profile or specialized 90° roller track joints (check if your model requires internal rotation lean pipe joints for smooth bends).
Mark drill points with a pencil—double-check measurements before drilling! A 5mm error here can throw off the entire system later.
Step 2: Mount the Support Brackets (30–40 Minutes)
Your roller track needs a stable base. Most systems use aluminum profile brackets bolted to the floor or workbench legs. Here's how to secure them:
- Place a bracket at each marked drill point. Use the spirit level to ensure it's perfectly horizontal—shim with washers if the floor is uneven.
- Pre-drill holes with a 4mm drill bit (for concrete, use a masonry bit). insert wall plugs if mounting on drywall or brick.
- Tighten the bracket screws with a hex key until snug—over-tightening can strip threads in aluminum profile!
Common Mistake: Skipping the pre-drill. This can crack the aluminum bracket, especially in cold weather when metal is brittle.
Step 3: Assemble the Roller Track Units (45–60 Minutes)
Now it's time to connect the roller track sections. Most kits come with pre-assembled roller units, but you'll need to link them with connectors:
- Slide a roller track placon mount connector into the end of one track section. Align the holes with the next section—you should feel a "click" when they lock.
- insert locking pins or screws through the connector holes. For steel roller track, use stainless steel screws to prevent rust in humid environments (like warehouses).
- Attach end supports with stops at the start/end of the track. These prevent parts from sliding off—critical if the track is on a raised workbench.
Pro Tip: For ESD (electrostatic discharge) workstations, use black ESD wheel roller track (like 40 Steel Roller Track Black ESD Wheel). These dissipate static, protecting sensitive 3C components during transport.
Step 4: Level and Test the Track (20–30 Minutes)
Even a tiny dip can cause parts to get stuck. Here's how to fine-tune:
- Place the spirit level along the length of the track. Adjust the anti-slip leveling feet under the brackets until the bubble is centered.
- Test with a sample part (similar weight to what'll run daily). It should glide smoothly—no jerking or stopping. If it gets stuck, check for misaligned rollers or a bent track section.
- For multi-level tracks (like in a material rack B with 3 floors), repeat the test for each tier. Ensure parts flow at the same speed across all levels.

3. Safety First & Long-Term Care
A well-installed roller track is only effective if it's maintained properly. Here's how to keep it running for years:
| Task | Frequency | How to Do It |
|---|---|---|
| Visual Inspections | Daily (before shift starts) | Check for loose connectors, cracked rollers, or debris (like plastic shavings from 3C assembly) stuck in gaps. |
| Lubrication | Monthly (or every 200 hours of use) | Apply a light machine oil to roller axles—avoid heavy grease, which attracts dust. Wipe excess with a rag. |
| Deep Cleaning | Quarterly | Use a soft brush to clean between rollers; for ESD tracks, use isopropyl alcohol to remove static-attracting dirt. |
Safety Reminders:
- Never stand on the roller track—even sturdy steel models can bend under human weight.
- Tag out the area with warning signs during maintenance to prevent coworkers from accidentally starting the conveyor.
- replace worn parts immediately: a cracked end support could send parts crashing to the floor, risking injury or product damage.

4. Real-World Applications: How Industries Use Your Roller Track
Your all direction roller track isn't just a "part"—it's a tool that adapts to different manufacturing needs. Here are examples from key industries:
Automotive Manufacturing
In car plants, roller tracks often connect welding stations to painting lines. A 40 steel roller track with yellow wheels (high visibility) might carry door panels, while a heavier 85 staggered roller track handles engine blocks. The aluminum profile brackets resist oil and chemical spills common in this environment.
3C Assembly (Phones, Laptops)
ESD workstation setups rely on black ESD wheel roller tracks to protect circuit boards from static. These tracks often feed into conveyors that move components to testing workbenches—imagine a line where a phone case glides from a 3D printer to a labeling station, all on your installed track!
Medical Device Production
Cleanrooms demand stainless steel roller track series (resistant to corrosion from disinfectants). A mini aluminum roller track might transport syringe components between sterile packaging stations, with end supports that lock to prevent contamination from falling parts.

5. Troubleshooting: Fix Common Issues Fast
Even with careful installation, problems happen. Here's how to diagnose and solve them:
Parts keep getting stuck—what's wrong?
Check for misalignment (use the spirit level again) or debris in the rollers. If only small parts jam, you might need a narrower track or guide rails (like plastic roller track guide rail yellow) to keep items centered.
The track makes a loud squeaking noise when in use.
Lubricate the roller axles! If that doesn't work, tighten loose connectors—squeaks often come from metal-on-metal rubbing where joints have wiggled free.
Rollers are uneven (some spin, others don't).
replace worn bearings—over time, dust and moisture can seize them. For ESD tracks, ensure replacement rollers have the same conductivity rating to avoid static buildup.
Wrapping Up: Your Roller Track, Your Lean Partner
Installing all direction roller track might seem like just another task, but it's a cornerstone of lean production. When done right, it reduces waste (no more manually carrying heavy parts!), speeds up workflows, and keeps your team focused on what matters—building great products.
Remember: a well-maintained roller track isn't just equipment. It's the quiet force that turns chaotic assembly lines into streamlined, efficient systems. So take pride in your work today—your future self (and your production metrics!) will thank you.