- Company Articles
- Products and Technology
- Installation And Maintenance
- Installation Steps for Anti-Slip Adjustable Leveling Feet on Lean Tube Workbenches

Installation Steps for Anti-Slip Adjustable Leveling Feet on Lean Tube Workbenches
Related Product
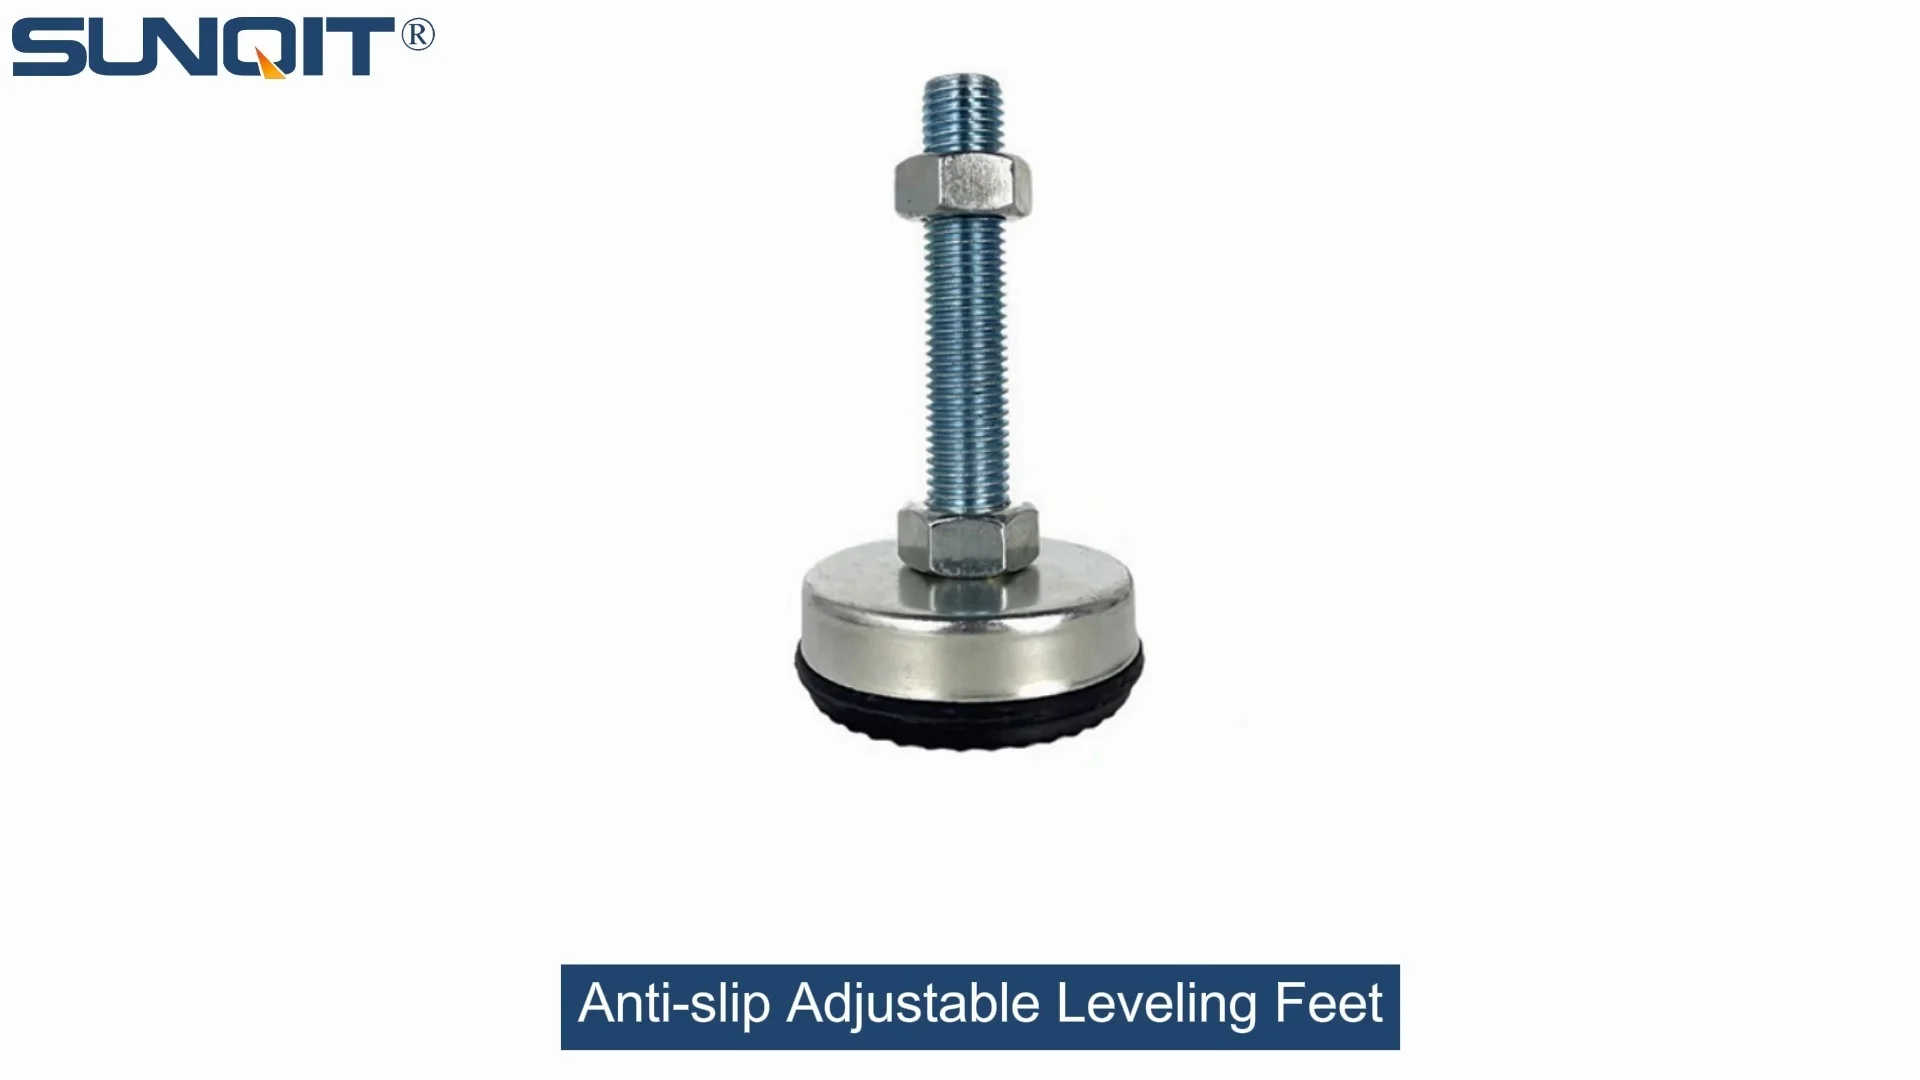
Anti-slip Adjustable Leveling Feet
Anti-slip Adjustable Leveling Feet are designed to keep machines level when placed on uneven or sloped ground, the rubber base will prevent product slip during work.
Introduction: Why Anti-Slip Adjustable Leveling Feet Matter for Your Lean Tube Workbench
If you've ever spent a day working at a wobbly workbench, you know how frustrating it can be. Tools slide off the edge, parts roll into awkward corners, and even simple tasks like assembling small components become a battle against instability. In production assemble lines, where efficiency and precision are everything, a shaky workbench isn't just an annoyance—it's a productivity killer. That's where anti-slip adjustable leveling feet come in. These small but mighty components are the unsung heroes of a stable, reliable workspace, especially when paired with a lean tube workbench.
Lean tube workbenches, built from lightweight yet durable lean tube frames and lean pipe joints, are a staple in modern manufacturing and assembly environments. Their modular design makes them easy to customize, but that flexibility can sometimes come at the cost of stability—especially if the floor isn't perfectly level. Uneven floors, common in older factories or warehouses with concrete surfaces that have settled over time, can turn even the sturdiest lean tube workbench into a rocking hazard. Add in the constant movement of tools, materials, and workers, and you've got a recipe for slips, spills, and wasted time.
Anti-slip adjustable leveling feet solve this problem in two key ways. First, their adjustable height lets you tweak each foot to compensate for uneven floors, ensuring the workbench sits perfectly flat. Second, the anti-slip base—usually made from rubber or a high-friction material—grips the floor to prevent sliding, even when the workbench is jostled or loaded with heavy items. Whether you're using your lean tube workbench for electronics assembly, small-part sorting, or as a packing station, these feet transform it from a wobbly liability into a rock-solid asset.
In this guide, we'll walk you through everything you need to know to install anti-slip adjustable leveling feet on your lean tube workbench. From gathering the right tools to testing stability, we'll break down the process step by step, with tips and tricks to ensure a smooth, successful installation. By the end, you'll have a workbench that not only supports your workflow but enhances it—one stable, slip-free inch at a time.
Tools and Materials You'll Need
Before you dive into installation, it's important to gather all the tools and materials you'll need. Having everything on hand saves time and prevents frustrating mid-project trips to the toolbox. Here's a checklist to get you started:
| Tool/Material | Purpose | Tips for Use |
|---|---|---|
| Anti-slip adjustable leveling feet (kit) | The main component—includes feet, mounting plates, and hardware | Ensure the kit is compatible with your lean tube workbench legs (most fit standard 28mm or 30mm lean tube diameters) |
| Adjustable wrench or socket set | To tighten nuts and bolts securing the feet to the workbench legs | Use a socket that matches the bolt size to avoid stripping |
| Spirit level (24-inch or longer) | To check if the workbench is level after installation | Place it diagonally across the workbench surface to test both directions |
| Measuring tape | To measure leg spacing and ensure feet are positioned evenly | Measure from the bottom of the workbench frame to the floor to estimate initial foot height |
| Rubber mallet | To gently tap mounting plates into place if they're tight | Avoid metal hammers—they can damage the lean tube or feet |
| Clean cloth or rag | To wipe down workbench legs and remove dust, grease, or debris | Use a mild degreaser if legs are oily (debris can prevent proper adhesion of mounting plates) |
| Optional: Thread locker (e.g., Loctite) | To prevent bolts from loosening over time with vibration | Apply sparingly to bolt threads before tightening |

Step 1: Prepare the Workbench and Work Area
Before you start attaching feet, take a few minutes to prep your workbench and workspace. This step might seem trivial, but it's crucial for a smooth installation and a stable end result.
1.1 Clear the Workbench Surface – Remove all tools, materials, and equipment from the workbench. Even small items can add weight, making the workbench harder to move or tip. If your workbench has a shelf or lower rack, empty that too—you don't want anything falling out when you lift the legs.
1.2 Move the Workbench to a Flat, Open Space – You'll need room to get under the workbench and maneuver tools. If possible, roll it (if it has temporary casters) or enlist a helper to lift and carry it to a clear area. Avoid installing feet in tight corners where you can't easily reach all legs.
1.3 Inspect the Lean Tube Frame and Joints – A stable workbench starts with a sturdy frame. Check all lean pipe joints connecting the legs to the top frame—are they tight? If any joints are loose, tighten them with a wrench before installing the feet. Wobbly joints will undermine even the best leveling feet, so don't skip this!
1.4 Clean the Workbench Legs – Over time, dust, grease, and debris can build up on the bottom of the legs. Wipe each leg with a clean cloth (use degreaser if needed) to remove grime. This ensures the mounting plates (if your feet kit includes them) sit flush against the legs, preventing slipping or uneven pressure.
Quick Check: Rock the workbench gently from side to side. If it wobbles without any feet installed, the frame might be bent or joints loose. Fix those issues first—leveling feet can't compensate for a warped frame!

Step 2: Position the Anti-Slip Adjustable Leveling Feet
Now that your workbench is prepped, it's time to figure out where to place the feet. Proper positioning ensures weight is distributed evenly, preventing stress on individual legs and keeping the workbench stable under load.
2.1 Determine Foot Placement – Most lean tube workbenches have four legs, so you'll need four feet (one per leg). For extra stability on larger workbenches (6 feet or longer), you might add a fifth foot in the center, but four is standard. Position each foot at the very bottom of the leg, centered if possible. If the legs are made from aluminum lean pipe or basic aluminum tube, they might have pre-drilled holes for mounting hardware—use those if available.
2.2 Measure Leg Spacing – Use your measuring tape to check the distance between opposite legs (front-left to back-right, front-right to back-left). This ensures the feet are aligned, which helps with leveling later. For example, if the front legs are 48 inches apart, the back legs should be the same. Mark the center of each leg's bottom edge with a pencil—this is your target for the foot's mounting plate.
2.3 Test-Fit the Feet – Before securing anything permanently, hold a foot against the bottom of a leg to see how it fits. If your feet have a mounting plate with holes, align the plate's holes with the leg's holes (or mark new holes if there are none). If the feet attach directly (e.g., via a clamp or threaded insert), make sure the leg diameter matches the foot's opening. Most lean tube workbenches use 28mm or 30mm tubes, so check the foot's specs to confirm compatibility.
Pro Tip for Odd-Shaped Workbenches: If your workbench has more than four legs (e.g., a long, rectangular bench with six legs), space the feet evenly. Measure the length of the bench and divide by the number of legs to ensure equal spacing—this prevents sagging in the middle.

Step 3: Attach the Feet to the Workbench Legs
With the feet positioned, it's time to secure them to the legs. The exact method depends on your feet's design—some use bolts and mounting plates, others clamp on, and a few screw directly into threaded inserts. We'll cover the most common type: feet with mounting plates and bolts.
3.1 Attach the Mounting Plates (If Included) – Many anti-slip adjustable leveling feet come with a metal mounting plate that bolts to the leg, with the foot attached to the plate. Hold the plate against the bottom of the leg, aligning the pre-drilled holes (or the marks you made earlier). insert the bolts through the plate and into the leg—if the leg isn't pre-drilled, you may need to drill pilot holes first (use a drill bit slightly smaller than the bolt diameter to avoid splitting the tube).
3.2 Tighten the Bolts – Use your adjustable wrench or socket set to tighten the bolts. Turn them clockwise until they're snug, but don't overtighten—this can strip the threads or warp the mounting plate. A good rule of thumb: tighten until you feel resistance, then give a quarter-turn more. Repeat this for all four legs.
3.3 Secure the Feet to the Mounting Plates – Once the plates are attached, screw the leveling feet into the plates. Most feet have a threaded stem that screws into a nut on the plate. Turn the foot clockwise until it's hand-tight. You'll adjust the height later, so don't worry about how high it is yet—just get it started.
3.4 Check for Alignment – Stand back and look at the feet from the side. Are they all pointing straight down? If a foot is tilted, loosen the mounting plate bolts slightly, adjust the plate, and retighten. A tilted foot won't grip the floor properly and could cause wobbling.
Clamp-On Feet? No Problem! If your feet clamp onto the leg (common with aluminum lean pipe), open the clamp, slide it onto the bottom of the leg, and tighten the clamp screw with a wrench. Make sure the clamp is tight enough that it doesn't spin when you twist the foot—you don't want it slipping during use.
Step 4: Adjust the Height for a Level Workbench
Now comes the fun part: making the workbench perfectly level. This is where the "adjustable" in anti-slip adjustable leveling feet really shines. Grab your spirit level and let's get to work.
4.1 Place the Level on the Workbench Surface – Lay the spirit level flat on the workbench, positioned so it spans from the front-left to the back-right corner (diagonally). Look at the bubble in the level's vial—if it's centered, that direction is level. If it's off to one side, the workbench is higher on that side.
4.2 Adjust the Feet to Center the Bubble – Let's say the bubble is off to the left, meaning the left side of the workbench is higher. Find the left-front and left-back feet—these are the ones raising the left side. To lower them, turn the foot counterclockwise (this extends the stem, lowering the workbench on that side). Turn each foot 1/4 turn at a time, then check the level again. Repeat until the bubble is centered diagonally.
4.3 Check the Other Diagonal – Rotate the level so it spans from front-right to back-left. Repeat the process: adjust the right-front and right-back feet as needed to center the bubble here too. This ensures the workbench isn't just level in one direction, but flat across the entire surface.
4.4 Fine-Tune with Front-to-Back and Side-to-Side Checks – Place the level parallel to the front edge of the workbench (front-to-back). Adjust the front feet up or down until the bubble is centered. Then place it parallel to the side edge (side-to-side) and adjust the side feet. It might take a few rounds of adjustments—patience is key!
4.5 Lock the Feet in Place (If Needed) – Some leveling feet have a lock nut on the threaded stem. Once you've set the height, hold the foot steady with one hand and tighten the lock nut against the mounting plate with the other. This prevents the foot from unscrewing over time due to vibration.
Dealing with Very Uneven Floors: If your floor has a big dip (more than 1/2 inch), you might need to extend a foot further than others. Most adjustable feet can extend 1-2 inches, but if you need more, consider adding a small shim (like a piece of rubber or metal) under the foot. Just make sure the shim is anti-slip too!
Step 5: Test Stability and Anti-Slip Performance
You've installed and adjusted the feet—now it's time to make sure they work. A level workbench on paper might still wobble in real life, and the anti-slip feature needs to hold up when things get busy.
5.1 Rock the Workbench Gently – Stand at one end of the workbench and push gently from side to side. Then try pushing forward and backward. The workbench should feel solid—no rocking or shifting. If it moves, check which foot is slipping: maybe the anti-slip pad is dirty, or the foot isn't tightened enough. Wipe the pad with a damp cloth to remove dust, then retest.
5.2 Add Weight and Retest – A workbench that's stable when empty might wobble when loaded. Place some heavy items on the surface—tools, a box of parts, or even a few bricks (aim for 50-100 pounds, depending on your workbench's capacity). Rock it again—still stable? If it sags in the middle, you might need to adjust the feet to redistribute weight, or add a center foot for extra support.
5.3 Test the Anti-Slip Grip – To check if the anti-slip pads work, push the workbench with moderate force (like you would if you were moving it without lifting). The feet should grip the floor and prevent sliding. If the workbench moves, the pads might be worn (replace them) or the floor is too smooth (try a rubber mat under the feet).
5.4 Check for Even Weight Distribution – Kneel down and look at the gap between each foot and the floor. All feet should be touching the ground—no floating legs! If a foot is off the floor, that leg isn't supporting weight, which can strain the frame. Adjust that foot's height until it touches, then recheck the level.
Long-Term Test: Let the workbench sit loaded for a few hours (or overnight) and check it again. Sometimes the feet settle slightly under weight, which can throw off the level. A quick readjustment ensures it stays stable for the long haul.
Troubleshooting Common Issues
Even with careful installation, you might run into problems. Here's how to fix the most common issues:
Problem 1: Workbench still wobbles after leveling.
Solution:
Check if the lean tube joints are loose—tighten them with a wrench. If joints are tight, the floor might have a subtle slope. Use the level to find the low spot, then adjust the corresponding foot up slightly to compensate.
Problem 2: Feet keep unscrewing and lowering.
Solution:
If your feet have lock nuts, tighten them against the mounting plate. If not, apply a small amount of thread locker to the stem before screwing in the foot. Avoid overusing thread locker—it can make future adjustments hard.
Problem 3: Anti-slip pads wear out quickly.
Solution:
replace the pads with heavier-duty ones (rubber or polyurethane lasts longer than plastic). If you move the workbench often, consider feet with replaceable pads—they're cheaper than buying new feet.
Problem 4: Mounting plates won't stay tight on the legs.
Solution:
If the bolts keep loosening, add a washer between the bolt head and the mounting plate. The washer distributes pressure and prevents slipping. For aluminum lean pipe legs, use bolts with a slightly larger diameter to get a tighter grip.
Maintenance: Keeping Your Leveling Feet (and Workbench) in Top Shape
Installing anti-slip adjustable leveling feet isn't a "set it and forget it" job. A little maintenance goes a long way in keeping your workbench stable and safe for years to come.
1. Monthly Tightness Check – Use your wrench to tighten the mounting plate bolts and foot lock nuts. Vibration from daily use can loosen them over time, so a quick once-over each month prevents wobbles.
2. Clean the Anti-Slip Pads – Wipe the pads with a damp cloth every few weeks to remove dust, oil, or debris. A dirty pad loses friction, making the workbench more likely to slide.
3. Inspect for Damage – Look for cracks in the mounting plates, bent stems, or worn pads. replace any damaged parts right away—waiting can lead to bigger problems (like a leg collapsing under weight).
4. Relevel After Moving – If you have to move the workbench (even a few feet), the floor might be uneven in the new spot. Grab your level and readjust the feet to ensure stability.
Spare Parts Kit: Keep a few extra anti-slip pads, bolts, and lock nuts on hand. Most lean pipe suppliers sell small accessory kits, so you're not stuck waiting for replacements if something breaks.
Conclusion: A Stable Workbench = Happier, More Productive Workdays
Installing anti-slip adjustable leveling feet on your lean tube workbench might seem like a small task, but its impact is huge. A stable workbench reduces frustration, prevents accidents, and lets you focus on what really matters—getting the job done right. Whether you're assembling electronics, packing orders, or working on a hobby, the time you spend installing these feet will pay off in smoother, more efficient workdays.
Remember, the key to success is preparation: gather your tools, clean the legs, align the feet carefully, and test thoroughly. And don't forget maintenance—those monthly checks will keep your workbench stable for years. With a little effort, you'll transform your wobbly workbench into a reliable partner in productivity.
So go ahead—grab your tools, follow these steps, and enjoy the stability. Your back, your tools, and your sanity will thank you.