- Company Articles
- Products and Technology
- Installation And Maintenance
- Installation Steps for Flat Rigid Castor Wheels on Lean Pipe Workstations

Installation Steps for Flat Rigid Castor Wheels on Lean Pipe Workstations
Related Product
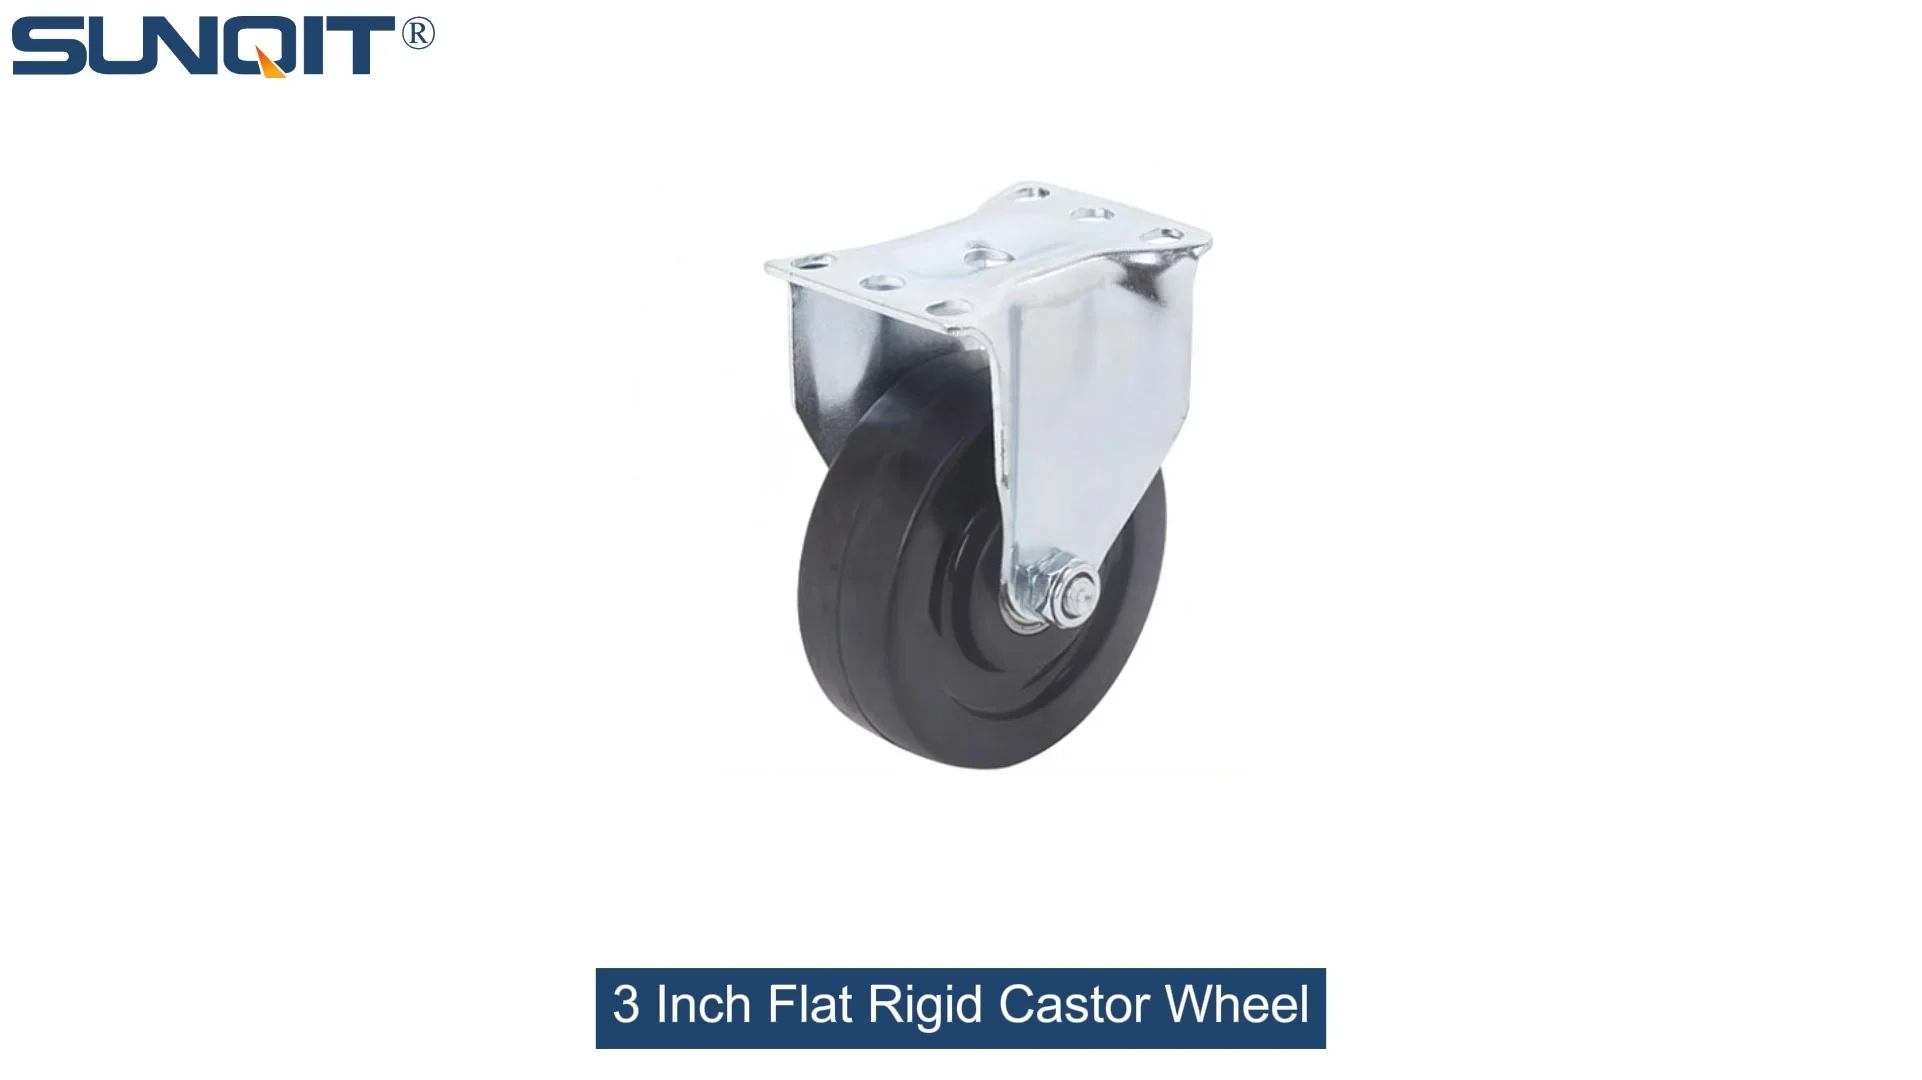
Flat Rigid Castor Wheel
Chair Casters Ball Bearing Wheels Rubber Base. Resistant to abrasion, impact and corrosion. Heavy payload can hold 70Kgs per pcs,which can make it works at a stable and smooth status.
Introduction: The Backbone of Efficient Workspaces
In the fast-paced world of manufacturing, warehousing, and assembly lines, every second counts. A well-designed workspace isn't just about aesthetics—it's about flow, productivity, and reducing unnecessary movement. Enter the lean pipe workbench: a versatile, modular solution that has become the backbone of lean manufacturing systems worldwide. These workstations, built with lightweight yet durable materials like lean pipe (also known as "flexible pipe" or "production pipe"), are prized for their adaptability. They can be customized to fit specific tasks, reconfigured as needs change, and scaled to match growing operations. But even the most well-designed workbench is only as effective as its mobility (or stability) allows. That's where flat rigid castor wheels come into play.
Flat rigid castor wheels are the unsung heroes of stationary workstations. Unlike swivel casters, which offer 360-degree maneuverability, rigid castors are fixed in direction—meaning they only roll forward and backward. This might sound limiting at first, but for lean pipe workbenches tasked with holding heavy tools, assembly components, or ESD-sensitive equipment, rigidity is a strength. These castors provide unmatched stability, preventing unwanted movement during precision work, and they're built to handle consistent, heavy loads without wobbling or shifting. Whether you're setting up a permanent assembly station, a material staging area, or a quality control checkpoint, installing flat rigid castor wheels correctly ensures your lean pipe workbench stays exactly where it needs to be—secure, level, and ready to support your team's best work.
In this guide, we'll walk through the step-by-step process of installing flat rigid castor wheels on a lean pipe workbench. From pre-installation safety checks to testing stability, we'll cover everything you need to know to get the job done right. We'll also touch on common pitfalls to avoid, maintenance tips to extend the life of your casters, and why choosing the right components—like compatible caster accessories and sturdy lean pipe joints—makes all the difference. Let's dive in.
Understanding Flat Rigid Castor Wheels: When Stability Matters Most
Before grabbing your tools, it's important to understand what flat rigid castor wheels are and why they're the right choice for certain applications. At first glance, they might look similar to other casters, but their design is purpose-driven. A typical flat rigid castor consists of a wheel (usually made of rubber, polyurethane, or nylon), a rigid frame (the "yoke"), and a mounting plate or stem that attaches to the workbench. The key word here is "rigid": the yoke is fixed to the mounting plate, so the wheel can't swivel. This design prioritizes stability over maneuverability—a trade-off that's critical for workbenches where precision is non-negotiable.
So when should you choose flat rigid castors over swivel casters? Let's break it down. Swivel casters are ideal for workstations that need to be moved frequently—think mobile carts, temporary assembly lines, or tools that shift between work cells. They allow operators to easily navigate tight spaces and turn corners. But for workbenches that stay in one spot for hours (or days) at a time—like those used for detailed electronics assembly, heavy machinery repair, or material inspection—swivel casters can be a liability. Even a small bump or vibration can cause the workstation to drift, disrupting workflows and potentially damaging sensitive components.
Flat rigid castors solve this problem by locking the direction of movement. When installed correctly, they keep the lean pipe workbench firmly planted, even under heavy loads or during repetitive tasks like drilling or fastening. They're also easier to maintain than swivel casters, which have more moving parts (like ball bearings and swivel plates) that can wear out over time. For operations that prioritize consistency and durability, rigid castors are the clear choice.
Pro Tip: Always check the load rating of your flat rigid castor wheels before installation. Most lean pipe workbenches can support 200–500 lbs, but casters should be rated for at least 120% of the expected load to account for dynamic forces (like placing heavy items on the bench suddenly).

Pre-Installation Preparation: Safety First, Precision Always
Installing flat rigid castor wheels might seem like a straightforward task, but rushing through preparation is a recipe for frustration (or worse, injury). Before you even pick up a wrench, take the time to gather your tools, inspect your components, and set up a safe workspace. Let's start with the basics: safety.
Safety First:
Your workspace should be clean, dry, and free of clutter. Clear away any debris, tools, or materials that could trip you up. If you're working in a manufacturing environment, ensure the area is cordoned off with warning tape or cones to prevent others from accidentally disturbing your work. Wear appropriate PPE: safety glasses to protect against flying debris, work gloves to grip tools and components, and steel-toed boots if there's a risk of dropping heavy casters or tools. Finally, if the lean pipe workbench is already assembled and loaded with equipment, empty it first. A lighter workbench is easier to maneuver and reduces the risk of strain.
Inspect Your Components:
Now, turn your attention to the parts you'll be working with. Lay out the flat rigid castor wheels, caster accessories (like mounting plates, bolts, and washers), and the lean pipe workbench itself. Start with the workbench: check the frame for signs of damage, like bent lean pipe, cracked joints, or loose connectors. Lean pipe joints—those small, often metal or plastic connectors that hold the pipe sections together—are critical here. If any joint is loose, tighten it with a wrench before proceeding; a wobbly frame will make caster installation nearly impossible.
Next, inspect the castor wheels. Check for cracks or chips in the wheel material, and ensure the axle is securely fastened to the yoke. Spin the wheels by hand—they should roll smoothly without grinding or resistance. If a wheel feels stiff, it might have debris stuck in the bearing or a bent axle; replace it immediately. Finally, verify that you have all the necessary caster accessories: most installations require mounting plates (sometimes called "castor installation bases"), bolts, lock washers, and nuts. If your lean pipe workbench has pre-drilled holes for casters, confirm the bolt size matches (common sizes are M8 or 5/16-inch). If not, you may need to drill holes in the workbench legs—more on that later.
Gather Your Tools:
Having the right tools on hand will save you time and frustration. Here's a list of essentials, organized by purpose:
| Tool | Purpose | Pro Tips |
|---|---|---|
| Adjustable wrench or socket set | Tightening bolts and nuts | Use a socket set with a ratchet for faster tightening; avoid using pliers, which can round off bolt heads. |
| Phillips-head and flat-head screwdrivers | Removing any existing fasteners or securing mounting plates | Match the screwdriver size to the screw head to prevent stripping. |
| Level (2-foot or longer) | Ensuring the workbench is flat after installation | A digital level with a backlight is easier to read in dim workspaces. |
| Tape measure | Measuring distances between mounting holes | Use a retractable tape measure for one-handed use while marking holes. |
| Marker or pencil | Marking drill points (if holes need to be drilled) | A fine-tipped permanent marker works best on metal lean pipe legs. |
| Drill and metal drill bits | Drilling holes in the workbench legs (if no pre-drilled holes exist) | Use a drill bit 1/64-inch larger than the bolt diameter to allow for easy insertion. |
| Rubber mallet | Gently tapping mounting plates into alignment | Avoid using a steel hammer, which can damage the casters or workbench frame. |
| Thread locker (blue, medium-strength) | Preventing bolts from loosening over time | Apply a small drop to the bolt threads before tightening—avoid over-applying, as excess can seep into bearings. |

Step-by-Step Installation: From Preparation to Perfection
Now that you've prepped your workspace, inspected your components, and gathered your tools, it's time to start installing the flat rigid castor wheels. Follow these steps carefully, and you'll have a stable, secure workstation in no time.
Step 1: Prepare the Workbench Base
Start by flipping the lean pipe workbench upside down. This will give you easy access to the legs, where the casters will be mounted. If the workbench is too heavy to flip alone, enlist a colleague to help—never attempt to lift more than you can safely handle. Once flipped, place the workbench on a stable, flat surface (like a work mat or piece of plywood) to protect the top from scratches.
Start by flipping the lean pipe workbench upside down. This will give you easy access to the legs, where the casters will be mounted. If the workbench is too heavy to flip alone, enlist a colleague to help—never attempt to lift more than you can safely handle. Once flipped, place the workbench on a stable, flat surface (like a work mat or piece of plywood) to protect the top from scratches.
Next, clean the mounting area on each leg. Use a rag or wire brush to remove dirt, grease, or rust—this ensures a tight bond between the caster mounting plate and the leg. If the legs are made of painted or coated lean pipe, lightly sand the mounting area with fine-grit sandpaper (200–400 grit) to create a rough surface for better adhesion (if using adhesive-backed mounting plates, though most rely on bolts).
Step 2: Align the Mounting Plates
If your lean pipe workbench has pre-drilled holes for casters, skip to Step 3. If not, you'll need to mark and drill holes for the mounting plates. Start by placing a caster mounting plate (also called a "castor install base") against the bottom of one leg. Center it both horizontally and vertically—most mounting plates have a flange that should sit flush with the edge of the leg for stability. Use a tape measure to ensure the plate is positioned the same way on all legs; inconsistent placement will lead to a wobbly workbench.
If your lean pipe workbench has pre-drilled holes for casters, skip to Step 3. If not, you'll need to mark and drill holes for the mounting plates. Start by placing a caster mounting plate (also called a "castor install base") against the bottom of one leg. Center it both horizontally and vertically—most mounting plates have a flange that should sit flush with the edge of the leg for stability. Use a tape measure to ensure the plate is positioned the same way on all legs; inconsistent placement will lead to a wobbly workbench.
Once aligned, use a marker to trace the holes in the mounting plate onto the leg. Repeat this process for all four legs (or more, if your workbench has additional support legs). Double-check the measurements to ensure all marks are identical—even a 1/8-inch difference can throw off the alignment.
Step 3: Drill Holes (If Needed)
If you're drilling holes, attach a metal drill bit to your drill. The bit size should match the diameter of the bolts you'll be using (e.g., a 5/16-inch bit for 1/4-inch bolts). Place the tip of the drill on one of the marked points and apply steady, even pressure. Drill straight down—tilting the drill will result in slanted holes, which can weaken the connection. Once the hole is drilled, deburr the edges with a file or deburring tool to remove sharp metal fragments. Repeat for all marked holes on all legs.
If you're drilling holes, attach a metal drill bit to your drill. The bit size should match the diameter of the bolts you'll be using (e.g., a 5/16-inch bit for 1/4-inch bolts). Place the tip of the drill on one of the marked points and apply steady, even pressure. Drill straight down—tilting the drill will result in slanted holes, which can weaken the connection. Once the hole is drilled, deburr the edges with a file or deburring tool to remove sharp metal fragments. Repeat for all marked holes on all legs.
Pro Tip: To prevent the drill bit from slipping, start with a small pilot hole (1/8-inch) before using the full-size bit. This is especially helpful if you're working with hard materials like stainless steel lean pipe.
Step 4: Attach the Mounting Plates
Now it's time to secure the mounting plates to the legs. Place a mounting plate over the holes (or pre-drilled holes) and insert a bolt through each hole from the outside of the plate. Add a lock washer and nut to the end of each bolt—lock washers prevent the nuts from loosening due to vibration. Tighten the nuts by hand first to ensure they thread on smoothly, then use an adjustable wrench or socket set to fully tighten them. For best results, tighten the bolts in a crisscross pattern (like tightening lug nuts on a car) to distribute pressure evenly.
Now it's time to secure the mounting plates to the legs. Place a mounting plate over the holes (or pre-drilled holes) and insert a bolt through each hole from the outside of the plate. Add a lock washer and nut to the end of each bolt—lock washers prevent the nuts from loosening due to vibration. Tighten the nuts by hand first to ensure they thread on smoothly, then use an adjustable wrench or socket set to fully tighten them. For best results, tighten the bolts in a crisscross pattern (like tightening lug nuts on a car) to distribute pressure evenly.
Step 5: Install the Flat Rigid Castor Wheels
With the mounting plates in place, it's time to attach the casters. Most flat rigid castor wheels have a stem or bolt that fits into the mounting plate. If the caster has a stem, apply a small amount of thread locker to the stem (this prevents it from unscrewing over time), then screw it into the hole in the mounting plate. Use a wrench to tighten it until it's snug—over-tightening can strip the threads.
With the mounting plates in place, it's time to attach the casters. Most flat rigid castor wheels have a stem or bolt that fits into the mounting plate. If the caster has a stem, apply a small amount of thread locker to the stem (this prevents it from unscrewing over time), then screw it into the hole in the mounting plate. Use a wrench to tighten it until it's snug—over-tightening can strip the threads.
If the caster attaches with bolts (common for heavier-duty models), place the caster's yoke over the mounting plate so the holes align. insert bolts through the yoke and mounting plate, add lock washers and nuts, and tighten in a crisscross pattern. Again, use thread locker on the bolt threads for added security.
Repeat this process for all casters, ensuring each is tightened to the same torque (most manufacturers recommend 15–20 ft-lbs for 1/4-inch bolts).
Step 6: Test Stability and Leveling
With all casters installed, carefully flip the lean pipe workbench right-side up. Enlist help if needed—this is the most critical moment for avoiding injury, as the workbench will be top-heavy until it's resting on all four casters. Once upright, give the workbench a gentle push from different angles. It should move only forward or backward (depending on caster orientation) and should not rock or wobble.
With all casters installed, carefully flip the lean pipe workbench right-side up. Enlist help if needed—this is the most critical moment for avoiding injury, as the workbench will be top-heavy until it's resting on all four casters. Once upright, give the workbench a gentle push from different angles. It should move only forward or backward (depending on caster orientation) and should not rock or wobble.
Next, use a level to check if the workbench is flat. Place the level on the top surface, both front-to-back and side-to-side. If it's tilted, check if all casters are making contact with the floor—one caster might be loose or the mounting plate might be misaligned. If the floor itself is uneven (common in older warehouses), you can use shims under the casters to level the workbench. Avoid overtightening bolts to compensate for uneven floors, as this can warp the workbench frame over time.

Troubleshooting Common Issues: When Things Don't Go as Planned
Even with careful preparation, you might run into issues during or after installation. Here are some common problems and how to fix them:
Issue 1: The Workbench Rocks or Wobbles
This is the most common problem, and it's usually caused by one of three things: uneven casters, loose bolts, or misaligned mounting plates. Start by checking if all casters are the same height—remove one caster and compare it to another, or use a tape measure to measure from the floor to the bottom of the workbench leg on each side. If one caster is shorter, replace it with a matching model. If the casters are the same height, check for loose bolts: tighten any that feel wobbly, using thread locker if needed. Finally, inspect the mounting plates—if one is bent or misaligned, loosen the bolts, realign the plate, and retighten.
This is the most common problem, and it's usually caused by one of three things: uneven casters, loose bolts, or misaligned mounting plates. Start by checking if all casters are the same height—remove one caster and compare it to another, or use a tape measure to measure from the floor to the bottom of the workbench leg on each side. If one caster is shorter, replace it with a matching model. If the casters are the same height, check for loose bolts: tighten any that feel wobbly, using thread locker if needed. Finally, inspect the mounting plates—if one is bent or misaligned, loosen the bolts, realign the plate, and retighten.
Issue 2: Casters Won't Roll Smoothly
If the workbench is hard to push (even though rigid casters should roll easily), the wheels might be dirty or the axles might be bent. Remove the caster and clean the wheel with soap and water, then dry thoroughly. If there's debris stuck in the bearing, use a toothpick or compressed air to dislodge it. If the axle is bent, replace the caster—bent axles can't be repaired and will cause uneven wear on the wheel.
If the workbench is hard to push (even though rigid casters should roll easily), the wheels might be dirty or the axles might be bent. Remove the caster and clean the wheel with soap and water, then dry thoroughly. If there's debris stuck in the bearing, use a toothpick or compressed air to dislodge it. If the axle is bent, replace the caster—bent axles can't be repaired and will cause uneven wear on the wheel.
Issue 3: Bolts Keep Loosening
Vibration from daily use can cause bolts to loosen over time. If this happens, remove the bolt, clean the threads, and apply a fresh coat of thread locker. Tighten the bolt to the recommended torque and let the thread locker cure for at least 24 hours before using the workbench. For extra security, you can also use lock nuts (nylon-insert nuts), which have a nylon ring that grips the bolt threads to prevent loosening.
Vibration from daily use can cause bolts to loosen over time. If this happens, remove the bolt, clean the threads, and apply a fresh coat of thread locker. Tighten the bolt to the recommended torque and let the thread locker cure for at least 24 hours before using the workbench. For extra security, you can also use lock nuts (nylon-insert nuts), which have a nylon ring that grips the bolt threads to prevent loosening.
Maintenance Tips: Keeping Your Casters (and Workbench) in Top Shape
Installing flat rigid castor wheels is just the first step—proper maintenance will ensure they last for years. Here's how to keep your casters and lean pipe workbench in top shape:
Inspect Regularly:
Check the casters, bolts, and mounting plates at least once a month. Look for signs of wear, like cracked wheels, bent axles, or rusted bolts. Tighten any loose bolts and replace damaged parts immediately—small issues can turn into big problems if ignored.
Clean the Wheels:
Dirt, grease, and debris can build up in the wheel bearings, causing them to drag or squeak. Clean the wheels weekly with a damp rag, and use a toothbrush to scrub hard-to-reach areas. For stubborn grime, use a mild detergent (avoid harsh chemicals, which can damage wheel materials like polyurethane).
Lubricate Moving Parts:
While rigid casters have fewer moving parts than swivel casters, the axle and bearings still need lubrication to roll smoothly. Apply a few drops of lightweight machine oil (like 3-in-1 oil) to the axle every 3–6 months. Wipe away excess oil to prevent attracting dirt.
Protect Against Corrosion:
If you're working in a humid or damp environment, coat the mounting plates and bolts with a thin layer of rust-resistant spray (like WD-40 Specialist Long-Term Corrosion Inhibitor). This will prevent rust from weakening the connections over time.
Conclusion: Stability That Powers Productivity
Installing flat rigid castor wheels on a lean pipe workbench might seem like a small task, but it's a critical one. These unassuming components transform a basic workstation into a stable, reliable hub of productivity—one that stays where it's needed, supports heavy loads, and stands up to the rigors of daily use. By following the steps outlined in this guide—preparing carefully, aligning precisely, and maintaining regularly—you'll ensure your workbench is ready to tackle whatever your operation throws at it.
Remember, the goal of lean manufacturing is to eliminate waste—whether that's wasted time, wasted movement, or wasted resources. A stable, well-installed workstation reduces waste by keeping tools and materials within reach, minimizing disruptions, and creating a consistent environment for your team. And when your team has the right tools and a workspace they can depend on, there's no limit to what they can achieve.
So go ahead—grab your tools, gather your components, and get started. Your lean pipe workbench (and your productivity) will thank you.