- Company Articles
- Products and Technology
- Installation And Maintenance
- Installation Tips for Aluminum Honeycomb Panels in Flexible Production Facilities

Installation Tips for Aluminum Honeycomb Panels in Flexible Production Facilities
Related Product
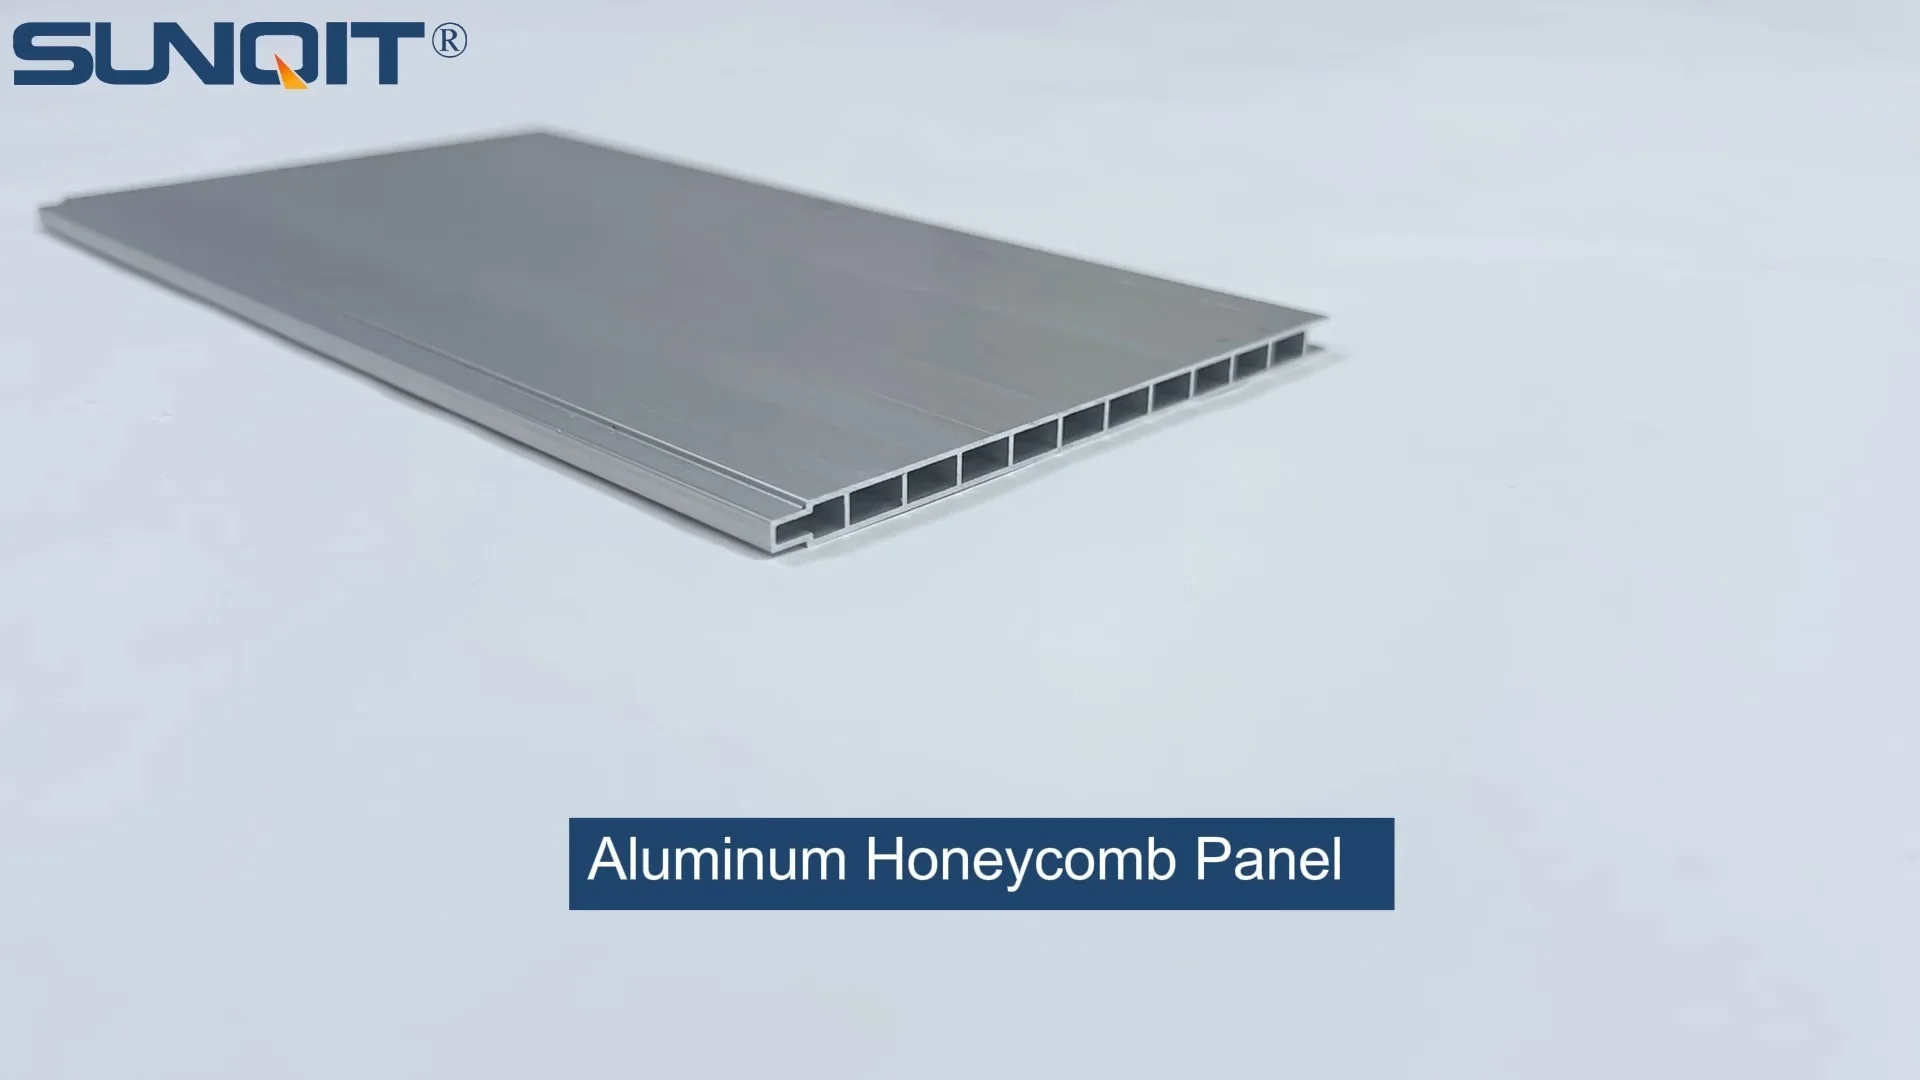
Aluminum Honeycomb Panel
Aluminum honeycomb panel used as table top, side wall, it is connected one pcs by one pcs from the side slot to make a full pieces.This panel width 105mm, 55mm, 35mm are optional for slection.
In the dynamic world of flexible production, where adaptability and efficiency are paramount, the infrastructure supporting daily operations often determines the difference between smooth workflows and costly disruptions. Among the unsung heroes of this infrastructure are aluminum honeycomb panels—versatile, durable, and surprisingly lightweight components that form the backbone of workbenches, material racks, and assembly stations. Whether you're setting up a new production line or upgrading an existing one, installing these panels correctly isn't just about putting a surface in place; it's about building a foundation that can keep pace with shifting demands, heavy use, and the need for quick reconfiguration. Let's walk through the essentials of installing aluminum honeycomb panels in flexible production facilities, from pre-installation planning to long-term maintenance, and how to ensure every step contributes to a setup that's both reliable and ready for whatever comes next.
Why Aluminum Honeycomb Panels Are a Game-Changer for Flexible Production
Before diving into installation, it's worth understanding why aluminum honeycomb panels have become a staple in modern production environments. Unlike solid wood or steel, which are either too heavy, prone to warping, or difficult to reposition, aluminum honeycomb panels strike a unique balance of strength and lightness. Their structure—thin aluminum skins bonded to a honeycomb core—creates a surface that's rigid enough to support heavy tools and materials yet light enough to be moved or reconfigured with minimal effort. This makes them ideal for workbenches that need to shift between tasks, or material racks that adapt to changing inventory needs.
But their benefits don't stop there. These panels are highly customizable, fitting seamlessly into systems built with aluminum extrusion profiles and aluminum profile accessories—the modular building blocks of flexible production setups. This compatibility means they can be integrated into existing infrastructure without overhauls, saving time and resources. Their smooth, non-porous surface resists scratches, chemicals, and daily wear, ensuring they maintain a professional look even in high-traffic areas. And perhaps most importantly, their design dampens vibrations, reducing noise and improving stability for precision work. In short, aluminum honeycomb panels aren't just surfaces—they're enablers of the flexibility that modern production demands.
Pre-Installation: Setting the Stage for Success
Installing aluminum honeycomb panels is rarely a "quick fix." Rushing through preparation often leads to misaligned surfaces, loose fittings, or premature wear. The pre-installation phase is about eliminating surprises, and it starts with three critical steps: assessing the installation site, inspecting the panels, and preparing the support structure.
1. Site Assessment: Measuring, Leveling, and Planning
Start by getting intimate with the space where the panel will go. Grab a tape measure, spirit level, and notebook, and document every detail. If the panel is destined for a workbench, confirm the dimensions of the frame—typically built from aluminum extrusion profiles—and check for levelness. Even a slight tilt in the frame can cause the panel to shift over time, leading to stress cracks or uneven weight distribution. Use a 2-foot spirit level to check both horizontal and vertical alignment, marking any high or low spots. Most aluminum extrusion profile frames have adjustable feet, so now's the time to tweak those until the frame is perfectly level. Don't forget to account for environmental factors, too: Will the panel be near moisture, extreme temperatures, or heavy machinery vibration? These can affect both the panel and its fasteners, so plan for corrosion-resistant hardware or additional reinforcement if needed.
2. Panel Inspection: Ensuring Quality Before Installation
Next, turn your attention to the panels themselves. Even the best-manufactured panels can arrive with hidden defects, so a thorough inspection is non-negotiable. Examine the surface for scratches, dents, or discoloration—minor blemishes might be fixable, but deep dents or cracks could compromise structural integrity. Check the edges: the honeycomb core should be fully encapsulated by the aluminum skins, with no gaps or exposed cells (exposed core absorbs moisture and debris, leading to mold or weakening). Flex the panel gently (if size allows) to test rigidity; a quality panel should feel firm with minimal bowing. Finally, verify dimensions against your site measurements—even a 1mm discrepancy can throw off a tight fit, especially when installing multiple panels side by side. Catching issues now saves frustration later.
3. Preparing the Support Structure: The Backbone of Durability
Aluminum honeycomb panels are only as stable as the structure they're mounted on, and in most cases, that structure is built from aluminum extrusion profiles. These lightweight, modular profiles are designed to work with aluminum profile accessories like brackets, connectors, and T-slot nuts, making them ideal for custom setups. Before installing the panel, ensure the frame is clean, tight, and properly reinforced. Wipe down the aluminum extrusion profiles to remove dust or grease that could prevent a secure bond, and tighten any loose connectors—wobbly frame joints are a leading cause of panel instability. If the frame spans a large area (over 4 feet), add cross-braces or additional support rails to prevent sagging; even strong panels can bow under heavy loads without proper support.

Essential Tools and Materials: What You'll Need
Having the right tools on hand turns a daunting installation into a straightforward task. Below is a breakdown of the essentials, from measuring tools to fasteners, along with why each matters. For quick reference, we've included a table summarizing key tools, their purposes, and pro tips to ensure you use them effectively.
| Tool/Material | Purpose | Pro Tips |
|---|---|---|
| Tape Measure (25ft minimum) | Precise measurements of frame and panel dimensions. | Use a locking tape to avoid slippage; for long spans, have a helper hold the other end to maintain accuracy. |
| Spirit Level (2ft or longer) | Ensuring frame and panel are horizontally/vertically level. | Check level in 2-3 spots per surface; a longer level reduces margin for error on large panels. |
| Cordless Drill with Bits | Drilling pilot holes and driving screws into aluminum extrusion profiles. | Use variable speed (low for metal) and match bit size to screws to prevent stripping or cracking. |
| Panel Clamps/C-Clamps | Holding panels in place during drilling and fastening. | Use soft-jaw clamps to avoid scratching panels; position clamps 12-18 inches apart along edges. |
| Stainless Steel Screws & Washers | Securing panels to aluminum extrusion profiles. | Opt for T-slot screws for aluminum profiles; add washers to distribute pressure and prevent panel damage. |
| Deburring Tool | Removing sharp edges from drilled holes or cut panel edges. | Deburr immediately after drilling to avoid cuts and ensure smooth fastener insertion. |
In addition to these basics, consider safety gear: gloves to protect hands from sharp edges, safety glasses when drilling, and a dust mask if cutting panels (though pre-cut panels are recommended to avoid this step). If your installation involves adhesive (e.g., for non-removable setups), choose a high-strength, heat-resistant adhesive compatible with aluminum—check with your panel supplier for recommendations.

Step-by-Step Installation: From Frame to Finish
With prep work done and tools ready, it's time to install the panel. The process below assumes mounting to an aluminum extrusion profile frame (the most common setup in flexible production), but the core principles apply to other support structures. Follow these steps for a secure, level installation that stands up to daily use.
Step 1: Position and Secure the Frame
Start by placing the aluminum extrusion profile frame in its final location. If it's a standalone unit (like a workbench), ensure it's on a flat surface and adjust the leveling feet until the frame is perfectly horizontal—use your spirit level along both the length and width. For frames attached to walls or other structures, verify that all mounting brackets are tight and the frame is square (measure diagonally from corner to corner; equal measurements mean it's square). Tighten all frame connectors with a hex key or screwdriver—loose joints will transfer movement to the panel, causing screws to loosen over time. If the frame has pre-drilled holes for panel mounting, double-check their alignment with your panel's intended screw locations; misaligned holes are a common installation headache.
Step 2: Align and Temporarily Secure the Panel
With the frame ready, carefully lift the aluminum honeycomb panel and position it on the frame. Enlist a helper for larger panels—even lightweight panels can be awkward to maneuver alone. Center the panel so there's a 1-2mm gap around all edges (this allows for thermal expansion and prevents binding). For multi-panel setups, align edges so seams are straight and even. Once roughly positioned, use panel clamps to hold the panel in place—attach clamps to the frame's outer rails, not the panel surface, to avoid damage. Gently slide the panel into exact alignment, checking that edges are parallel to the frame and gaps are consistent. A rubber mallet can help nudge the panel into place, but always tap through a scrap piece of wood to protect the surface.
Step 3: Mark and Drill Pilot Holes
Now, mark where screws will go. Refer to your panel supplier's guidelines for screw spacing—most recommend fasteners every 8-12 inches along edges and every 16-24 inches along support rails for large panels. Using a pencil, mark screw locations on the panel, ensuring each mark aligns with a frame rail (not empty space). For T-slot aluminum extrusion profiles, marks should align with the T-slot grooves to ensure screws bite into the profile, not just air. Once marked, drill pilot holes through the panel using a bit slightly smaller than your screws (e.g., 1/8-inch bit for #8 screws). Drill perpendicular to the panel surface with gentle pressure—let the bit cut slowly to avoid cracking the aluminum skin. After drilling, use a deburring tool to smooth hole edges and wipe away metal shavings with a dry cloth.
Step 4: Fasten the Panel to the Frame
It's time to secure the panel. For aluminum extrusion profiles, T-slot screws are ideal—they slide into the profile's grooves and tighten with a hex key, creating a strong, vibration-resistant bond. If your frame uses pre-drilled holes, use machine screws with nuts on the underside. In either case, add a washer under each screw head to distribute pressure and prevent the screw from sinking into the panel. Start with one screw, then tighten screws in a "star" pattern (e.g., top-left, bottom-right, top-right, bottom-left) to ensure even pressure—this prevents warping. Stop when the washer is snug against the panel; over-tightening strips threads or cracks the panel. After all screws are in place, give each a final check with a screwdriver—vibration from machinery can loosen fasteners over time, so a little extra snugging now prevents issues later.
Step 5: Final Checks and Finishing Touches
With the panel fastened, do a final inspection. Place your spirit level on the panel surface to confirm it's still level—if not, loosen nearby screws and gently adjust the panel, then retighten. Check seams between panels (if applicable) to ensure they're even and gap-free; a thin bead of silicone sealant can fill minor gaps and prevent debris buildup. Clean the panel with a soft cloth and mild soap to remove fingerprints or dust, and inspect edges for sharp spots—use sandpaper to smooth any burrs. For added protection, consider edge trim (rubber or aluminum) to cover exposed edges, especially in high-traffic areas. Finally, test the panel by placing a moderate load (e.g., tools or materials) on it and checking for movement—no wobbling or creaking means you're good to go.
Troubleshooting Common Installation Issues
Even with careful planning, hiccups happen. Here's how to address three common problems:
Issue 1: Panel is Wobbly or Uneven
If the panel rocks when pressed, the frame is likely unlevel or the screws are loose. Recheck the frame with your spirit level and adjust leveling feet as needed. Tighten all frame connectors and panel screws, working in a star pattern to distribute pressure. For persistent wobble, add additional screws along the panel's centerline—this reinforces against sagging in large spans.
Issue 2: Screw Heads Strip or Panel Cracks
Stripped screws usually stem from over-tightening or using the wrong bit size. Remove the stripped screw with a screw extractor, then use a larger screw (e.g., #10 instead of #8) with a matching pilot hole. If the panel cracks, assess the damage—small cracks can be sealed with epoxy resin to prevent moisture intrusion, but large cracks mean replacing the panel (compromised structural integrity risks failure under load).
Issue 3: Panels Don't Align Seamlessly
Misaligned seams often result from frame irregularities. Measure the frame's diagonal corners—if they're unequal, the frame is out of square. Loosen the frame's corner connectors, adjust until diagonals match, then retighten. For minor panel misalignment, loosen adjacent screws, gently tap the panel into place with a rubber mallet (via a wood block), and retighten.
Maintenance: Extending the Life of Your Installation
A well-installed aluminum honeycomb panel should last a decade or more with minimal upkeep. Simple monthly checks will keep it in top condition:
• Cleaning: Wipe surfaces with a soft cloth and mild soap; avoid abrasive cleaners that scratch the aluminum. For tough stains, use isopropyl alcohol or a specialized aluminum cleaner.
• Fastener Check: Tighten any loose screws—vibration from machinery is their biggest enemy. replace corroded screws with stainless steel alternatives to prevent rust.
• Edge Inspection: Check edges for damage or exposed core; reapply edge trim if it wears or comes loose.
• Frame Maintenance: Inspect aluminum extrusion profiles and accessories for looseness or corrosion; tighten connectors and replace worn parts as needed.
Conclusion: Building a Foundation for Flexibility
Installing aluminum honeycomb panels in flexible production facilities is more than a construction task—it's an investment in efficiency, adaptability, and longevity. By taking the time to prep properly, use the right tools, and follow a methodical installation process, you'll create a surface that not only meets today's needs but can evolve with tomorrow's challenges. Paired with sturdy aluminum extrusion profiles and reliable aluminum profile accessories, these panels become more than just work surfaces—they're the quiet enablers of the flexible, resilient production environments that drive modern manufacturing forward. With care and attention to detail, your installation will stand strong, supporting your team and your operations for years to come.