- Company Articles
- Products and Technology
- Installation And Maintenance
- Installation Tools for External Straight Aluminum Joints: Must-Have Equipment

Installation Tools for External Straight Aluminum Joints: Must-Have Equipment
Related Product
External Straight Aluminum Joint
Aluminum pipe joint outside connection used for two pcs 28pcs aluminum pipe connection in straight angle,it connects two pcs pipe from outside.
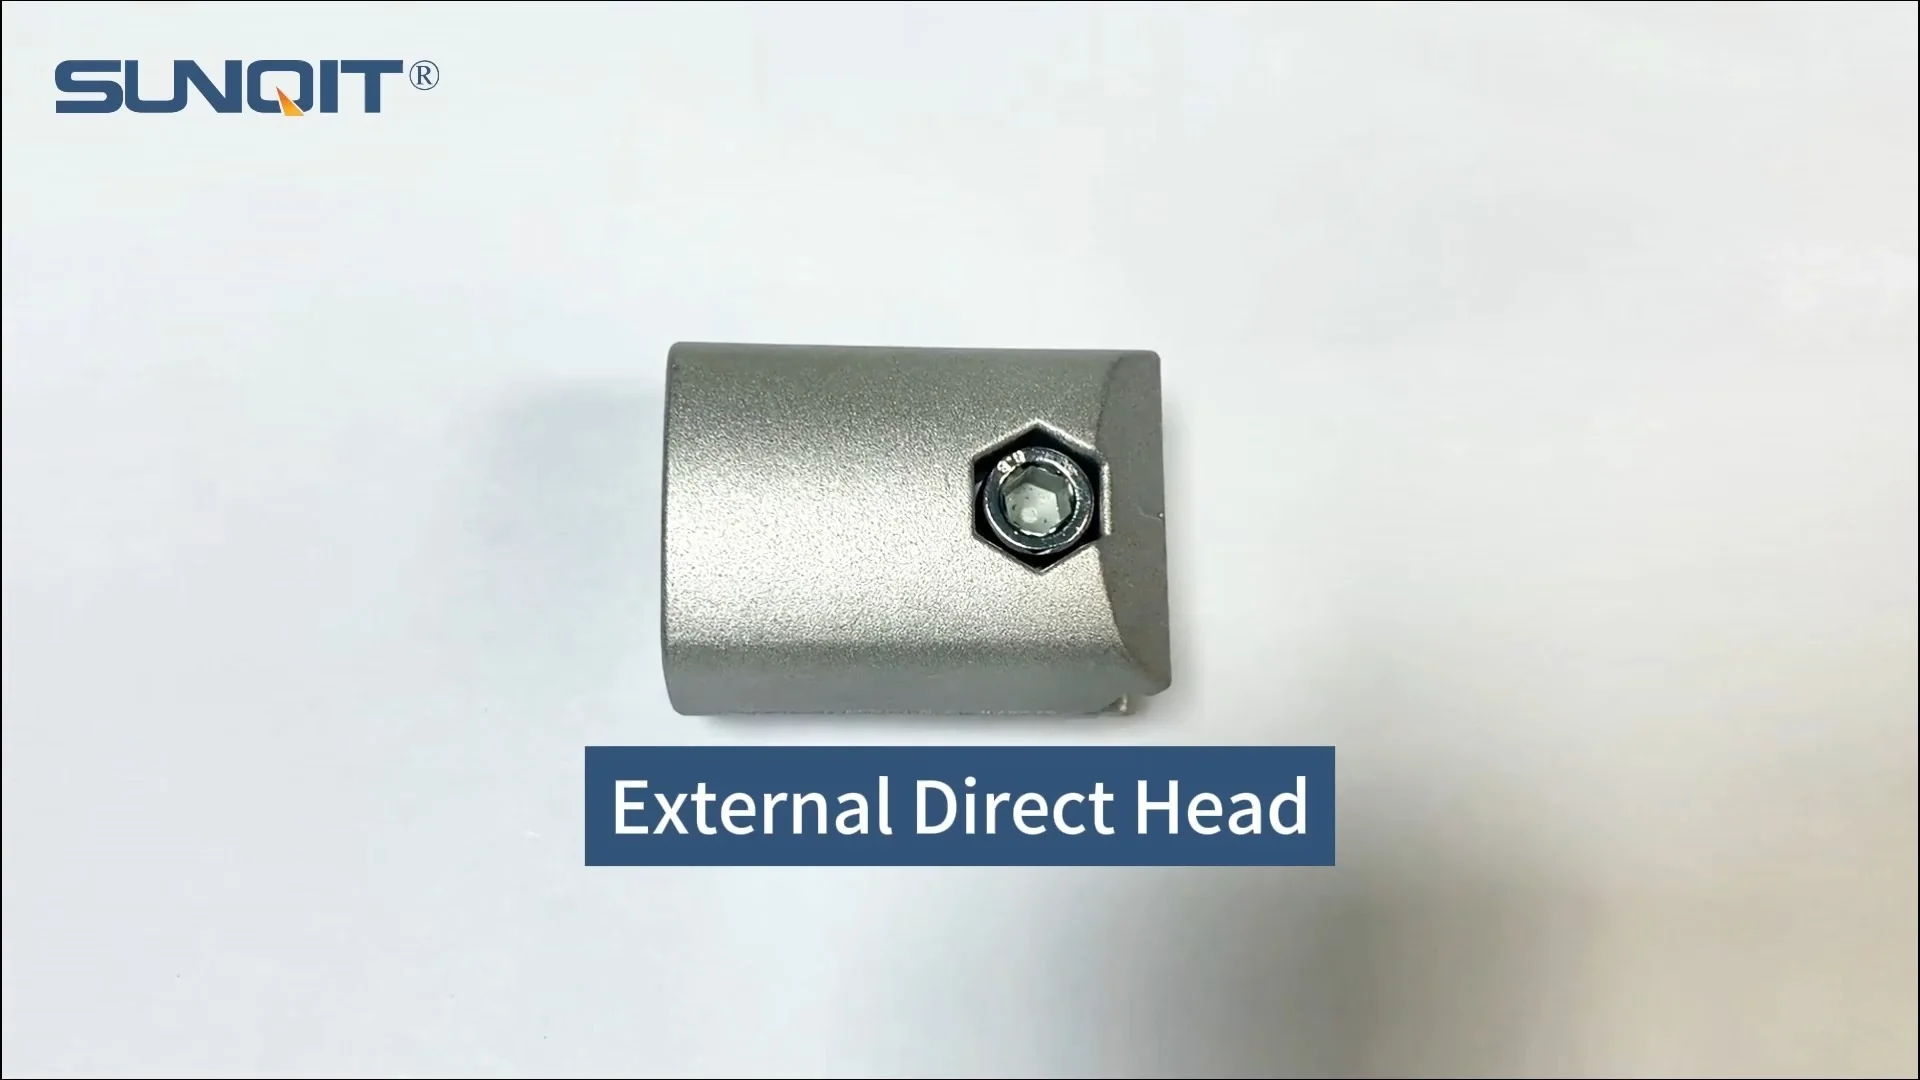
If you've ever walked through a busy warehouse, a precision manufacturing plant, or even a well-organized home workshop, you've probably seen the sleek, modular setups made with aluminum lean pipe. These systems—whether they're workbenches, material racks, or assembly lines—owe their strength and flexibility to one small but critical component: the external straight aluminum joint. These unassuming connectors are the glue that holds everything together, turning lengths of aluminum pipe into sturdy, customizable structures. But here's the thing: even the highest-quality joints won't perform well if you skimp on the tools used to install them. A misaligned cut, a stripped screw, or a wobbly measurement can turn a rock-solid setup into a shaky mess that sways, creaks, or even collapses over time. That's why choosing the right installation tools isn't just about efficiency—it's about building something that lasts. In this guide, we'll break down the must-have tools for installing external straight aluminum joints, from measuring to cutting to fastening, and explain why each one matters. Whether you're a seasoned pro or a DIY enthusiast setting up your first aluminum lean pipe system, this is the toolkit you need to get the job done right.
Why Tools Matter: The Hidden Cost of Cutting Corners
Before we dive into specific tools, let's talk about why they're so important. Aluminum lean pipe systems are designed to be modular and adaptable, which means they rely on precise connections to maintain structural integrity. An external straight aluminum joint, for example, is engineered to fit snugly around two lengths of pipe, using screws or set bolts to lock them in place. If the pipe is cut at a slight angle, or the joint isn't aligned straight, that "small" mistake can create stress points. Over time, those stress points lead to loosened joints, bent pipes, or even system failure. And when that happens, you're not just looking at a wobbly workbench—you're looking at wasted time, money, and potentially safety risks. Imagine a material rack holding heavy parts: if the external straight joints aren't properly secured, a shelf could collapse, damaging inventory or injuring someone nearby. The right tools help you avoid these issues by ensuring every cut is straight, every measurement is accurate, and every fastener is tightened to the perfect tension. They turn a frustrating, trial-and-error process into a smooth, confident workflow where you know the end result will be strong, stable, and built to last.
Measuring Tools: Getting the Numbers Right (Before You Cut)
The first rule of installing external straight aluminum joints? Measure twice, cut once. It's a cliché for a reason: inaccurate measurements are the single biggest cause of installation headaches. Whether you're building a simple two-post rack or a 20-foot assembly line, getting the length and angle of your aluminum lean pipe right starts with the right measuring tools. Let's break down the essentials.
Tape Measures: Not All Are Created Equal
You might think any old tape measure will do, but when working with aluminum lean pipe, precision matters. Look for a tape measure with a few key features: metric units (most aluminum pipe and joints are sized in millimeters), a sturdy, non-stretch blade (fiberglass or steel), and a locking mechanism that holds the blade in place without slipping. A 25-foot (7.5-meter) tape is usually enough for most projects, but if you're working on larger setups, go for 50 feet (15 meters). Why metric? Because aluminum pipe dimensions—like 28mm or 30mm diameters—are standard in the industry, and converting inches to millimeters mid-project is a recipe for errors. Pro tip: Choose a tape with a magnetic hook. When measuring pipes laid out on a metal workbench, the magnet will hold the hook in place, freeing up your other hand to steady the tape. This might seem like a small detail, but when you're measuring 10 or 20 pipes in a row, it saves time and reduces mistakes.
Digital Calipers: For the Tightest Fits
External straight aluminum joints are designed to fit specific pipe diameters. A joint made for 28mm pipe, for example, won't work well with 30mm pipe—and vice versa. That's where digital calipers come in. These tools measure the outer diameter of your aluminum lean pipe with pinpoint accuracy, down to 0.01mm. Why does that matter? Because even a 0.5mm difference in diameter can mean the joint is either too loose (and won't grip the pipe) or too tight (and could crack when you try to insert the pipe). Calipers also help check for ovality—if a pipe is slightly bent (common in shipping or storage), the diameter might vary by a millimeter or two across its circumference. A quick check with calipers ensures you're using straight, uniform pipes that will fit perfectly into your external straight joints. Look for a pair with a stainless steel body (to resist corrosion from aluminum dust) and an easy-to-read LCD screen. They're affordable, portable, and will save you from the frustration of trying to force a misfit pipe into a joint.
Angle Finders: Because "Straight" Isn't Always Straight
An external straight aluminum joint is meant to connect two pipes in a straight line—180 degrees, no exceptions. But if your pipe is cut even 1 degree off, that "straight" line becomes a subtle angle. Over 10 feet of pipe, that 1-degree error adds up to a misalignment of nearly 2 inches—enough to throw off an entire system. An angle finder (or protractor) helps you verify that your cuts are dead straight before you even attach the joint. Digital angle finders are the easiest to use: just place the flat edge against the cut end of the pipe, and the screen displays the angle. For analog fans, a simple metal protractor works too—just be sure to align the baseline with the pipe's edge for accuracy. Either way, this tool is non-negotiable if you want to avoid that "close enough" mindset that leads to wobbly connections.

Cutting Tools: Making Clean, Straight Cuts Every Time
Once you've measured your aluminum lean pipe, it's time to cut it to length. But aluminum isn't like wood or plastic—it's a soft metal that can bend, warp, or leave jagged edges if cut with the wrong tools. A clean, straight cut isn't just about looks; it ensures the external straight aluminum joint can seat properly, with full contact between the pipe and the joint's inner surface. Without that, the joint can't grip as tightly, and the connection will loosen over time. Here are the tools you need to get those perfect cuts.
Hacksaws: Old-School, but Still Useful (With the Right Blade)
A hacksaw is the most accessible cutting tool for small projects or DIY setups. It's affordable, portable, and doesn't require electricity, which makes it great for on-the-go installations. But not all hacksaws are up to the task of cutting aluminum lean pipe. The key is the blade: look for a high-speed steel (HSS) blade with 32 teeth per inch (TPI). The fine teeth reduce tearing and leave a smoother edge, while HSS is tough enough to handle aluminum without dulling quickly. When using a hacksaw, clamp the pipe securely in a vice first—freehand cutting is almost impossible to keep straight. Use slow, steady strokes, letting the blade do the work, and avoid pressing too hard (this bends the blade and leads to crooked cuts). After cutting, always deburr the edge with a deburring tool—those sharp, ragged bits of aluminum can slice through gloves, damage the joint's inner surface, or even prevent the pipe from seating fully in the external straight aluminum joint.
Miter Saws: The Pro's Choice for Speed and Precision
If you're cutting more than a few pipes, or if you need consistent, repeatable cuts, a miter saw with an aluminum-cutting blade is worth the investment. These power tools make quick work of aluminum lean pipe, delivering straight, clean cuts in seconds. But not just any blade will do: aluminum is soft and gummy, so you need a blade designed specifically for non-ferrous metals (aluminum, brass, copper). Look for a carbide-tipped blade with 60-80 teeth—carbide stays sharp longer than HSS, and the extra teeth ensure a smooth cut. Set the saw to 0 degrees for straight cuts (perfect for external straight aluminum joints) and use a clamp to secure the pipe to the saw's fence. Let the blade reach full speed before making contact, and feed the pipe slowly to avoid overheating the blade (which can melt the aluminum and clog the teeth). For added safety, wear ear protection—the high-pitched whine of a miter saw cutting aluminum is loud—and a dust mask to avoid inhaling fine aluminum particles.
Pipe Cutters: For Tubing That Needs a "Perfect Circle"
If you're working with thin-walled aluminum lean pipe (common in lightweight systems), a pipe cutter is a game-changer. These tools look like small C-clamps with a rotating cutting wheel. To use one, you clamp it around the pipe, tighten the wheel until it makes contact with the surface, then rotate the cutter around the pipe, tightening slightly with each turn. The wheel scores the pipe gradually, creating a clean, burr-free cut with minimal effort. Pipe cutters are ideal for external straight aluminum joints because they ensure the cut end is perfectly round—no ovaling, no warping, just a smooth surface that fits snugly into the joint. They're also portable, so you can use them on-site if you need to adjust pipe lengths after moving materials. Just be sure to choose a cutter with a cutting wheel made for aluminum (some are designed for copper or steel, which will dull quickly on aluminum) and clean the wheel after use to remove metal shavings.
| Tool Type | Best For | Pros | Cons |
|---|---|---|---|
| Hacksaw (HSS Blade) | Small projects, portability, tight spaces | Affordable, no electricity needed, lightweight | Slow for large jobs, requires steady hand to stay straight |
| Miter Saw (Carbide Blade) | Large projects, repeatable cuts, speed | Fast, precise, consistent results | Expensive, needs power, less portable |
| Pipe Cutter (Aluminum Wheel) | Thin-walled pipe, on-site adjustments | Clean, round cuts, minimal burrs, portable | Not ideal for thick-walled pipe, slow for multiple cuts |

Fastening Tools: Locking in the Joint (Without Stripping or Breaking)
Once your pipes are cut and deburred, it's time to attach the external straight aluminum joint. This is where the rubber meets the road—or, more literally, where the joint meets the pipe. Most external straight joints use screws, bolts, or set screws to lock the pipe in place, and using the wrong tool here can strip threads, snap screws, or leave joints loose. The goal is to tighten the fasteners just enough to grip the pipe firmly without damaging the joint or the pipe itself. Let's explore the tools that make this possible.
Hex Keys (Allen Wrenches): The Go-To for Set Screws
If you've ever handled an external straight aluminum joint, you've probably noticed the small, hexagonal holes on the side—those are for set screws, and they're almost always tightened with a hex key (also called an Allen wrench). Hex keys come in sets, with sizes ranging from tiny 1.5mm to larger 10mm or more, and they're designed to fit snugly into the hex-shaped recess of the screw. The key here is to use the right size: a hex key that's too small will strip the screw head, making it impossible to tighten or loosen later, while one that's too large won't fit at all. Look for a set with ball-end tips—these allow you to turn the key at an angle, which is handy when the joint is in a tight spot (like up against a wall or another pipe). For added durability, choose hex keys made of chrome-vanadium steel—they're less likely to bend or snap under pressure. And pro tip: if your joint has multiple set screws (many do, for extra grip), tighten them in a crisscross pattern, like you would with lug nuts on a car tire. This ensures even pressure, so the pipe doesn't get pinched or warped.
Torque Wrenches: Precision Tightening for Critical Connections
For high-stress applications—like material racks holding heavy loads or assembly lines with constant vibration—"hand tight" just isn't enough. That's where a torque wrench comes in. These tools measure the amount of force (torque) applied to a fastener, ensuring you tighten it to the manufacturer's recommended specification (usually listed in Newton-meters or inch-pounds). Over-tightening a screw in an external straight aluminum joint can strip the threads in the joint (aluminum is softer than steel, so it's prone to this) or even crack the joint itself. Under-tightening, on the other hand, leaves the pipe loose, which can rattle and wear down the joint over time. A torque wrench takes the guesswork out of it. Most torque wrenches come with interchangeable bits, so you can use them with hex keys, screwdriver heads, or socket wrenches, depending on the fasteners in your joint. For aluminum lean pipe systems, a small, adjustable torque wrench (up to 50 Nm) is usually sufficient. Just be sure to calibrate it annually—like any precision tool, torque wrenches lose accuracy over time, and a miscalibrated wrench is worse than none at all.
Screwdrivers: For Joints with Slotted or Phillips Heads
While hex keys are the most common, some external straight aluminum joints use slotted or Phillips-head screws, especially in older or budget-friendly models. For these, a good set of screwdrivers is essential. Look for ones with magnetic tips—they hold the screw in place, which is a lifesaver when you're trying to thread a tiny screw into a joint above your head or in a tight corner. The handle matters too: a soft-grip, ergonomic handle reduces hand fatigue during long projects, and a sturdy shaft (preferably chrome-plated) resists bending. Like with hex keys, size is critical—using a Phillips screwdriver that's too small will cam out (slip and strip the head), while one that's too large won't fit. If you're unsure, check the screw head: Phillips screws are labeled with a number (0, 1, 2, 3), while slotted screws are measured by the width of the blade (e.g., 3mm, 5mm). Matching the screwdriver to the screw size ensures a tight, secure fit for your joint.

Alignment Tools: Keeping It Straight (Even When It's Tempting to "Eyeball" It)
You've measured twice, cut straight, and tightened the screws—but is your external straight aluminum joint actually straight? It's easy to think "close enough" when you're in a hurry, but even a tiny misalignment can throw off an entire system. A workbench that's 1 degree off-level might not seem like a big deal, but over 6 feet, that's a difference of 1.2 inches from one end to the other. Over time, that slope causes tools to slide off, materials to shift, and joints to loosen as the system compensates for the uneven weight. Alignment tools help you catch these issues before they become problems.
Spirit Levels: The Classic Tool for Flat and Plumb
A spirit level (or bubble level) is the simplest way to check if your aluminum lean pipe setup is horizontal (flat) or vertical (plumb). These tools have one or more vials filled with liquid and an air bubble; when the bubble is centered between the two lines, the surface is level. For external straight aluminum joints, a 2-foot or 4-foot spirit level is ideal—long enough to span across two joints, short enough to maneuver in tight spaces. When attaching a joint, place the level along the top of the connected pipes. If the bubble is off-center, loosen the set screws slightly, adjust the pipe, and retighten. Repeat until the bubble is centered. For vertical pipes (like the legs of a workbench), use the vertical vial on the level to ensure they're straight up and down. It might take a few tries, but trust us—taking the time to level now will save you from a wobbly setup later.
Laser Levels: For Long Runs and Multiple Joints
If you're building a system with multiple external straight aluminum joints in a straight line—like a 20-foot material rack or an assembly line— a laser level is a game-changer. These tools project a straight, visible laser beam across a room, giving you a reference line to align all your joints. Set the laser level at one end of your project, point it down the length of the pipes, and then adjust each joint so the pipe lines up with the laser. This ensures every external straight joint is in perfect alignment, even over long distances. Laser levels come in basic (battery-powered, manual leveling) and advanced (self-leveling, with multiple beam options) models. For most aluminum lean pipe projects, a basic cross-line laser (which projects both horizontal and vertical lines) is sufficient. Just be sure to use it in a dimly lit area—the laser is harder to see in bright sunlight—and secure it to a tripod or stable surface to prevent movement while you work.
Straightedges: The Low-Tech Alternative That Still Works
If you don't have a laser level, a simple straightedge can do the job. A long, rigid aluminum profile (like the ones used in your lean pipe system) works perfectly—they're straight, lightweight, and already part of your materials. To use one, place the straightedge across the tops of the pipes connected by external straight aluminum joints. If there's a gap between the straightedge and the pipe, that means the joint is misaligned. Loosen the set screws, adjust the pipe until it touches the straightedge, and retighten. Straightedges are especially useful for checking alignment in tight spaces where a laser level might not fit, or for small projects where a laser feels like overkill. They're also great for verifying that the pipes themselves are straight—if the straightedge rocks when placed on a single pipe, that pipe is bent and should be replaced before installing the joint.
Safety Tools: Protecting Yourself (Because No Project is Worth an Injury)
We've talked a lot about tools that help you build better, but let's not forget the most important tool of all: protecting yourself. Installing external straight aluminum joints involves cutting metal, handling sharp edges, and using power tools—all of which come with risks. A slip with a hacksaw can lead to a deep cut, aluminum dust can irritate your lungs, and flying shavings can scratch your eyes. These injuries aren't just painful; they slow down your project and could lead to long-term issues. Here are the safety tools you should never start a project without.
Safety Glasses: Your First Line of Defense
Aluminum shavings are sharp, lightweight, and surprisingly fast-moving—when you cut a pipe with a miter saw or pipe cutter, those tiny metal bits fly everywhere. Even a small shaving in your eye can cause irritation, scratches, or worse. Safety glasses with impact-resistant lenses are a must. Look for ones that wrap around the sides to protect from shavings coming from any angle, and choose anti-fog lenses if you're working in a warm or humid environment (nothing's worse than fogged-up glasses when you're trying to make a precise cut). If you wear prescription glasses, you can get over-the-glasses safety goggles or prescription safety glasses—don't skip this step just because you already wear glasses; regular lenses aren't impact-resistant.
Cut-Resistant Gloves: Keeping Your Hands in One Piece
Deburring a pipe, handling cut aluminum, or tightening set screws—all of these tasks put your hands at risk. Aluminum edges are sharp, even after deburring, and a slip with a hex key can result in a deep puncture wound. Cut-resistant gloves are made from materials like Kevlar or high-performance polyethylene, which resist cuts and punctures while still letting you grip tools. Look for gloves with a snug fit (baggy gloves can get caught in tools) and good dexterity—you need to feel the hex key turning or the screwdriver gripping the screw. Avoid latex gloves; they don't protect against cuts, and aluminum dust can stick to them, making them slippery.
Ear Protection: Saving Your Hearing (One Miter Saw at a Time)
Power tools like miter saws or angle grinders are loud—often 90 decibels, which is enough to cause hearing damage with prolonged exposure. Earplugs or earmuffs are a must if you're using these tools. Disposable foam earplugs are cheap and easy to use (roll them up, insert into your ear, and let them expand), while earmuffs are reusable and offer higher noise reduction. If you're working in a noisy environment (like a busy warehouse), combining earplugs and earmuffs gives extra protection. Your ears can't heal from damage, so don't skip this step—even a few hours with a loud tool can lead to tinnitus or hearing loss later in life.
Aluminum Pipe Accessories: The "Nice-to-Haves" That Make the Job Easier
While not strictly "tools," aluminum pipe accessories can turn a frustrating installation into a smooth one. These small, often-overlooked items complement your toolkit, making tasks like clamping pipes, retrieving dropped screws, or cleaning up shavings faster and easier. Here are a few worth adding to your setup.
Pipe Clamps: Holding Pipes Steady While You Work
Trying to cut or deburr a pipe that's rolling around on the workbench is a recipe for mistakes (or injuries). Pipe clamps—adjustable tools that grip the pipe tightly—solve this problem. They come in various styles: C-clamps, bar clamps, or specialized pipe vises that bolt to your workbench. For aluminum lean pipe, a simple C-clamp with rubberized jaws works well—it holds the pipe without scratching the surface (important if your pipes have a finish or coating). Clamps are also useful when installing external straight aluminum joints: secure the two pipes in the clamp first, align them, attach the joint, then tighten the screws. This ensures the pipes don't shift while you're working, leading to a straighter, more secure connection.
Magnetic Pickup Tools: Saving You from Crawling on the Floor
Dropping a tiny set screw or hex key under the workbench is inevitable—and frustrating. A magnetic pickup tool (a long, flexible rod with a magnet on the end) lets you retrieve those lost parts without getting on your hands and knees. They're cheap, portable, and a lifesaver when you're working in tight spaces (like under a shelf or behind a rack). Look for one with a strong magnet (neodymium magnets are best) and a telescoping handle so you can reach into deep or hard-to-access areas. Some even have LED lights to help you spot the lost part in dark corners.
Putting It All Together: Building a Toolkit That Grows With You
By now, you might be thinking, "That's a lot of tools—do I really need all of them?" The answer depends on your project. If you're building a single small workbench with a few external straight aluminum joints, a basic toolkit (tape measure, hacksaw, hex key set, spirit level, safety glasses) might be enough. But if you're planning to build multiple systems, or if you want professional-quality results, investing in better tools (like a miter saw, torque wrench, or laser level) will save you time and frustration in the long run. The key is to start with the essentials and add tools as you need them. And remember: even the best tools are useless if you don't take care of them. Clean your hex keys after use to prevent rust, sharpen your saw blades when they start to drag, and store your tools in a dry, organized case. A well-maintained toolkit will last for years, helping you build sturdy, reliable aluminum lean pipe systems that stand the test of time.
Final Thoughts: Tools That Build Confidence
Installing external straight aluminum joints isn't just about connecting pipes—it's about building something you can trust. Whether it's a workbench where you'll spend hours tinkering, a material rack holding valuable inventory, or an assembly line that keeps your business running, the tools you use matter. They turn a pile of aluminum lean pipe and joints into a system that's strong, stable, and ready to work as hard as you do. So don't skimp on the tools. Measure with precision, cut with care, fasten with purpose, and align with patience. Your future self (and your back, when you're not fixing wobbly joints) will thank you. After all, the best projects aren't just built with materials—they're built with the right tools.