- Company Articles
- Products and Technology
- Installation And Maintenance
- Installation Tools Needed for Anti-Slip Adjustable Leveling Feet

Installation Tools Needed for Anti-Slip Adjustable Leveling Feet
Related Product
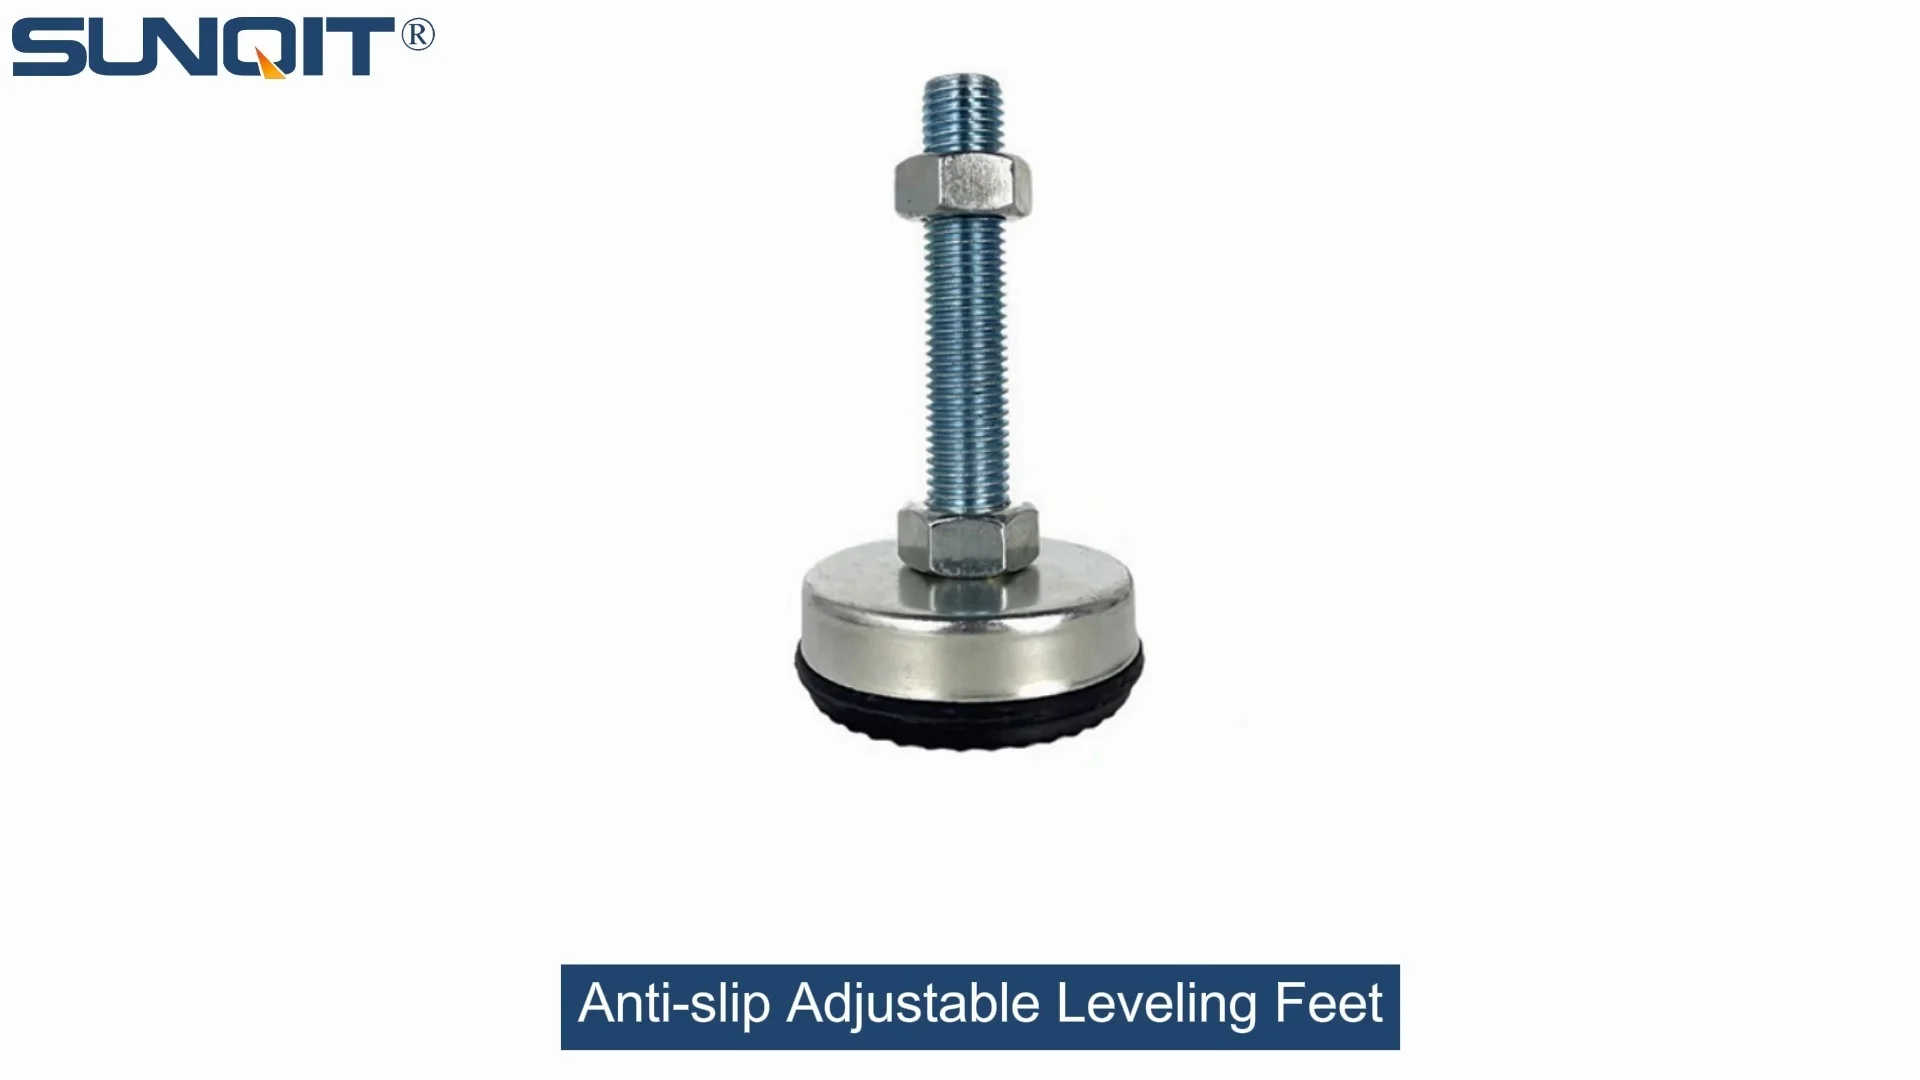
Anti-slip Adjustable Leveling Feet
Anti-slip Adjustable Leveling Feet are designed to keep machines level when placed on uneven or sloped ground, the rubber base will prevent product slip during work.
Let's start with a scenario we've all encountered at some point: you're in a workshop, standing at a workbench, trying to assemble a delicate component. Everything's going smoothly until you notice the bench wobbles slightly with every movement. A quick glance down reveals the problem—the feet aren't sitting evenly on the floor. That tiny wobble might seem minor, but over time, it can throw off measurements, damage sensitive equipment, or even lead to accidents. This is where anti-slip adjustable leveling feet step in. These unassuming components are the unsung heroes of stable, safe workspaces, whether you're setting up a sleek aluminum profile workbench, a sturdy material rack, or a production line conveyor system. But here's the thing: even the best leveling feet won't perform well if they're installed haphazardly. The key to getting them right? Having the right tools and knowing how to use them.
In this guide, we're diving deep into the world of anti-slip adjustable leveling feet installation. We'll explore why these feet matter, the consequences of cutting corners during setup, and—most importantly—the essential tools you need to ensure a rock-solid, long-lasting installation. Whether you're a seasoned facility manager, a DIY enthusiast building your first workbench, or a production supervisor upgrading your team's material rack B (3 row and 3 floor), this article will walk you through everything you need to know. By the end, you'll not only have a clear checklist of tools but also the confidence to tackle installation like a pro.
Why Proper Installation of Anti-Slip Adjustable Leveling Feet Matters
Before we jump into tools, let's take a moment to appreciate why anti-slip adjustable leveling feet are worth the effort. These feet are designed to do two critical jobs: adjust for uneven surfaces and prevent slipping. In a busy workshop or factory, floors are rarely perfectly flat. Concrete might have small cracks, tiles could be uneven, or the ground might slope slightly over time. Without adjustable feet, your workbench or material rack would rock, making tasks like measuring, cutting, or assembling parts frustrating at best and dangerous at worst. The "anti-slip" feature is equally vital—imagine a loaded turnover trolley suddenly sliding on a smooth floor because the feet couldn't grip. That's not just a productivity killer; it's a safety hazard.
Poor installation turns even the highest-quality leveling feet into liabilities. If they're not tightened enough, they'll loosen over time, leading to wobbling. If they're over-tightened, you might strip the threads or damage the mounting surface, especially if you're working with aluminum profile, which is durable but prone to warping under excessive force. Misaligned feet can cause uneven weight distribution, putting stress on the structure itself—think of a workbench where one corner is higher than the others; over time, the wooden or aluminum top could crack. And let's not forget the anti-slip function: if the feet aren't secured properly, that "anti-slip" rubber base won't stay in contact with the floor, defeating the purpose entirely.
So, what's the cost of cutting corners? Wobbly workbenches lead to inaccurate measurements, which in turn lead to defective products. Loose feet on a material rack could cause boxes to tip, damaging inventory. In a production line, unstable conveyors might jostle parts, leading to jams or errors. And worst-case scenario? A slipping trolley or collapsing rack could result in injuries. The good news? These risks are entirely avoidable with the right tools and a little care during installation.
The Essential Toolkit: What You Need to Install Anti-Slip Adjustable Leveling Feet
Installing anti-slip adjustable leveling feet isn't rocket science, but it does require a specific set of tools. Think of it like baking a cake: you can't make a moist, fluffy dessert with just a spoon and a pan—you need measuring cups, a mixer, and a spatula. Similarly, installing leveling feet demands tools that let you measure precisely, tighten securely, and adjust with finesse. Below, we've broken down the toolkit into four categories: basic hand tools, measuring and marking tools, specialized tools, and safety gear. Let's start with the basics.
Basic Hand Tools: The Foundation of Every Installation
These are the workhorses of any toolkit—tools you'll reach for again and again, whether you're attaching feet to a workbench or adjusting a caster on a trolley. Don't skimp on quality here; a cheap wrench that slips or a flimsy screwdriver that bends will only slow you down and increase the risk of mistakes.
1. Wrenches: Your Go-To for Tightening
When it comes to securing leveling feet, wrenches are non-negotiable. Most anti-slip adjustable leveling feet have hexagonal (hex) nuts or bolt heads, which require a wrench to tighten. Here are the types you'll need:
- Adjustable Wrench: The Swiss Army knife of wrenches. Its jaws can be adjusted to fit different nut sizes, making it ideal for situations where you're not sure of the exact bolt diameter. Look for one with a smooth adjustment mechanism and a wide jaw opening (at least 1.5 inches) to handle larger nuts. Pro tip: Always position the wrench so the force is applied to the fixed jaw, not the adjustable one, to avoid bending the tool.
- Socket Wrench Set: For precision and speed, a socket wrench can't be beat. Sockets come in standard (SAE) and metric sizes, and since most leveling feet use metric threads (common in aluminum profile systems), a metric set is a must. Look for a set with 6-point sockets—they grip nuts more securely than 12-point sockets, reducing the chance of rounding the edges. A 1/4-inch or 3/8-inch drive set should cover most leveling feet sizes (typically 8mm to 14mm nuts).
- Torque Wrench: If you're installing leveling feet on heavy-duty equipment (like a material rack holding hundreds of pounds), a torque wrench is critical. Over-tightening can strip threads or crack the mounting surface (especially on aluminum), while under-tightening leads to loosening over time. A torque wrench lets you tighten to a specific torque value (measured in foot-pounds or Newton-meters), ensuring you hit the manufacturer's recommended setting. A basic digital torque wrench with a range of 10-100 in-lbs should suffice for most leveling feet applications.
Example: Suppose you're installing anti-slip adjustable leveling feet on a workbench made with 4040 aluminum profile. The feet have M10 bolts, and the manufacturer recommends 25 in-lbs of torque. Using a torque wrench set to 25 in-lbs ensures you don't over-tighten and damage the profile's threads.
2. Screwdrivers: For Phillips, Flathead, and Everything In Between
While many leveling feet use bolts and nuts, some models (especially those designed for quick installation) use screws to attach to the base. A good set of screwdrivers will help you drive these screws home without stripping the heads.
- Phillips Screwdrivers: Look for a set with multiple sizes ( #1, #2, #3) to match different screw heads. Magnetic tips are a game-changer—they hold the screw in place, so you don't have to fumble with it while positioning the foot.
- Flathead Screwdrivers: Essential for slotted screws, which are still common in some leveling foot designs. Again, multiple sizes (3/16-inch, 1/4-inch) are key. Avoid using a flathead that's too small—it will slip and damage the screw head.
- Cordless Drill/Driver with Screwdriver Bits: For larger projects (like installing feet on an entire row of material racks), a cordless drill with screwdriver bits will save you time and hand fatigue. Opt for a variable-speed drill so you can start screws slowly (to avoid cross-threading) and then speed up once they're seated. Include Phillips, flathead, and hex bits in your set—many leveling feet use hex screws that fit these bits.
3. Pliers: Grip, Twist, and Hold
Pliers are indispensable for tasks that require extra grip or leverage. Here are the types you'll need:
- Combination Pliers: Great for gripping small parts, bending wire (if you're dealing with cable management near the feet), or holding a nut in place while you tighten a bolt with a wrench. Look for ones with serrated jaws for better grip.
- Needle-Nose Pliers: Perfect for tight spaces, like when installing feet in the corner of a workbench where a wrench won't fit. They're also useful for adjusting small components, like the anti-slip rubber pad on some leveling feet models.
- Locking Pliers (Vise-Grips): These are like a third hand. Use them to hold a bolt steady while you tighten the nut, or to clamp the leveling foot in place during installation. Adjustable locking pressure ensures you don't damage the foot's finish.
4. Hammers: For Gentle Persuasion (Not Bashing!)
You might be thinking, "Hammers? I'm installing leveling feet, not building a deck!" But a gentle tap with the right hammer can help seat a foot that's slightly misaligned or loosen a stuck nut. The key word here is "gentle"—aluminum profile and plastic components (like the anti-slip pad) can crack if hit too hard.
- Rubber Mallet: The best choice for leveling feet installation. The rubber head delivers force without marring the surface of the foot or the aluminum profile. Use it to tap the foot into alignment if it's sitting crooked, or to seat a bolt that's stuck in a threaded hole.
- Claw Hammer (Optional): Only needed if you're removing old, rusted feet or prying up damaged components. Use the claw end to pull out stripped screws, but be careful not to scratch nearby surfaces.
Measuring & Marking Tools: Precision is Everything
"Close enough" might work for hanging a picture, but when installing leveling feet, precision matters. A difference of 1/8 of an inch can mean the difference between a stable workbench and one that wobbles. These tools will help you measure, mark, and align with accuracy.
1. Tape Measure: Your Most Trusted Measuring Tool
Invest in a 25-foot retractable tape measure with a locking mechanism and a clear, easy-to-read scale. Look for one with both imperial (inches) and metric (centimeters) markings—many leveling feet and aluminum profile systems use metric measurements. A magnetic hook is a bonus; it will stick to metal surfaces, freeing up your hands to hold the other end.
How to use it: When installing feet on a workbench, measure the distance from each corner to ensure the feet are evenly spaced. For a material rack, measure the height of each foot to ensure the rack sits level front-to-back and side-to-side.
2. Level: Ensuring Everything is Flat and Straight
A level is the only way to confirm that your leveling feet are, well, level. There are two main types to consider:
- Spirit Level (Bubble Level): The classic choice. Look for a 2-foot or 4-foot model with multiple vials (horizontal, vertical, and 45-degree) for versatility. Place it on top of the workbench or material rack after installing the feet; if the bubble is centered in the horizontal vial, you're good to go. For smaller surfaces, a torpedo level (6-10 inches long) is easier to maneuver.
- Laser Level (Optional but Game-Changing): For larger projects, like installing feet along a long conveyor system or multiple material racks in a row, a laser level projects a straight, visible line across the floor or wall, making alignment a breeze. Some models even have a self-leveling feature, so you don't have to worry about holding them perfectly straight.
3. Pencil, Marker, and Carpenter's Pencil
You can't measure if you can't mark. A sharp pencil or a fine-tip permanent marker will help you mark drill points, foot positions, and alignment lines. For rough surfaces (like concrete floors or unfinished aluminum), a carpenter's pencil (with a flat, rectangular lead) is better—it won't roll away and makes bold, easy-to-see marks.
4. Carpenter's Square: Ensuring Right Angles
When installing feet on a square or rectangular structure (like a workbench or material rack), a carpenter's square helps ensure the feet are aligned at 90-degree angles to the frame. This prevents the structure from "racking" (twisting) over time. Place the square's corner against the joint where the frame meets the foot, and check that both edges align with the square—if they do, the angle is square.
Specialized Tools: For Those Tricky, Material-Specific Tasks
Depending on the material of your structure (aluminum profile, steel, wood) and the design of your leveling feet, you might need a few specialized tools to get the job done right. These tools are (targeted) but worth having if you work with specific materials regularly.
1. Deburring Tool: Smoothing Aluminum Profile Edges
If you're installing feet on an aluminum profile workbench or rack, you've probably cut the profile to size first. Aluminum is soft, so cutting it (with a saw or miter box) often leaves sharp burrs or rough edges. These burrs can scratch hands, catch on gloves, or even damage the leveling foot's threads when you're attaching it. A deburring tool (a small, handheld tool with a rotating blade) quickly smooths these edges. Simply run the blade along the cut edge—you'll feel the burrs disappear, leaving a clean, safe surface.
2. Drill Bits and Hole Saw: Prepping for Installation
Some leveling feet require pre-drilling holes in the structure before installation—especially if you're attaching them to wood or thick aluminum profile. A set of high-speed steel (HSS) drill bits in various sizes (from 1/8-inch to 1/2-inch) will cover most needs. For larger holes, a hole saw (a circular saw blade with a pilot drill) is necessary. When drilling into aluminum, use a lubricant like cutting oil to prevent the bit from overheating and dulling.
3. Thread Sealant Applicator: Preventing Loosening Over Time
For leveling feet that will be subjected to vibration (like those on a conveyor or production line), thread sealant (also called thread locker) is a smart addition. It prevents the nuts or bolts from loosening due to movement. A small applicator brush or a tube with a precision nozzle will help you apply the sealant evenly to the threads without making a mess. Stick with medium-strength sealant (like Loctite Blue)—it's strong enough to hold but can be removed with hand tools if you need to adjust the feet later.
Safety Gear: Protecting Yourself During Installation
Last but never least: safety gear. Installing leveling feet might seem low-risk, but there are hazards to watch for: sharp edges on aluminum profile, flying debris from drilling, or slipping tools. Don't skip these items—they're cheap insurance against injury.
- Work Gloves: Choose leather or synthetic gloves with a grippy palm to protect your hands from sharp edges, splinters, or hot tools (like a drill that's been running for a while).
- Safety Glasses: A must when drilling, deburring, or using a hammer. Even a small metal shard or wood chip can cause serious eye damage.
- Knee Pads: If you'll be kneeling on concrete or hard floors (common when installing feet on the bottom of racks or workbenches), knee pads will save you from soreness and bruising.
- Ear Protection: If you're using power tools (like a drill or impact driver) for an extended period, earplugs or earmuffs will protect your hearing from loud, prolonged noise.

Tool Checklist: What You Need for Different Applications
Not every installation is the same. Installing feet on a lightweight workbench e (single deck-without caster) requires fewer tools than setting up a heavy-duty material rack B (3 row and 3 floor) or a conveyor system with casters. To help you prep, we've created a handy table breaking down the essential tools for common scenarios. Use this as a quick reference before you start your next project.
| Application | Basic Hand Tools | Measuring Tools | Specialized Tools | Safety Gear |
|---|---|---|---|---|
| Workbench E (single deck-without caster) | Adjustable wrench, Phillips/flathead screwdrivers, rubber mallet | Tape measure, 2-foot spirit level, pencil | — | Work gloves, safety glasses |
| Material Rack B (3 row and 3 floor) | Socket wrench set, cordless drill, locking pliers, rubber mallet | 25-foot tape measure, 4-foot spirit level, carpenter's square | Deburring tool (if using aluminum profile), thread sealant | Work gloves, safety glasses, knee pads |
| Conveyor System with Casters | Torque wrench, adjustable wrench, needle-nose pliers, impact driver | Laser level, tape measure, marker | Drill bits, hole saw, thread sealant | Work gloves, safety glasses, ear protection |
| Aluminum Profile Trolley | Hex key set, combination pliers, rubber mallet | Torpedo level, tape measure, carpenter's pencil | Deburring tool, aluminum profile end cap installer | Work gloves, safety glasses |

Step-by-Step Installation Guide: Putting Your Tools to Work
Now that you have your tools, let's walk through the installation process step by step. We'll use a common scenario: installing anti-slip adjustable leveling feet on a material rack B (3 row and 3 floor) made with aluminum profile. This rack is designed to hold heavy boxes, so stability is critical. Follow these steps, and you'll have a rack that stands firm for years.
Step 1: Gather Your Tools and Materials
Before you start, lay out all your tools and materials. For this project, you'll need: anti-slip adjustable leveling feet (4-6, depending on the rack size), aluminum profile frame (already assembled), your toolkit (socket wrench set, tape measure, 4-foot spirit level, deburring tool, etc.), and thread sealant. Having everything within arm's reach saves time and reduces frustration.
Step 2: Inspect the Leveling Feet and Rack
Take a minute to inspect the leveling feet. Check that the anti-slip rubber pads are intact (no cracks or tears) and that the threads on the bolts are clean and undamaged. Next, inspect the aluminum profile rack: remove any burrs from cut edges with the deburring tool, and wipe down the mounting surfaces to remove dust or grease—this ensures the feet sit flat.
Step 3: Mark the Foot Positions
Using the tape measure and pencil, mark where each foot will go. For a rectangular rack, place feet at each corner and one in the middle of each long side for extra stability. Measure the distance from each mark to the edges to ensure they're evenly spaced. Use the carpenter's square to confirm the marks are square to the rack's frame.
Step 4: Pre-Drill Holes (If Needed)
If your aluminum profile doesn't already have pre-drilled holes for the feet, use a drill bit (matched to the bolt size) to drill holes at your marked positions. Apply a drop of cutting oil to the drill bit to keep it cool, and drill slowly to avoid damaging the profile. After drilling, use the deburring tool to smooth any rough edges around the holes.
Step 5: Attach the Leveling Feet
Place a leveling foot at each marked position, aligning the bolt with the pre-drilled hole. Thread the nut onto the bolt by hand to start—this prevents cross-threading. Once hand-tight, use the socket wrench to tighten the nut. For aluminum profile, be careful not to over-tighten (you'll feel the wrench resist; stop there to avoid stripping the threads). If the rack will be exposed to vibration, apply a small amount of thread sealant to the threads before tightening.
Step 6: Level the Rack
Place the 4-foot spirit level on top of the rack, first along the length, then the width. If the bubble is off-center, adjust the leveling feet: turn the foot clockwise to raise that corner, or counterclockwise to lower it. Repeat until the bubble is centered in both directions. For extra precision, check the level on the middle shelf (since material rack B has 3 floors) to ensure the entire rack is level, not just the top.
Step 7: Test Stability
Once all feet are installed and leveled, give the rack a gentle push from different directions. It should feel solid, with no wobbling. Place a few heavy boxes on the shelves (simulating real use) and check the level again—sometimes the weight of materials can cause minor shifts. If it wobbles, readjust the feet as needed.

Troubleshooting Common Installation Issues
Even with the right tools, things can go wrong. Here are some common issues you might encounter and how to fix them:
Issue 1: The Leveling Foot Wobbles Even After Tightening
Cause: The mounting surface is uneven, or the anti-slip pad is worn. Solution: Check if the aluminum profile is bent (use the level to confirm). If the surface is uneven, add a shim (a small piece of metal or plastic) under the foot to fill the gap. If the pad is worn, replace it with a new one (most manufacturers sell replacement pads).
Issue 2: The Bolt Stripped When Tightening
Cause: Over-tightening or using the wrong wrench size. Solution: If the threads on the bolt are stripped, replace the bolt. If the threads in the aluminum profile are stripped, you may need to drill a larger hole and use a helicoil (a threaded insert that repairs stripped holes)—this is a bit advanced, so consider consulting a professional if you're not comfortable with it.
Issue 3: The Rack is Still Wobbly After Leveling
Cause: Feet are not evenly spaced, or the floor itself is uneven. Solution: Re-measure the foot positions to ensure they're evenly spaced. If the floor is uneven (common in older workshops), adjust the feet to compensate—raise the feet on the lower side of the floor until the rack is level.
Maintaining Your Tools: Keeping Them Ready for the Next Job
Your tools are an investment—treat them well, and they'll serve you for years. Here are some quick maintenance tips:
- Clean After Use: Wipe off dirt, oil, and debris from wrenches, screwdrivers, and drills with a rag. For drill bits, use a wire brush to remove metal shavings.
- Lubricate Moving Parts: Apply a drop of oil to the pivot points of adjustable wrenches and the chuck of your drill to keep them moving smoothly.
- Store Properly: Hang wrenches on a pegboard or store them in a toolbox drawer with dividers to prevent them from banging together. Keep drill bits in a case to avoid bending or dulling.
- Sharpen When Needed: Dull drill bits and screwdrivers are frustrating to use. Invest in a drill bit sharpener or take them to a professional for sharpening.
Conclusion: Your Tools, Your Success
Installing anti-slip adjustable leveling feet might seem like a small task, but it's a critical one. These humble components keep your workbenches stable, your material racks secure, and your production lines running smoothly. And as we've seen, the key to getting them right is having the right tools and knowing how to use them. From basic wrenches and levels to specialized deburring tools and torque wrenches, each tool plays a role in ensuring a precise, safe installation.
Whether you're setting up a single workbench or outfitting an entire factory, remember: patience and precision pay off. Take the time to measure twice, tighten carefully, and test thoroughly. With the toolkit and tips outlined here, you're ready to tackle any anti-slip adjustable leveling feet installation with confidence. So grab your tools, roll up your sleeves, and get ready to build something stable—you've got this.