- Company Articles
- Products and Technology
- Installation And Maintenance
- Installation Tutorial: Four Way Straight Lean Pipe Joint Chrome – Step-by-Step Guide

Installation Tutorial: Four Way Straight Lean Pipe Joint Chrome – Step-by-Step Guide
Related Product
Four Way Straight Lean Pipe Joint Chrome
Four way lean pipe joint for 4 pcs 28MM lean pipe connection in straight angle, which used widely in workbench, flow rack, hand trolley frame connection.
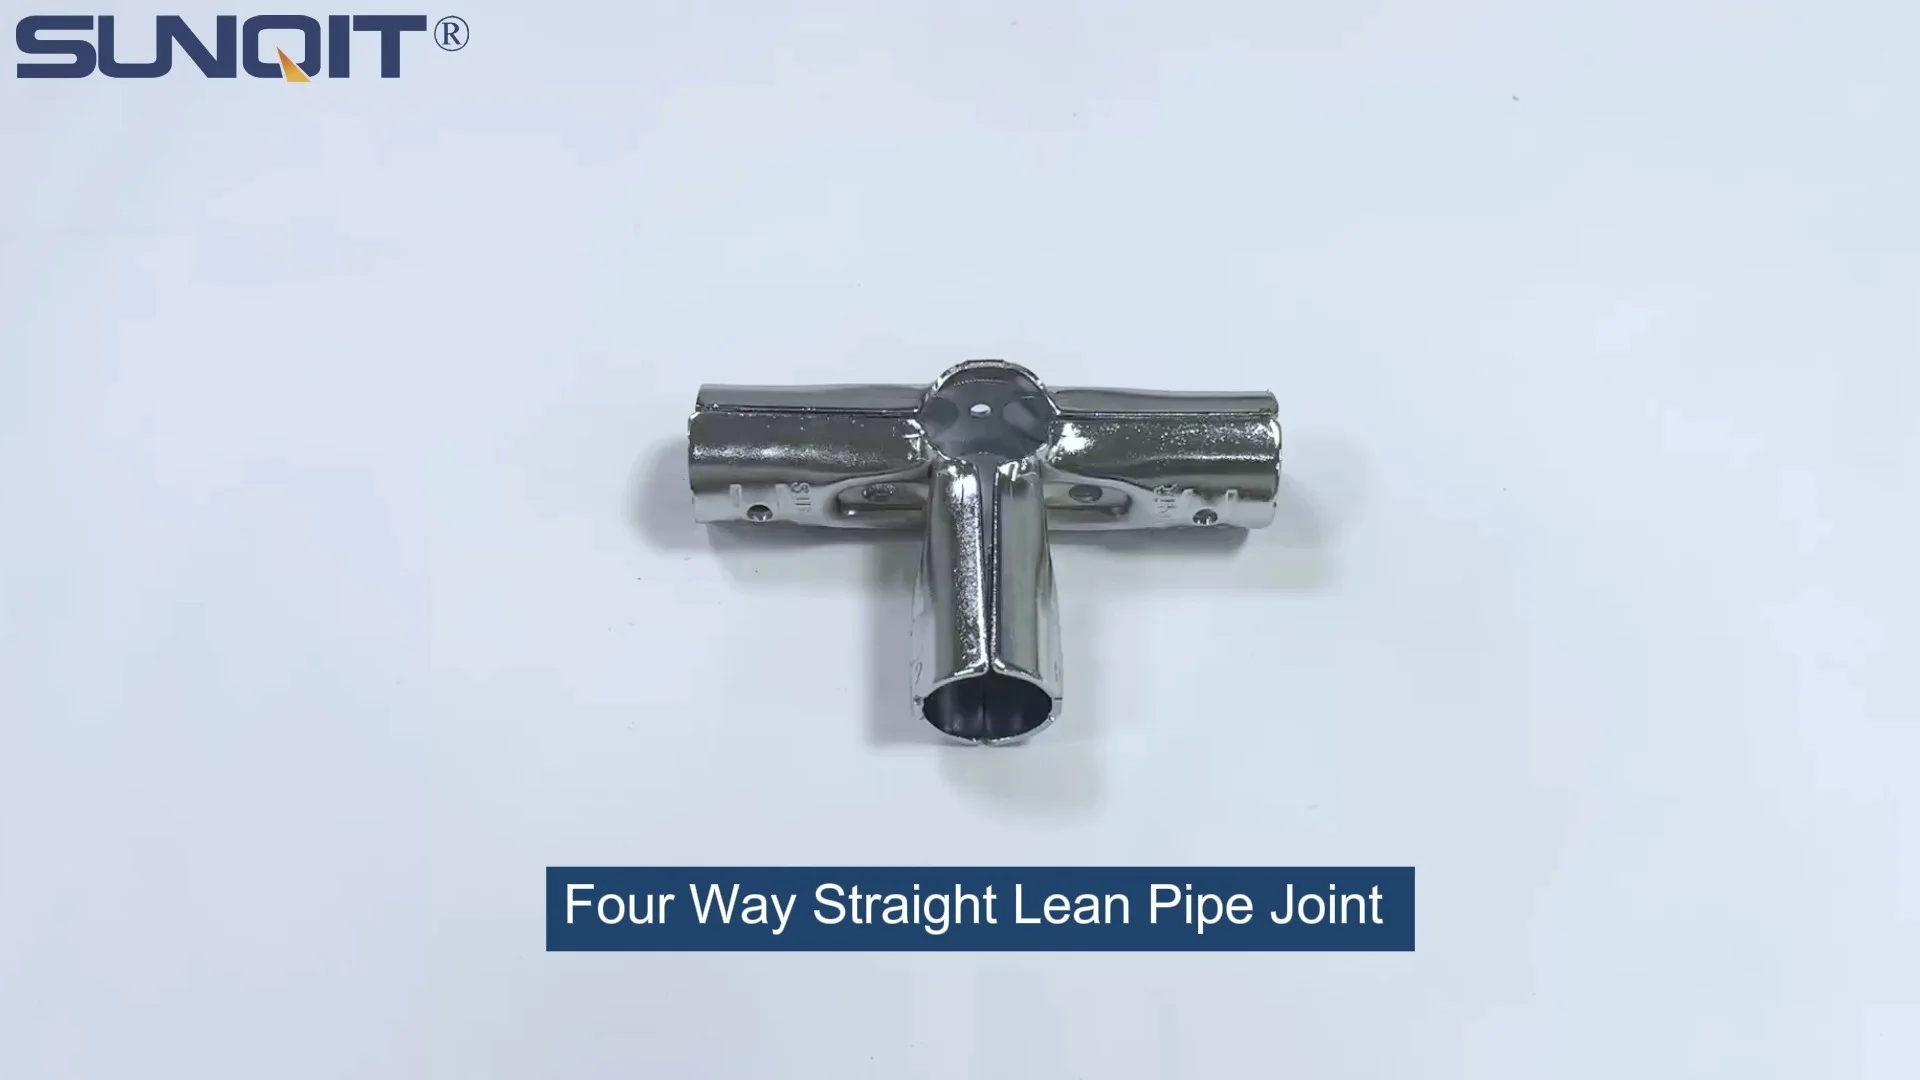
Setting up a smooth, efficient workspace or production line often comes down to the small, unsung heroes of industrial design—components like the four way straight lean pipe joint chrome . If you've ever assembled a lean pipe workbench , built a material rack, or designed a flow system, you know that the right joints can make or break the stability and flexibility of your structure. Today, we're diving deep into how to install this specific joint, a workhorse in the world of lean systems . Whether you're a seasoned facility manager, a DIY workshop enthusiast, or new to lean manufacturing, this guide will walk you through the process with clarity and a touch of hands-on wisdom.
First, let's get familiar with what we're working with. The four way straight lean pipe joint chrome is exactly what it sounds like: a chrome-plated connector that joins four lean pipes in a straight, symmetrical configuration. Its chrome finish isn't just for looks—it adds corrosion resistance, making it ideal for busy workshops where spills, humidity, or regular cleaning are part of the routine. This joint is a staple in lean pipe accessories kits because it lets you build multi-directional structures, from simple shelving to complex production cells, without welding or heavy tools. Think of it as the "cornerstone" of modular design—strong enough to support weight, yet adjustable enough to reconfigure when your needs change.
Gather Your Tools & Materials
Before we roll up our sleeves, let's make sure you have everything you need. Nothing kills momentum like pausing mid-installation to hunt for a missing tool. Here's a quick checklist:
| Tool/Material | Purpose | Pro Tips |
|---|---|---|
| Four way straight lean pipe joint chrome | The star of the show—your connector for four lean pipes. | Check for any dents or cracks in the chrome coating; a smooth finish ensures a tight fit. |
| Lean pipes (typically 28mm diameter) | The "bones" of your structure—choose length based on your design. | Opt for pre-cut pipes if possible, but if cutting your own, use a pipe cutter for clean edges. |
| Hex key (5mm or as specified by the joint) | To tighten the set screws that secure the pipes in the joint. | Magnetic hex keys are a game-changer—they hold onto screws when your hands are full. |
| Rubber mallet | To gently tap pipes into the joint without damaging the chrome or pipes. | Avoid metal hammers—they can scratch the chrome or warp the pipe ends. |
| Measuring tape (3m+) | To ensure pipes are cut to the correct length and aligned properly. | Mark measurements with a pencil or masking tape—permanent markers can stain pipes. |
| Bubble level | To check that your structure is straight and level during assembly. | A small 2ft level works best for tight spaces between pipes. |
| Microfiber cloth | To clean dust, oil, or fingerprints from the joint and pipes before assembly. | Dampen lightly with water if there's stubborn grime—avoid harsh chemicals on chrome. |
| Safety gloves | To protect your hands from sharp edges on pipes or joint burrs. | Nitrile gloves offer good grip; avoid latex if you're sensitive to it. |
Pro Tip:
Lay out all your parts on a clean, flat surface (like a plywood sheet or old workbench) before starting. This helps you spot missing pieces early—no one wants to stop halfway through because a pipe is too short!
Safety First: A Quick Reminder
Before we start turning screws, let's talk safety. Even simple assemblies can have hidden hazards, so keep these points in mind:
- Inspect parts first: If a pipe has a sharp bend or the joint's threads are stripped, don't use it. A faulty part can lead to a wobbly structure later.
- Watch your fingers: When tapping pipes into the joint with a mallet, keep your hands on the pipe, not near the joint—you don't want to pinch skin between metal parts.
- Secure loose tools: Keep your hex key, tape measure, and other small tools in a tool belt or tray. Dropping a metal tool on a hard floor can chip the chrome finish.
- Work at waist height: If assembling a tall structure, use a step stool instead of reaching. Straining to reach high pipes can lead to misalignment or accidents.
Okay, safety check done—let's get to building!
Step-by-Step Installation Guide
We'll break this down into 7 clear steps, with plenty of tips along the way. Take your time—rushing leads to mistakes, and a well-assembled joint will save you headaches later.
1 Unbox and Inspect the Joint & Pipes
Start by opening the packaging for your four way straight lean pipe joint chrome and lean pipes. Chrome plating should be smooth and shiny, with no flaking or discoloration. Check the joint's four openings—they should be clean, with no metal burrs or debris inside. Run your finger gently around the edges (wearing gloves!) to feel for sharp spots.
For the lean pipes, roll them on a flat surface to check for bends—if they wobble, they're bent and should be replaced. The ends should be square (not angled) so they seat fully into the joint. If a pipe end is slightly crushed or dented, you can gently tap it back into shape with a rubber mallet (cover the end with a cloth to avoid marring the pipe).
Pro Tip:
If you're using pipes from a previous project, wipe them down with the microfiber cloth to remove rust, oil, or dust. Even a little grit can prevent the joint from tightening properly.
2 Measure and Mark Your Pipes
Now, decide how long each pipe needs to be. Let's say you're building a small material rack with horizontal pipes 60cm long and vertical pipes 120cm long—adjust based on your design. Use the measuring tape to mark the length on each pipe, making sure the line is straight (a square can help here). If you need to cut pipes, use a pipe cutter or hacksaw with a metal-cutting blade. For clean cuts, rotate the cutter slowly and apply gentle, even pressure—no need to force it.
Once cut, deburr the ends with a file or sandpaper. A tiny metal burr might seem harmless, but it can scratch the joint's interior or prevent the pipe from seating all the way in. Wipe away metal shavings with your cloth—they're sharp and can get into your eyes or gloves.
3 Prep the Joint: Loosen Set Screws
Look at the four way straight lean pipe joint chrome —you'll notice small set screws (usually 2-4 per opening) around each pipe socket. These screws are what hold the pipes in place. Use your hex key to loosen them slightly (don't unscrew them all the way—you don't want to lose them!). The goal is to create enough space for the pipe to slide into the socket easily.
Why not loosen them all the way? Because if a screw falls out, it's easy to misplace, and hunting for a tiny metal screw on a busy shop floor is no fun. Just turn each screw 2-3 full rotations counterclockwise—you'll feel the tension release.
Pro Tip:
If the screws are tight (common in new joints), press the hex key firmly into the screw head to avoid stripping it. A little WD-40 can help if they're stuck, but wipe off excess before proceeding.
4 insert the First Pipe: Start with a Stable Base
Let's start assembling! Pick one pipe (say, a vertical leg of your lean pipe workbench ) and slide it into one of the joint's openings. Push it in until it hits the bottom of the socket—you should feel a slight "stop." If it won't go in, check for burrs or debris in the socket, or make sure the set screws are loose enough. If needed, tap the pipe gently with the rubber mallet (hold the pipe near the end, not the joint) to seat it fully.
Once the first pipe is in, tighten the set screws just enough to hold it in place —not fully tight yet. We'll do a final tighten later, after all pipes are in. This "finger-tight" stage lets you adjust alignment without fighting fully tightened screws.
5 Add the Remaining Pipes: Check Alignment
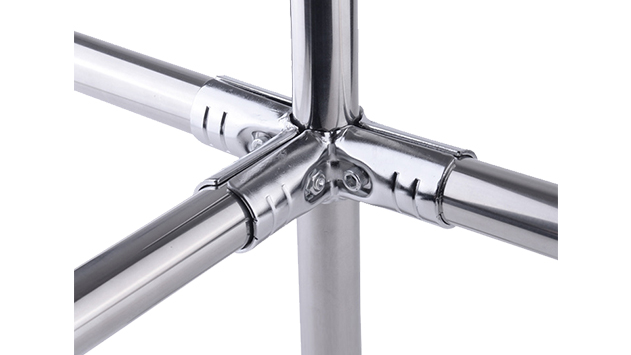
Now, add the second pipe to the opposite opening of the joint (e.g., if the first was vertical, the second might be horizontal). Slide it in until it stops, then loosely tighten its set screws. Repeat for the third and fourth pipes, making sure they're pointing in the right directions (for a four-way straight joint, they should be 90 degrees apart, like the arms of a cross).
Here's where the bubble level comes in. Place it across two horizontal pipes—if the bubble is off-center, gently twist the joint or pipes to adjust. For vertical pipes, hold the level alongside them to ensure they're plumb (straight up and down). Lean systems rely on precision—even a 1-degree slant can make a workbench wobble or a flow rack misfeed materials.
Don't stress if it takes a few tries. Pipes can shift as you add more weight, so pause after each pipe to check alignment. It's better to adjust now than to disassemble later!
6 Tighten the Set Screws: Secure the Joint
Once all pipes are aligned, it's time to lock everything in place. Go back to the set screws and tighten them clockwise with your hex key. Apply firm pressure, but don't overdo it—stripping a screw is a nightmare. You'll know they're tight enough when you can't twist the pipe by hand. A good rule: tighten until you feel resistance, then give a tiny extra turn (about 1/4 rotation).
Work in a crisscross pattern (like tightening lug nuts on a car) to ensure even pressure. For example, tighten the top-left screw, then bottom-right, then top-right, then bottom-left. This prevents the joint from warping or pulling to one side.
After tightening, give each pipe a gentle tug. If it moves, the screws need a bit more tension. If not, you're golden!
7 Test and Integrate into Your Lean System
Now, step back and admire your handiwork! The four way straight lean pipe joint chrome should hold the pipes firmly, with no wobbling or creaking. If you're building a larger structure (like a full lean pipe workbench ), repeat these steps for all joints, connecting sections one by one. As you go, test stability by gently pushing on the structure—if it sways, check for loose screws or misaligned pipes.
Once assembled, your new structure is ready to support tools, materials, or whatever else your workspace needs. The chrome joint will stand up to daily use, and the modular design means you can reconfigure it later if your needs change—perfect for agile lean systems .

Troubleshooting Common Issues
Even with careful work, things can go wrong. Here's how to fix the most common problems:
- Pipe won't slide into the joint: Check for burrs on the pipe or debris in the socket. Loosen the set screws more, or try rotating the pipe slightly as you push.
- Joint feels wobbly after tightening: Did you seat the pipes all the way? They should hit the bottom of the socket. If they're too short, you may need longer pipes. If screws are tight but still wobbly, the joint might be defective—contact your lean pipe supplier for a replacement.
- Set screw stripped: Oops! Use a rubber band between the hex key and screw head for extra grip. If that fails, drill out the screw carefully (this is a last resort—better to replace the joint if possible).
- Chrome finish scratched: Small scratches can be buffed out with a metal polish (like Brasso). For deeper scratches, touch up with chrome paint (available at hardware stores) to prevent rust.
Caring for Your Chrome Joint: Longevity Tips
To keep your four way straight lean pipe joint chrome in top shape for years:
- Clean regularly: Wipe with a damp cloth to remove dust and grime. For greasy fingerprints, use a mild soap solution—avoid abrasive cleaners like steel wool.
- Check screws monthly: In high-vibration environments (like near machinery), screws can loosen over time. A quick tighten with the hex key takes 30 seconds and prevents accidents.
- Protect from moisture: Chrome resists rust, but if your workspace is humid (like a food processing plant), apply a thin coat of car wax to the joint—this adds an extra barrier against water.
- Reuse and reconfigure: One of the best things about lean pipe systems is their flexibility. When you need to redesign your workspace, simply loosen the screws, adjust the pipes, and retighten—the joint will hold up to multiple reassemblies.
And there you have it! Installing a four way straight lean pipe joint chrome is a straightforward process, but attention to detail makes all the difference. With the right tools, a little patience, and this guide, you'll be building sturdy, efficient lean systems in no time. Whether it's a workbench, a flow rack, or a custom material handling setup, this joint will be the reliable backbone of your project.
Remember, the beauty of lean manufacturing is in its simplicity—using modular components to create solutions that adapt to your needs. So go ahead, grab your pipes, joint, and hex key, and start building something that works for you. And if you need more parts—whether it's extra joints, pipes, or lean pipe accessories —your local lean pipe supplier is just a call away. Happy assembling!