- Company Articles
- Products and Technology
- Installation And Maintenance
- Installing M10*56 Rubber Leveling Feet on Material Rack B: A Tutorial

Installing M10*56 Rubber Leveling Feet on Material Rack B: A Tutorial
Related Product
M10*56 Rubber Leveling Feet
Adjustable leveling feet are designed to keep machines level when placed on uneven or sloped ground. Otherwise known as adjustable equipment feet, they are available to order in a wide variety of size and load capacity combinations.
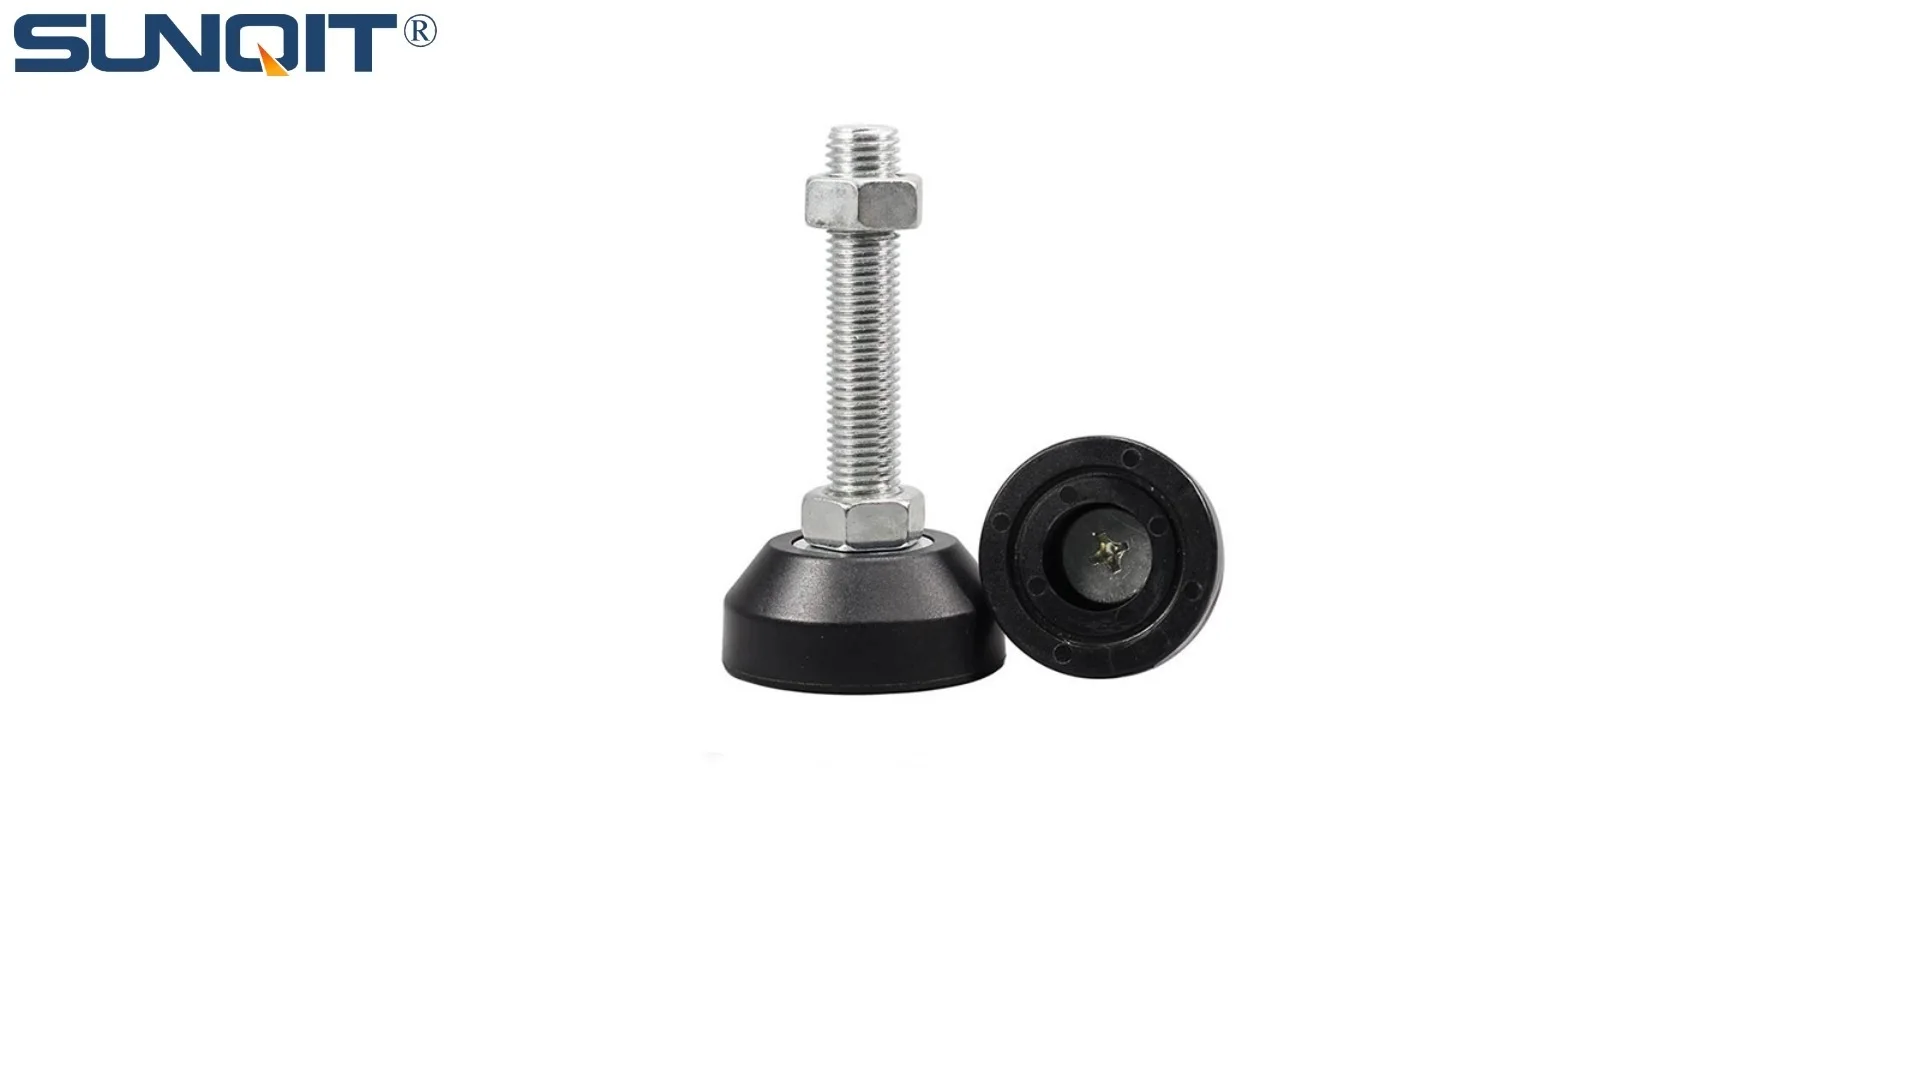
If you've ever assembled a storage rack or workbench, you know the frustration of a wobbly structure. Even the sturdiest racks can feel unstable if the feet aren't properly adjusted—especially on uneven floors. That's where components like M10*56 rubber leveling feet come in. Today, we're diving into a step-by-step guide to installing these essential feet on Material Rack B (3 row and 3 floor) , a popular choice for warehouses and production lines. Whether you're a seasoned facility manager or a DIY enthusiast setting up your garage, this tutorial will ensure your rack stands firm, protects your materials, and integrates seamlessly into your lean system .
Why Leveling Feet Matter for Material Rack B
First, let's talk about why this small component deserves your attention. Material Rack B is designed to hold heavy loads—think boxes of inventory, tools, or production parts—across three rows and three floors. Without stable feet, even a slight wobble can lead to:
- Materials shifting or sliding off shelves, risking damage or injury.
- Uneven weight distribution, which strains the rack's frame over time and shortens its lifespan.
- Difficulty accessing items, as a tilted rack makes it harder to slide bins or boxes in and out.
- Violation of safety standards—OSHA and other regulatory bodies emphasize stable storage as a key workplace safety requirement.
Rubber leveling feet solve these issues in two ways: their rubber base grips the floor to prevent slipping, and their threaded design lets you adjust height to compensate for uneven surfaces. The M10*56 size is specifically engineered for medium to heavy-duty racks like Material Rack B, with a 56mm thread length that offers enough adjustability for most floor imperfections.
Tools You'll Need: Gather These Before You Start
Before diving into installation, let's make sure you have all the tools and parts handy. Rushing to hunt for a wrench mid-project is a surefire way to slow things down (and test your patience). Here's what you'll need:
| Tool/Parts | Purpose | Pro Tip |
|---|---|---|
| M10*56 rubber leveling feet (4 units) | The star of the show—these are the adjustable feet that attach to the rack's base. | Check that the rubber base is intact (no cracks) and the threads are clean. |
| Adjustable wrench or 17mm socket wrench | To tighten the leveling feet onto the rack's legs. | A socket wrench with a ratchet will save time compared to a standard adjustable wrench. |
| Spirit level (24-inch or longer) | To check if the rack is level from side to side and front to back. | Magnetic spirit levels are handy—they stick to the rack's metal frame, leaving your hands free to adjust. |
| Measuring tape | To ensure feet are evenly positioned and the rack is square. | A retractable tape with a locking mechanism works best for one-person jobs. |
| Cleaning cloth | To wipe dirt or debris from the rack's leg threads and the floor where the feet will sit. | Dampen the cloth slightly to remove stubborn dust—grime on threads can make adjustment harder later. |
| Thread locker (optional, medium-strength) | To prevent feet from loosening over time (ideal for high-vibration areas). | Use sparingly—you'll still want to adjust the feet later if the floor shifts. |
Pro tip: If you're working alone, prop the rack against a wall or have a helper hold it steady during installation. This prevents the rack from tipping while you attach the feet.

Step 1: Unpack and Inspect Your Materials
Start by unboxing Material Rack B and laying out its components. Most racks come partially assembled, with the frame and shelves pre-connected, but the feet are usually separate. Take a moment to inspect the rack's legs: each should have a threaded hole at the bottom, designed to accept the M10*56 leveling feet. If the holes are blocked with paint, debris, or manufacturing residue, use a small wire brush or the tip of your screwdriver to clean them out—this ensures the feet thread on smoothly.
Next, check the M10*56 rubber leveling feet themselves. The "M10" refers to the thread diameter (10mm), and "56" is the thread length (56mm). Screw one foot into a leg by hand to test the fit—if it's too tight or cross-threads, the hole might be misaligned, and you'll need to contact your lean pipe workbench supplier for a replacement part. (Pro tip: Reputable suppliers include spare feet in their kits, so check the box for extras!)

Step 2: Position the Rack and Mark the Floor (Optional but Helpful)
Decide where Material Rack B will live permanently before installing the feet. Moving a fully assembled rack is heavy work, and repositioning can throw off your leveling. Once you've chosen the spot, use a pencil or masking tape to mark the corners of the rack on the floor—this helps you return it to the exact position if you need to lift it during adjustments.
If your floor has obvious dips or bumps, use your measuring tape to note their locations. For example, if the left rear corner of the marked area is ½ inch lower than the right front, you'll know to extend the leveling foot more on that side later.

Step 3: Attach the M10*56 Rubber Leveling Feet to the Rack Legs
Now, let's attach the feet. Start by threading each foot into the rack's legs by hand. Turn clockwise until the foot is snug but not fully tightened—you'll need to adjust the height later, so leave a few millimeters of thread exposed. Do this for all four legs.
Once all feet are hand-tightened, gently lower the rack onto the floor. If the rack has shelves, leave them empty for now—adding weight too early can make leveling harder. Stand back and check for wobble: push lightly on the top corners of the rack. If it rocks, note which leg(s) are off the floor or barely touching.
Step 4: Level the Rack Using the Spirit Level
This is where the magic happens. Place your spirit level on the top shelf, aligned with the front edge (left to right). Look at the bubble: if it's off-center to the left, the left side is higher than the right, so you'll need to extend the right foot. If it's off to the right, lower the right foot or raise the left.
Here's the step-by-step adjustment process for each direction:
Left-Right Level: Loosen the lock nut on the foot that needs adjustment (most M10*56 feet have a hex nut above the rubber base to lock the height once set). Turn the foot clockwise to lower it (shortening the thread) or counterclockwise to raise it (extending the thread). Check the spirit level again—repeat until the bubble is centered. Once level, tighten the lock nut against the rack leg to hold the foot in place.
Front-Back Level: Move the spirit level to the top shelf's side edge (front to back). Repeat the adjustment process for the front and rear feet. For example, if the bubble drifts toward the front, extend the rear feet or lower the front ones until the bubble centers.
Diagonal Check: For extra precision, place the spirit level diagonally across the top shelf (from left front to right rear, then left rear to right front). If the bubble shifts, (fine-tune) the opposing feet until both diagonals are level. This ensures the rack isn't "twisted," which can stress the frame over time.
Take your time here—rushing through leveling often leads to rework later. If you're struggling with a particularly uneven floor, try this trick: place a thin shim (like a piece of cardboard or metal) under the rubber foot instead of extending it all the way. This prevents the foot from being overextended, which can make it unstable.
Step 5: Tighten and Test Stability
Once the rack is level in all directions, use your wrench to fully tighten the lock nuts on all four feet. Apply firm pressure, but don't over-tighten—stripping the threads is a common mistake here. A good rule of thumb: tighten until the nut won't turn by hand, then give it a ¼-turn more with the wrench.
Now, test the rack's stability. Push gently on each corner—there should be no noticeable wobble. Next, load a few light boxes onto the shelves (about 20% of the rack's maximum weight capacity) and test again. The feet should grip the floor without sliding, and the rack should feel solid. If it still moves, double-check the lock nuts or re-level the feet—sometimes adding weight reveals small adjustments needed.
Troubleshooting Common Issues
Even with careful work, you might run into snags. Here's how to fix the most common problems:
Issue 1: The foot won't thread into the leg.
Possible cause: Dirt in the thread or cross-threading. Solution: Clean the leg's threaded hole with a wire brush. If cross-threading occurs (you feel a "catch" while turning), back the foot out completely, realign the threads, and try again. If the threads are damaged, contact your supplier for a replacement leg or foot.
Issue 2: The rack still wobbles after leveling.
Possible cause: Loose lock nuts, uneven weight distribution, or a bent frame. Solution: Retighten lock nuts. If the wobble persists, empty the rack and check if the frame is bent (use your measuring tape to compare diagonal lengths—they should be equal). Bent frames usually mean the rack was damaged during shipping, so reach out to the manufacturer.
Issue 3: The rubber foot slides on the floor.
Possible cause: Smooth floor (like polished concrete) or worn rubber. Solution: Clean the rubber foot with soap and water to remove oils that reduce grip. For extra traction, apply a non-slip pad under the foot (check that it's compatible with rubber to avoid chemical reactions).
Pro Tips for Long-Term Performance
Installing the feet is just the first step—maintaining them ensures your rack stays stable for years. Here are some pro tips:
Regular Inspections: Check the leveling feet every 3–6 months (more often in high-traffic areas). Tighten loose lock nuts and readjust if the rack has shifted. Seasonal changes (like humidity causing floors to expand or contract) can throw off leveling, so a quick check in spring and fall is smart.
Clean the Feet: Wipe the rubber bases with a damp cloth to remove dust, grease, or debris. Built-up grime reduces friction and can cause slipping.
replace Worn Feet: If the rubber starts to crack, harden, or lose its grip, replace the feet immediately. Most suppliers sell M10*56 feet individually, so you don't need to buy a whole set.
Pair with a Lean System: Stable racks are a cornerstone of lean manufacturing—they reduce waste by making materials easy to access, preventing damage, and keeping workflows efficient. When Material Rack B is level, it integrates better with other lean tools like flow racks or conveyor systems, creating a smoother production line.
Why M10*56 Rubber Leveling Feet Are the Right Choice
You might be wondering: with so many leveling feet on the market, why choose M10*56 rubber ones? Here's why they're a top pick for Material Rack B:
- Load Capacity: The M10 thread size and 56mm length support the rack's weight (typically up to 500kg per shelf) without bending or stripping.
- Rubber Grip: Rubber is non-marking (important for warehouse floors) and provides better traction than plastic or metal feet, even on smooth surfaces.
- Adjustability: 56mm of thread length means you can compensate for floors that are up to 5cm uneven—plenty for most industrial or garage settings.
- Cost-Effective: These feet are affordable and widely available, making them easy to replace if needed. Many lean pipe workbench suppliers bundle them with racks, so you don't have to source them separately.
Wrapping Up: A Stable Rack for a Smoother Workflow
Installing M10*56 rubber leveling feet on Material Rack B might seem like a small task, but it's one that pays big dividends in safety, efficiency, and longevity. By taking the time to level your rack properly, you're protecting your materials, reducing the risk of workplace accidents, and ensuring your storage system supports your lean goals—whether that's faster material retrieval, better space utilization, or a more organized workspace.
Remember, the key to success is patience: measure twice, adjust carefully, and test thoroughly. And if you ever need help sourcing feet, racks, or other components, don't hesitate to reach out to your lean pipe workbench supplier—they're experts in matching the right parts to your needs.
Now go forth and build a rack that stands tall (and steady)! Your future self (and your back) will thank you.