- Company Articles
- Products and Technology
- Installation And Maintenance
- Installing Saddle Pipe Clamps: Step-by-Step Guide for Lean Workstations

Installing Saddle Pipe Clamps: Step-by-Step Guide for Lean Workstations
Related Product
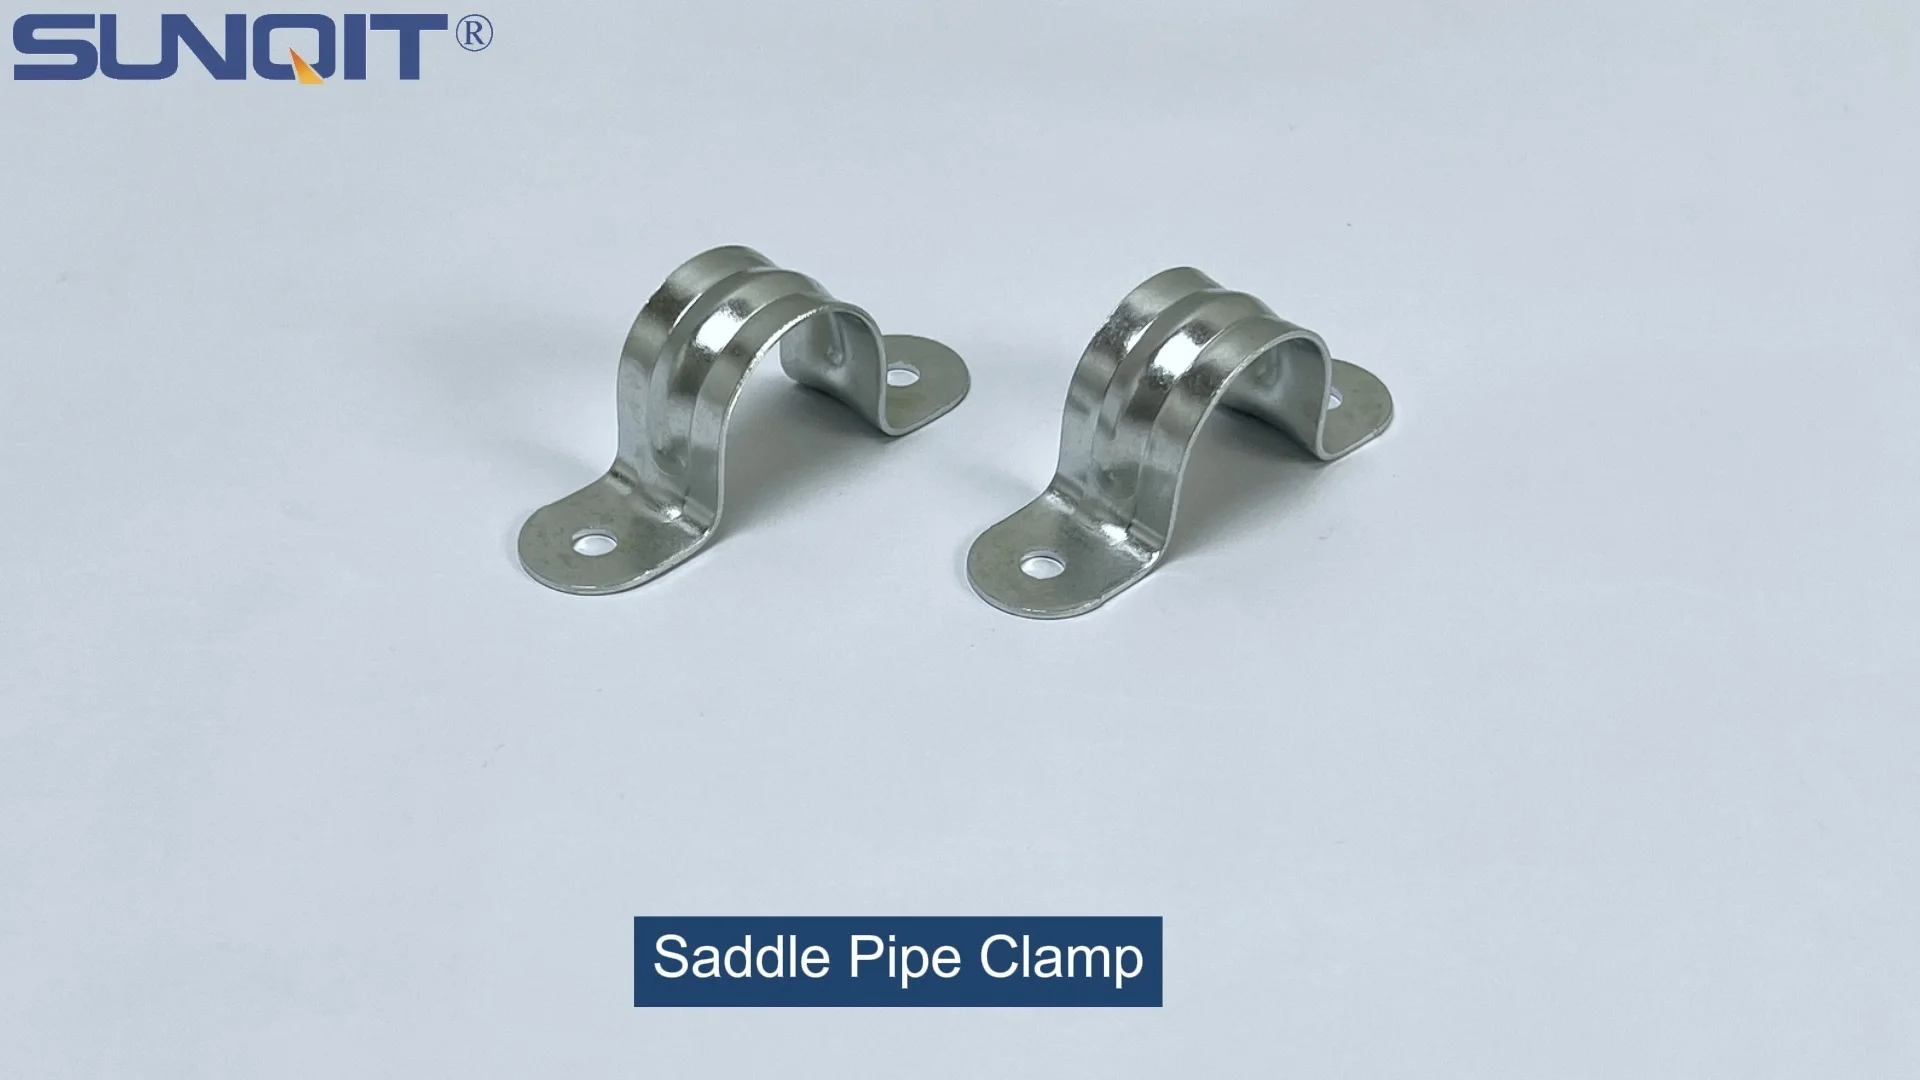
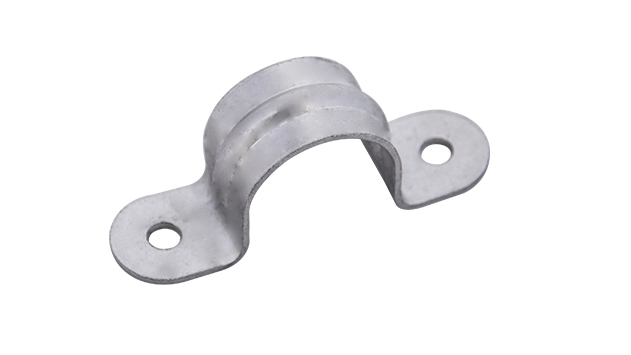
Saddle Pipe Clamp
Saddle pipe clamp, used for board connect with pipe, usually for table top installation.
If you've ever walked through a well-organized manufacturing floor or a bustling workshop, you've probably noticed the backbone of efficient operations: lean workstations. These setups aren't just about looking neat—they're designed to minimize waste, streamline workflows, and keep teams productive. At the heart of many of these workstations lies a simple yet critical component: the saddle pipe clamp. Whether you're building a new lean pipe workbench from scratch or upgrading an existing setup, installing saddle pipe clamps correctly can make all the difference between a rickety frame that slows you down and a sturdy, flexible structure that grows with your needs.
In this guide, we're going to break down everything you need to know about installing saddle pipe clamps, from gathering the right tools to troubleshooting common hiccups. We'll focus on practical, hands-on steps that even if you're new to DIY assembly, you'll feel confident tackling the project. Plus, we'll touch on how these clamps work with other key components like lean pipe joints and aluminum profiles to create a workstation that's both functional and built to last.
Why Saddle Pipe Clamps Matter in Lean Workstations
Before we dive into the installation process, let's take a minute to understand why saddle pipe clamps are so important. In the world of lean manufacturing, flexibility is king. Workstations need to adapt to changing production needs—maybe you need to add a shelf next month, or reconfigure the layout to accommodate a new machine. Saddle pipe clamps are the unsung heroes that make this flexibility possible. Unlike permanent welds or rigid fasteners, these clamps let you secure pipes together firmly while still allowing for adjustments down the line.
Think of a lean pipe workbench as a puzzle. The pipes are the pieces, and the clamps are the connectors that hold them in place. A saddle pipe clamp, with its curved "saddle" shape, wraps around the outer diameter of a pipe, gripping it tightly. When paired with a lean pipe joint, it creates a stable connection at right angles—perfect for building frames, shelves, or work surfaces. And because they're reusable, you can take apart and rebuild sections without damaging the pipes, saving time and money in the long run.
But here's the catch: if a clamp is installed incorrectly—too loose, misaligned, or over-tightened—it can compromise the entire structure. A wobbly frame might lead to tools sliding off shelves, parts getting damaged, or even workplace injuries. That's why getting the installation right the first time is so crucial. Let's make sure you're set up for success.
Pre-Installation Prep: Tools, Materials, and Workspace Setup
Before you start tightening bolts, you'll need to gather your tools and materials. Skipping this step is like trying to bake a cake without preheating the oven—you might get there eventually, but it'll be messy and take twice as long. Let's start with the essentials.
Tools You'll Need
| Tool | Purpose | Pro Tip |
|---|---|---|
| Adjustable wrench or socket set | Tightening clamp bolts | Use a socket with a ratchet for faster, more consistent tightening than a wrench. |
| Tape measure | Measuring pipe lengths and marking clamp positions | Opt for a retractable tape with a locking mechanism to keep measurements steady. |
| Permanent marker or pencil | Marking where clamps will go on pipes | Use a fine-tip marker for precision—thick lines can lead to misalignment. |
| Level (bubble or digital) | Ensuring pipes are straight and level | A 2-foot level works best for most lean pipe setups; longer levels can be unwieldy. |
| Deburring tool or sandpaper | Smoothing rough edges on cut pipes | Even a small burr can prevent the clamp from seating properly—don't skip this! |
| Rubber mallet | Gently tapping pipes into alignment | Plastic or rubber mallets won't scratch aluminum or stainless steel pipes. |
| Torque wrench (optional but recommended) | Ensuring bolts are tightened to the right tension | Most clamps require 15-20 ft-lbs of torque—check the manufacturer's specs! |
Materials to Have on Hand
Of course, you'll need the main components too. Here's a quick checklist:
- Saddle pipe clamps : Make sure you have enough for your project. Count the number of right-angle connections in your design—each will need at least one clamp.
- Lean pipes : These are the main structural elements. Most lean workstations use 28mm diameter pipes (often called "lean tube"), but double-check your design specs.
- Lean pipe joints : These connect pipes at angles other than 90 degrees (like T-joints or elbows). Saddle clamps work with these to reinforce connections.
- Aluminum profile (optional) : If you're adding a work surface, aluminum profile is lightweight and durable. It can be attached to the frame using clamps or brackets.
- Washers and bolts : Most clamps come with hardware, but it's smart to have extras on hand in case of loss or damage.
- Caster wheels (if applicable) : For mobile workstations, caster wheels attach to the bottom frame using—you guessed it—more clamps or dedicated brackets.
Pro Tip: Lay out all your materials on a clean, flat surface before starting. This helps you spot missing parts early—nothing derails a project faster than realizing you're short a clamp halfway through!
Workspace Setup
Your workspace matters too. You'll need enough room to lay out pipes, move around the frame as you assemble it, and apply pressure when tightening clamps. Clear a space at least 3 feet wider than your workstation's dimensions—this gives you room to maneuver without bumping into walls or tools. If you're working on a concrete floor, lay down a sheet of plywood or a thick blanket to protect pipes from scratches. For wooden floors, skip the blanket (it might slip) and use non-slip mats instead.
Lighting is another key factor. Installing clamps requires precision, so make sure the area is well-lit. A portable work light with a flexible neck can be angled to shine directly on the connection points, helping you see if bolts are aligned correctly.
Step-by-Step Installation: Securing Saddle Pipe Clamps Like a Pro
Now that you're prepped and ready, let's get to the fun part: installing the clamps. We'll break this down into 7 clear steps, with tips to avoid common mistakes along the way.
Step 1: Measure and Mark Your Pipe Positions
First, you need to figure out exactly where each clamp will go. Grab your tape measure and the design plans for your lean pipe workbench (if you don't have plans, sketch a quick diagram—even a rough sketch helps!). Let's say you're building a simple frame with four vertical pipes and two horizontal pipes on each side. For the horizontal pipes, measure the distance between the vertical pipes and mark the midpoint—this is where the clamp will secure the horizontal pipe to the vertical one.
Use your permanent marker to make a small, clear line on the vertical pipe where the bottom of the clamp will sit. For horizontal pipes, mark the point where the clamp's saddle will wrap around. Double-check your measurements—measure twice, mark once! A 1/4-inch misalignment might not seem like much, but it can throw off the entire frame's squareness.
Pro Tip: If you're installing multiple clamps along the same pipe (like for a shelf), use a level to ensure all marks are at the same height. This keeps shelves even and prevents items from sliding off.
Step 2: Prepare the Pipes
Before attaching clamps, inspect your pipes for burrs, dents, or dirt. Even small imperfections can cause problems: a burr might prevent the clamp from sitting flush, while dirt can create gaps that loosen over time. Use your deburring tool to smooth any rough edges (especially if the pipes were recently cut). For dirt or grease, wipe the pipes with a clean rag dampened with rubbing alcohol—this removes residue without leaving a sticky film.
If you're using aluminum profile for a work surface, now's the time to prep that too. Remove any protective film (it can be tricky, so use a fingernail or plastic scraper to lift an edge) and wipe down the profile with alcohol. Aluminum is prone to fingerprints, so handle it by the edges to keep the surface clean.
Step 3: Position the Saddle Clamp
Take one saddle clamp and place it on the vertical pipe, aligning the bottom edge with your mark. The clamp's "saddle" (the curved part) should face upward if you're attaching a horizontal pipe above it, or downward if the horizontal pipe is below. For most frames, horizontal pipes attach to the top of vertical pipes, so the saddle will face up.
Next, take the horizontal pipe and rest it in the saddle. Make sure the horizontal pipe's mark lines up with the clamp's bolt holes—this ensures the connection is centered. Hold the horizontal pipe steady with one hand while using the other to adjust the clamp's position. It might help to have a friend hold the pipes in place while you work, but if you're solo, prop the horizontal pipe on a sawhorse or stack of books to keep it level.
Step 4: insert and Hand-Tighten the Bolts
With the clamp and pipes positioned, it's time to add the bolts. Most saddle clamps have two bolts that pass through the clamp's "ears" (the flat parts on either side of the saddle) and into a nut or threaded hole in the joint. Start by inserting one bolt through the top ear, then the bottom ear, and hand-tighten the nuts until they're snug but not tight—you'll fully tighten them later. This "hand-tight" step lets you adjust the clamp's position if needed without stripping threads.
If your clamp uses a lean pipe joint (like a T-joint or cross-joint), slide the joint onto the horizontal pipe first, then position the clamp over both the joint and the vertical pipe. The joint adds stability, so make sure it's flush against the vertical pipe before inserting bolts.
Pro Tip: Apply a drop of thread locker (like Loctite) to the bolt threads before tightening. This prevents bolts from loosening due to vibration—critical for workstations in busy environments.
Step 5: Align and Square the Frame
Before fully tightening any clamps, you need to ensure the frame is square and level. A frame that's out of square will wobble, and shelves won't line up. Here's how to check:
- Measure the diagonal distance from the top-left corner of the frame to the bottom-right corner.
- Measure the diagonal from the top-right corner to the bottom-left corner.
- If the two measurements are equal, the frame is square. If not, gently push or pull the corners until the diagonals match.
Once the frame is square, use your level to check the horizontal pipes. Place the level on top of the pipe—if the bubble is centered, it's level. If not, adjust the clamp's position slightly (remember, the bolts are still hand-tight, so this should be easy). Repeat this for all horizontal and vertical pipes—even a small slope can cause tools to slide over time.
Step 6: Fully Tighten the Clamps
Now comes the moment of truth: tightening the clamps. Grab your wrench or socket set and start with one bolt at a time. Turn the bolt clockwise until it's snug, then give it a 1/4-turn more—this ensures a tight grip without over-tightening. Over-tightening can warp the clamp or strip the threads, so resist the urge to crank it as hard as possible!
Work in a "cross" pattern if the clamp has multiple bolts (like two bolts per clamp). Tighten the top bolt a little, then the bottom bolt, then back to the top—this distributes pressure evenly and prevents the clamp from tilting. After tightening, give the horizontal pipe a gentle shake. It should feel solid, with no movement relative to the vertical pipe. If it wobbles, check the alignment and tighten the bolts a bit more (but again, don't overdo it).
Repeat this process for all clamps in your frame. Take your time—rushing through tightening can lead to uneven pressure and weak connections. For a standard 4x2 foot lean pipe workbench, this step should take 15-20 minutes if you're working carefully.
Step 7: Test the Structure
You're almost done! Now it's time to test the frame's stability. Push gently on the corners—there should be no creaking or shifting. Place a heavy object (like a toolbox or a stack of books) on the horizontal pipes to simulate the weight of tools or materials. Let it sit for 5-10 minutes, then check the clamps again—sometimes the weight causes bolts to loosen slightly, so a quick retighten might be needed.
If you're adding caster wheels, now's the time to attach them. Most caster wheels mount to the bottom of the vertical pipes using brackets that are secured with—you guessed it—more saddle clamps or dedicated caster mounts. Follow the same steps: align, hand-tighten, level, then fully tighten. Once the casters are on, roll the workstation back and forth to ensure it moves smoothly without wobbling.

Troubleshooting Common Issues
Even with careful prep, things can go wrong. Here are the most common issues and how to fix them:
Issue 1: Clamp Slips on the Pipe
If the clamp slides along the pipe when you apply pressure, the problem is usually either dirt on the pipe or insufficient friction. First, remove the clamp and clean both the pipe and the clamp's saddle with alcohol—grease or dust can act as a lubricant, causing slipping. If that doesn't work, check the clamp's saddle for wear. Over time, the curved part can flatten out, reducing grip. replace worn clamps with new ones—they're inexpensive and critical for safety.
Issue 2: Pipe is Bent or Misaligned
Bent pipes throw off alignment and make clamps hard to secure. If a pipe is slightly bent, you can straighten it by placing it on a flat surface and gently tapping the bent area with a rubber mallet. For more severe bends, replace the pipe—trying to work with a badly bent pipe will only lead to a wobbly frame.
Issue 3: Bolts Strip or Break
Stripped or broken bolts are usually caused by over-tightening or using the wrong size bolt. If a bolt strips, remove it with a bolt extractor (available at hardware stores) and replace it with a new one of the same size and thread count. To prevent this, always use the torque wrench set to the manufacturer's recommended tension (usually 15-20 ft-lbs for lean pipe clamps).

Maintenance Tips: Keeping Your Clamps (and Workstation) in Top Shape
Installing clamps is just the first step—regular maintenance ensures your workstation stays stable for years. Here's what to do:
- Monthly checks : Tighten any loose bolts with a wrench. Vibration from daily use can loosen clamps over time, so a quick once-over each month prevents big issues.
- Quarterly cleaning : Wipe down pipes and clamps with a damp rag to remove dust and debris. For aluminum profile work surfaces, use a mild detergent to cut through grease.
- Annual inspection : Check clamps for signs of wear, like cracks in the saddle or rust on bolts. replace any damaged parts immediately—don't wait for them to fail.
- Lubricate joints : If your workstation uses moving parts (like caster wheels or adjustable shelves), apply a drop of machine oil to joints every 6 months to keep them moving smoothly.
Real-World Applications: Where Saddle Clamps Shine
Saddle pipe clamps aren't just for basic workbenches—they're used in a variety of industries to create custom solutions. For example, in automotive manufacturing, they're used to build parts racks that hold components at waist height, reducing bending and strain. In electronics assembly, they secure esd workstations (static-free workbenches) by attaching aluminum profile tops to lean pipe frames, ensuring sensitive components aren't damaged by static electricity.
Small businesses love them too. A local bike repair shop might use saddle clamps to build a mobile workstation with caster wheels, letting mechanics roll tools and parts directly to the bike instead of carrying heavy toolboxes. Even home workshops benefit—imagine a garage setup where you can reconfigure shelves and tool hooks by simply loosening a few clamps and moving pipes around. That's the power of lean manufacturing principles, made possible by simple components like saddle pipe clamps.
Conclusion: Your Workstation, Built to Last
Installing saddle pipe clamps might seem like a small task, but it's the foundation of a sturdy, efficient lean workstation. By following these steps—prepping your tools, measuring carefully, aligning properly, and tightening with care—you'll create a setup that not only looks professional but also stands up to the demands of daily use. Remember, the goal isn't just to build something functional today, but to build something that can adapt as your needs change. With saddle clamps, you've got the flexibility to add shelves, reposition pipes, or even disassemble and rebuild in a new location—all without starting from scratch.
So grab your tools, lay out those pipes, and get started. Your future self (and your productivity) will thank you. And if you hit a snag? Refer back to this guide, take a deep breath, and remember: even the most experienced builders started with a single clamp. You've got this!