- Company Articles
- Products and Technology
- Installation And Maintenance
- Integrating Flat Rigid Castor Wheels with Material Rack B: A Complete Stability Guide

Integrating Flat Rigid Castor Wheels with Material Rack B: A Complete Stability Guide
Related Product
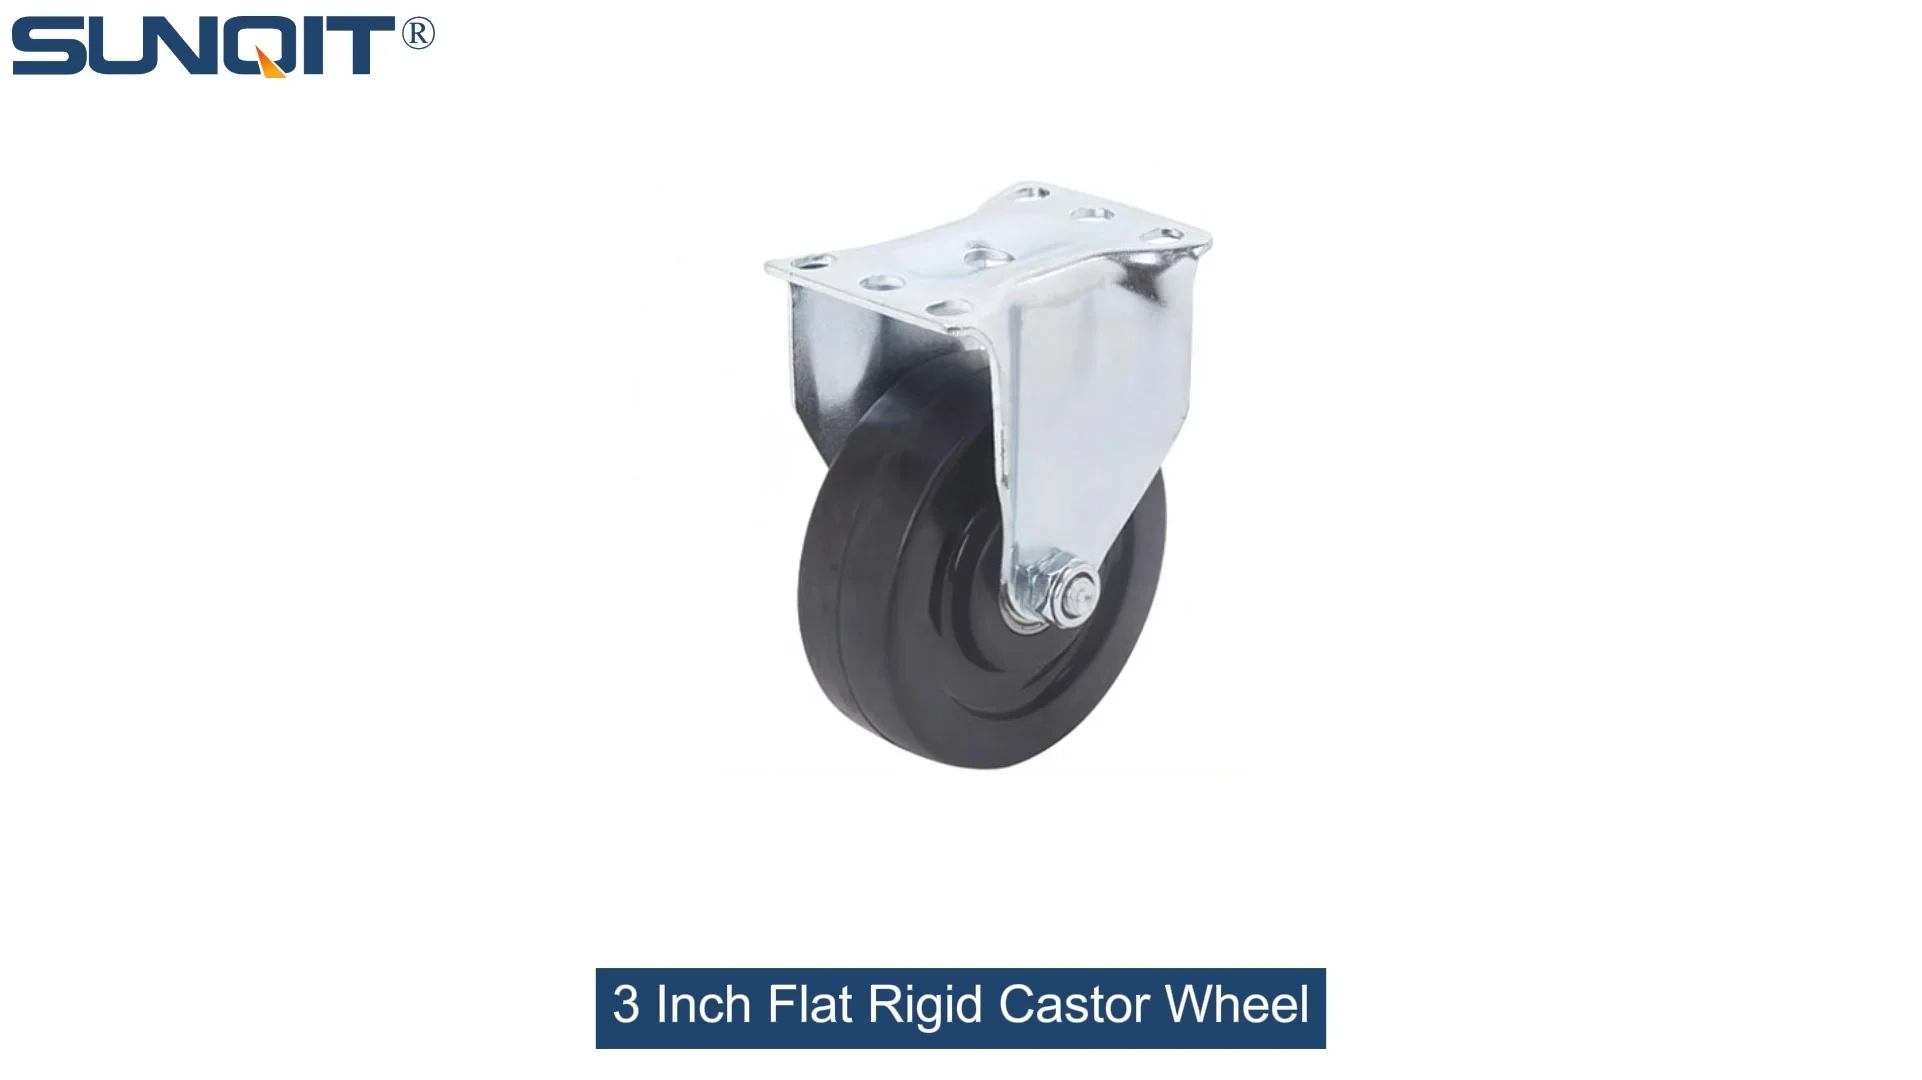
Flat Rigid Castor Wheel
Chair Casters Ball Bearing Wheels Rubber Base. Resistant to abrasion, impact and corrosion. Heavy payload can hold 70Kgs per pcs,which can make it works at a stable and smooth status.
Walk into any busy warehouse, manufacturing floor, or distribution center, and you'll notice a silent hero of efficiency: the material rack. These unassuming structures hold everything from raw components to finished products, keeping operations running smoothly. But here's the thing—even the sturdiest rack can become a liability if it's not properly equipped to move (or stay put) when needed. That's where the marriage of Material Rack B (3 row and 3 floor) and flat rigid castor wheels comes into play. In this guide, we're diving deep into how to integrate these two components for rock-solid stability, because in a world where every second counts, a wobbly rack isn't just an annoyance—it's a risk to safety, productivity, and your bottom line.
Why Stability Matters More Than You Think
Let's start with the basics: Why does stability matter when it comes to material racks? Imagine this scenario: A team member is rushing to fulfill an order, pulls a rack loaded with heavy boxes, and suddenly the whole structure lurches to one side. Boxes topple, time is wasted, and worst-case, someone could get hurt. That's the cost of instability. But it's not just about accidents. A rack that shifts or sways during use can damage the items it's holding—scratched parts, crushed packaging, or even broken goods. Over time, those small losses add up. And let's not forget efficiency: If your team has to slow down to "baby" a wobbly rack, or stop entirely to fix a misalignment, you're bleeding productivity.
Then there's the flip side: Sometimes you need a rack to move. Maybe you're reorganizing your workspace for a new production line, or shifting inventory to a different zone. In those cases, a stationary rack becomes a hassle—you either need extra hands to lift it (risking strains) or you're stuck with a layout that no longer serves your needs. That's where castor wheels come in. But not just any castors— flat rigid castor wheels are designed for a specific job: providing mobility without sacrificing stability. Unlike swivel casters, which rotate 360 degrees, rigid casters stay fixed in one direction, making them ideal for racks that need to move in straight lines (like along aisles) while staying steady under load.
Meet Material Rack B: The Workhorse of Storage
Before we talk about castors, let's get to know our star rack: Material Rack B (3 row and 3 floor) . If you're in the market for a versatile, durable storage solution, this rack is likely already on your radar. With three rows and three floors, it's built to maximize vertical space without taking up too much floor area—perfect for warehouses where square footage is precious. But what makes it stand out? Let's break down its specs:
- Structure: Typically made from heavy-duty steel or aluminum, with a frame designed to distribute weight evenly across all three floors. The three-row design means you can separate items by category, project, or priority—no more digging through a jumbled mess.
- Load Capacity: While exact numbers vary by manufacturer, most Material Rack B models can handle 200-300 lbs per shelf, with a total capacity of 600-900 lbs. That's enough for everything from small electronic components to larger mechanical parts.
- Flexibility: Many versions come with adjustable shelves, so you can customize the height to fit taller items or stack smaller ones more efficiently. The open design also makes it easy to see what's stored where—no more guessing what's on the bottom shelf.
But here's the catch: Out of the box, Material Rack B is usually stationary. It sits on the floor, anchored by its own weight and maybe some rubber feet. That's great for permanent storage, but if you need to move it—say, to clean underneath, reconfigure your workspace, or bring materials closer to a production line—you're out of luck. Enter flat rigid castor wheels: the upgrade that turns a static rack into a mobile (yet stable) powerhouse.

Flat Rigid Castor Wheels: What They Are and Why They're a Game-Changer
Not all casters are created equal. Swivel casters are great for maneuverability—think office chairs or shopping carts—but they're not the best choice for heavy, tall racks. Why? Because that 360-degree rotation can make the rack prone to tipping if it's overloaded or moved too quickly. Rigid casters, on the other hand, are fixed in direction (usually straight ahead or behind), which means they track in a straight line. No swiveling, no surprises. And flat rigid castor wheels take it a step further: Their flat mounting plate ensures a secure connection to the rack's base, distributing weight evenly and reducing the risk of wobble.
Let's break down the key features of flat rigid castor wheels that make them ideal for Material Rack B:
1. Load-Bearing Capacity
Flat rigid casters are built tough. They're designed to handle heavy loads without bending or breaking, which is crucial for a rack that might be holding hundreds of pounds of materials. Look for casters with a load rating that exceeds your rack's total capacity—if Material Rack B holds up to 900 lbs, aim for casters that can handle 1,000 lbs or more (remember, you're distributing the weight across 4-6 casters, so each one doesn't bear the full load, but it's better to over-engineer).
2. Fixed Direction for Predictable Movement
Swivel casters let you turn on a dime, but that flexibility can be a curse for tall racks. A sudden turn could shift the center of gravity, leading to instability. Rigid casters only move forward or backward, so when you push the rack, it goes exactly where you want it to—no unexpected swerves. This predictability is a lifesaver in tight spaces, like narrow warehouse aisles.
3. Flat Mounting Plates for a Secure Fit
The "flat" in flat rigid castor wheels refers to the mounting plate—the part that attaches to the rack. Unlike stem casters (which use a rod to insert into a hole), flat plate casters bolt directly to the rack's base. This creates a larger contact area, spreading the weight across more surface area and reducing the risk of the caster pulling away from the rack over time. It's like the difference between gluing a picture to the wall versus using a single nail—more support means less chance of failure.

Getting to Know Your Material Rack B: Key Specs to Consider
Before you start attaching casters, you need to understand your rack inside and out. Let's take a closer look at Material Rack B (3 row and 3 floor) to make sure you're choosing the right casters and installing them correctly.
Dimensions and Weight
First, measure your rack. How tall is it? How wide? How deep? The height is especially important because taller racks have a higher center of gravity, which makes them more prone to tipping. A standard Material Rack B might stand around 6-7 feet tall, with a width of 3-4 feet and depth of 2-3 feet. Next, check the empty weight of the rack—this is the base weight you'll be moving, even before you add any materials. If the rack itself is 100 lbs, and you plan to load it with 800 lbs of goods, your total moving weight is 900 lbs. That number will dictate the load capacity of the casters you need.
Base Structure: Where Will the Casters Go?
Look at the bottom of your Material Rack B. Is the base a solid frame, or are there crossbars? Are there pre-drilled holes for attaching casters, or will you need to drill your own? Most industrial-grade racks have reinforced base rails specifically designed for caster installation—these are the best spots to attach your flat rigid casters, as they're built to handle the stress of movement. If your rack doesn't have pre-drilled holes, you'll need to mark and drill them yourself (more on that later), but make sure you're drilling into the main frame, not just a thin crossbar that can't support the weight.
Floor Compatibility
What kind of floor will the rack be rolling on? Concrete? Tile? Vinyl? Rough concrete might require casters with larger wheels to avoid getting stuck on cracks, while smooth floors could work with smaller wheels. Also, consider floor protection—if you're working on polished concrete or hardwood (unlikely in a warehouse, but possible in a workshop), you might want rubber wheels to prevent scratches. Most flat rigid castor wheels come with either rubber, polyurethane, or steel wheels; rubber is great for shock absorption and floor protection, while steel is better for heavy loads on rough surfaces.

Choosing the Right Flat Rigid Castor Wheels for Material Rack B
Now that you know your rack's specs, it's time to pick the perfect casters. This isn't a one-size-fits-all situation—choosing the wrong casters can lead to instability, premature wear, or even damage to the rack. Here's what to look for:
Load Rating: Do the Math
We touched on this earlier, but it's worth repeating: Always calculate the total weight the casters will need to support. Let's say your Material Rack B weighs 150 lbs empty, and you typically load it with 750 lbs of materials. Total weight = 900 lbs. If you're using 4 casters (the standard for most racks), each caster needs to support at least 225 lbs (900 lbs ÷ 4). But here's the golden rule: Add a 30% safety margin. So 225 lbs x 1.3 = 292.5 lbs per caster. Look for casters with a load rating of at least 300 lbs each to be safe. It's better to have extra capacity than to cut it close—you never know when you might need to load the rack a little heavier than usual.
Wheel Size: Bigger Isn't Always Better (But Sometimes It Is)
Wheel diameter affects how easily the rack rolls and how stable it is. Larger wheels (4-6 inches) roll over obstacles like cracks or debris more easily, which reduces the force needed to move the rack. They also have a larger contact patch with the floor, which can improve stability. Smaller wheels (2-3 inches) are more compact, which might be necessary if the rack is very low to the ground, but they're harder to roll and more prone to getting stuck. For Material Rack B, which is typically 6-7 feet tall, we recommend wheels between 4-5 inches in diameter—big enough to handle most warehouse floors, but not so big that they raise the rack's center of gravity too much.
Wheel Material: Match the Environment
As mentioned, wheel material matters for both performance and floor protection:
- Rubber: Quiet, shock-absorbent, and gentle on floors. Great for smooth surfaces like polished concrete or tile. Not ideal for heavy loads or rough terrain, as rubber can wear down quickly.
- Polyurethane: A step up from rubber—more durable, better load capacity, and still gentle on floors. Polyurethane wheels also roll more easily than rubber, making them a good all-around choice for most warehouses.
- Steel: The heavyweight champion. Steel wheels can handle massive loads and rough surfaces, but they're noisy, hard on floors, and don't absorb shocks (so your items might jostle more during movement). Best for outdoor use or extremely heavy loads.
Mounting Plate Size: Fit for Your Rack
The mounting plate is where the caster attaches to the rack, so it needs to be large enough to provide a secure connection. Most flat rigid castor wheels come with mounting plates that are 3-4 inches square, with pre-drilled holes for bolts. Check the distance between the holes (the bolt pattern) to make sure they line up with the holes on your rack's base (or the holes you'll drill). If the plate is too small, it might not distribute the weight evenly, leading to stress cracks in the rack's base over time.
Step-by-Step Installation: Integrating Flat Rigid Castor Wheels with Material Rack B
Now comes the fun part: putting it all together. Installing casters might seem straightforward, but skipping steps or cutting corners can lead to instability down the line. Follow this step-by-step guide for a rock-solid installation:
Tools You'll Need
Gather these tools before you start—there's nothing worse than having to stop mid-project to hunt for a missing wrench:
- Drill and drill bits (if your rack doesn't have pre-drilled holes)
- Socket set or wrench (to tighten bolts)
- Level (to ensure the rack is even after installation)
- Tape measure and pencil (for marking hole positions)
- Stud finder (if you're attaching to a wooden base—unlikely for Material Rack B, but good to have on hand)
- Assistant (to help hold the rack steady while you work)
Step 1: Prepare the Rack
Start by emptying the rack completely. Trying to install casters with materials on the shelves is dangerous—items could fall, and the extra weight will make it harder to move the rack. Once it's empty, move the rack to a flat, open space where you have room to work. If the rack has adjustable feet, remove them (you won't need them once the casters are installed).
Step 2: Mark the Mounting Positions
Flip the rack upside down (or tilt it onto its side, if it's too heavy to flip) so you can access the base. Measure the distance between the corners of the base frame—you want to position the casters as far apart as possible to maximize stability. For a rectangular rack, the ideal position is at the four corners. If the rack is longer than it is wide, you might add a fifth caster in the middle for extra support, but 4 casters are usually sufficient for Material Rack B.
Place a caster on the base frame, aligning the mounting holes with the frame's crossbars or rails. Use a pencil to mark the position of each hole on the frame. If the frame doesn't have pre-drilled holes, use a drill bit slightly smaller than the bolts you'll be using to drill new holes. Pro tip: Use a center punch to mark the drill points—this prevents the drill bit from slipping.
Step 3: Attach the Casters
Once the holes are marked (and drilled, if needed), place the caster's mounting plate over the holes. insert the bolts through the plate and into the frame, then tighten them with a wrench or socket set. Don't just hand-tighten—you want these bolts to be snug, but not so tight that you strip the threads. A good rule of thumb is to tighten until you feel resistance, then give it a quarter-turn more. Repeat this for all casters.
Step 4: Check for Level and Alignment
Stand the rack upright and place a level on the top shelf. If the rack leans to one side, it means the casters aren't all at the same height. Check to see if any bolts are loose, or if one caster is mounted higher than the others. You can adjust the height by adding washers under the mounting plate, but most flat rigid castor wheels are fixed-height, so this is usually a matter of ensuring the mounting holes were drilled straight.
Next, test the movement: Push the rack gently forward and backward. It should roll smoothly without wobbling or sticking. If it's hard to push, check the wheel alignment—rigid casters should all face the same direction (usually parallel to the length of the rack). If one caster is twisted, loosen the bolts and adjust it until it's aligned with the others.
Step 5: Secure with Lock Washers (Optional but Recommended)
To prevent the bolts from loosening over time (vibration from moving the rack can cause them to back out), add lock washers between the bolt head and the mounting plate. Lock washers have a split design that "bites" into the surface, creating friction that resists loosening. It's a small step, but it can save you from having to retighten bolts every few weeks.
Common Installation Mistakes to Avoid
Even with careful planning, it's easy to make mistakes during installation. Here are the most common ones—and how to steer clear of them:
Mistake 1: Using Casters with Too Low a Load Rating
We can't stress this enough: Underestimating the load is a recipe for disaster. If the casters can't handle the weight, they'll bend, crack, or fail completely. Always calculate the total weight and add that 30% safety margin.
Mistake 2: Mounting Casters Too Close Together
Casters placed too close to the center of the rack reduce stability. The wider the stance, the harder it is for the rack to tip. Think of it like a tightrope walker—they use a long pole to widen their base of support. The same principle applies here.
Mistake 3: Ignoring Wheel Alignment
Rigid casters must face the same direction. If two casters point forward and two point sideways, the rack will bind up when you try to move it, leading to uneven wear on the wheels and possibly damaging the floor.
Mistake 4: Overlooking Floor Conditions
Installing small, hard wheels on a rough concrete floor will make the rack impossible to move. Take the time to assess your floor type and choose wheels accordingly.
Maintaining Your Integrated System for Long-Term Stability
Installing the casters is just the first step—keeping them (and the rack) stable over time requires regular maintenance. Here's a quick checklist to add to your routine:
Weekly Checks:
- Tighten bolts: Give each caster's mounting bolts a quick check with a wrench—vibration can loosen them over time.
- Inspect wheels: Look for cracks, flat spots, or debris stuck in the wheels (like string or small rocks).
- Test movement: Push the rack a short distance to make sure it rolls smoothly and doesn't wobble.
Monthly Checks:
- Lubricate axles: Add a drop of lubricating oil to each wheel's axle to keep them rolling freely. Avoid over-lubricating—excess oil can attract dirt.
- Check for rust: If your casters are steel, look for signs of rust and treat with a rust inhibitor if needed.
- Verify load distribution: Make sure items on the rack are evenly distributed—don't overload one side or shelf, as this can shift the center of gravity.
Quarterly Checks:
- replace worn wheels: If wheels are cracked, worn down, or no longer roll smoothly, replace them immediately. Don't wait for a failure.
- Re-level the rack: Over time, floors can settle or casters can wear unevenly. Use a level to check if the rack is still even, and adjust if needed (by adding washers under the mounting plate).
Real-World Success: How One Warehouse Improved Stability (and Saved Time)
Let's put this all into context with a real example. A mid-sized electronics manufacturer was struggling with their Material Rack B units. They used the racks to store circuit boards and small components, but the stationary design meant team members had to walk back and forth between the racks and the assembly line—wasting up to 2 hours per day in travel time. They tried adding swivel casters, but the racks were too tall and wobbly, leading to several near-misses with falling components.
After consulting with a lean system expert, they switched to flat rigid castor wheels. Here's what happened: The fixed direction made the racks stable enough to move with confidence, even when fully loaded. Team members could now roll the racks directly to the assembly line, cutting travel time by 75%. The rigid casters also reduced wear on the warehouse floor, since there were no more sudden swerves or skidding. Best of all, they reported zero incidents of tipping or damage to components in the first six months. The investment in proper casters paid for itself in productivity gains alone.
Troubleshooting Common Issues
Even with proper installation and maintenance, you might run into issues. Here's how to troubleshoot the most common problems:
Problem: The Rack Wobbles When Moving
Cause: Casters are misaligned, or the rack is overloaded on one side. Solution: Check that all casters are facing the same direction. Redistribute the load so weight is evenly spread across the shelves.
Problem: Wheels Get Stuck on the Floor
Cause: Wheels are too small, or there's debris in the wheels. Solution: Clean the wheels thoroughly. If the problem persists, upgrade to larger wheels (4-5 inches) for better obstacle clearance.
Problem: Bolts Keep Loosening
Cause: Vibration from movement, or bolts weren't tightened enough. Solution: Add lock washers and retighten bolts. Consider using thread-locking adhesive (like Loctite) for extra security.
Conclusion: Stability as the Foundation of Efficiency
At the end of the day, integrating flat rigid castor wheels with Material Rack B (3 row and 3 floor) isn't just about adding wheels to a rack—it's about building a foundation for safer, more efficient operations. When your racks are stable, your team can move with confidence, your materials stay protected, and your workflow stays on track. It's a small upgrade with big returns: fewer accidents, less waste, and more time to focus on what really matters—growing your business.
So, take the time to choose the right casters, follow the installation steps, and stick to a maintenance routine. Your future self (and your team) will thank you. After all, in the world of material handling, stability isn't just a nice-to-have—it's the backbone of success.