- Company Articles
- Products and Technology
- Installation And Maintenance
- Internal Straight Aluminum Joint Maintenance: Cleaning & Inspection Best Practices

Internal Straight Aluminum Joint Maintenance: Cleaning & Inspection Best Practices
Related Product
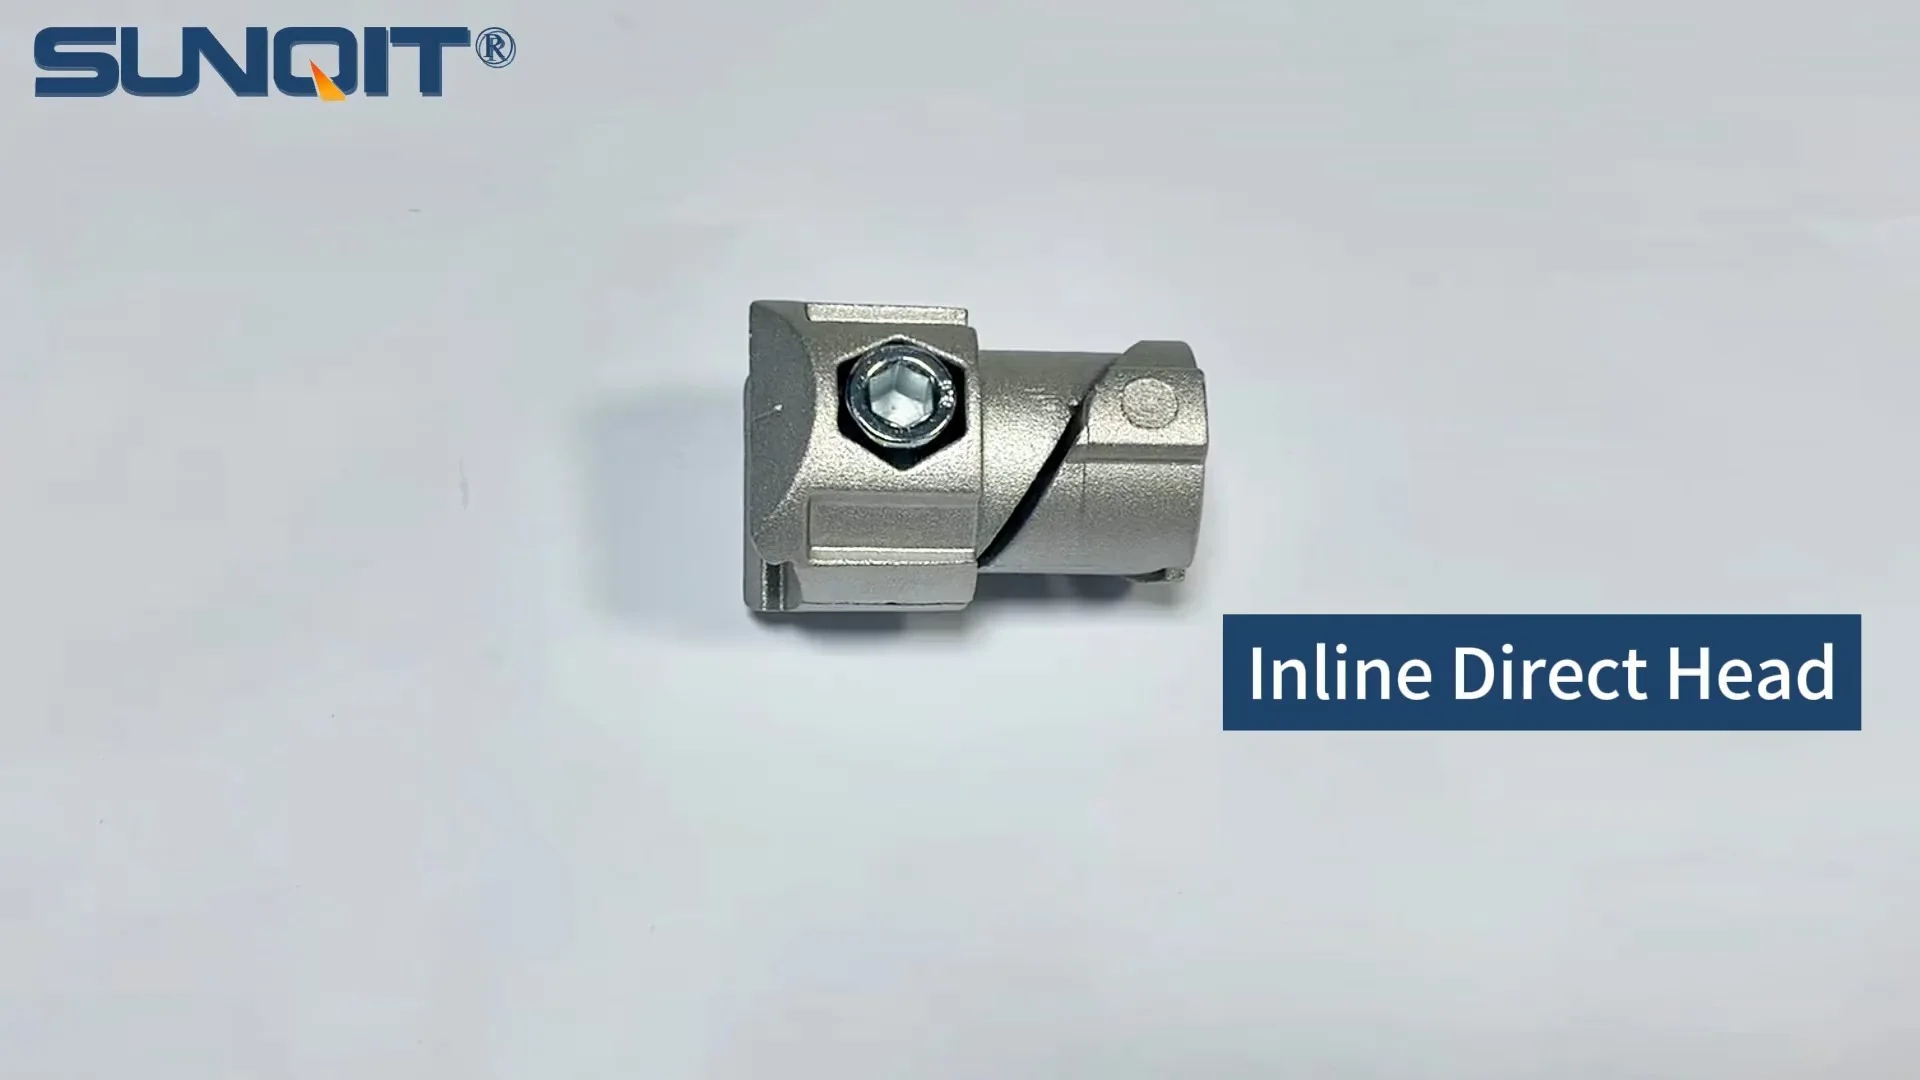
Internal straight aluminum joint
Aluminum pipe joint inside connection used for two pcs 28pcs aluminum pipe connection in straight angle,it connects two pcs pipe from inside.
Introduction: The Unsung Hero of Aluminum Profile Systems
In the world of manufacturing, warehousing, and lean production, the stability and efficiency of workspaces often hinge on the smallest components. Among these, the internal straight aluminum joint stands out as a quiet workhorse. These unassuming connectors are the backbone of countless structures—from assembly line workbenches to material racks, and from conveyor systems to turnover trolleys. As a critical part of aluminum pipe accessories, internal straight aluminum joints ensure that aluminum profiles lock together securely, maintaining structural integrity even under constant use.
Yet, despite their importance, these joints are often overlooked during routine maintenance. A loose or corroded joint might seem trivial at first, but over time, it can lead to wobbling workbenches, misaligned conveyor tracks, or even collapsed material racks—all of which risk downtime, product damage, and worker safety. That's why mastering the art of cleaning and inspecting internal straight aluminum joints isn't just a "good practice"; it's essential for keeping operations running smoothly.
In this guide, we'll dive deep into the world of internal straight aluminum joint maintenance. We'll explore why these joints matter, break down step-by-step cleaning techniques, outline thorough inspection protocols, and share tips for troubleshooting common issues. Whether you're a facility manager, a maintenance technician, or someone who relies on aluminum profile systems daily, this article will equip you with the knowledge to keep your joints—and your operations—in top shape.
Understanding Internal Straight Aluminum Joints: Design, Function, and Importance
What Are Internal Straight Aluminum Joints?
Internal straight aluminum joints are specialized connectors designed to join two or more aluminum profiles in a straight line. Unlike external joints, which wrap around the outside of pipes, these joints fit inside the hollow core of aluminum pipes, creating a sleek, low-profile connection. This internal design not only saves space but also reduces the risk of snags or damage from passing materials—a key advantage in high-traffic areas like production floors.
Most internal straight aluminum joints are made from high-grade aluminum alloys, chosen for their strength, lightweight properties, and resistance to corrosion. They typically feature ridges or threads that grip the inner walls of aluminum pipes, ensuring a tight, secure fit without the need for excessive external hardware. Some models may also include built-in fasteners, like set screws or spring-loaded tabs, to further lock the joint in place once inserted.
Why They Matter in Aluminum Profile Systems
Aluminum profile systems are prized for their versatility—they can be customized into almost any structure, from simple workbenches to complex automated machinery. But that versatility relies on strong, reliable connections. Internal straight aluminum joints are the glue that holds these systems together. Here's why they're irreplaceable:
- Structural Stability: In load-bearing structures like material racks or workbenches, internal joints distribute weight evenly across connected aluminum profiles, preventing bending or warping.
- Precision Alignment: For systems like roller tracks or conveyors, even minor misalignment can disrupt workflow. Internal straight joints ensure pipes stay perfectly straight, keeping materials moving smoothly.
- Durability: Aluminum's natural corrosion resistance means these joints can withstand harsh environments—from humid warehouses to dusty factories—without degrading quickly. But this durability isn't permanent; without maintenance, even aluminum can fail.
Think of it this way: if aluminum profiles are the bones of your workspace, internal straight aluminum joints are the joints (like elbows or knees) that let those bones work together. Just as a human joint needs care to stay mobile, these metal joints need cleaning and inspection to stay strong.

Cleaning Best Practices: Keeping Joints Free of Debris and Corrosion
Why Cleaning Matters
Dirt, dust, grease, and moisture are the biggest enemies of internal straight aluminum joints. Over time, debris can build up in the joint's crevices, preventing it from seating properly in aluminum pipes. Moisture, especially when mixed with industrial chemicals or salt (in coastal areas), can cause corrosion—eating away at the joint's surface and weakening its grip. Even something as simple as a spilled drink or a dusty environment can lead to problems down the line.
Regular cleaning removes these threats, ensuring the joint maintains a tight fit and prolonging its lifespan. It also makes inspection easier: a clean joint reveals cracks, wear, or damage that might be hidden under grime.
Tools You'll Need
Cleaning internal straight aluminum joints doesn't require fancy equipment, but having the right tools on hand will make the job faster and more effective. Here's what you'll need:
- Soft-Bristle Brushes: A small, nylon-bristle brush (like a toothbrush or detail brush) for scrubbing crevices without scratching the aluminum.
- Microfiber Cloths: Lint-free cloths for wiping away dust and moisture—avoid paper towels, which can leave residue.
- Mild Detergent: A pH-neutral soap (like dish soap) mixed with warm water for removing grease or oil.
- Isopropyl Alcohol (70%+): For disinfecting and drying joints quickly, especially in areas prone to mold or mildew.
- Compressed Air Canister: To blow out dust from hard-to-reach internal spaces (optional but helpful for deeply nested joints).
- Rubber Gloves: To protect hands from chemicals or sharp edges.
- Small Container: For mixing soapy water.
Step-by-Step Cleaning Process
Cleaning internal straight aluminum joints is a straightforward process, but attention to detail is key. Follow these steps for best results:
1. Prepare the Work Area
Start by clearing the area around the joint. If the joint is part of a larger structure (like a workbench), remove any tools, materials, or debris that might get in the way. If possible, gently disassemble the joint from the aluminum profile—this makes cleaning easier, especially for internal surfaces. To disassemble, loosen any set screws or release tabs (check the manufacturer's instructions for your specific joint model), then slide the joint out of the pipe.
2. Remove Loose Debris
Use a soft-bristle brush to gently scrub the outside and inside of the joint. Focus on crevices, threads, or ridges where dust and dirt tend to accumulate. For internal channels (the hollow part of the joint that fits over pipes), use the brush's tip to dislodge trapped debris. If you have a compressed air canister, blast a short burst into these channels to blow out remaining dust—hold the can upright to avoid spraying liquid propellant.
3. Clean Grease and Grime
For joints coated in oil, grease, or sticky residue, mix a few drops of mild detergent with warm water in a small container. Dip a microfiber cloth into the soapy water, wring it out well (you don't want excess moisture), and wipe the joint thoroughly. Pay extra attention to areas where the joint contacts the aluminum profile—these are high-friction zones where grime builds up fastest. Avoid using harsh chemicals like bleach or abrasive cleaners, as they can damage the aluminum's finish.
4. Disinfect (If Needed)
In environments where hygiene is critical (e.g., food processing or pharmaceutical facilities), disinfect the joint after cleaning. Moisten a fresh microfiber cloth with isopropyl alcohol and wipe all surfaces. Alcohol evaporates quickly, so it won't leave moisture behind—a must for preventing corrosion. Let the joint air-dry for 5–10 minutes before reassembly.
5. Dry Thoroughly
Even if you used alcohol, always dry the joint with a clean, dry microfiber cloth to remove any remaining moisture. Aluminum is resistant to corrosion, but trapped water (especially in tight crevices) can still cause pitting over time. For internal channels, roll a dry cloth into a small cylinder and insert it to soak up moisture—twist gently to reach all surfaces.
6. Reassemble and Test
Once the joint is clean and dry, slide it back into the aluminum profile. Tighten set screws or re-engage tabs until the joint is snug—don't over-tighten, as this can strip threads or warp the joint. Give the connection a gentle shake to test stability: there should be no wobbling or movement. If the joint feels loose, double-check that it's fully seated and that all fasteners are secure.
How Often Should You Clean?
Cleaning frequency depends on the joint's environment: in dusty factories or outdoor settings, clean joints every 2–4 weeks. In cleaner indoor spaces (like offices or labs), monthly cleaning is usually enough. For high-use systems (e.g., conveyor joints that move materials 24/7), inspect and clean every 1–2 weeks. Keep a log of cleaning dates to track maintenance and spot patterns (e.g., joints near air vents get dirtier faster).

Inspection Protocols: Spotting Problems Before They Escalate
Cleaning removes threats, but inspection identifies existing damage. Even a sparkling clean joint can hide cracks, wear, or loose components that compromise its performance. Regular inspections turn "surprise failures" into "preventable fixes." Below is a detailed guide to inspecting internal straight aluminum joints, including common issues to watch for and how to address them.
Key Inspection Areas
When inspecting a joint, focus on these critical areas—they're the most likely to fail first:
- Joint Body: The main structure of the joint, including outer walls and internal channels.
- Fasteners: Set screws, tabs, or clips that secure the joint to the aluminum profile.
- Grip Surfaces: Ridges, threads, or rubber O-rings that create friction between the joint and pipe.
- Connection Points: Where the joint meets the aluminum profile (check for gaps or misalignment).
Common Issues and How to Detect Them
The table below outlines the most common problems with internal straight aluminum joints, the signs to look for during inspection, and how to test for them:
| Common Issue | Signs to Look For | Inspection Method |
|---|---|---|
| Cracks in the Joint Body | Hairline fractures (often near corners or fastener holes), discoloration (darker or lighter spots around cracks), or visible separation of metal. | Hold the joint up to a light source and tilt it to catch reflections—cracks will appear as dark lines. Run a fingernail gently over suspect areas; cracks will catch on the nail. |
| Loose or Stripped Fasteners | Set screws that spin freely, tabs that don't lock into place, or visible gaps between the joint and aluminum profile. | Use a screwdriver to test set screws—they should resist turning when tight. For tabs, press down gently; they should snap back into place firmly. |
| Corrosion | White, powdery residue (aluminum oxide) or greenish-brown spots (from chemical reactions with moisture/chemicals), pitting (small holes in the metal surface). | Wipe the joint with a dry cloth—corrosion residue will transfer to the cloth. Inspect with a magnifying glass to check for pitting, which weakens the joint's structure. |
| Worn Grip Surfaces | Smooth, shiny areas on ridges/threads (where friction has worn away texture), or rubber O-rings that are cracked, flattened, or missing. | Run your finger along grip surfaces—they should feel rough, not slippery. For O-rings, check for signs of hardening or tearing; press gently—they should bounce back, not stay indented. |
| Misalignment | Joint not sitting flush with the aluminum profile, or connected pipes that aren't straight (visible "bend" in the structure). | Place a straightedge along the connected aluminum profiles—they should form a straight line. If the joint is disassembled, check that internal channels are round and not bent (use a pipe gauge if available). |
When to replace vs. Repair
Not all issues require replacement. Minor problems can often be repaired, saving time and money. Here's how to decide:
- Repair: Loose fasteners can be tightened or replaced (use the same size and thread type as the original). Mild corrosion can be removed with a paste of baking soda and water (gently scrub with a soft cloth, then rinse and dry). Worn O-rings can be swapped out for new ones (measure the old O-ring's diameter and thickness to find a match).
- replace: Cracks in the joint body are irreparable—even small cracks will grow under stress. Severe corrosion (deep pitting or large areas of flaking metal) weakens the joint beyond repair. Stripped threads or fastener holes also mean replacement, as they can't hold screws securely. Always replace joints with the same model/brand to ensure compatibility with your aluminum profile system.
Troubleshooting: Fixing Common Joint Problems
Even with regular cleaning and inspection, internal straight aluminum joints can develop issues. Here's how to troubleshoot and resolve the most frustrating problems:
Problem: Joint Feels Loose After Reassembly
Causes:
Debris trapped between the joint and profile, worn grip surfaces, or incorrect fastener tightness.
Solution:
Disassemble the joint, clean it again (focusing on grip surfaces), and check for wear. If ridges/threads are smooth, replace the joint. If not, reassemble and tighten fasteners in small increments—over-tightening can warp the joint, making it looser over time. For joints without fasteners, ensure the pipe's end is cut cleanly (burrs can prevent a tight fit); use a deburring tool to smooth rough edges.
Problem: Joint Sticks or Won't Slide Into the Profile
Causes:
Corrosion buildup, bent internal channels, or debris inside the pipe.
Solution:
Clean the joint and pipe thoroughly. For corrosion, use a mild abrasive (like a soft wire brush) to gently remove residue—avoid scrubbing too hard, as this can scratch the aluminum. If the joint's internal channel is bent, use a pipe cleaner or dowel rod (slightly smaller than the channel diameter) to gently straighten it. If the pipe itself is bent, replace it—trying to force a joint into a bent pipe will damage both.
Problem: White/Green Residue on the Joint
Causes:
Corrosion from moisture, chemicals, or salt exposure.
Solution:
Mix equal parts water and white vinegar, apply to the residue with a cloth, and let sit for 5 minutes. Gently scrub with a soft brush, then rinse and dry thoroughly. For severe cases, use a commercial aluminum cleaner (follow the manufacturer's instructions). To prevent future corrosion, apply a thin coat of clear, dry lubricant (like silicone spray) to the joint's surface—this repels moisture without attracting dust.
Preventive Maintenance: Making It a Habit
The best way to keep internal straight aluminum joints in top condition is to make maintenance a regular habit, not a reactive chore. Here are tips to build a sustainable preventive maintenance routine:
- Create a Schedule: Use a calendar or maintenance software to set reminders for cleaning and inspection. Assign specific team members to check joints in different areas (e.g., "John checks workbench joints on Mondays; Maria checks conveyor joints on Wednesdays").
- Train Your Team: Ensure everyone who works with aluminum profile systems knows how to spot joint issues. Hold short training sessions on basic inspection (e.g., "What does a cracked joint look like? How do you test for looseness?").
- Stock Spare Parts: Keep a small inventory of replacement joints, fasteners, and O-rings on hand. This way, you can replace a damaged joint immediately instead of waiting for a shipment—minimizing downtime.
- Monitor High-Stress Areas: Joints in load-bearing structures (like material racks) or high-vibration areas (near machinery) wear faster. Inspect these weekly instead of monthly.
Conclusion: Invest in Maintenance, Reap the Rewards
Internal straight aluminum joints may be small, but their impact on your operations is huge. By taking the time to clean them regularly, inspect them thoroughly, and fix issues promptly, you'll extend their lifespan, reduce downtime, and keep your aluminum profile systems safe and efficient. Remember: maintenance isn't an expense—it's an investment in the reliability of your workspace.
Whether you're managing a factory floor, a warehouse, or a small workshop, the steps outlined in this guide are simple, cost-effective, and proven to work. So grab your brush, cloth, and inspection checklist, and give your internal straight aluminum joints the care they deserve. Your future self (and your bottom line) will thank you.