- Company Articles
- Products and Technology
- Product knowledge
- Internal Straight Aluminum Joints in Furniture Manufacturing: Lean Workbench Construction

Internal Straight Aluminum Joints in Furniture Manufacturing: Lean Workbench Construction
Related Product
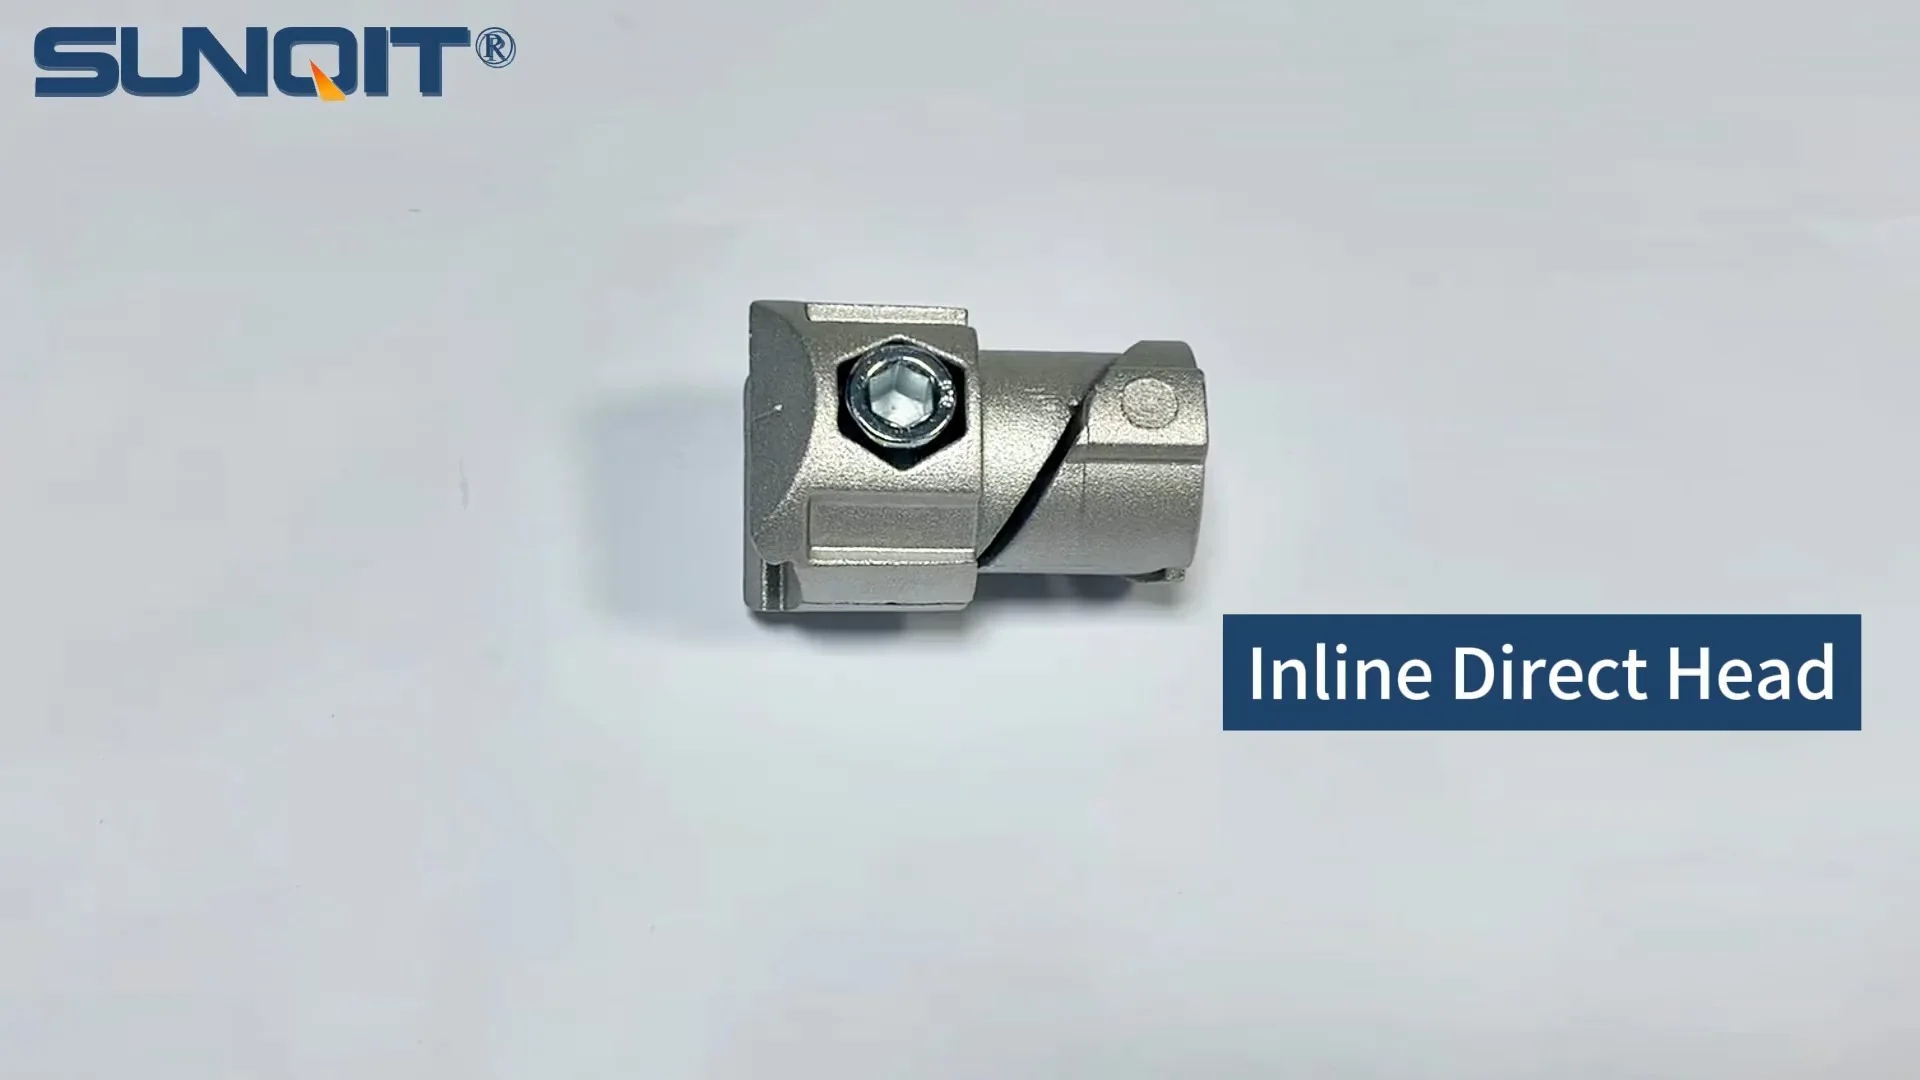
Internal straight aluminum joint
Aluminum pipe joint inside connection used for two pcs 28pcs aluminum pipe connection in straight angle,it connects two pcs pipe from inside.
Walk into any modern manufacturing facility, and you'll notice a quiet revolution happening on the factory floor. Gone are the days of clunky, one-size-fits-all workstations bolted to the ground, their wooden surfaces scarred by years of use and their frames warped from heavy tools. Instead, you'll find sleek, modular setups—workbenches that seem to adapt to the task at hand, their aluminum frames glinting under overhead lights, and components that click together with the precision of a well-oiled machine. At the heart of this transformation lies a small but mighty component: the internal straight aluminum joint . These unassuming connectors are the unsung heroes of lean manufacturing, turning raw aluminum profiles into workbenches that don't just hold tools, but actively streamline workflow, reduce waste, and empower teams to work smarter.
In this article, we're going to dive deep into the world of lean workbench construction, focusing on how internal straight aluminum joints are redefining what's possible in furniture manufacturing. We'll explore why aluminum has become the material of choice for lean environments, break down the unique benefits of these specialized joints, walk through a step-by-step construction process, and even hear from a production manager who saw firsthand how swapping out old joints for internal straight aluminum ones transformed their team's efficiency. Whether you're a factory owner looking to upgrade your workstations, a procurement specialist researching suppliers, or simply curious about the engineering behind the tools that build our everyday products, this guide will give you a front-row seat to how small components make a big impact.
The Lean Revolution: Why Workbenches Matter More Than You Think
Before we get into the nuts and bolts of joints and profiles, let's take a step back and talk about lean manufacturing. At its core, lean is all about eliminating waste —whether that's wasted time, wasted movement, or wasted materials. And if there's one place where waste tends to hide, it's in the workspace itself. Think about it: A worker who has to reach three feet to grab a screwdriver because the tool rack is misaligned. A team that spends two hours reconfiguring a workbench for a new product because the old one is nailed together. A surface that warps under heat, requiring constant replacements. These might seem like small annoyances, but add them up over a shift, a week, a year, and they eat into productivity like termites in wood.
That's where the lean workbench comes in. It's not just a table; it's a system . A well-designed lean workbench should bring tools, materials, and the worker into a harmonious triangle, minimizing unnecessary movement and maximizing focus. It should be sturdy enough to handle daily use but flexible enough to adapt when production needs change. And in today's fast-paced manufacturing landscape—where product cycles shrink and customization is king—rigidity is the enemy. This is why more and more facilities are turning to aluminum as the base material for their workbenches, and why the joints that hold that aluminum together have become critical decision points.
Aluminum Profiles: The Backbone of Modern Workbenches
Aluminum has long been prized in manufacturing for its unique blend of strength, lightness, and corrosion resistance, but it's the aluminum profile —specifically, the T-slot aluminum extrusion—that has made it indispensable for lean workbenches. Imagine a length of aluminum with grooves (or "T-slots") running along its sides, like a track waiting for components to snap into place. These slots are what make aluminum profiles so versatile: they allow accessories, tools, and even other profiles to be attached anywhere along the length, without drilling or welding. Need a tool hook? Slide a bracket into the T-slot and tighten a screw. Want to add a shelf? Bolt a crossbeam to the slots on the uprights. It's like building with industrial Legos, but for grown-ups who need their creations to withstand 500-pound loads.
But here's the thing: even the best aluminum profile is only as good as the joint that connects it to another profile. Welded joints are strong but permanent—great for fixed structures, terrible for lean environments where reconfiguration is key. Plastic connectors are cheap and easy to install but flex under heavy weight, leading to wobbly workbenches that need constant readjustment. External metal joints, while sturdier, can be bulky, adding unnecessary width to the frame and creating snags where tools or materials might catch. This is where internal straight aluminum joints shine: they're designed to fit inside the T-slot of the aluminum profile, creating a connection that's strong, streamlined, and infinitely reusable.

What Are Internal Straight Aluminum Joints, Anyway?
Let's start with the basics: an internal straight aluminum joint is a cylindrical or rectangular connector made from high-grade aluminum alloy (usually 6061 or 6063, known for their strength and corrosion resistance) that fits snugly into the hollow interior of an aluminum profile. Unlike external joints, which clamp around the outside of the profile, these joints sit inside the T-slot, with a threaded hole or bolt that extends through the slot to connect to another profile. Picture it like this: when you want to attach a horizontal beam to a vertical upright, you slide the internal straight joint into the end of the horizontal beam, align the beam with the upright, and tighten a screw through the T-slot of the upright into the joint. The result? A flush, seamless connection where the only visible part is the screw head (which can be countersunk for a smooth finish).
But why does this matter? For starters, internal joints save space. Without a bulky external clamp, the overall width of the workbench frame is reduced, which might not sound like a big deal until you realize that in a factory with 50 workbenches, those extra inches add up to wasted floor space. Second, they're stronger than you might think. By fitting inside the profile, the joint distributes the load across the entire interior surface of the aluminum extrusion, rather than just clamping to the edges. This means a workbench built with internal straight joints can handle heavier tools and materials without flexing. Third, they're incredibly easy to adjust. Loosen the screw, slide the profile to the new position, retighten—and you're done. No drilling new holes, no cutting new threads, no prying off old clamps. It's the kind of flexibility that makes lean managers smile.
Let's take a concrete example: suppose you're building a workbench where the height needs to be adjustable for different operators (a key ergonomic feature in lean setups). With external joints, you'd have to drill multiple holes in the uprights at different heights, then bolt the crossbeams into place—a process that takes time and leaves permanent marks. With internal straight joints, you simply slide the crossbeam up or down the T-slot of the upright, tighten the screw at the desired height, and you're good to go. If an operator needs the bench two inches higher next month, you don't need a new workbench—just a hex key and 30 seconds of your time.

From Profile to Workbench: Building with Internal Straight Aluminum Joints
Now that we understand what internal straight aluminum joints are and why they're useful, let's walk through how they're actually used to build a lean workbench. For this example, we'll focus on a common model: the workbench e (single deck-without caster) . This is a basic but versatile workstation—no wheels, a single flat work surface, and a frame built from 4040 aluminum profiles (a standard size for medium-duty workbenches). By the end of this section, you'll see how a handful of profiles, joints, and accessories come together to create a workstation that's ready for action.
Step 1: Gather Your Materials
First, you'll need the right components. For a workbench e (single deck-without caster) measuring 1200mm long, 600mm deep, and 800mm high, you'll typically need:
- 4 uprights: 4040 aluminum profiles, 800mm long (these form the legs)
- 2 front/back crossbeams: 4040 aluminum profiles, 1200mm long (run along the length of the workbench)
- 2 side crossbeams: 4040 aluminum profiles, 600mm long (run along the depth)
- 1 worktop: 1200mm x 600mm aluminum honeycomb panel (lightweight but strong)
- 8 internal straight aluminum joints (one for each end of the crossbeams, to connect to the uprights)
- Aluminum pipe accessories: 4 leveling feet (to stabilize the workbench on uneven floors), 8 M8 x 20 socket head cap screws (to secure the joints), and a hex key set
Pro tip: Always check that the internal straight joints are compatible with your aluminum profile size. A 4040 profile (40mm x 40mm) requires a joint designed to fit its internal dimensions—using a 3030 joint in a 4040 profile will result in a loose, wobbly connection.
Step 2: Prepare the Profiles
Before assembly, you'll need to cut the aluminum profiles to the correct lengths (unless you ordered them pre-cut from your supplier). A miter saw with a non-ferrous metal blade works best here—take your time, and measure twice to avoid mistakes. Once cut, deburr the edges with a file to remove sharp burrs that could cut hands or catch on materials later. Then, use a cloth to wipe down the profiles, removing any dust or oil that might interfere with the joint fit.
Step 3: Assemble the Frame
Now, it's time to start connecting. Begin by inserting an internal straight aluminum joint into one end of a 1200mm front crossbeam. Push it all the way in until it's flush with the end of the profile—you should feel a slight resistance as the joint's O-ring (if included) creates a tight seal. Next, align the crossbeam with the top of one upright: the joint inside the crossbeam should line up with a T-slot on the upright. insert an M8 screw through the T-slot and into the threaded hole of the internal joint, then tighten with a hex key until snug (but not over-tightened—you'll strip the threads if you crank it too hard).
Repeat this process for the other end of the front crossbeam, attaching it to the second upright. Now you have a U-shape: two uprights connected by a front crossbeam. Do the same with the back crossbeam and the remaining two uprights, then connect the sides with the 600mm crossbeams. By the end, you'll have a rectangular frame: four uprights, connected by two front/back beams and two side beams at the top. Stand it up—if it wobbles, check that all joints are tight and the uprights are plumb.
Step 4: Add the Worktop
With the frame assembled, it's time to mount the worktop. The aluminum honeycomb panel is lightweight but rigid, so you'll need to support it evenly across the frame. Place the panel on top of the crossbeams, centering it so there's equal overhang on all sides. Then, use T-slot nuts and screws to secure the panel to the crossbeams—these nuts slide into the T-slots of the crossbeams, allowing you to position the screws exactly where you need them. Space the screws every 200mm or so to prevent the panel from sagging under weight.
Step 5: Level and Test
Finally, attach the leveling feet to the bottom of the uprights. These feet have a threaded rod that screws into the upright, with a rubber pad on the bottom to prevent slipping. Adjust each foot until the workbench is level (use a spirit level on the worktop) and stable—no rocking, even when you push on the corners. Give the frame a good shake to test for looseness; if any joint feels wobbly, tighten the screw slightly (but again, don't overdo it).
And just like that, you've built a lean workbench using internal straight aluminum joints. Total assembly time? About 45 minutes for a first-timer, and under 30 minutes once you've done it a few times. Compare that to building a wooden workbench, which might take half a day and require power tools, glue, and clamps—and can't be taken apart and rebuilt if you need to move it.
Beyond the Basics: Enhancing Workbenches with Aluminum Pipe Accessories
A bare-bones workbench e is a great start, but the real power of aluminum profiles and internal straight joints lies in their ability to adapt. With the right aluminum pipe accessories , you can turn that basic frame into a workstation tailored to your specific needs. Let's say you're assembling small electronics: you might add a shelf above the worktop for bins of components, a tool rail along the back for screwdrivers and pliers, and a LED light bar for better visibility. Each of these accessories attaches using the same T-slots and internal joints, no drilling required.
Take the tool rail, for example. It's a simple aluminum pipe (16mm diameter) with a series of hooks. To attach it, you'd use two L-shaped brackets—each with an internal straight joint on one end. Slide the joint into the T-slot of the upright, tighten the screw, and then bolt the pipe to the bracket. Need to move the rail up six inches? Loosen the joint, slide it, retighten. It's that easy. Or consider a material rack: if your workbench is part of an assembly line, you might add a flow rack above it to feed components down to the operator. The flow rack's frame would be built from aluminum profiles connected with internal joints, and its roller tracks would bolt into the T-slots—all without modifying the original workbench frame.
This modularity is a game-changer for lean manufacturing. In traditional setups, adding a shelf or tool rail might require welding, drilling, or custom fabrication—time-consuming and expensive. With aluminum profiles and internal straight joints, it's a matter of unboxing the accessory, sliding it into place, and tightening a screw. This means your workbench can evolve with your production needs: today it's for assembling phones, tomorrow it's for testing circuit boards, and next month it's for packing finished products. No waste, no downtime, just adaptability.
Real-World Impact: A Factory's Journey with Internal Straight Aluminum Joints
To put this all in perspective, let's hear from someone who's lived through the transition. Meet Maria Gonzalez, production manager at Precision Electronics, a mid-sized manufacturer of medical device components in Austin, Texas. Two years ago, her team was struggling with a set of wooden workbenches that had been in use since the 1990s.
"Our old workbenches were a nightmare," Maria recalls. "They were heavy, so we couldn't move them when we rearranged the line. The tops were chipped and stained, which made cleaning between batches a hassle. And if we needed to add a shelf or move a tool holder, we'd have to drill new holes, which always ended up splitting the wood. We were spending 10 hours a week just maintaining them—time we should have been using to build products."
After researching options, Maria decided to test a set of aluminum profile workbenches with internal straight aluminum joints. She ordered five workbench e models and set them up in the assembly area. The results were immediate.
"The first thing we noticed was how
light
they were—two people could move a workbench across the floor in 30 seconds. Then, when we launched a new product line, we needed to reconfigure the workbenches to accommodate a longer assembly process. With the old wooden ones, that would have taken a full day of drilling and sawing. With the aluminum ones? We had all five reconfigured in two hours. We just loosened the joints, moved the crossbeams, and tightened them back up. The operators couldn't believe it—they kept asking, 'Is that it?'"
But the biggest win came in setup time for new employees. "We used to spend an hour training someone on how to use the old workbenches—where everything was supposed to go, how to adjust the (rarely adjustable) parts. With the aluminum ones, the layout is so intuitive, and they can tweak the setup themselves if something feels off. We've cut training time by 40%," Maria says. "And the best part? When we need to change the line again next quarter, we won't have to buy new workbenches. We'll just reconfigure the ones we have."
Why Internal Straight Aluminum Joints Beat the Competition: A Comparison
By now, you're probably convinced that internal straight aluminum joints are pretty great—but how do they stack up against other joint types? Let's put them head-to-head with three common alternatives: external 90° metal joints, plastic snap-fit connectors, and welded joints. We'll evaluate them on five key criteria for lean manufacturing: strength, reusability, installation time, cost, and ergonomics/aesthetics.
| Joint Type | Strength (1-10) | Reusability | Installation Time | Cost (Relative) | Ergonomics/Aesthetics |
|---|---|---|---|---|---|
| Internal Straight Aluminum Joint | 9 – Distributes load evenly inside the profile; handles heavy weights without flexing. | Excellent – Can be disassembled and reused hundreds of times without degradation. | Fast (5-10 mins per joint) – Slide into profile, tighten screw with hex key. | Moderate – More expensive than plastic, but cheaper than welding in the long run. | High – Flush design; no external bulk; smooth surfaces prevent snags. |
| External 90° Metal Joint | 8 – Strong, but load is concentrated at the clamp points; may loosen over time. | Good – Can be reused, but clamps may wear out after 10-15 disassembly cycles. | Moderate (10-15 mins per joint) – Requires aligning clamps and tightening multiple screws. | Moderate – Similar to internal joints, but adds bulk to the frame. | Low – Bulky clamps create snags; protrude from the frame, increasing footprint. |
| Plastic Snap-Fit Connector | 5 – Works for light loads, but flexes under heavy weight; prone to cracking in cold environments. | Poor – Plastic fatigues after 3-5 disassembly cycles; may break during reuse. | Very Fast (2-3 mins per joint) – Snaps into place; no tools needed. | Low – Cheap upfront, but needs frequent replacement. | Medium – Smooth, but can look cheap; may discolor over time. |
| Welded Joints | 10 – Extremely strong; permanent bond. | None – Once welded, cannot be disassembled or reconfigured. | Slow (30+ mins per joint) – Requires skilled labor, welding equipment, and cooling time. | High – Labor-intensive; expensive to repair if damaged. | Medium – Smooth if done well, but welds can be unsightly; no flexibility for changes. |
As the table shows, internal straight aluminum joints strike the perfect balance for lean environments. They're strong enough for heavy-duty use, reusable enough to adapt to changing needs, fast to install, and streamlined enough to keep workbenches ergonomic. Welded joints might be stronger, but their permanence makes them a poor fit for lean's "adapt or die" philosophy. Plastic connectors are cheap, but they won't stand up to the daily grind of a busy factory. Internal straight aluminum joints? They're the Swiss Army knife of connectors—versatile, reliable, and ready for whatever the production floor throws at them.
Best Practices for Working with Internal Straight Aluminum Joints
Now that you're sold on internal straight aluminum joints, let's talk about how to get the most out of them. Like any tool, they work best when used correctly—and avoiding common mistakes will save you time, money, and frustration down the line.
1. Choose the Right Joint for the Job
Not all internal straight aluminum joints are created equal. Some are designed for light-duty use (e.g., 2020 profiles for small workbenches), others for heavy loads (e.g., 8080 profiles for industrial racks). Always check the joint's load rating—suppliers will list the maximum weight it can support in tension and shear. Using a light-duty joint in a heavy-duty application is a recipe for bent profiles and wobbly workbenches.
2. Don't Over-Tighten the Screws
This is the most common mistake we see. It's tempting to crank down on the hex key until the joint feels "super tight," but aluminum is a softer metal than steel—over-tightening can strip the threads in the joint or deform the profile's T-slot. A good rule of thumb: tighten until you feel resistance, then give it a quarter-turn more. If the screw starts to spin without getting tighter, you've stripped the threads—time to replace the joint.
3. Keep Joints Clean and Lubricated
Dust, oil, and metal shavings can build up in the threads of internal joints, making them hard to tighten or loosen. After assembly, wipe down the joints with a dry cloth to remove debris. If you're disassembling a joint that hasn't been moved in a while, apply a drop of penetrating oil to the threads and let it sit for 5 minutes before loosening—this will prevent seized screws.
4. Train Your Team on Proper Assembly
Even the best joints won't perform if your team doesn't know how to use them. Take 15 minutes to train new employees on joint installation: how to insert the joint into the profile, how tight to make the screws, and how to check for a secure connection. A quick demo can prevent hours of rework later.
5. Inspect Regularly
Workbenches take a beating—tools get dropped, parts get slammed down, and operators lean on them for support. Over time, this can loosen joints. Make it a weekly ritual to walk through the factory and check each workbench: wiggle the crossbeams, tug on the accessories, and tighten any loose screws. Catching a loose joint early prevents bigger issues like bent profiles or even workbench collapse.
The Future of Lean Workbench Construction
As manufacturing continues to evolve—toward Industry 4.0, smarter factories, and more customized production—internal straight aluminum joints and aluminum profiles are poised to play an even bigger role. We're already seeing innovations like joints with built-in RFID tags, which allow facilities to track which workbenches are in use, where they are on the floor, and when they were last reconfigured. Imagine a system that alerts you when a workbench's joints need tightening, or that automatically generates a parts list when you want to reconfigure 50 workbenches for a new product line. It's not science fiction—it's the next step in the lean journey.
We're also seeing advancements in joint materials. Some suppliers are experimenting with carbon fiber-reinforced aluminum joints, which are lighter and stronger than traditional alloys. Others are developing self-locking joints that use friction to maintain tightness over time, reducing the need for regular inspections. And as sustainability becomes a bigger priority, we'll likely see more joints made from recycled aluminum, without sacrificing strength or durability.
But even with all these advancements, the core appeal of internal straight aluminum joints will remain the same: they empower manufacturers to build workbenches that adapt to people, not the other way around. In a world where change is the only constant, that's a superpower.
Final Thoughts: Small Joints, Big Impact
At the end of the day, internal straight aluminum joints are a reminder that great things often come in small packages. They're not flashy—you'll never see them in a marketing video or a trade show booth—but they're the reason lean workbenches can do what they do: streamline workflow, reduce waste, and make operators' lives easier. They're the silent partners in the factories that build our cars, our phones, and our medical devices—making sure that every product is assembled with the efficiency and precision that modern manufacturing demands.
So the next time you walk into a factory and see those sleek aluminum workbenches, take a closer look. Underneath that smooth surface, inside those T-slots, there's an internal straight aluminum joint hard at work. And now, you'll know just how much thought, engineering, and lean philosophy went into making that simple connection possible. Whether you're building your first workbench or upgrading a whole factory, remember: the right joints don't just hold things together—they hold the key to a more efficient, more adaptable, and more human-centered manufacturing future.