- Company Articles
- Products and Technology
- Product knowledge
- Lean Pipe Clamps for Workbench E: Assembly & Stability Testing

Lean Pipe Clamps for Workbench E: Assembly & Stability Testing
Related Product
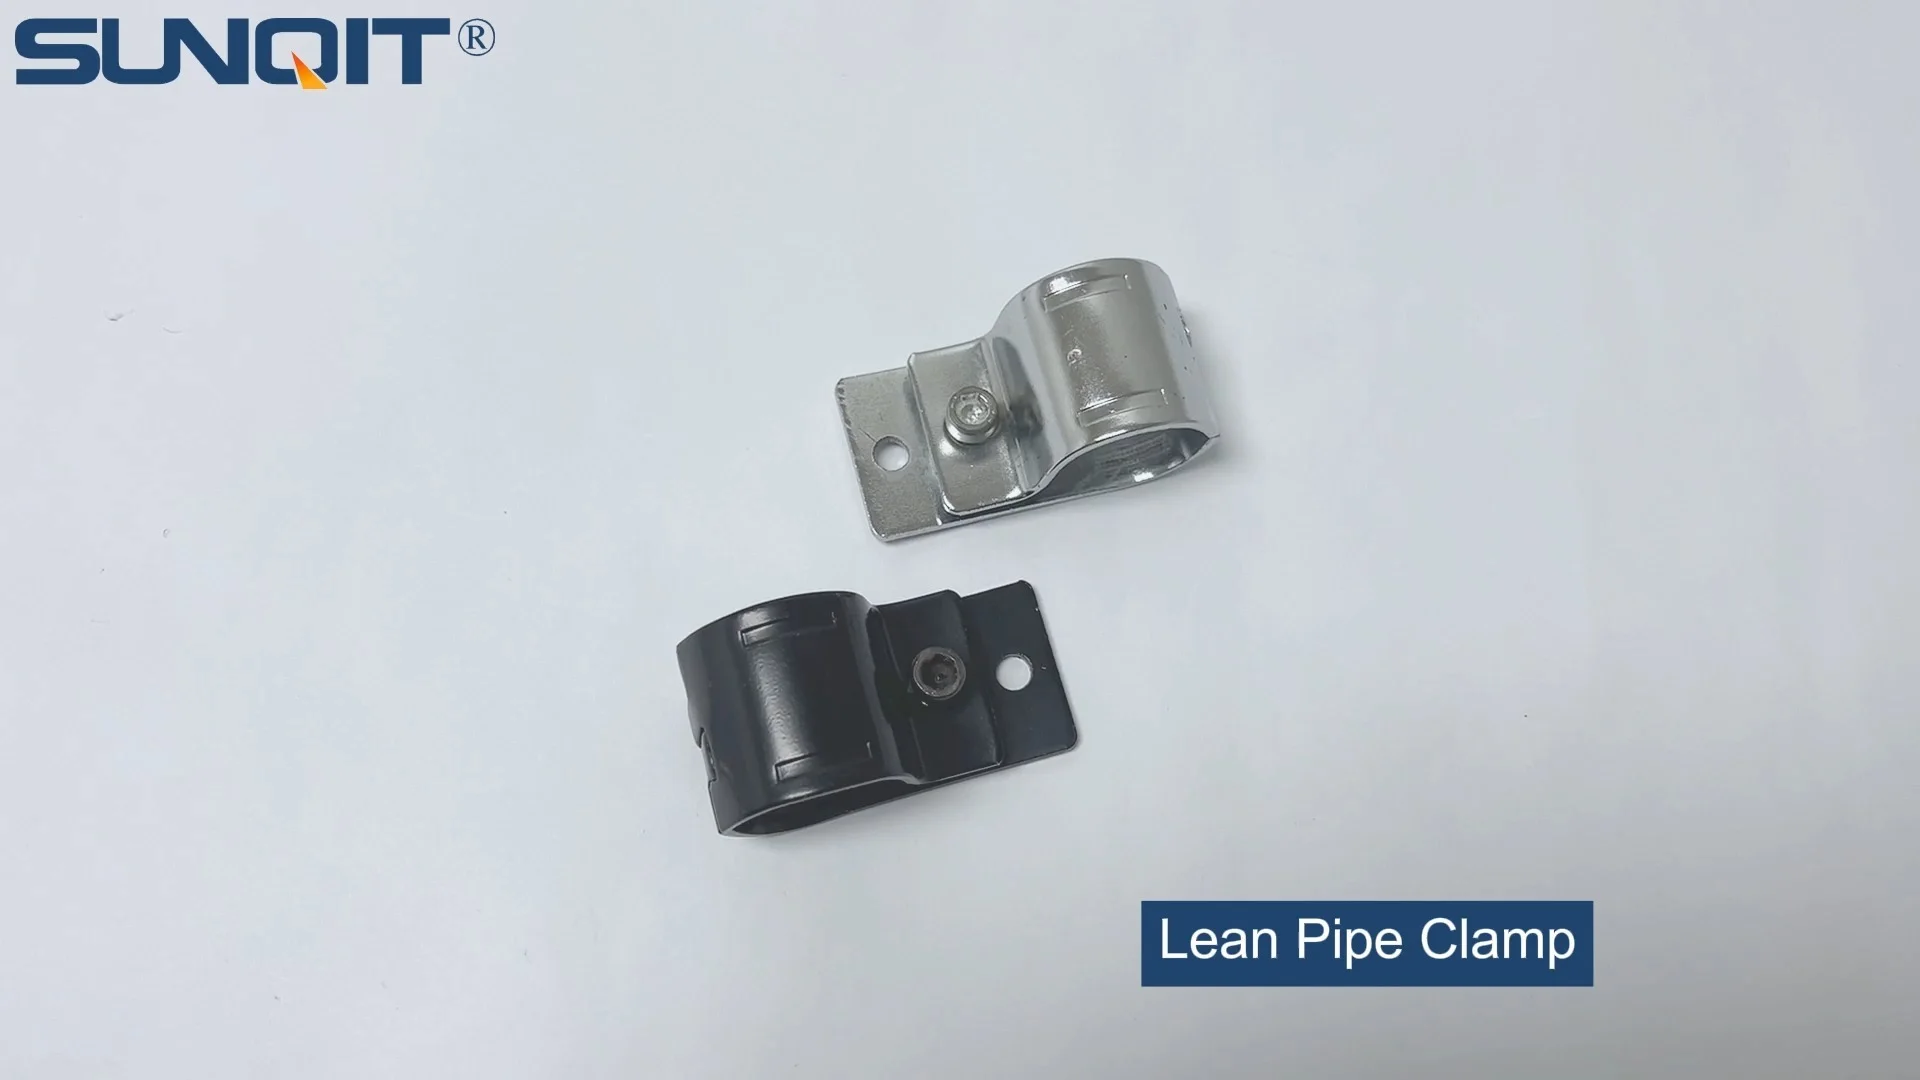
Lean Pipe Clamp
Lean pipe clamp is used for rack system hang monitor or other panel for workbenck, flowrack in production daily use.
Walk into any manufacturing facility, and you'll likely hear the hum of machinery, the clink of tools, and the steady rhythm of workers assembling products. But beneath that productivity lies a silent hero: the workbench. It's where precision meets purpose, where parts become products, and where every second counts. Yet, for many teams, a wobbly, unstable workbench isn't just an annoyance—it's a productivity killer, a safety risk, and a drain on morale. That's where Workbench E (single deck-without caster) comes in, designed to be the backbone of efficient assembly lines. But even the best workbench design falls flat without the right components holding it together. Enter the unsung champions: lean pipe clamps and lean pipe joints . In this article, we'll dive into how these small but mighty parts transform Workbench E from a flat pack of aluminum profiles into a rock-solid workstation, and why stability testing isn't just a step—it's the difference between smooth operations and costly disruptions.
What Makes Workbench E a Game-Changer for Assembly Lines?
Before we get into clamps and joints, let's talk about the star of the show: Workbench E (single deck-without caster). Unlike bulky, one-size-fits-all workbenches of the past, this model is built on lean principles—modular, adaptable, and designed to fit the unique needs of your workspace. Picture this: a single, sturdy deck (no casters, so it stays firmly planted) made from high-grade plywood or metal, supported by a frame of aluminum profiles and lean pipes. It's compact enough for tight production floors but robust enough to handle daily wear and tear, from heavy tool storage to constant part handling.
What sets Workbench E apart is its modularity. Need to add a shelf? Screw in an extra aluminum profile. Want to mount a tool holder? Attach it to the frame with a few clamps. But here's the catch: that modularity relies entirely on how well its components connect. The aluminum profiles form the skeleton, but it's the lean pipe clamps and joints that act as the ligaments, holding everything in place. Without them, the frame would wobble, the deck would sag, and the workbench would quickly become more of a liability than an asset.
The Role of Lean Pipe Clamps: Small Parts, Big Impact
If Workbench E's frame is the skeleton, then lean pipe clamps are the bolts that keep the bones from shifting. These unassuming components come in various shapes and sizes, but their core job is simple: secure lean pipes (or aluminum profiles) to each other or to the workbench deck. Think of them as the glue of the lean system—without the right type, in the right place, the whole structure falls apart.
Take, for example, the parallel lean pipe clamp. Its U-shaped design wraps around two parallel pipes, tightening with a screw to create a rigid connection. Or the 90° lean pipe joint clamp, which secures pipes at right angles (perfect for the corners of Workbench E's frame). Each clamp is engineered to distribute pressure evenly, preventing the pipes from warping or slipping over time. And because they're made from durable materials like galvanized steel or aluminum, they stand up to rust, corrosion, and the constant vibrations of a busy factory floor.
But not all clamps are created equal. Cheap, generic clamps might save you a few dollars upfront, but they'll cost you in the long run. Imagine a clamp with a weak screw that strips after a month of use, causing the frame to loosen. Suddenly, your workers are stopping mid-assembly to tighten it, or worse, the deck shifts, damaging a batch of parts. Quality lean pipe clamps, on the other hand, are designed for repeat use—they'll hold tight through thousands of hours of operation, and when you need to reconfigure the workbench (because lean manufacturing is all about adaptability), they'll loosen and re-tighten without losing their grip.
Choosing the Right Clamp for Workbench E
Not every lean pipe clamp is a fit for Workbench E. To ensure a stable build, you need to match the clamp to the pipe size, material, and application. Here's a quick breakdown of the most common types and when to use them:
| Clamp Type | Best For | Compatible Pipe Sizes | Key Benefit |
|---|---|---|---|
| Parallel Lean Pipe Clamp | Securing horizontal/vertical parallel pipes (e.g., side rails of the frame) | 28mm, 30mm lean pipes; 40x40mm aluminum profiles | Even pressure distribution prevents pipe bending |
| 90° Lean Pipe Joint Clamp | Corner connections (e.g., vertical legs to horizontal rails) | 28mm, 30mm lean pipes; 30x30mm, 40x40mm aluminum profiles | Creates rigid right angles without welding |
| Single-Side Pipe Clamp | Attaching accessories (e.g., tool hooks, shelf brackets) to the frame | 28mm, 30mm lean pipes | Easy to install/remove for quick reconfiguration |
| Heavy-Duty Flange Clamp | Supporting the deck (connecting the frame to the work surface) | 40x40mm, 40x80mm aluminum profiles | High weight capacity (up to 500kg) for heavy tools |
Pro tip: Always check the clamp's load rating before installation. Workbench E's deck alone can hold up to 300kg, but if your clamps are rated for only 100kg, you're asking for trouble. It's like using a rubber band to hold a brick—eventually, it'll snap.

Step-by-Step Assembly: Building Workbench E the Right Way
Now that we understand the importance of clamps and joints, let's walk through assembling Workbench E. I'll guide you through each step, with a focus on how lean pipe clamps ensure stability from start to finish. (Note: This guide assumes you have all components unboxed and laid out: aluminum profiles, lean pipes, clamps, joints, deck, and basic tools like a hex key and torque wrench.)
Step 1: Prep the Workspace and Components
Start by clearing a flat area—preferably the spot where the workbench will live (no need to move a fully assembled frame later!). Lay out all aluminum profiles and lean pipes, checking for dents or bends (a warped profile will throw off the entire frame). Next, sort your clamps and joints by type—you don't want to fumble for a 90° joint when you need a parallel clamp. Pro move: Use a magnetic tray to keep small screws and hex keys organized.
Step 2: Build the Frame (The "Skeleton")
The frame is the foundation, so take your time here. Start with the vertical legs: cut four aluminum profiles to your desired height (standard is 800mm, but adjust for worker comfort). Then, attach horizontal rails to the top and bottom of the legs using 90° lean pipe joint clamps. Here's the key: hand-tighten the clamps first, then use a torque wrench to tighten them to the manufacturer's specs (usually 25-30 Nm). Overtightening can strip the threads; undertightening leaves room for wobble. Think of it like tightening a jar lid—snug, but not so tight you need a tool to open it later.
Once the rectangle (top rails) and square (bottom rails) are formed, add diagonal braces (using parallel clamps) for extra stability. These braces prevent the frame from "racking" (twisting sideways) when weight is applied. Without them, pushing on the workbench would feel like pushing a cardhouse—easy to topple.
Step 3: Secure the Deck (The "Muscle")
With the frame upright, it's time to add the deck. Lay the deck (plywood or metal) on top of the frame, centering it so there's equal overhang on all sides. Then, attach it using heavy-duty flange clamps—one every 30cm along the rails. Again, torque matters: 25 Nm ensures the deck won't shift, even when someone leans on it or drops a tool.
Pro tip: Before fully tightening, use a level to check that the deck is flat. A sloped deck means parts will roll off, and tools will slide—frustrating for workers and dangerous for delicate components.
Step 4: Add Accessories (The "Nerves")
Now for the fun part: customizing! Want a tool rail? Attach a lean pipe to the back of the frame with single-side clamps. Need a parts bin holder? Screw a bracket to the side rails using parallel clamps. The beauty of Workbench E is that you can add or remove these accessories later—no welding, no drilling, just a few clamps and a hex key.

Stability Testing: How to Ensure Your Workbench Stays Rock-Solid
You've assembled the frame, secured the deck, and added accessories—now what? It's time to put Workbench E through its paces with stability testing. This isn't just a "check the box" step; it's how you ensure the workbench can handle the chaos of daily use. Let's break down the key tests every team should perform.
Test 1: Static Load Testing (Can It Hold the Weight?)
Static load testing checks if the workbench can support its maximum rated weight without sagging or bending. Here's how to do it:
- Place sandbags or weighted boxes on the deck, evenly distributed (mimicking tools, parts, and equipment).
- Start at 50% of the rated load (150kg for Workbench E), then increase to 100% (300kg), and finally 125% (375kg) for a safety buffer.
- Let the weight sit for 24 hours (materials like aluminum and wood can "creep" under constant load, causing slow deformation).
-
After 24 hours, remove the weight and check for:
- Sagging deck (use a level to compare before/after)
- Loose clamps (tighten any that have shifted)
- Bent aluminum profiles (if a profile is bowed, replace it—don't try to bend it back)
Pass criteria: No visible deformation, clamps remain tight, deck stays level.
Test 2: Dynamic Load Testing (Can It Handle Movement?)
Static load is important, but workbenches aren't just for sitting still—they're for action. Dynamic load testing simulates the daily movement of parts, tools, and workers. Here's the drill:
- Place a 20kg weight on a trolley and roll it across the deck 100 times (mimicking pushing parts back and forth).
- drop a 5kg tool (like a wrench) from 30cm onto the deck (simulating accidental drops—yes, it happens).
- Push/pull the workbench from all sides with 50N of force (about the strength of a gentle shove).
Pass criteria: No clamps loosen, no creaking or shifting, deck remains intact (no cracks or splits).
Test 3: Vibration Testing (Will It Loosen Over Time?)
Fact: Manufacturing floors are noisy, and all that vibration can loosen even the tightest clamps. To test for this, use a vibration meter (available for rent or purchase) and clamp it to the frame. Run the meter for 8 hours (a typical shift) while nearby machinery is operating. Afterward, check each clamp with a torque wrench—they should still read 25-30 Nm. If any have dropped below 20 Nm, they'll loosen further over time—replace the clamp or add thread-locking fluid to keep it tight.
Real-World Case Study: How Clamps Saved a Production Line
Let's hear from a team that learned the hard way about the importance of quality clamps and stability testing. Acme Manufacturing, a small electronics assembly plant in Ohio, installed 10 Workbench E units in 2023. Eager to cut costs, they opted for generic, off-brand lean pipe clamps instead of the recommended ones. The result? Disaster.
"Within the first week, the workbenches were wobbling so bad, our workers were complaining about headaches from the constant shaking," says Maria Gonzalez, Acme's production supervisor. "We had to stop the line twice a day to tighten clamps, and once, a circuit board fell off a bench and shattered. We were losing $500 a day in downtime and scrap."
After three weeks of frustration, Maria's team replaced the generic clamps with high-quality lean pipe clamps and re-ran stability tests. "It was night and day," she recalls. "The workbenches didn't budge, even when we did the dynamic load test. We haven't had to tighten a single clamp since, and our scrap rate dropped by 40%. The clamps cost more upfront, but they paid for themselves in a month."
"I used to think clamps were just… clamps. Now I know they're the difference between a team that's stressed and a team that's productive. We'll never skimp on them again." — Juan Ruiz, Acme assembly line worker

Common Mistakes to Avoid (And How to Fix Them)
Even with the best intentions, assembly errors happen. Here are the most common mistakes we've seen, and how to steer clear of them:
Mistake #1: Using Mismatched Clamp Sizes
Problem: Trying to fit a 28mm clamp on a 30mm pipe. The clamp will never fully tighten, leaving gaps that cause wobble. Solution: Always check pipe diameter before buying clamps. Most lean pipes are 28mm or 30mm; aluminum profiles are 20x20mm, 30x30mm, or 40x40mm. Match the clamp to the pipe, not the other way around.
Mistake #2: Overtightening Clamps
Problem: Cranking the clamp screw until it strips, or bending the pipe. Solution: Use a torque wrench set to the manufacturer's specs (25-30 Nm for most Workbench E clamps). If you hear a "creak" or see the pipe dent, you've gone too far.
Mistake #3: Ignoring Joint Compatibility
Problem: Mixing lean pipe joints with aluminum profile clamps (they're not always interchangeable). Solution: Read the product specs! A joint designed for lean pipes may not fit into an aluminum profile's T-slot, leading to weak connections.
Mistake #4: Skipping Pre-Assembly Checks
Problem: Assembling the frame without checking if all parts are straight or undamaged. Solution: Lay out all aluminum profiles on a flat surface and roll them—if they wobble, they're bent. replace any warped parts before starting.
Why Investing in Quality Clamps Pays Off (Literally)
At this point, you might be thinking: "Quality clamps cost more—can't we just use the cheap ones and replace them later?" Let's do the math. A pack of 10 generic clamps costs $20; the recommended ones cost $50. Sounds like a no-brainer, right? But factor in:
- Downtime: Acme lost $500/day with cheap clamps. Even if your team only stops for 30 minutes a week, that's $200/week in lost productivity ($10,400/year for 10 workbenches).
- Scrap: A single damaged part can cost $50-$200. If cheap clamps cause just one part to break per month, that's $600-$2,400/year.
- Replacement costs: Generic clamps need replacing every 3 months; quality ones last 3+ years. Over 3 years, you'll spend $240 on generics ($20/pack x 12 replacements) vs. $50 on quality clamps—a $190 savings.
Add it all up: $10,400 (downtime) + $2,400 (scrap) + $240 (replacements) = $13,040/year with cheap clamps. With quality clamps: $0 (downtime) + $0 (scrap) + $50 (replacements) = $50/year. The "expensive" clamps save you over $13,000 in a single year. That's not just an investment—that's a no-brainer.
Conclusion: Clamps, Stability, and the Lean Dream
Workbench E (single deck-without caster) is more than just a table—it's a tool for efficiency, a foundation for productivity, and a reflection of how much you value your team's work. But without the right lean pipe clamps and joints, it's just a pile of aluminum profiles and wood. These small components are the unsung heroes that turn a modular design into a rock-solid workstation, ensuring that every part, tool, and worker stays safe and productive.
Stability testing isn't optional, either. It's the final check that ensures your workbench can handle the chaos of daily use, from the early-morning rush to the end-of-shift cleanup. By investing in quality clamps, following assembly best practices, and never skipping that 24-hour load test, you're not just building a workbench—you're building a lean, efficient, and resilient production line.
So the next time you look at a workbench, take a moment to appreciate the clamps holding it together. They may be small, but they're the reason your team can focus on what matters: building great products, one stable workstation at a time.