- Company Articles
- Products and Technology
- Installation And Maintenance
- Lean Pipe Clamps Maintenance: Cleaning & Lubrication Tips

Lean Pipe Clamps Maintenance: Cleaning & Lubrication Tips
Related Product
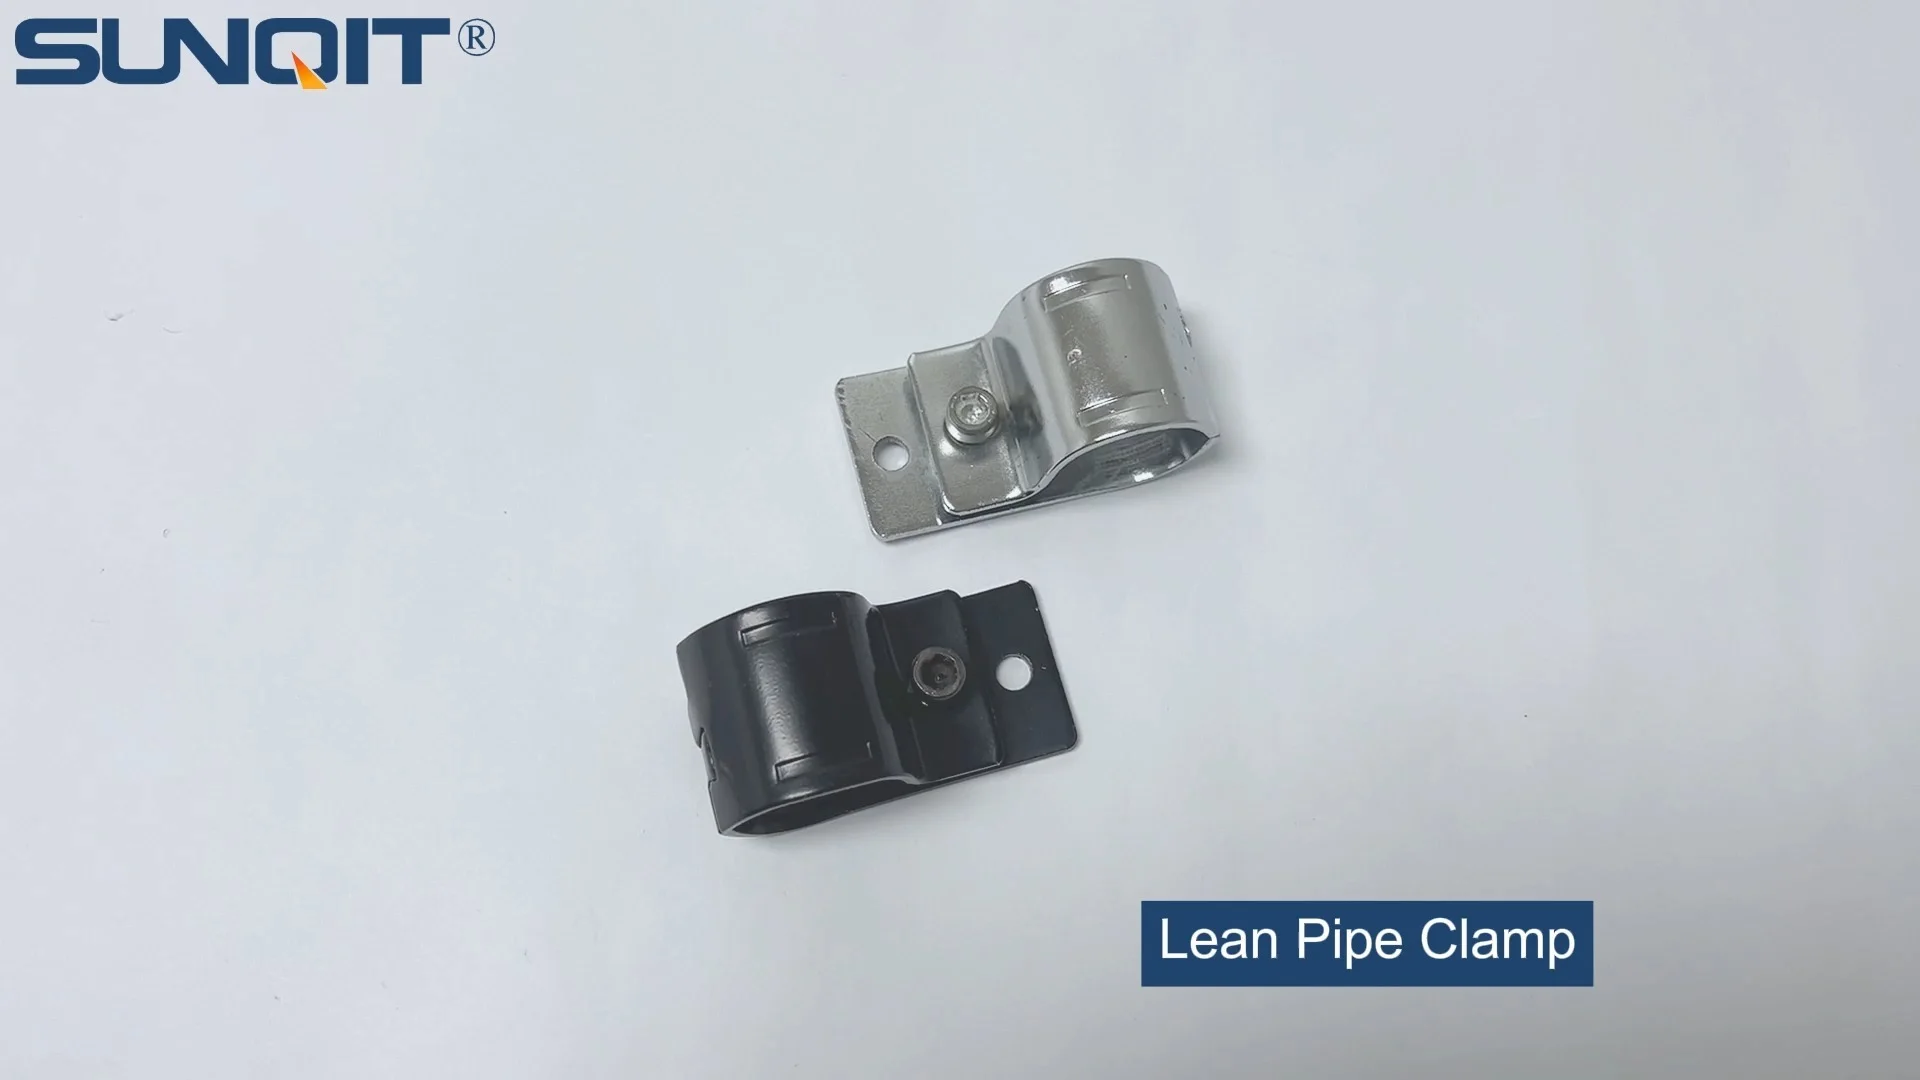
Lean Pipe Clamp
Lean pipe clamp is used for rack system hang monitor or other panel for workbenck, flowrack in production daily use.
Introduction: The Unsung Heroes of Your Lean System
Walk through any well-organized production floor, and you'll notice the backbone of efficiency: sturdy workbenches, smooth-flowing roller tracks, and nimble turnover trolleys. What holds these structures together? Often, it's the small, unassuming components like lean pipe clamps and lean pipe joints. These little pieces are the quiet workhorses of your lean system, ensuring everything from material racks to assembly stations stays stable, functional, and aligned with your operational goals. But here's the thing: even the most durable clamps can't last forever without a little TLC. In this guide, we're diving deep into how to keep your lean pipe clamps in top shape through proper cleaning and lubrication—because when these small parts fail, the ripple effects can disrupt your entire workflow, slow down production, and even compromise safety.
Why Lean Pipe Clamps Maintenance Matters More Than You Think
Let's start with the basics: Why bother with regular maintenance for something as "simple" as a clamp? The answer lies in the role these components play in your lean system. A lean system thrives on efficiency—minimizing waste, reducing downtime, and keeping operations running like a well-oiled machine. When a lean pipe clamp loosens or corrodes, it's not just a minor inconvenience. A wobbly workbench might cause tools to slip, leading to damaged parts or even employee injuries. A stuck roller track, held together by a seized clamp, could bring a material flow to a grinding halt, delaying deadlines and costing your team valuable time.
Then there's the financial angle. Replacing a worn clamp might seem cheap, but multiply that by dozens of clamps across your facility, and the costs add up. Regular maintenance extends the lifespan of your clamps, saving you from frequent replacements. Plus, when your equipment stays in shape, you avoid the hidden costs of downtime—like missed production targets or rushed overtime to catch up. In short, taking 10 minutes to clean and lubricate a clamp today can save you hours of headaches (and hundreds of dollars) tomorrow.

Understanding Your Lean Pipe Clamps: What You're Working With
Before grabbing a wrench or a bottle of cleaner, it helps to know what kind of clamps you're dealing with. Lean pipe clamps come in various materials and designs, each with its own maintenance needs. The most common types include steel clamps (often coated in PE for rust resistance), stainless steel clamps (great for humid or cleanroom environments), and aluminum lean pipe clamps (lightweight and corrosion-resistant, ideal for industries like food processing or electronics). Each of these materials reacts differently to cleaning agents and lubricants, so identifying yours is step one.
Clamps are typically paired with lean pipe joints to connect pipes, forming structures like workbenches, material racks, or roller tracks. These joints often have moving parts—like swivel mechanisms or threaded bolts—that rely on clean, lubricated surfaces to function smoothly. For example, a 90° crossing lean pipe joint might have a pivot point that, if gunked up with dust and debris, becomes stiff or stuck. That stiffness can throw off the alignment of your entire structure, making it harder to load materials or adjust workflows.

Step-by-Step Cleaning: Getting Rid of Gunk and Grime
1. Gather Your Tools (and Protect Yourself)
Cleaning lean pipe clamps doesn't require fancy equipment, but having the right tools on hand will make the job faster and safer. Here's what you'll need: a soft-bristled brush (to sweep away loose debris), microfiber cloths (for wiping surfaces without scratching), a bucket of warm water mixed with mild dish soap (avoid harsh chemicals like bleach or ammonia—they can damage coatings), and a small toothbrush or cotton swabs (for getting into tight crevices, like the threads of a lean pipe joint). If your clamps are in a greasy area (like near a conveyor with lubricated parts), you might also want a degreaser specifically designed for metal surfaces—just test it on a small, hidden area first to ensure it doesn't strip the coating.
Don't forget safety gear! Even simple cleaning can involve sharp edges or slippery surfaces. Wear gloves to protect your hands from grime or rough clamp edges, and safety glasses if you're working near overhead structures where debris might fall.
2. Start with Dry Cleaning
Before introducing water, always start by removing loose dirt, dust, and debris. Use the soft-bristled brush to gently sweep the surface of the clamp and joint. Pay extra attention to crevices where dust loves to hide—like between the clamp and the pipe, or around the bolts of a lean pipe joint. If you're cleaning a clamp on a workbench or roller track, take a moment to clear the area around it too; a quick sweep of the surrounding surface will prevent debris from falling back onto the clamp once you've cleaned it.
3. Wet Cleaning (When Needed)
For clamps that are visibly dirty, greasy, or stained, move on to wet cleaning. Dip the microfiber cloth into the soapy water, wring it out well (you don't want excess water pooling on metal surfaces), and gently wipe the clamp and joint. Use the toothbrush or cotton swab to scrub any stubborn spots—like dried oil or food residue (common in packaging facilities). If you're using a degreaser, apply a small amount to the cloth (not directly onto the clamp) and wipe the greasy areas, then follow up with a clean, damp cloth to remove any residue.
A quick note: Avoid soaking clamps in water, especially if they're made of steel (even PE-coated steel). Prolonged exposure to moisture can lead to rust, which weakens the clamp over time. For stainless steel or aluminum clamps, water is less of a risk, but it's still best to keep soaking to a minimum.
4. Dry Thoroughly and Inspect
After cleaning, dry the clamp and joint immediately with a clean, dry microfiber cloth. Make sure to get into all those tight spots—moisture trapped in threads or crevices is a recipe for corrosion. Once dry, take a close look at the clamp. Are there any cracks in the metal or coating? Are the threads on the bolts worn or stripped? Is the joint moving smoothly, or does it feel stiff even after cleaning? If you notice any damage, it's better to replace the clamp now than wait for it to fail during production.

Lubrication: Keeping the "Lean" in Your Lean System
Cleaning removes the gunk, but lubrication ensures your clamps and joints keep moving smoothly. Think of it like oiling a door hinge—without it, the movement becomes stiff, noisy, and eventually, the part wears out. For lean pipe clamps and joints, the goal is to apply just enough lubricant to reduce friction without attracting more dust and debris.
1. Choose the Right Lubricant
Not all lubricants are created equal. For lean pipe clamps and joints, the best options are silicone-based lubricants or lithium grease. Silicone lubricants are great for metal-on-metal or metal-on-plastic surfaces (like the plastic roller track guide rails often used with roller tracks); they're water-resistant, won't damage coatings, and don't attract as much dust as oil-based lubricants. Lithium grease is thicker and better for heavy-duty applications—like clamps holding up a loaded material rack or a high-use roller track. Avoid using WD-40 as a long-term lubricant; while it's good for loosening stuck parts, it's not designed to stay in place and will dry out quickly, leaving your clamps unprotected.
2. Apply Sparingly (Less Is More)
When it comes to lubrication, more isn't better. Excess lubricant will drip onto surfaces, attract dirt, and create a messy, sticky buildup. Instead, apply a tiny amount—about the size of a pea—to the moving parts of the clamp or joint. For example, if you're lubricating a swivel lean pipe joint, put a drop of lubricant on the pivot point, then rotate the joint back and forth a few times to spread it evenly. For threaded bolts, apply a small amount to the threads before tightening—this makes future adjustments easier and prevents seizing.
After applying, wipe away any excess with a clean cloth. This step is crucial! A clean, lightly lubricated surface will function better and stay cleaner longer than one caked in grease.
3. Know When to Lubricate
How often should you lubricate your clamps? It depends on how much they're used. High-traffic areas—like the roller track on a busy assembly line or the clamps on a workbench that's adjusted daily—need monthly lubrication. Low-use areas, like a storage rack that's rarely moved, can go 3–6 months between applications. A good rule of thumb: if a joint feels stiff when you try to move it, or if you hear squeaking, it's time to lubricate.
Creating a Maintenance Routine: The Checklist You'll Actually Use
The key to keeping your lean pipe clamps in shape is consistency. Waiting until a clamp fails is a reactive approach—and in lean systems, reactivity equals waste. Instead, build a simple maintenance routine that your team can follow. To make it easy, we've created a checklist you can print and post near your workstations or include in your standard operating procedures (SOPs).
| Maintenance Task | Frequency | Tools Needed | Key Notes |
|---|---|---|---|
| Dry brush debris from clamps/joints | Weekly | Soft-bristled brush, microfiber cloth | Focus on high-dust areas (near fans, open windows) |
| Wet clean with mild soap | Monthly (or as needed for greasy/dirty clamps) | Warm soapy water, microfiber cloth, toothbrush | Avoid soaking; dry immediately after |
| Lubricate moving parts | Monthly (high-use areas); 3–6 months (low-use) | Silicone lubricant or lithium grease, cloth | Apply sparingly; wipe excess |
| Inspect for damage (cracks, wear, looseness) | During cleaning/lubrication | Flashlight (for tight spots) | replace immediately if cracks or stripped threads are found |
| Tighten loose bolts/nuts | Bi-weekly | Adjustable wrench or screwdriver (as needed) | Don't over-tighten—this can strip threads |
Post this checklist near areas with the most clamps—like your main assembly workbench or roller track stations—and assign a team member to lead the maintenance. Even 15 minutes a week can make a huge difference in the longevity of your equipment.
Troubleshooting Common Clamp Issues (and How to Fix Them Fast)
Even with regular maintenance, you might run into issues. Here's how to spot and solve the most common problems:
Problem: Clamp is stuck or won't tighten
This is often caused by debris in the threads or a rusted bolt. Start by cleaning the threads with a cotton swab dipped in degreaser, then apply a few drops of penetrating oil (like PB Blaster) and let it sit for 10–15 minutes. Try tightening again—if it still won't budge, the threads might be stripped, and it's time to replace the clamp.
Problem: Clamp keeps loosening
If a clamp tightens but loosens again after use, check if the joint is under too much stress. Maybe the structure (like a workbench) is uneven, causing the clamp to shift. Adjust the structure for stability, then use a thread-locking compound (like Loctite) on the bolt threads to keep it in place. Avoid over-tightening, as this can warp the clamp.
Problem: Rust or corrosion
Rust is a sign that moisture isn't being cleaned up properly. For minor rust, scrub with a wire brush (gently, to avoid damaging the coating), then apply a rust converter. For severe rust (pitting or holes), replace the clamp—rust weakens the metal, making it unsafe to use. To prevent future rust, switch to stainless steel clamps or apply a thin coat of anti-rust spray after cleaning.
Long-Term Care: Investing in Durability
Beyond regular cleaning and lubrication, there are a few extra steps you can take to extend the life of your lean pipe clamps. First, consider the environment they're in. If your facility is humid (like a food processing plant) or has exposure to chemicals (like a manufacturing floor with coolants), upgrading to stainless steel or aluminum lean pipe clamps can prevent corrosion. Aluminum pipe accessories, for example, are naturally rust-resistant and lightweight, making them a great investment for long-term durability.
Second, train your team to handle equipment with care. Slamming a workbench drawer or overloading a material rack can put extra stress on clamps, causing them to loosen or bend. A quick 5-minute training session on proper load limits and handling can go a long way in preventing unnecessary wear.
Finally, keep spare clamps and lean pipe joints on hand. Even with the best maintenance, parts wear out. Having backups means you can replace a faulty clamp immediately, avoiding downtime while you wait for a new order. Store spares in a dry, labeled bin so they're easy to find when needed.
Conclusion: Small Clamps, Big Impact
Lean pipe clamps might be small, but their role in your lean system is huge. They're the glue that holds your workflows together, and taking care of them through regular cleaning and lubrication is one of the simplest, most cost-effective ways to keep your operations running smoothly. By following the steps in this guide—from gathering the right tools to creating a maintenance checklist—you'll extend the life of your clamps, reduce downtime, and keep your team safe. Remember: in lean manufacturing, every detail matters. And when it comes to lean pipe clamps, a little care today prevents a lot of chaos tomorrow.