- Company Articles
- Products and Technology
- Installation And Maintenance
- Lean Pipe Clamps Maintenance Schedule: How Often to Inspect?

Lean Pipe Clamps Maintenance Schedule: How Often to Inspect?
Related Product
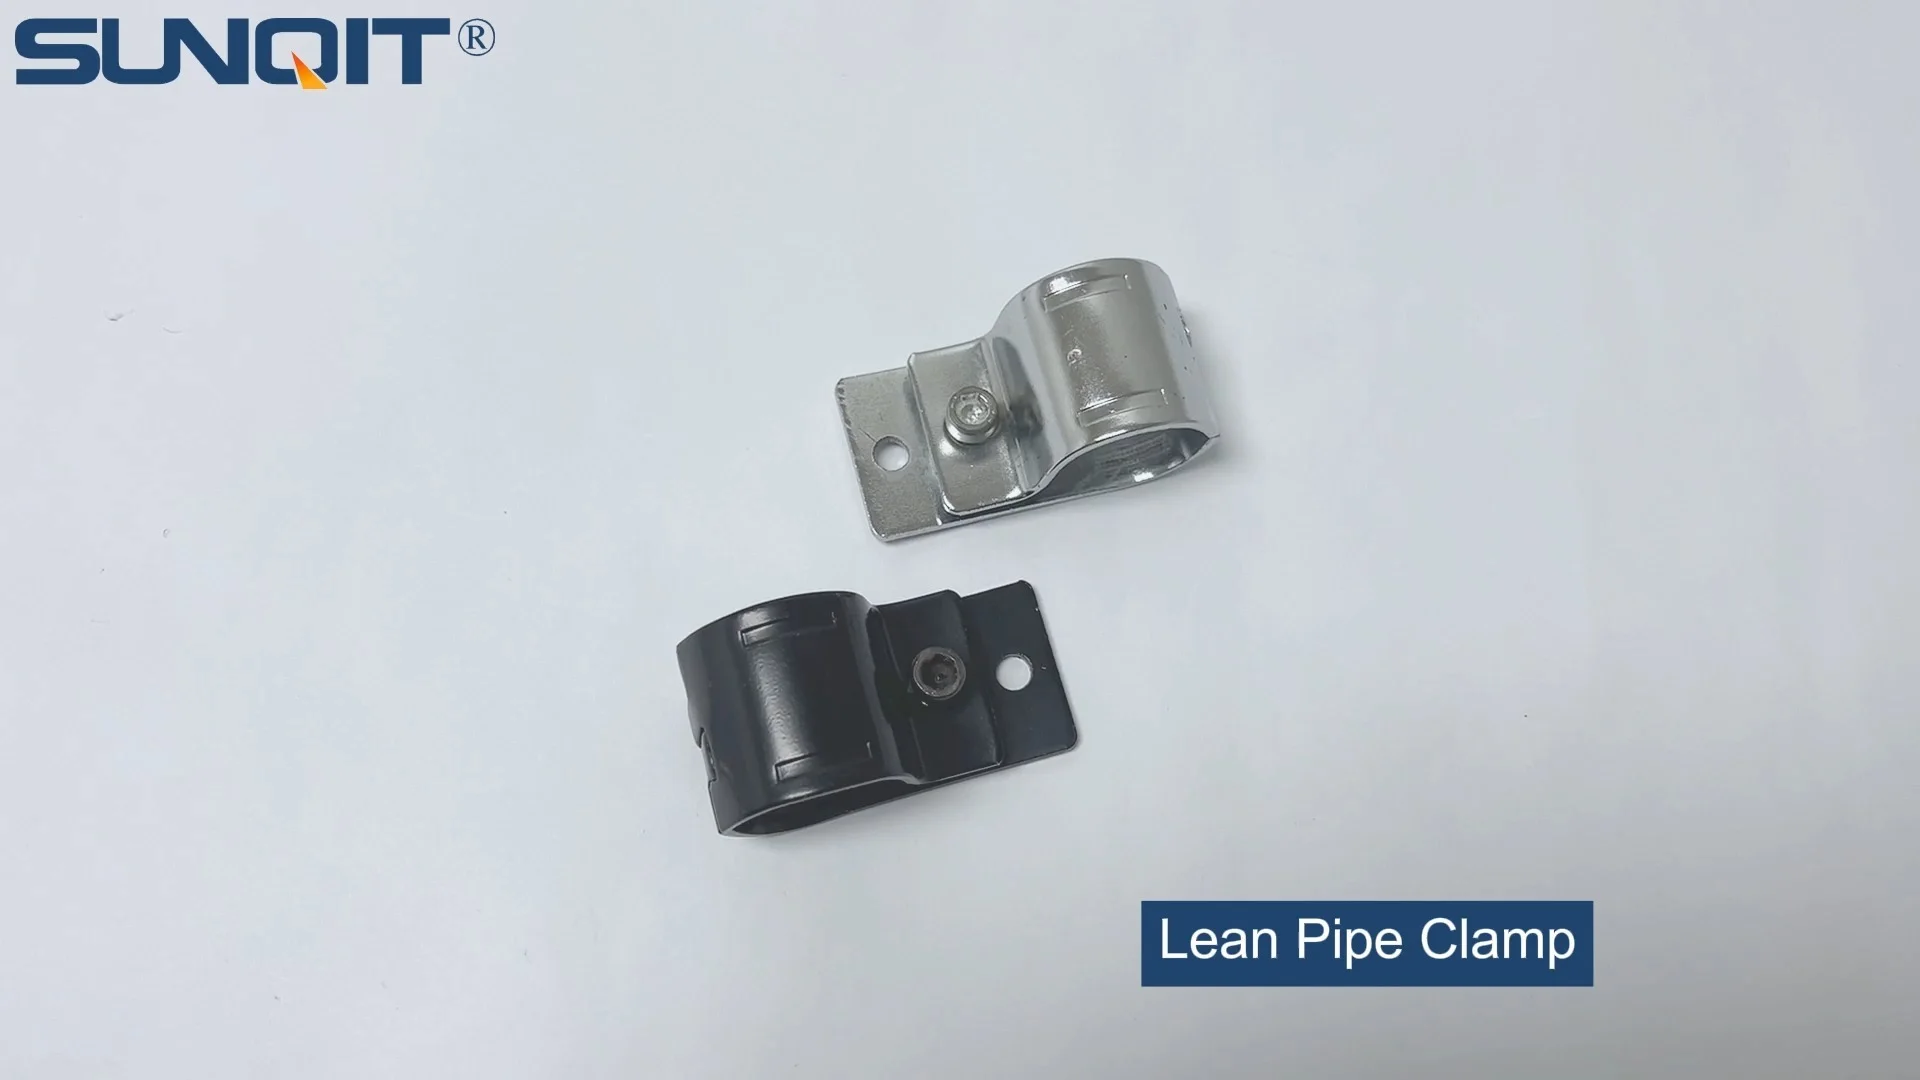
Lean Pipe Clamp
Lean pipe clamp is used for rack system hang monitor or other panel for workbenck, flowrack in production daily use.
Walk into any busy production facility, and you'll likely see them: workbenches hum with activity, roller tracks glide materials from station to station, and mobile carts zip between lines—all held together by a network of lean pipes and their unsung heroes: lean pipe clamps. These small, unassuming components might not grab attention, but they're the glue that keeps your lean system stable, efficient, and safe. Yet, how often do we really stop to check if those clamps are doing their job? If you're like most operations managers, the answer might be "not often enough." But here's the truth: neglecting lean pipe clamp maintenance isn't just a minor oversight—it's a ticking time bomb for downtime, inefficiency, and even workplace accidents. In this guide, we'll break down exactly how often to inspect your lean pipe clamps, what to look for, and how to keep your entire lean system—from clamps to joints to caster wheels—running like a well-oiled machine.
Why Lean Pipe Clamps Deserve Your Attention
Before we dive into schedules and checklists, let's talk about why lean pipe clamps matter. At first glance, they might seem like simple pieces of hardware: a metal band or bracket that holds two lean pipes together. But in reality, they're critical load-bearers. A single loose clamp on a workbench could cause the surface to wobble, throwing off precision assembly work. A failing clamp on a roller track might lead to jams, halting material flow and delaying production. And if a clamp securing a caster wheel gives way? That mobile cart could tip, risking damage to parts or injury to your team.
Lean systems are built on the principles of efficiency and waste reduction, but even the most well-designed system can't perform if its foundational components are compromised. Lean pipe clamps work hand-in-hand with lean pipe joints to distribute weight, maintain alignment, and ensure structural integrity. Over time, though, factors like constant vibration, heavy loads, temperature fluctuations, and even regular cleaning can take a toll. Bolts loosen, rubber gaskets wear, and metal weakens—all invisible to the untrained eye until something goes wrong.
Key Components to Inspect: Beyond Just the Clamp
Lean Pipe Clamps: The Backbone of Stability
Let's start with the star of the show: the lean pipe clamp. These come in various designs—from basic fixed clamps to adjustable models—and are typically made of steel, stainless steel, or coated metals to resist corrosion. Their job is to apply even pressure around the lean pipe, creating a tight bond with the pipe and the connecting joint. When inspecting clamps, you're looking for signs of wear that compromise this grip. Common issues include:
Loosening:
The most obvious red flag. If a clamp can be twisted by hand or if there's visible space between the clamp and the pipe, it's no longer holding securely. This often happens due to vibration from nearby machinery or repeated loading/unloading of the structure.
Corrosion:
Rust or pitting on metal clamps weakens their structural integrity. This is especially common in humid environments or areas where clamps are exposed to chemicals or moisture.
Deformation:
Bent or warped clamps (often caused by over-tightening during installation or impact from heavy objects) can't apply even pressure, leading to uneven stress on the joint.
Worn Gaskets or Liners:
Many clamps have rubber or plastic liners to prevent slipping and protect the lean pipe's coating. If these liners are cracked, missing, or hardened, the clamp is more likely to slide.
Lean Pipe Joints: The Connectors That Keep It All Together
You can't talk about clamps without mentioning their partners: lean pipe joints. These are the 3-way, 4-way, or multi-angle connectors that allow you to build custom structures like workbenches, racks, and carts. While joints themselves aren't clamps, they rely on clamps to stay fastened to the pipes. A loose clamp can cause a joint to rotate or shift, throwing off the entire structure's alignment. When inspecting joints, check for:
Play or Movement:
Grab the joint and gently wiggle it. If it moves independently of the pipes, the clamp is likely loose or the joint's internal mechanism (like a set screw) is worn.
Cracks or Chips:
Plastic or composite joints can develop cracks from impact, while metal joints might chip at the edges, reducing their grip.
Thread Damage:
Many joints use threaded bolts to secure clamps. Stripped threads mean the bolt can't tighten properly, leaving the clamp loose.
Caster Wheels: Mobility Depends on Secure Clamping
Mobile structures like carts and some workbenches use caster wheels to stay agile. But those caster wheels are mounted to the frame using—you guessed it—lean pipe clamps or brackets. A loose caster clamp is a disaster waiting to happen: a cart that veers off course, a wheel that locks up, or worst-case, a cart that tips over. When inspecting caster wheels, pay close attention to the clamps securing their mounts. Look for:
Wobble:
Lift the cart slightly and shake the wheel. If the entire caster assembly moves, the clamp holding it to the frame is loose.
Uneven Wear:
A caster wheel that's leaning (due to a misaligned clamp) will wear unevenly, with one side of the tread looking more worn than the other.
Rust on Mounting Hardware:
Caster clamps are often exposed to floor moisture or cleaning chemicals, making them prone to rust. Rust can seize bolts, making it impossible to tighten them properly.
Roller Tracks: Clamps Keep the Flow Smooth
Roller tracks are the arteries of your lean system, moving parts, bins, and assemblies between workstations. They rely on a series of rollers mounted to a frame—again, often secured with lean pipe clamps. A loose clamp here can cause a roller to misalign, leading to jams or materials getting stuck. When inspecting roller tracks, check the clamps holding the track to its support structure and the clamps securing individual rollers. Look for:
Roller Misalignment:
Rollers should be parallel and evenly spaced. If one is tilted or higher than the others, the clamp holding its axle might be loose.
Track Sagging:
A roller track that dips in the middle could mean the clamps attaching it to the support frame are failing under the weight of repeated use.
Excessive Noise:
While some noise is normal, a sudden increase in squeaking or grinding might indicate a loose clamp causing metal-on-metal friction.
Workbench Integrity: Clamps Ensure a Stable Surface
Workbenches are the workhorses of any production line, supporting tools, parts, and workers. Their frames are typically built from lean pipes, with the tabletop secured using clamps and brackets. A wobbly workbench isn't just annoying—it can ruin precision tasks like electronics assembly or quality inspection. When inspecting workbenches, focus on the clamps where the legs meet the frame, where cross-braces connect, and where the tabletop attaches. Look for:
Tabletop Movement:
Push down on opposite corners of the workbench. If the top shifts or creaks, the clamps securing it to the frame are loose.
Leg Stability:
Grab a leg and try to rock it side to side. No movement should occur if the clamps are tight.
Cross-Brace Tension:
Cross-braces add rigidity to the frame. If a brace is slack, the clamps holding its ends are likely loose.

How Often Should You Inspect? Finding Your Maintenance Rhythm
Now, the million-dollar question: How often do you need to inspect all these components? The answer depends on a few factors: how heavily your lean system is used, the environment it's in (e.g., dusty, humid, high-vibration), and the criticality of the structure (a workbench used for delicate assembly vs. a storage rack with light loads). Below is a general guideline, but remember: every facility is unique. You might need to adjust based on your specific conditions.
| Inspection Type | Frequency | Focus Areas | Who Should Perform |
|---|---|---|---|
| Daily Quick Checks | Once per shift (e.g., start of day) | Visible looseness, wobbling structures, caster wheel function | Operators using the equipment |
| Weekly Detailed Checks | Every 1-2 weeks | Lean pipe clamps, joints, caster mounts, roller track alignment | Line supervisors or maintenance techs |
| Monthly Deep Dives | Once per month | Torque testing clamps, checking for corrosion/wear, lubricating moving parts | Maintenance team |
| Quarterly System-Wide Audits | Every 3 months | Full structural integrity, load testing, replacement planning | Maintenance manager + cross-functional team |
| Annual Overhauls | Once per year | replace worn clamps/joints, upgrade components, review system design | Maintenance team + lean system supplier (if needed) |
Daily Quick Checks: The First Line of Defense
Daily checks are all about catching obvious issues before they escalate. These don't need to be time-consuming—in fact, they should take no more than 5-10 minutes per workstation or structure. The best people to perform these checks? The operators who use the equipment every day. They know what "normal" looks and feels like, so they'll notice when something is off.
For example, a worker at a lean pipe workbench might notice the surface wobbles when they lean on it—an immediate sign of loose clamps. A material handler using a roller track might spot a roller that's not spinning freely, indicating a clamp issue. The goal here is to flag problems early: operators can jot down notes or use a digital checklist (e.g., a tablet app) to report loose clamps, sticky wheels, or unusual noises. These reports then go to the maintenance team for follow-up.
Weekly Detailed Checks: Digging a Little Deeper
Once a week (or every two weeks for less heavily used equipment), it's time for a more thorough inspection by someone with a bit more training—like a line supervisor or maintenance technician. This isn't just about looking; it's about touching, testing, and tightening. For lean pipe clamps, this means physically checking each clamp for looseness. Use a wrench or screwdriver to give bolts a gentle "snug" (don't over-tighten—you could strip threads or warp the clamp). Pay extra attention to high-stress areas: the corners of workbenches, the joints where roller tracks meet, and the caster mounts on frequently moved carts.
During weekly checks, also inspect lean pipe joints for movement. Grab the joint and try to twist it—if it moves, the clamp is likely loose. For caster wheels, spin them by hand to ensure they rotate smoothly and check for wobble. On roller tracks, run a test bin along the track to feel for jams or uneven movement—this will quickly reveal misaligned rollers (and their underlying clamp issues).
Monthly Deep Dives: Preventive Maintenance
Monthly inspections are where preventive maintenance really kicks in. This is when you go beyond tightening and start looking for early signs of wear. For lean pipe clamps, check for corrosion, especially in areas near cleaning stations or moisture. Look at the rubber liners (if present)—are they cracked or brittle? If so, they need to be replaced, as they're no longer providing a secure grip. For metal clamps, inspect for bending or deformation—even a small warp can reduce clamping force.
This is also a good time to torque-test critical clamps. Using a torque wrench, verify that bolts are tightened to the manufacturer's specifications (you can usually find this in the lean pipe system manual). Over-tightening can stretch bolts, leading to premature failure, while under-tightening leaves clamps loose. For roller tracks, clean the rollers and apply a light lubricant (check the manufacturer's recommendations—some plastic rollers don't need lubrication). For caster wheels, remove any debris stuck in the bearings and ensure the brakes (if equipped) engage properly.
Quarterly System-Wide Audits: Big-Picture Assessment
Every three months, take a step back and look at the entire lean system. How are your clamps and joints holding up overall? Are there patterns—like clamps failing more often in a certain area of the facility? Maybe that zone has more vibration from nearby machinery, requiring more frequent checks. Or perhaps the humidity is higher, leading to faster corrosion—prompting a switch to stainless steel clamps in that area.
Quarterly audits should also include load testing. If a workbench is rated for 500 lbs, place a weighted pallet on it and check for sagging or shifting. For roller tracks, run a fully loaded bin through the system to ensure the clamps and joints can handle the stress. This is also a good time to document which components are showing wear so you can plan replacements before they fail. For example, if 10% of your lean pipe clamps have minor corrosion, order replacements now so you're not scrambling when they give out.
Annual Overhauls: Investing in Longevity
Even with meticulous maintenance, lean pipe clamps and joints have a lifespan. After a year of constant use, it's wise to replace heavily worn components—even if they're still "working." Think of it like changing the oil in your car: you don't wait for the engine to seize; you do it proactively. During annual overhauls, replace any clamps with significant corrosion, bent metal, or worn liners. Swap out lean pipe joints that have become loose despite repeated tightening. Upgrade caster wheels if they're showing uneven wear, and replace roller track rollers that no longer spin freely.
Annual overhauls are also an opportunity to review your lean system design. Maybe that workbench could benefit from additional cross-braces to reduce clamp stress, or those roller tracks could use reinforced clamps to handle heavier loads. By combining maintenance with design tweaks, you'll not only extend the life of your equipment but also boost efficiency for the year ahead.

Step-by-Step Inspection Process: A Practical Guide
Now that you know when to inspect, let's break down how to do it—step by step. We'll use a common scenario: inspecting a lean pipe workbench with caster wheels and an attached roller track. This covers multiple components, so you can apply the same principles to other structures.
Step 1: Prep the Area
Start by clearing the workbench surface and powering down any nearby machinery (to reduce vibration and noise). If the workbench has a roller track, remove any materials or bins from it. This gives you full access to all clamps, joints, and moving parts. Grab your tools: a set of wrenches (socket and open-end), a screwdriver (flathead and Phillips), a torque wrench (for monthly checks), a flashlight (to spot corrosion in tight spaces), and a notepad or digital checklist to record findings.
Step 2: Inspect the Workbench Frame
Begin with the workbench's main frame. Start at one corner and work your way around, checking each lean pipe clamp:
Visual Check:
Look for rust, cracks, or bent metal on the clamp itself. Check the rubber liner (if present) for cracks or missing pieces.
Manual Test:
Use your hand to try to twist the clamp—if it moves, it's loose. Use a wrench to snug the bolt; if it spins freely, the threads are stripped (mark for replacement).
Joint Inspection:
At each lean pipe joint, grab the connected pipes and try to pull them apart gently. No movement should occur. If the joint shifts, check the clamp securing it—tighten or replace as needed.
Step 3: Check the Workbench Surface
Next, focus on the tabletop. Push down firmly on each corner and the center to check for wobble. If it moves:
Inspect Mounting Clamps:
These are usually located under the tabletop, securing it to the frame. Tighten any loose clamps with a screwdriver or wrench.
Check for Warping:
If the tabletop itself is warped (common with wooden or particleboard surfaces), the clamps might be unevenly stressed. Adjust the clamps to distribute pressure evenly, or consider replacing the tabletop if warping is severe.
Step 4: Examine the Caster Wheels
Move to the caster wheels. Lift one side of the workbench slightly to take weight off the wheels, then:
Spin the Wheels:
They should rotate smoothly without grinding or squeaking. If they stick, check for debris in the bearings (clean with a brush) or loose clamps causing misalignment.
Check for Wobble:
Grab the wheel and shake it side to side. If the entire caster assembly moves, tighten the clamp securing it to the frame.
Inspect Tread Wear:
Look for uneven wear (e.g., one side of the tread is thinner than the other), which indicates a misaligned clamp or bent axle. replace the wheel if wear is significant.
Step 5: Evaluate the Roller Track
Finally, inspect the attached roller track:
Check Roller Alignment:
Look down the length of the track—rollers should be parallel and evenly spaced. If any are tilted, check the clamps securing their axles and adjust as needed.
Test Movement:
Place a test bin on the track and push it gently. It should glide smoothly without jamming. If it gets stuck, inspect the rollers and clamps in that area—one might be loose or misaligned.
Inspect Track Supports:
The roller track is mounted to the workbench frame with clamps. Check these clamps for looseness; tighten if needed to prevent sagging.
Step 6: Document and Follow Up
As you go, jot down notes: Which clamps were loose? Did any show corrosion? Were there any bent joints or wobbly casters? After the inspection, prioritize fixes: critical issues (e.g., a loose caster clamp that could cause tipping) should be addressed immediately. Minor issues (e.g., a slightly loose frame clamp) can be scheduled for the end of the shift. For monthly or quarterly checks, log your findings in a maintenance management system (MMS) to track trends over time—this helps you spot patterns, like clamps failing more often in a certain area.

Troubleshooting Common Issues
Even with regular inspections, problems can pop up. Here's how to troubleshoot some of the most common lean pipe clamp-related issues:
Issue: Workbench Wobbles Despite Tightened Clamps
Possible Cause:
The clamps are tight, but the lean pipe joint itself is worn. Over time, the internal mechanism of a joint (like a spring or set screw) can wear out, making it impossible to get a secure grip.
Solution:
replace the lean pipe joint. If multiple joints are worn, consider upgrading to a heavier-duty model (e.g., metal instead of plastic) if your load requirements allow.
Issue: Caster Wheel Locks Up When Rolling
Possible Cause:
The clamp securing the caster mount is loose, causing the axle to misalign. This puts pressure on the wheel bearings, leading to locking.
Solution:
Tighten the caster mount clamp. If the wheel still locks, check the bearings for debris or damage—clean or replace the wheel if needed.
Issue: Roller Track Jams Repeatedly
Possible Cause:
A roller is misaligned due to a loose clamp, or the roller's axle is bent.
Solution:
Tighten the clamp securing the roller axle. If the roller still doesn't spin freely, remove it and check for axle bending—replace the roller if bent. For persistent jams, inspect the track's support clamps; sagging can cause rollers to misalign.
Issue: Lean Pipe Clamp Keeps Loosening
Possible Cause:
Vibration from nearby machinery is shaking the bolt loose. Or, the bolt threads are stripped, so it can't hold tension.
Solution:
Use a thread-locking compound (like Loctite) on the bolt threads to prevent loosening from vibration. If threads are stripped, replace the bolt or the clamp itself.
Best Practices for Sustained Performance
Maintenance isn't just about inspections and repairs—it's about building habits that keep your lean system healthy long-term. Here are some best practices to integrate into your workflow:
Train Your Team
Your operators are your first line of defense. Train them to recognize the signs of loose clamps (wobbling, squeaking, jams) and empower them to report issues immediately. Hold a quick 10-minute training session on daily checks—show them how to spot a loose clamp or a wobbly caster wheel. The more eyes on the equipment, the faster problems get fixed.
Stock Spare Parts
There's nothing worse than a failed clamp and having to wait days for a replacement. Keep a small inventory of common parts: lean pipe clamps, bolts, lean pipe joints, caster wheels, and roller track rollers. Label them clearly so anyone can grab what they need quickly. This cuts downtime from hours (or days) to minutes.
Partner with a Reliable Supplier
Not all lean pipe clamps are created equal. Cheap, low-quality clamps might save money upfront, but they'll wear out faster and fail more often. Partner with a reputable lean pipe supplier who offers high-quality components—look for clamps made from corrosion-resistant materials, with reinforced bolts and durable liners. A good supplier can also help you choose the right components for your specific environment (e.g., stainless steel clamps for humid areas) and provide guidance on maintenance best practices.
Document Everything
Keep records of inspections, repairs, and replacements. Note which clamps were tightened, which joints were replaced, and how often issues occur. Over time, this data will help you predict maintenance needs (e.g., "Clamps on workbench #3 loosen every 2 weeks—maybe we need a heavier-duty joint here") and budget for replacements. Digital tools like CMMS (Computerized Maintenance Management Systems) make this easy—you can log inspections on a tablet and generate reports with a click.
Conclusion: Small Clamps, Big Impact
Lean pipe clamps might be small, but their role in your facility's efficiency and safety is enormous. By following a regular inspection schedule—daily quick checks, weekly tightening, monthly deep dives, quarterly audits, and annual overhauls—you can prevent downtime, reduce waste, and keep your team safe. Remember, maintenance isn't a chore; it's an investment in your lean system's performance. When your clamps are tight, your joints are secure, and your caster wheels roll smoothly, your entire operation runs better. So, the next time you walk past that workbench or roller track, take a second to check those clamps. Your bottom line (and your team) will thank you.