- Company Articles
- Products and Technology
- Installation And Maintenance
- Lean Pipe Fixed Clamp Maintenance: Tips to Extend Lifespan

Lean Pipe Fixed Clamp Maintenance: Tips to Extend Lifespan
Related Product
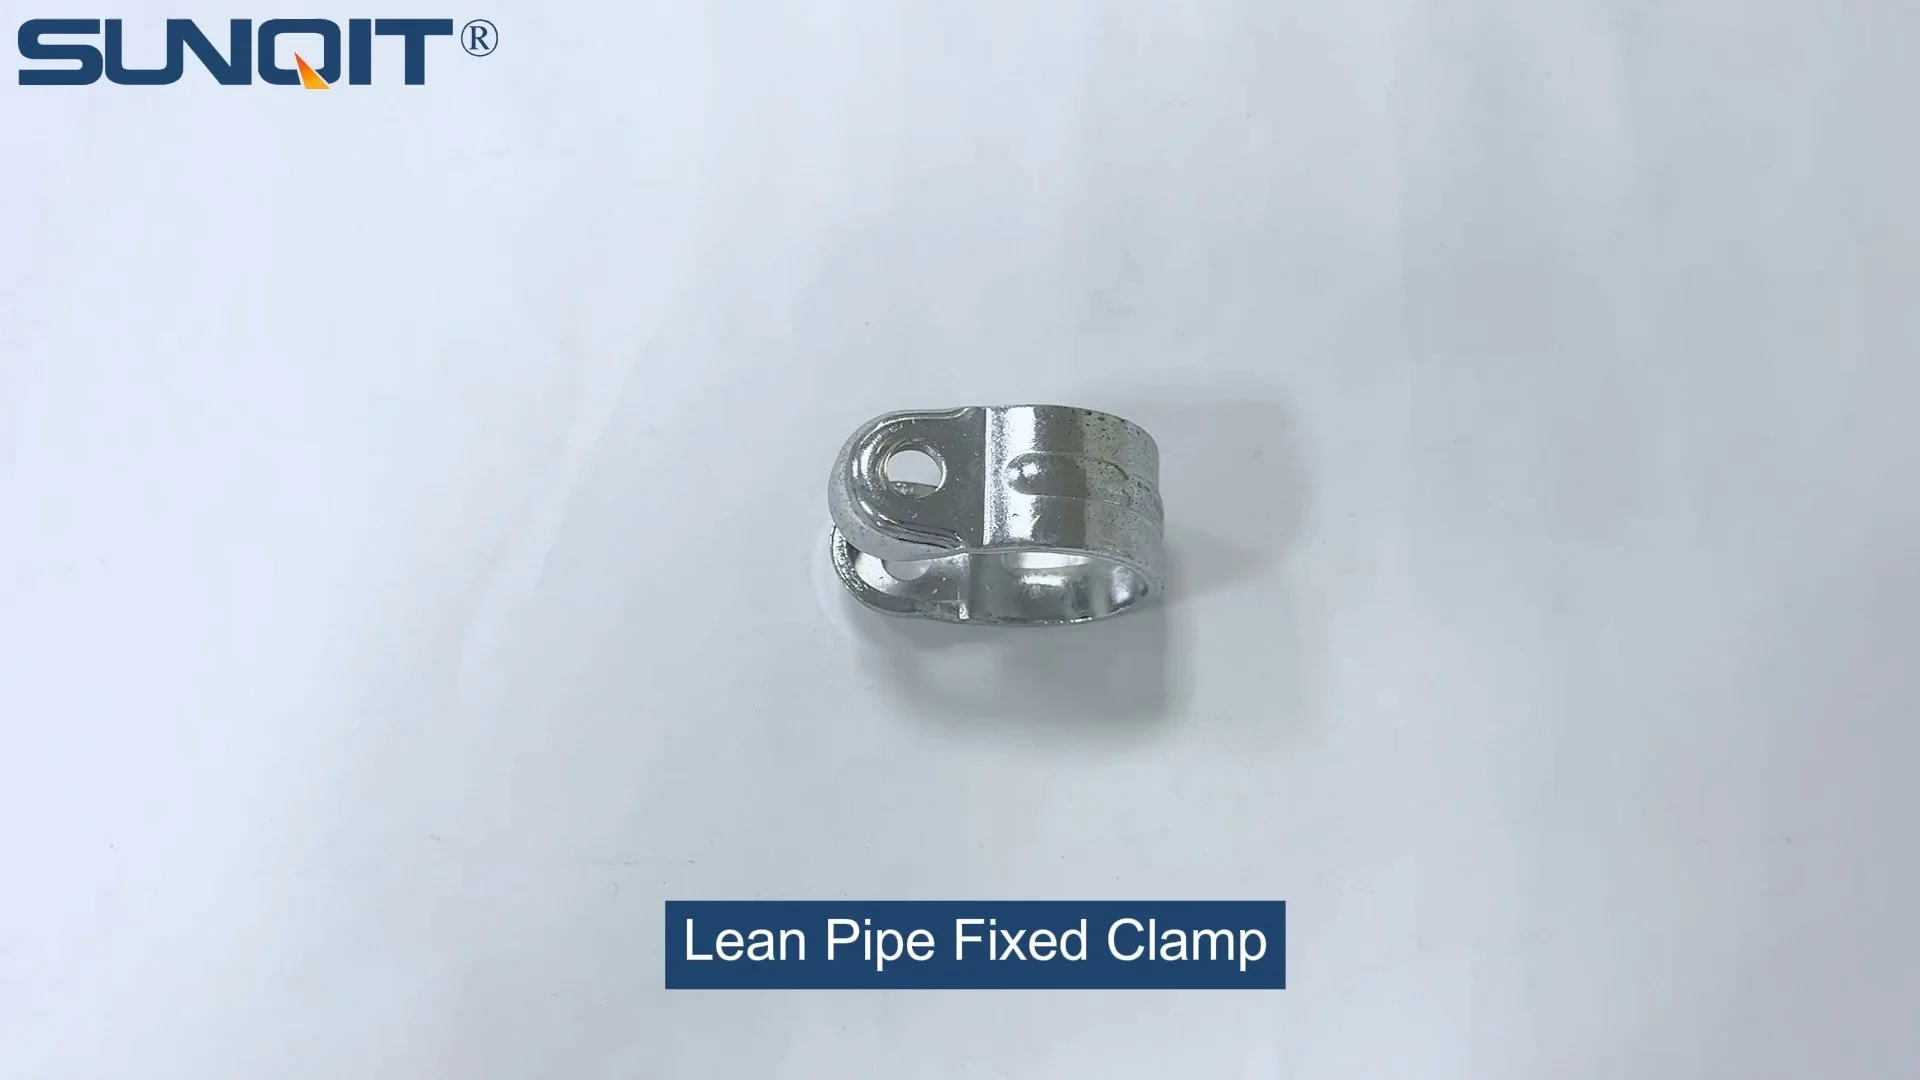
Lean Pipe Fixed Clamp
Lean pipe fixed clamp is used for pipe connector fixing the correct position during workbench flow rack hand trolley assemble work.
A Guide to Keeping Your Lean Systems Running Smoothly and Efficiently
Introduction: The Unsung Heroes of Lean Systems
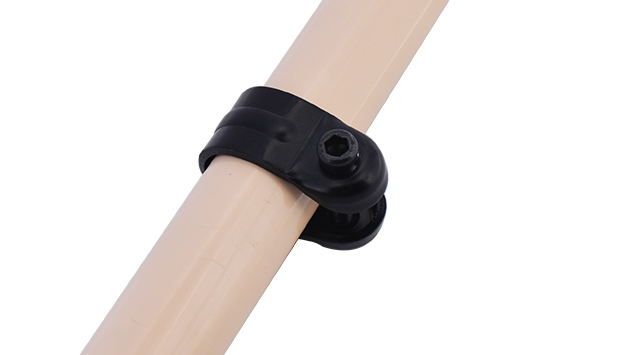
In the fast-paced world of production and assembly, where every second counts and efficiency is king, lean systems have become the backbone of modern manufacturing. These systems—built on principles of minimizing waste, maximizing flow, and adapting to change—rely on a delicate balance of components working in harmony. At the heart of this balance lies a humble yet critical part: the lean pipe fixed clamp. Often overlooked, these small, unassuming devices hold together the very structure of your workbenches, flow racks, conveyor systems, and material trolleys. They're the silent guardians that keep your operations stable, your workflows uninterrupted, and your team safe.
But here's the truth: even the sturdiest lean pipe fixed clamp won't last forever without proper care. A loose clamp can wobble a workbench, causing tools to slide and errors to creep into assembly. A corroded clamp can weaken a flow rack, risking damage to valuable materials. And a worn clamp? It might just be the domino that brings down an entire section of your production line. The good news? Extending the lifespan of your lean pipe fixed clamps isn't about expensive replacements or overhauls. It's about consistent, intentional maintenance—small habits that add up to big results.
In this guide, we'll walk you through everything you need to know to keep your lean pipe fixed clamps (and the systems they support) in top shape. From daily checks to deep cleaning, from lubrication tricks to knowing when to repair versus replace, we'll cover it all. Whether you're a seasoned plant manager or a new technician just learning the ropes, these tips will help you save time, reduce costs, and keep your lean systems humming for years to come.
Common Issues: Why Lean Pipe Fixed Clamps Fail (and How to Spot Them Early)
Before we dive into maintenance, let's talk about the enemy: the common issues that shorten a clamp's lifespan. By learning to recognize these red flags early, you can stop small problems from turning into costly disasters. Here are the most frequent culprits:
1. Loosening Over Time
Lean pipe systems are built for flexibility—they're designed to be adjusted, reconfigured, and moved as production needs change. But that flexibility comes with a price: vibration from daily use, frequent repositioning, and even temperature fluctuations can cause clamps to loosen. A loose clamp might not seem urgent at first, but over time, it creates instability. Imagine a workbench where the top wobbles slightly every time you set down a tool; that movement puts extra stress on neighboring clamps, creating a domino effect of wear and tear.
How to spot it: Gently tug on the pipe near the clamp. If there's any give or creaking, the clamp is loose. You might also notice visible gaps between the clamp and the pipe, or threads that look worn from repeated tightening.
2. Corrosion and Rust
Many lean pipe fixed clamps are made of steel, which is strong but prone to corrosion—especially in environments with high humidity, exposure to liquids, or chemical spills (common in electronics or food production). Even aluminum clamps, while more rust-resistant, can develop oxidation if not cared for. Corrosion eats away at the clamp's structure, weakening its grip and making it brittle. Left unchecked, a rusted clamp can snap under pressure, putting workers and materials at risk.
How to spot it: Look for reddish-brown spots (rust) on steel clamps or white, powdery patches (oxidation) on aluminum. You might also notice pitting—small holes in the metal surface—or a rough, flaky texture where the protective coating has worn off.
3. Debris Buildup
Factories and workshops are messy places. Dust, metal shavings, grease, and even small parts can find their way into the crevices of your lean pipe fixed clamps. Over time, this debris acts like sandpaper, wearing down the clamp's moving parts and preventing it from tightening properly. For example, if dirt gets stuck between the clamp's jaws and the pipe, the clamp can't grip as tightly, leading to slippage. In extreme cases, debris can jam the clamp entirely, making it impossible to adjust or remove when you need to reconfigure your system.
How to spot it: Check the joints where the clamp meets the pipe—you might see a buildup of dust or grime. If the clamp feels sticky or hard to turn when adjusting, debris is likely the culprit.
4. Over-Tightening Damage
It's easy to think, "If a little tight is good, a lot must be better!" But over-tightening a lean pipe fixed clamp is just as bad as leaving it loose. When you crank down too hard on the clamp's bolt or lever, you risk stripping the threads, bending the clamp's metal components, or even warping the pipe itself. Plastic or nylon components (like those found in some lightweight clamps) can crack under excessive pressure. Once a clamp is damaged from over-tightening, it loses its ability to grip evenly, creating weak points that fail under stress.
How to spot it: Look for bent or misshapen clamp arms, stripped threads (where the bolt spins without tightening), or cracks in plastic parts. You might also notice that the pipe has indentations from the clamp's jaws—signs that too much pressure was applied.
5. Compatibility Issues with Lean Pipe Joints
Not all lean pipe fixed clamps are created equal. Using a clamp that's the wrong size for your pipe, or mixing and matching brands with incompatible lean pipe joints, can lead to premature failure. For example, a clamp designed for 28mm steel pipe might seem to fit a 30mm aluminum pipe, but the loose fit will cause slipping and wear. Similarly, low-quality clamps with poorly designed joints can't distribute pressure evenly, leading to uneven wear and eventual breakdown.
How to spot it: If the clamp slides on the pipe even when tight, or if the joint feels unstable despite proper tightening, compatibility is likely the issue. Check the clamp's specifications against your pipe diameter and material to confirm they're a match.
The Ultimate Maintenance Routine: Daily, Weekly, and Monthly Habits
Now that you know what to watch for, let's build a maintenance routine that keeps your lean pipe fixed clamps (and the rest of your lean pipe and accessories) in peak condition. This isn't about spending hours each day—just small, consistent actions that add up to long-term durability. We'll break it down into daily, weekly, and monthly tasks, so you can fit it into your team's schedule without disrupting production.
Daily Checks: 5-Minute Walkthroughs
Think of daily checks as your first line of defense. These quick inspections take just a few minutes per workstation and can catch issues before they escalate. Assign a team member (or rotate the responsibility) to do a visual and tactile check of all lean pipe fixed clamps at the start or end of each shift.
- Tightness Test: For each clamp, give the pipe a gentle but firm tug. If it moves or creaks, use a wrench or screwdriver to snug it up— but don't over-tighten ! A good rule of thumb: tighten until you feel resistance, then give it a quarter-turn more. For lever-style clamps, ensure the lever clicks securely into place.
- Visual Scan: Look for obvious red flags: rust spots, cracks, bent parts, or debris buildup. Pay extra attention to clamps near high-traffic areas or where liquids are used (like near cleaning stations).
- Debris Wipe: Use a dry microfiber cloth to brush away dust or loose debris from clamp joints. This prevents buildup that can wear down parts over time.
- Caster Wheel Alignment (If Applicable): If your lean system includes mobile workbenches or trolleys with caster wheels, check that the clamps securing the casters are tight. A loose caster clamp can make the trolley wobble, putting stress on other clamps in the system.
Pro tip: Keep a small toolkit at each workstation with basic tools (screwdrivers, adjustable wrenches) so workers can tighten loose clamps immediately when spotted. This prevents small issues from being forgotten until the end of the shift.
Weekly Deep Dive: Cleaning and Corrosion Prevention
Once a week, set aside 30–60 minutes (depending on the size of your system) for more thorough maintenance. This is when you'll clean, treat for corrosion, and address any issues that popped up during daily checks.
| Clamp Material | Cleaning Solution | Tools | Special Notes |
|---|---|---|---|
| Steel (Painted or Coated) | Mild dish soap + warm water | Soft-bristle brush, microfiber cloth | Avoid abrasive pads—they'll scratch the coating. |
| Aluminum | Vinegar + water (1:1 ratio) or aluminum cleaner | Non-metallic brush, soft cloth | Rinse thoroughly to prevent vinegar residue. |
| Plastic/Nylon | Lukewarm water + mild soap | Sponge, soft cloth | Avoid harsh chemicals (bleach, ammonia) that can weaken plastic. |
Step-by-Step Cleaning Process:
- Disassemble (If Needed): For clamps with removable parts (like bolts or covers), gently take them apart to clean hard-to-reach areas. Keep track of small parts in a labeled container to avoid losing them.
- Scrub Gently: Dip your brush or cloth in the cleaning solution and scrub the clamp, focusing on crevices where debris builds up. For stubborn grime, let the solution sit for 5 minutes before scrubbing.
- Rinse and Dry: Wipe the clamp with a damp cloth to remove soap residue, then dry immediately with a clean towel. Moisture left on metal clamps leads to rust, so don't skip this step!
- Treat for Corrosion: For steel clamps with minor rust spots, use a rust eraser or a paste of baking soda and water (apply with a cloth, let sit 10 minutes, then scrub). For aluminum, apply a thin coat of aluminum polish to prevent oxidation. For plastic, a quick wipe with a silicone-based protectant (like furniture polish) can keep it flexible and resistant to cracking.
- Reassemble and Retighten: Put the clamp back together, ensuring all parts are aligned correctly. Tighten bolts to the recommended torque (check the manufacturer's specs if available).
Monthly Maintenance: Lubrication and Detailed Inspection
Monthly maintenance is when you dig deeper, focusing on long-term durability. This is also the time to lubricate moving parts and assess whether any clamps need repair or replacement.
Lubrication: Keeping Joints Moving Smoothly
Moving parts in lean pipe fixed clamps—like pivot points, bolts, and lean pipe joints—need lubrication to reduce friction and wear. The type of lubricant you use depends on the environment:
- Dry Environments (Most Factories): Use a dry lubricant (like graphite spray or silicone-based dry lube). These don't attract dust and are ideal for clamps that adjust frequently.
- Wet/Humid Environments: Opt for a waterproof lubricant (like lithium grease or marine-grade oil). These create a barrier against moisture, preventing rust.
- Food/Pharmaceutical Settings: Use food-safe lubricants (check for NSF H1 certification) to avoid contamination risks.
How to apply: Spray or dab a small amount of lubricant onto the clamp's moving parts (hinges, bolt threads, joint connections). Work the clamp back and forth a few times to distribute the lube, then wipe away excess with a cloth. Avoid over-lubricating—too much can attract dirt.
Detailed Inspection Checklist
Grab a notebook or digital checklist and go through each clamp with a critical eye. Note any issues that need repair or replacement. Here's what to look for:
- Thread Integrity: Check bolt threads for stripping. If the bolt spins without tightening, or if you can see bare metal where threads used to be, it's time to replace the bolt (or the entire clamp if the threads in the clamp body are stripped).
- Clamp Jaws: Inspect the jaws (the part that grips the pipe) for wear. If they're bent, cracked, or have deep indentations, the clamp won't grip evenly. For plastic jaws, look for cracks or warping.
- Welds (If Applicable): For welded steel clamps, check welds for cracks or separation. A cracked weld means the clamp can't support weight safely.
- Plastic Pipe End Cap Condition: If your lean pipes have plastic pipe end caps, ensure they're intact. Missing or cracked end caps allow debris and moisture to enter the pipe, which can spread to clamps and cause internal corrosion.
- Compatibility Recheck: Confirm that all clamps are the correct size and type for their pipes. replace any mismatched clamps to prevent uneven wear.

Repair vs. Replacement: When to Fix, When to Let Go
Even with perfect maintenance, some clamps will eventually wear out. The question is: when should you repair a clamp, and when should you replace it? Knowing the difference can save you time and money. Here's a quick guide:
| Issue | Repair (If…) | replace (If…) |
|---|---|---|
| Loose Bolt | Threads are intact—tighten or replace the bolt. | Threads in the clamp body are stripped—no way to secure the bolt. |
| Minor Rust | Rust is surface-level and hasn't weakened the metal. | Rust has caused pitting or holes in the clamp. |
| Worn Jaws | Jaws are slightly worn but still grip the pipe securely. | Jaws are bent, cracked, or can't grip without slipping. |
| Plastic Component Damage | No cracks—just minor scratches or discoloration. | Cracks, warping, or parts that have broken off. |
Pro tip: Keep a stock of spare clamps and lean pipe and accessories on hand. This way, you can replace a damaged clamp immediately instead of waiting for a shipment, minimizing downtime. Label your spares clearly (e.g., "28mm Steel Clamp" or "Aluminum Lever Clamp") so you can find what you need quickly.

Storage Tips: Protecting Clamps When Not in Use
Whether you're storing spare clamps or taking apart a lean system for reconfiguration, how you store your lean pipe fixed clamps matters. Poor storage can lead to rust, bending, or damage that shortens their lifespan.
- Keep Them Dry: Store clamps in a climate-controlled area away from moisture. If your storage room is humid, use a dehumidifier or silica gel packets in storage bins to absorb moisture.
- Avoid Piling: Don't stack heavy objects on top of clamps—this can bend or warp them. Instead, use shallow bins or pegboards to keep clamps organized and protected.
- Label Clearly: Mark bins with clamp size, material, and type (e.g., "30mm Aluminum Lever Clamp"). This prevents rummaging and ensures you grab the right clamp for the job, reducing the risk of using incompatible parts.
- Protect Threads: For clamps with exposed bolts, screw a plastic pipe end cap onto the bolt threads to prevent bending or stripping during storage.
- Clean Before Storing: Never store a dirty clamp! Even a little dust can attract moisture and cause rust. Clean and dry clamps thoroughly before putting them away.
Case Study: How One Factory Extended Clamp Lifespan by 70%
Let's put this all into perspective with a real-world example. A mid-sized electronics assembly plant in Ohio was struggling with frequent clamp failures on their lean pipe workbenches. Their maintenance team was replacing clamps every 3–4 months, costing thousands in replacement parts and downtime. Frustrated, they decided to implement the maintenance routine outlined in this guide. Here's what happened:
- Day 1: They trained all production workers to do 2-minute daily checks (tightening loose clamps, wiping debris). They placed small toolkits at each workstation.
- Week 1: The maintenance team did a full deep clean of all clamps, treating minor rust spots and lubricating moving parts.
- Month 1: They inspected every clamp, replacing only those with severe damage (about 15% of the total). They also standardized clamp types to ensure compatibility with their pipes.
- 3 Months Later: Clamp failures dropped by 60%. Workers reported fewer wobbling workbenches and smoother workflows.
- 6 Months Later: The plant was replacing clamps only every 8–10 months—a 70% extension in lifespan. They estimated saving $12,000 annually in replacement parts and reduced downtime.
The takeaway? Maintenance isn't just about fixing problems—it's about preventing them. Small, consistent actions lead to big savings and more reliable lean systems.
Frequently Asked Questions
Q: Can I use WD-40 to lubricate my lean pipe fixed clamps?
A: WD-40 is a great water displacer and light lubricant, but it's not ideal for long-term lubrication. It tends to evaporate quickly, leaving parts unprotected. For better results, use a silicone-based lubricant or lithium grease for longer-lasting protection.
Q: My clamp is stuck—how do I loosen it without breaking it?
A: First, spray the joint with a penetrating oil (like PB Blaster or WD-40) and let it sit for 10–15 minutes. Then, use a wrench with a rag for grip, and apply steady pressure (don't jerk!). If it's still stuck, gently tap the wrench with a hammer to loosen rust or debris. Avoid using excessive force—you don't want to snap the bolt.
Q: How often should I replace my lean pipe fixed clamps?
A: With proper maintenance, most clamps last 1–2 years. However, this depends on usage: clamps in high-vibration areas or heavy-load systems may need replacement sooner. Use your monthly inspection to assess wear and plan replacements before failures occur.
Q: Are expensive clamps worth the investment?
A: In most cases, yes. High-quality clamps are made with better materials (thicker steel, corrosion-resistant coatings) and tighter tolerances, meaning they grip better and last longer. Cheaper clamps often have weak points (like thin jaws or brittle plastic parts) that fail quickly, costing more in replacements over time.
Conclusion: Small Habits, Big Results
Your lean pipe fixed clamps might be small, but they're the unsung heroes of your production line. They hold your systems together, keep workflows efficient, and ensure your team can focus on what matters: building quality products. By implementing a simple maintenance routine—daily checks, weekly cleaning, monthly lubrication, and smart storage—you can extend their lifespan by years, reduce costs, and avoid the headaches of unexpected failures.
Remember: maintenance isn't a one-time task—it's a habit. Train your team, make tools accessible, and schedule regular check-ins. The time you invest today will pay off in smoother operations, fewer disruptions, and a lean system that serves your business for years to come.
So grab your wrench, your cleaning cloth, and start caring for those clamps. Your future self (and your bottom line) will thank you.