
Walk into any modern manufacturing facility, warehouse, or even a busy workshop, and you'll likely spot a common thread: the relentless pursuit of efficiency. From streamlined assembly lines to organized workstations, every element is designed to reduce waste, cut down on unnecessary movement, and keep operations running like a well-oiled machine. At the heart of this efficiency revolution lies the lean pipe system —a versatile framework of pipes, joints, and accessories that can be customized into workbenches, flow racks, roller tracks, and more. But here's the thing: not all components in a lean system are created equal. Two tiny but critical parts often cause confusion, even among seasoned operations managers: the lean pipe fixed clamp and the pipe connector. Today, we're diving deep into these unsung heroes, breaking down their differences, uses, and why choosing the right one can make or break your workflow.
The Backbone of Lean Systems: Why Small Components Matter
Before we get into the nitty-gritty of clamps and connectors, let's take a step back. Lean manufacturing isn't just a buzzword—it's a philosophy built on the idea that every second, every inch of space, and every tool should add value. A poorly designed workbench might force employees to reach across a cluttered surface, wasting time and increasing the risk of errors. A wobbly flow rack could slow down material handling, leading to bottlenecks in production. And at the root of these issues? Often, it's the parts that hold everything together.
Imagine you're tasked with setting up a new assembly line for a small electronics company. You've ordered all the materials: aluminum lean pipes, a sturdy workbench top, and a set of roller tracks to move components from one station to the next. But when the shipment arrives, you're faced with a box of metal and plastic parts—some labeled "clamps," others "connectors"—and no clear instructions on which goes where. Do you use a clamp to attach the roller track to the workbench? Or a connector to join two pipes at a 90-degree angle? Choosing wrong could mean a wobbly structure that fails under weight, or a setup that's impossible to reconfigure when your production needs change. That's why understanding the difference between lean pipe fixed clamps and pipe connectors isn't just about technical knowledge—it's about building a system that works for your team, not against them.
What Is a Lean Pipe Fixed Clamp?
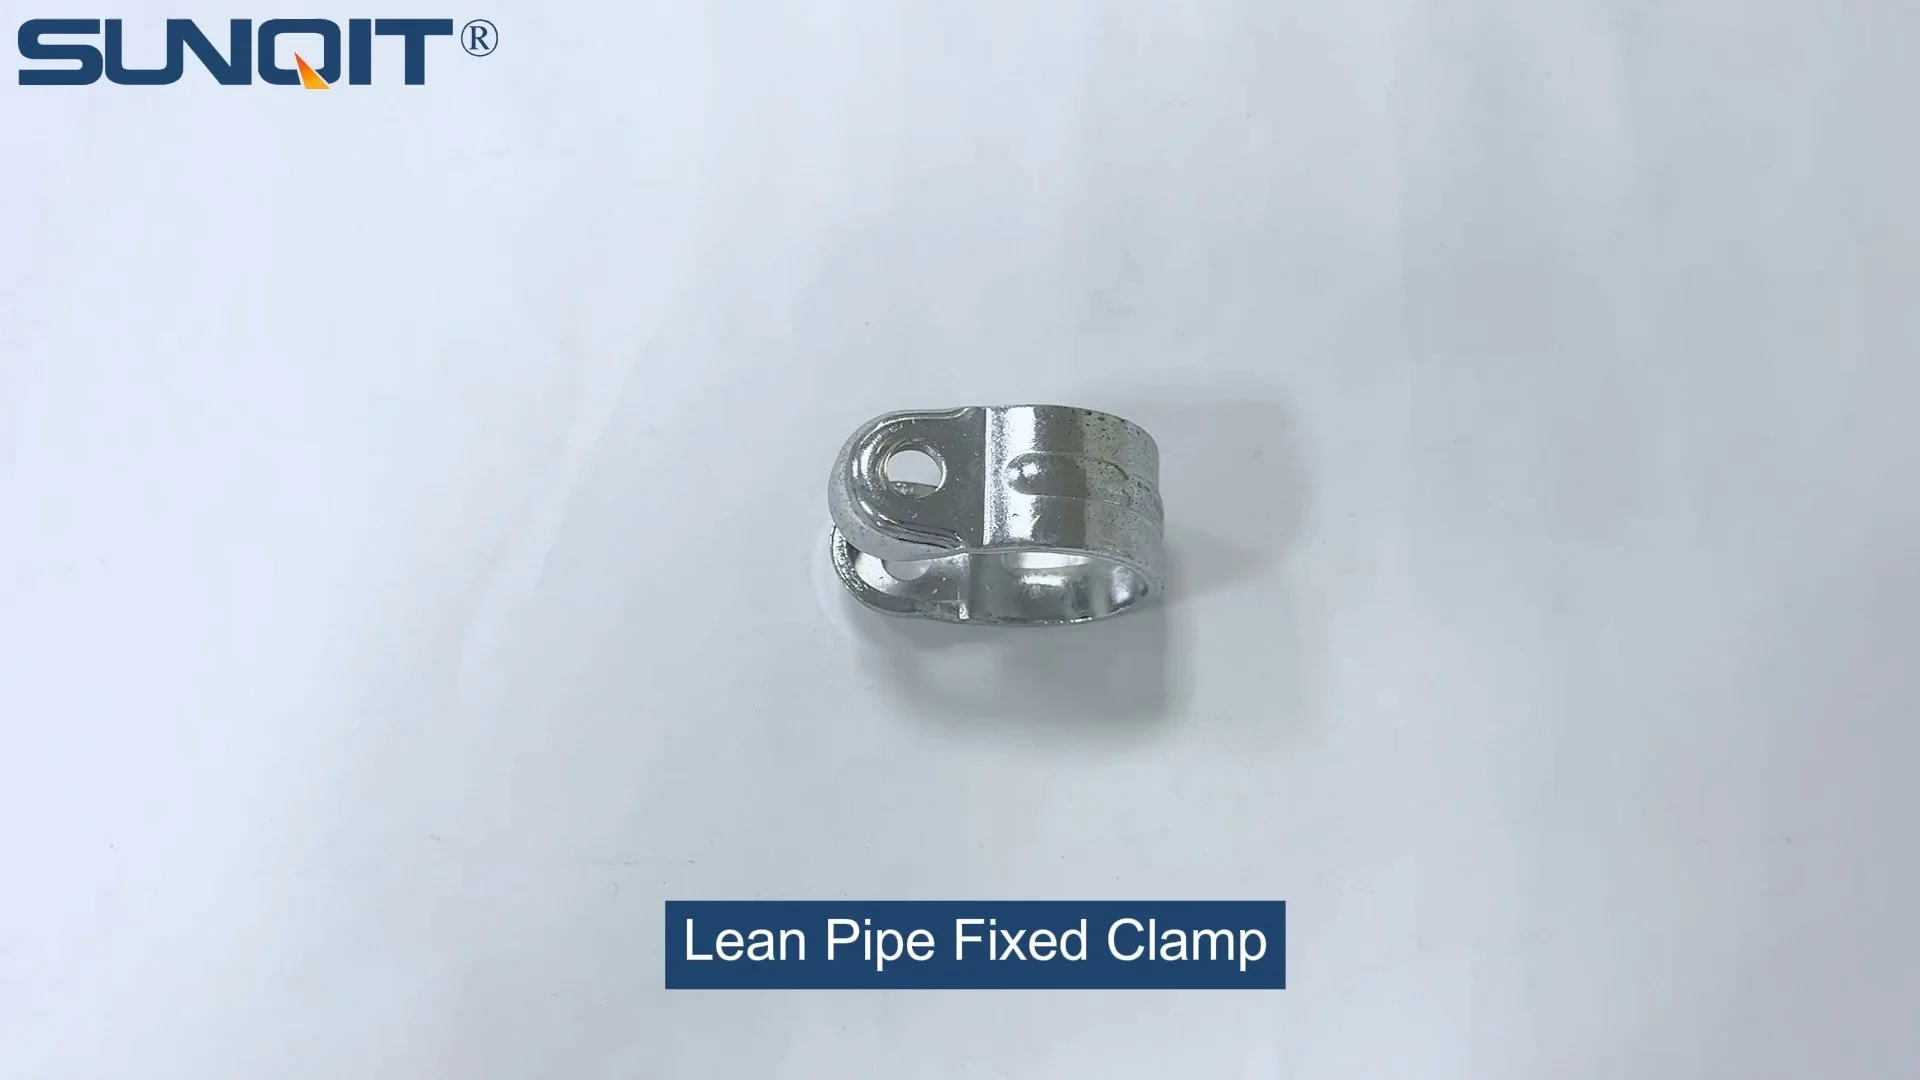
Let's start with the basics: the lean pipe fixed clamp. At its core, this component is exactly what it sounds like: a device designed to securely fasten a lean pipe to another structure—whether that's another pipe, a workbench frame, a wall, or even a roller track. Think of it as the industrial equivalent of a heavy-duty zip tie, but with far more strength and precision. Fixed clamps are typically made from durable materials like steel, aluminum, or high-grade plastic, and they come in various shapes and sizes to accommodate different pipe diameters and connection needs.
One of the key features of a fixed clamp is its rigidity. Once installed, it's meant to stay put. Unlike some adjustable components, a well-installed fixed clamp won't shift, rotate, or loosen over time—even under constant vibration or heavy loads. This makes it ideal for applications where stability is non-negotiable. For example, if you're building a workbench that will hold sensitive equipment or heavy tools, you'll want the legs and crossbars to stay firmly in place. A fixed clamp ensures that the pipes don't twist or separate, keeping the workbench level and secure for years.
But how does it work, exactly? Most fixed clamps consist of two main parts: a metal or plastic body that wraps around the pipe, and a bolt or screw that tightens the clamp into place. Some designs have a U-shaped bracket that fits over the pipe, while others are more like a collar that encircles it. The key is that when you tighten the bolt, the clamp compresses against the pipe, creating friction that holds it steady. In some cases, clamps may also have additional features, like rubberized liners to prevent scratching the pipe or to increase grip, or flanges that allow them to be mounted to flat surfaces (like the edge of a workbench).
And What About the Pipe Connector? Introducing the Lean Pipe Joint
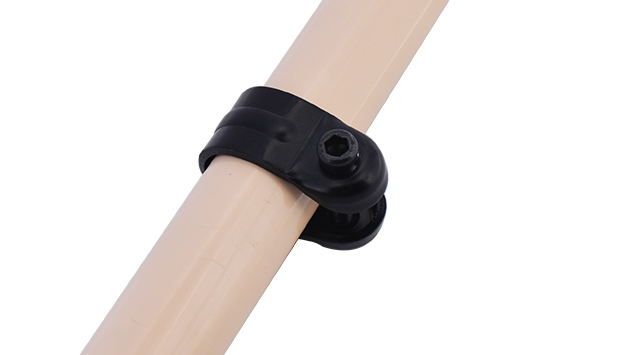
Now, let's meet the pipe connector—often referred to in industry jargon as a lean pipe joint . If the fixed clamp is the "anchor" of the lean system, the connector is the "flexible link." Its primary job is to join two or more pipes together at specific angles , allowing you to build complex structures like T-junctions, elbows, or multi-pipe frameworks. Unlike clamps, which are designed to fix a pipe to a non-pipe surface (or to lock a pipe in a static position), connectors are all about creating dynamic, modular connections between pipes themselves.
Walk into any lean system supplier's catalog, and you'll find a dizzying array of connectors: 90-degree elbows for right-angle turns, T-joints for branching off a main pipe, 45-degree connectors for sloped structures, and even multi-way joints that can link three or four pipes at once. The most common design is a metal or plastic block with holes (or "ports") that match the diameter of the lean pipes. To install a connector, you simply slide the end of a pipe into one of the ports and secure it—usually with a setscrew, a spring-loaded pin, or a friction fit. Some connectors even allow for rotation, letting you adjust the angle of the pipes slightly after installation (though this depends on the type).
What makes connectors so valuable is their modularity. Let's say you initially build a flow rack with three levels, but six months later, you need to add a fourth to accommodate new inventory. With connectors, you can simply loosen the existing joints, add a new pipe section, and re-tighten—no need to disassemble the entire rack. This flexibility is why connectors are the go-to choice for structures that need to evolve with your business, like temporary assembly lines or prototype workstations.

Design Showdown: How Clamps and Connectors Differ in Structure
To really understand the difference between fixed clamps and connectors, let's put them side by side. At first glance, they might look similar—both are small, metal or plastic parts that interact with lean pipes—but their designs reveal their unique purposes.
Lean Pipe Fixed Clamp Design: The defining feature here is simplicity and strength. Most clamps have a "clamping mechanism" that directly presses against the pipe, creating a tight grip. For example, a U-bolt clamp has two threaded bolts that pass through a metal plate; when you tighten the nuts, the U-bolt squeezes the pipe against the plate, locking it in place. Another common design is the saddle clamp, which has a curved "saddle" that fits around the pipe and a flat base with holes for mounting to a surface (like a workbench leg). These clamps are often made from steel with a zinc coating to resist rust, or aluminum for lighter, corrosion-resistant applications. The key takeaway? Clamps are all about compression —using force to hold a pipe stationary relative to another object.
Pipe Connector (Lean Pipe Joint) Design: Connectors, on the other hand, are all about alignment and connection . Instead of compressing the pipe, they enclose or interlock with its end. A typical 90-degree connector, for instance, has two perpendicular cylindrical ports. Each port is slightly larger than the diameter of the lean pipe, allowing the pipe to slide in. Once inserted, a setscrew (a small screw on the side of the connector) is tightened until it digs into the pipe, preventing it from slipping out. Some advanced connectors use a "push-fit" design, where internal springs or O-rings create a tight seal without the need for tools. Others, like the internal rotary aluminum joint, even allow one pipe to rotate relative to the other, adding a new level of flexibility. Materials here vary too: plastic connectors are lightweight and affordable for low-load applications, while metal (steel or aluminum) connectors are better for heavy-duty use.
Here's a quick way to remember: If a component has a "jaw" or "clamping surface" that squeezes the pipe, it's a clamp. If it has holes or ports where pipes are inserted and secured, it's a connector.

Primary Uses: When to Reach for a Clamp vs. a Connector
Design differences aside, the real test of any tool is how well it solves a problem. Let's break down the scenarios where clamps and connectors shine—and where they fall short.
Lean Pipe Fixed Clamp: Best for Static, High-Stability Applications
Clamps are your first choice when you need a permanent or semi-permanent connection that can withstand heavy loads or constant movement. Here are a few common use cases:
- Mounting Pipes to Workbenches or Floors: If you're building a workbench with a frame made of lean pipes, you'll need to secure the vertical legs to the horizontal crossbars to prevent wobbling. A fixed clamp can attach the crossbar to the leg, ensuring the structure stays rigid even when tools are slammed down or parts are stacked on top.
- Attaching Accessories to Pipes: Roller tracks, tool holders, or cable management clips often need to be fastened to a main pipe. A clamp can grip the pipe tightly, holding the accessory in place without requiring modifications to the pipe itself (like drilling holes).
- Heavy-Duty Load Bearing: Imagine a flow rack that holds boxes of raw materials weighing 50 pounds or more. The horizontal rails supporting those boxes need to be anchored firmly to the vertical posts. Clamps distribute the weight evenly and resist the downward force, preventing the rails from sliding down over time.
One real-world example: A automotive parts manufacturer I worked with once used fixed clamps to mount their roller track to the frame of their assembly line. The roller track carried heavy engine components, and any movement could have caused parts to shift or fall. By using steel clamps with rubber liners (to prevent scratching the aluminum pipes), they ensured the track stayed perfectly aligned for years—even with the constant vibration of nearby machinery.
Pipe Connector (Lean Pipe Joint): Best for Modular, Adjustable Structures
Connectors, by contrast, are all about adaptability. They're ideal when you need to build something that might change shape, size, or function down the line. Here are their top use cases:
- Building Multi-Pipe Frameworks: Want to create a T-shaped flow rack where materials branch off into two separate lines? A T-joint connector lets you join three pipes at once, no welding required. Need to add a diagonal brace for extra stability? A 45-degree connector can link the brace to the main frame.
- Prototyping or Temporary Setups: Startups or R&D departments often need to test new workflows before committing to a permanent design. Connectors allow them to build a lean system, use it for a few weeks, then disassemble and reconfigure it into something entirely different—all without damaging the pipes.
- Angled Connections: Not all structures are made of straight lines. A 135-degree connector can help you build a sloped roller track that guides parts downward by gravity, while a swivel connector lets you adjust the angle of a pipe slightly to fine-tune material flow.
A great example comes from a small electronics company that produces custom circuit boards. Their production runs are short—sometimes just 50 units of a new design—so they need workstations that can be rearranged quickly. By using aluminum connectors, they can take apart a workbench at the end of a run and rebuild it into a testing station the next day. No tools, no hassle, and no wasted materials.
Installation: Which Is Easier to Set Up?
Let's talk about the practical side: installing a fixed clamp vs. a connector. If you're a one-person team setting up a lean system, or if you're training new employees to assemble structures, ease of installation matters.
Installing a Lean Pipe Fixed Clamp: Clamps are generally straightforward, but they do require some care to get right. Most clamps come with a bolt or screw that needs to be tightened with a wrench or screwdriver. The steps are simple: position the clamp around the pipe and the surface you're mounting to, insert the bolt, and tighten until the clamp is snug. But here's the catch: overtightening can damage the pipe (especially if it's a lightweight aluminum lean pipe), while undertightening leaves the connection loose. It's a balance that takes a little practice. For example, a plastic-coated lean pipe might require a gentler touch than a steel one to avoid cracking the coating.
Installing a Pipe Connector: Connectors are often faster to install, especially if they use a friction fit or setscrew design. For a basic T-joint, you just slide the end of each pipe into the connector's ports until they hit the stop, then tighten the setscrews with a hex key. No measuring, no aligning multiple parts—just plug and play. This speed is a big advantage in high-volume setups, like when you're building 20 identical flow racks for a warehouse. However, connectors do have a learning curve too: if the pipes aren't cut to the exact length, they might stick out unevenly, or if the setscrews aren't tightened enough, the pipes can pull out under stress.
So, which is easier? It depends on the situation. For simple, one-off connections, clamps might win for their "grab and tighten" simplicity. But for complex frameworks with multiple angles, connectors save time and reduce errors—especially for teams that aren't experts in lean systems.
Durability and Longevity: Which Holds Up Better Over Time?
You don't want to be replacing clamps or connectors every few months—that's a waste of time and money. So, how do these components hold up under daily wear and tear?
Lean Pipe Fixed Clamp Durability: Clamps are built for longevity, especially if they're made of steel or aluminum. The compression-based design means there are no moving parts to wear out, and the friction between the clamp and pipe only gets stronger as the clamp is tightened repeatedly (within reason). However, they are vulnerable to corrosion if used in damp environments—say, a warehouse near the coast with high humidity. That's why many clamps come with zinc plating or stainless steel finishes to resist rust. Another factor: the pipe itself. If the pipe is damaged (e.g., dented or bent), the clamp might not grip as well, leading to slippage.
Pipe Connector Durability: Connectors have more potential failure points, but modern designs are surprisingly tough. The setscrews can strip if over-tightened, and the ports can wear down if pipes are inserted and removed repeatedly (a common issue in frequently reconfigured systems). Plastic connectors may become brittle over time if exposed to direct sunlight or extreme temperatures, while metal connectors hold up better in harsh conditions. One pro tip: if you're using connectors in a high-vibration area (like near a printing press), add a drop of thread locker to the setscrews to prevent them from loosening over time.
Overall, both components are durable, but clamps have a slight edge in long-term stability for static setups, while connectors are better for dynamic environments where occasional replacement is acceptable.
Cost: Is One More Expensive Than the Other?
Budget is always a consideration, especially for small businesses or teams with limited resources. So, how do clamps and connectors stack up in terms of cost?
Generally speaking, lean pipe fixed clamps are slightly cheaper than connectors, but the difference is minimal—usually just a few dollars per unit. For example, a basic steel fixed clamp might cost $2–$5, while a similar-sized 90-degree steel connector could run $3–$7. The price varies based on material (aluminum is pricier than plastic), brand, and features (e.g., a connector with a swivel function will cost more than a basic elbow joint).
But here's the catch: connectors often allow you to use fewer parts overall. Let's say you need to build a T-shaped structure. With clamps, you might need two clamps (one for each pipe), but with a single T-joint connector, you can do the job with one part. So, while the connector costs more per unit, you might save money by using fewer of them. It's all about the design of your system.
For example, a small bakery looking to build a simple flow rack for ingredient bins might opt for clamps to save on upfront costs. They don't need to reconfigure the rack often, so the lower price tag is worth it. On the other hand, a tech startup with ever-changing production needs might invest in connectors, knowing they'll save time (and thus money) by reusing the same parts for different setups.
Side-by-Side: The Ultimate Comparison Table
| Feature | Lean Pipe Fixed Clamp | Pipe Connector (Lean Pipe Joint) |
|---|---|---|
| Primary Function | Secures a pipe to a non-pipe surface (e.g., workbench, floor) or locks a pipe in a static position. | Joins two or more pipes together at specific angles (e.g., 90°, 45°, T-junction). |
| Design | Clamping mechanism (U-bolt, saddle) that compresses against the pipe; no ports for pipe insertion. | Block or cylindrical shape with ports/holes for inserting pipes; secured with setscrews or friction. |
| Adjustability | Low—difficult to reposition once tightened; best for permanent setups. | High—pipes can be removed and reinserted into different ports; ideal for modular systems. |
| Load Capacity | Higher—compression design distributes weight evenly; good for heavy loads. | Lower—relies on setscrews or friction; better for medium to light loads. |
| Installation Difficulty | Moderate—requires careful tightening to avoid damaging pipes. | Easy—simple plug-and-tighten process; faster for complex structures. |
| Best For | Static workbenches, heavy-duty flow racks, mounting accessories. | Prototyping, temporary setups, angled connections, reconfigurable systems. |
Expert Insights: What the Pros Say
To get a real-world perspective, I reached out to Mark, a lean manufacturing consultant with over 15 years of experience setting up systems for companies like Toyota and Amazon. Here's what he had to say:
"I've seen too many teams waste time and money by using the wrong component. The biggest mistake? Using connectors for static, heavy-load setups. A client once built a workbench with connectors joining the legs to the frame, and within a month, the whole thing was wobbling because the setscrews had loosened under the weight of their equipment. They should have used clamps. On the flip side, I've seen teams use clamps for a prototype line they wanted to reconfigure weekly—what a headache! They spent hours loosening and re-tightening clamps, when a few connectors would have let them snap the whole thing apart in minutes."
Mark's advice? "Start by asking: Will this structure change in the next six months? If yes, go with connectors. If no, clamps are safer. And always, always test the connection with the actual load it will bear before going into full production. A quick stress test can save you from a disaster later."
Common Misconceptions: Debunking Myths About Clamps and Connectors
Even with all this info, there are still myths floating around about clamps and connectors. Let's set the record straight:
Myth 1: "Connectors are only for lightweight systems." Not true! While it's true that some plastic connectors aren't built for heavy loads, metal connectors (like stainless steel or aluminum) can handle significant weight. For example, a heavy-duty steel T-joint can support the same load as a clamp if installed correctly.
Myth 2: "Clamps damage pipes." This is only true if you overtighten them. Most clamps have rounded edges or rubber liners that protect the pipe's surface. As long as you follow the manufacturer's torque guidelines, your pipes will be fine.
Myth 3: "You can't mix clamps and connectors in the same system." Absolutely false! In fact, many lean systems use both. For example, you might use connectors to build the frame of a flow rack and clamps to mount the roller track to that frame. It's all about using the right tool for each job.
Conclusion: Choosing the Right Component for Your Lean Journey
At the end of the day, the lean pipe fixed clamp and the pipe connector are two sides of the same coin: both are essential for building efficient, customizable lean systems, but they serve different purposes. The fixed clamp is your steady, reliable workhorse—perfect for static, heavy-duty setups where stability is key. The connector is your flexible, adaptable partner—ideal for dynamic environments where change is the only constant.
So, next time you're staring at a box of lean system parts, take a moment to think about your goals. Are you building something that will stay the same for years, or something that needs to evolve? Will it hold heavy loads, or light components? Answering these questions will make choosing between a clamp and a connector a no-brainer.
And remember: in lean manufacturing, every detail counts. The right component might seem small, but it can be the difference between a workflow that hums and one that sputters. So, choose wisely, test thoroughly, and let your lean system work as hard as your team does.