- Company Articles
- Products and Technology
- Installation And Maintenance
- Maintenance Tips for Anti-Slip Adjustable Leveling Feet in Warehouses

Maintenance Tips for Anti-Slip Adjustable Leveling Feet in Warehouses
Related Product
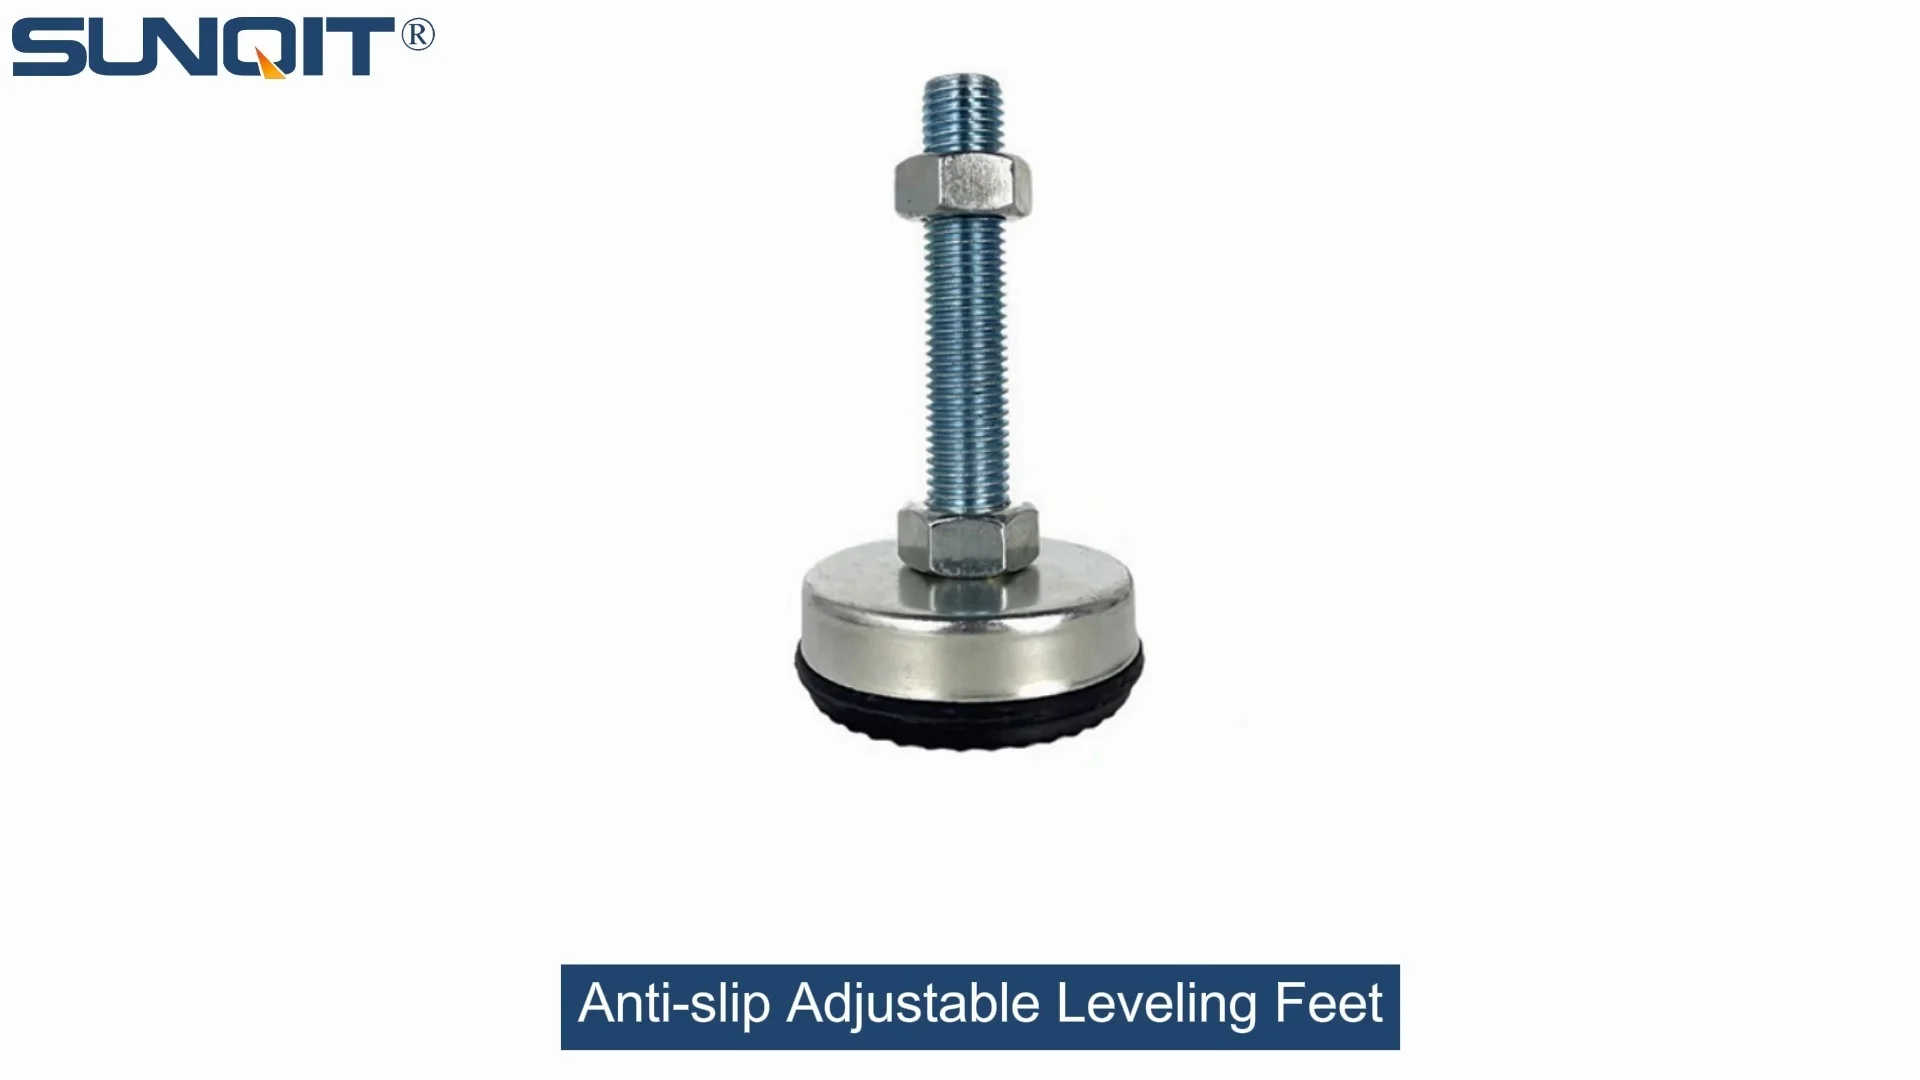
Anti-slip Adjustable Leveling Feet
Anti-slip Adjustable Leveling Feet are designed to keep machines level when placed on uneven or sloped ground, the rubber base will prevent product slip during work.
In the bustling environment of a warehouse, where every second counts and efficiency is paramount, even the smallest components play a critical role in keeping operations running smoothly. One such component, often overlooked yet indispensable, is the anti-slip adjustable leveling foot. Found beneath workbenches, turnover trolleys, material racks, and even large conveyor systems, these unassuming devices are the unsung heroes of stability, safety, and precision. They ensure that equipment stays level on uneven floors, prevent dangerous slips and wobbles, and protect both products and personnel from harm. But like any hardworking tool, anti-slip adjustable leveling feet require regular care to maintain their performance. Neglecting their maintenance can lead to loose fittings, reduced grip, and even equipment failure—consequences that ripple through the warehouse, causing delays, increasing costs, and putting workers at risk. In this article, we'll dive deep into the world of anti-slip adjustable leveling feet, exploring why they matter, how to keep them in top shape, and the best practices for long-term care. Whether you're a warehouse manager, a maintenance technician, or simply someone interested in the nuts and bolts of industrial operations, these tips will help you ensure that your leveling feet—and the equipment they support—remain reliable, safe, and efficient for years to come.
Understanding Anti-Slip Adjustable Leveling Feet: What They Are and Why They Matter
Before diving into maintenance, it's important to understand exactly what anti-slip adjustable leveling feet are and the role they play in warehouse settings. At their core, these devices are designed to stabilize equipment by adjusting to uneven surfaces while providing a secure, non-slip connection to the floor. They typically consist of a threaded stem, a base plate with an anti-slip material (like rubber or textured plastic), and a locking mechanism to hold the adjusted height in place. Some models also feature a swivel base, allowing the foot to adapt to slightly angled floors without compromising stability.
In warehouses, where floors are often concrete (and rarely perfectly level), and equipment ranges from lightweight workbenches to heavy-duty material racks, leveling feet are indispensable. Consider a workbench used for assembling delicate electronics: even a slight wobble could lead to errors or damaged components. Or a turnover trolley loaded with heavy inventory: if the leveling feet fail to grip, the trolley might slide unexpectedly, endangering the operator and risking product damage. For larger systems, like flow racks or conveyor belts, uneven leveling can cause items to jam or shift during transport, disrupting the entire production line. The anti-slip feature is particularly crucial in environments where spills (of oil, water, or other liquids) are possible, as it adds an extra layer of safety by preventing the equipment from sliding on slick surfaces.
Moreover, anti-slip adjustable leveling feet protect the warehouse floor itself. Without proper leveling, the weight of equipment can concentrate on small areas, leading to cracks, indentations, or wear patterns in the concrete. Over time, this not only damages the floor but also creates more uneven surfaces, exacerbating the problem. By distributing weight evenly, leveling feet extend the life of both the equipment and the infrastructure it sits on. In short, these small components are a cost-effective investment in safety, efficiency, and longevity—making their maintenance a top priority for any warehouse.
The Foundation of Maintenance: Regular Inspection
The first step in maintaining anti-slip adjustable leveling feet is establishing a routine inspection schedule. Just as you wouldn't wait for a flat tire to check your car's wheels, you shouldn't wait for a wobble or slip to inspect your leveling feet. Regular inspections catch minor issues before they escalate into major problems, saving time, money, and potential headaches down the line. So, how often should you inspect them? The frequency depends on the usage: equipment that's moved daily (like turnover trolleys) may need weekly checks, while stationary equipment (like fixed workbenches) can be inspected monthly. High-traffic areas or equipment handling heavy loads might require even more frequent attention—think biweekly or even daily quick checks for critical systems.
During an inspection, start with a visual check. Look for obvious signs of damage: cracks in the base plate, tears in the anti-slip pad, bent or stripped threads on the stem, or rust on metal components. Pay special attention to the locking nut or mechanism—if it's loose, the foot may have shifted out of position, compromising stability. Next, perform a tactile check: gently wiggle the foot to see if it moves in the stem (a small amount of play is normal, but excessive movement indicates a loose or worn connection). Press down on the equipment to test for wobbling; if the equipment rocks, it's a sign that the feet aren't adjusted evenly or that one (or more) feet are failing.
Don't forget to inspect the area around the leveling feet, too. Debris like dirt, dust, or small metal shavings can accumulate between the foot and the floor, preventing proper contact and reducing the anti-slip grip. Oil, grease, or chemical spills can also degrade the anti-slip material over time, so look for signs of staining or softening on the base plate. For equipment with multiple feet (like a workbench with four feet), check that all feet are making contact with the floor—if one is lifted, the weight is unevenly distributed, putting stress on the other feet and the equipment frame. Finally, test the adjustability: turn the stem (or the base, depending on the design) to see if it moves smoothly. If it's stuck or difficult to turn, it may need cleaning or lubrication. By making these inspections a regular part of your warehouse's maintenance routine, you'll ensure that your leveling feet are always ready to perform when needed.

Cleaning: The First Line of Defense Against Wear
If inspections are the eyes of maintenance, cleaning is the hands—removing the dirt, grime, and debris that can slowly degrade leveling feet over time. Even the most durable anti-slip materials can lose their effectiveness if covered in dust or oil, and threaded stems can seize up if grit works its way into the threads. Regular cleaning not only preserves the functionality of the feet but also makes inspections easier, as you can clearly see any signs of damage or wear. So, what's the best way to clean anti-slip adjustable leveling feet?
Start by clearing the area around the equipment. Move any items off the workbench or trolley to prevent them from getting in the way or getting damaged during cleaning. If the equipment is mobile (like a turnover trolley), wheel it to a designated cleaning area to avoid spreading debris. For stationary equipment, use a broom or shop vac to sweep away loose dirt from around the feet. Next, focus on the feet themselves. For the base plate and anti-slip pad, a soft-bristled brush (like a toothbrush or a small parts brush) works well to dislodge caked-on dirt. If there's oil or grease, dampen a cloth with a mild detergent solution (avoid harsh chemicals that might damage the anti-slip material) and gently wipe the base plate. For rubber anti-slip pads, avoid solvents like acetone or gasoline, as these can cause the rubber to dry out and crack. Instead, use warm water and a mild soap—this will remove most contaminants without harming the material.
The threaded stem and locking mechanism require special attention. Dirt and debris in the threads can make adjustment difficult and cause premature wear. Use a small brush (or a can of compressed air, if available) to blow out loose particles from the threads. If the threads are particularly dirty, you can use a cloth dampened with a light lubricant (like WD-40) to wipe them clean—just be sure to wipe off any excess lubricant afterward, as it can attract more dirt. For the locking nut, check if it's seized due to debris; if so, gently tap it with a rubber mallet (to loosen the debris) before wiping it clean. Once all parts are clean, dry them thoroughly with a clean cloth to prevent rust (especially important for metal components). For equipment in humid environments, you might even consider applying a thin coat of rust inhibitor to the metal stems, but be careful not to get it on the anti-slip pad, as it could reduce grip. By making cleaning a regular part of your maintenance routine, you'll keep your leveling feet functioning smoothly and extend their lifespan significantly.

Lubrication: Keeping Adjustments Smooth and Easy
While cleaning removes debris, lubrication ensures that the moving parts of anti-slip adjustable leveling feet remain smooth and easy to adjust. Over time, the threaded stem and locking mechanism can become dry, leading to friction, binding, or even seizing—making it difficult to level equipment when needed. Proper lubrication reduces wear on these components, prevents rust, and ensures that adjustments can be made quickly and accurately. But not all lubricants are created equal, and choosing the right one is key to effective maintenance.
First, consider the type of lubricant. For threaded stems, a light machine oil or a dry lubricant (like graphite powder) works best. Light machine oils (such as 3-in-One oil) penetrate the threads easily and provide long-lasting lubrication without attracting too much dust. Dry lubricants like graphite are ideal for environments where oil might attract dirt or where the equipment is used in cleanrooms (though warehouses are rarely cleanrooms, dry lubricants can still be a good option for reducing mess). Avoid heavy greases, as they tend to trap dirt and debris, turning into a gritty paste that can actually increase wear over time. For the locking mechanism (if it has moving parts, like a cam or lever), a small amount of silicone spray can help keep it operating smoothly—silicone is water-resistant and won't degrade rubber or plastic components, which is important since many locking nuts have plastic or rubber grips.
The key to effective lubrication is moderation. Applying too much lubricant can attract dirt, while applying too little won't provide adequate protection. For threaded stems, apply a few drops of oil to the threads and then turn the stem back and forth to distribute the oil evenly. Wipe off any excess with a clean cloth to prevent drips. For the locking nut, apply a tiny amount of lubricant to the threads where the nut meets the stem, then tighten and loosen the nut a few times to work the lubricant in. If the foot has a swivel base, apply a drop of oil to the swivel joint (if accessible) to keep it moving freely. Be careful not to get lubricant on the anti-slip pad, as it can reduce friction and compromise grip—if you do accidentally get oil on the pad, clean it immediately with a mild detergent and water. How often should you lubricate? As a general rule, lubricate leveling feet every three months, or more frequently if they're used in dirty or high-moisture environments. For equipment that's adjusted frequently (like a workbench that's reconfigured often), monthly lubrication might be necessary. By keeping the moving parts well-lubricated, you'll ensure that adjusting your leveling feet is always a smooth, hassle-free process.

Adjustment: Ensuring Proper Stability and Weight Distribution
Even with regular cleaning and lubrication, anti-slip adjustable leveling feet may need periodic adjustment to maintain optimal stability. Over time, equipment can shift, floors can settle, or feet can slowly unscrew (due to vibration from nearby machinery), leading to uneven weight distribution and wobbling. Proper adjustment ensures that all feet are making equal contact with the floor, distributing the equipment's weight evenly and maximizing the anti-slip grip. So, how do you adjust leveling feet correctly?
Start by preparing the equipment. For mobile equipment like turnover trolleys, empty the contents to reduce weight and make adjustment easier. For stationary equipment like workbenches, clear the surface to prevent items from falling during adjustment. Use a spirit level to check the equipment's current level—place the level on a flat part of the equipment (like the top of a workbench or the shelf of a material rack) and check both the front-to-back and side-to-side levels. Note which areas are high or low—this will tell you which feet need adjustment. If the equipment is severely uneven, start by adjusting the lowest foot first, then work your way around until the level shows evenness.
To adjust a leveling foot, loosen the locking nut (if present) by turning it counterclockwise. Then, turn the stem (or the base, depending on the design) to raise or lower the foot: clockwise to raise, counterclockwise to lower. Make small adjustments—even a quarter-turn can make a noticeable difference. After adjusting, retighten the locking nut to hold the position. Repeat this process for each foot until the equipment is level in both directions. Once level, check that all feet are making contact with the floor—if one foot is off the ground, it means the weight is concentrated on the others, which can lead to premature wear. To test, gently push down on different corners of the equipment; it should feel solid and not rock. For equipment with heavy loads, like a material rack loaded with inventory, you may need to adjust the feet while the rack is loaded (or with a similar weight) to account for how the frame flexes under load. Finally, torque the locking nuts to the manufacturer's specifications (if available) to ensure they don't loosen over time—over-tightening can strip the threads, while under-tightening can allow the foot to shift. By taking the time to adjust your leveling feet properly, you'll ensure that your equipment remains stable, safe, and efficient.
Handling Wear and Tear: When to Repair or replace
Despite the best maintenance efforts, anti-slip adjustable leveling feet will eventually show signs of wear and tear. Recognizing when to repair or replace these components is crucial to maintaining safety and performance. Ignoring worn parts can lead to sudden failure, equipment damage, or even accidents, so it's important to know what to look for and how to address it.
The most common signs of wear include: deterioration of the anti-slip pad (cracks, tears, or loss of texture), stripped or damaged threads on the stem, bent or deformed stems, loose or broken locking mechanisms, and rust or corrosion on metal parts. Let's break down each issue and how to handle it. First, the anti-slip pad: this is the part that makes contact with the floor, so its condition directly affects grip. If the pad is cracked, torn, or has lost its texture (it feels smooth instead of grippy), it's time to replace it. Many manufacturers sell replacement pads that can be attached with adhesive or screws—check with your supplier (or the equipment manufacturer) for compatible parts. If replacement pads aren't available, you may need to replace the entire foot.
Next, the threaded stem: if the threads are stripped (you turn the stem but it doesn't raise or lower) or bent (the foot wobbles even when tightened), repair is unlikely—replacement is the best option. Stripped threads can't be reliably fixed, and a bent stem will never provide stable support. Similarly, a broken locking mechanism (like a nut that won't tighten) means the foot can't hold its position, so replacement is necessary. For metal components with rust or corrosion, check if it's surface-level or deep. Surface rust can often be removed with a wire brush and a rust converter, then protected with a coat of paint or rust inhibitor. Deep corrosion, however, weakens the metal, making the foot unsafe—replace it immediately.
When replacing leveling feet, always use parts that match the original specifications. Using a foot with a shorter stem, a smaller base plate, or a different thread size can compromise stability and safety. If you're unsure about the specifications, check the equipment manual or contact the manufacturer. For DIY replacements, ensure you have the right tools: a wrench to remove the old foot, thread sealant (if needed), and a torque wrench to tighten the new foot to the correct specification. If the equipment is large or heavy, you may need to use a jack to lift it slightly while replacing the foot—never attempt to replace a foot on a loaded piece of equipment without proper support. For complex replacements (like feet integrated into aluminum profile frames), consider consulting a professional to ensure the new feet are installed correctly. By addressing wear and tear promptly, you'll keep your equipment safe and avoid costly downtime.
Integration with Caster and Accessories: Balancing Mobility and Stability
In many warehouse setups, anti-slip adjustable leveling feet are used alongside casters and other accessories, creating a balance between mobility and stability. For example, a workbench might have two casters (for moving) and two leveling feet (for stability when in use), or a turnover trolley might have four casters and two leveling feet (to lock it in place during loading/unloading). This combination is practical, but it also adds complexity to maintenance—both components need to be cared for to ensure the system works as a whole. Understanding how leveling feet interact with casters and accessories is key to maintaining overall equipment performance.
First, consider the interaction between casters and leveling feet. When equipment is moved, the casters bear the weight, and the leveling feet are typically raised off the floor. When the equipment is in use, the leveling feet are lowered to the floor, and the casters are either raised (via leveling foot adjustment) or locked (with caster brakes). If the casters are not maintained properly—for example, if the brakes fail or the wheels are worn—the leveling feet may end up bearing more weight than intended, leading to premature wear. Conversely, if the leveling feet are not adjusted correctly, the casters may remain partially on the floor, causing the equipment to roll unexpectedly. To avoid this, maintain casters and leveling feet as a system: inspect casters for worn wheels, loose axles, or stuck brakes at the same time you inspect leveling feet. Clean caster wheels and axles to prevent debris buildup, and lubricate caster bearings to ensure smooth movement. When adjusting leveling feet, ensure that they're lowered enough to lift the casters off the floor (if applicable) or that the caster brakes are engaged fully to prevent movement.
Another common accessory is the foot pedal or lever that raises and lowers leveling feet on mobile equipment. These mechanisms can become dirty or seized over time, making it difficult to switch between mobile and stable modes. To maintain them, clean the linkage or cable regularly (removing dirt and debris), and lubricate pivot points with a light machine oil. Test the pedal/lever to ensure it moves smoothly and that the leveling feet respond correctly—if there's slack or delay, adjust the linkage or replace worn parts. For equipment with multiple leveling feet and casters, check that they're aligned properly: the casters should be parallel, and the leveling feet should be positioned to distribute weight evenly when lowered. Misalignment can cause the equipment to pull to one side when moving or rock when stationary. By maintaining casters and accessories alongside leveling feet, you'll ensure that the entire system works together seamlessly, providing both mobility and stability when needed.
Troubleshooting Common Issues: A Handy Reference Table
Even with regular maintenance, issues can still arise with anti-slip adjustable leveling feet. To help you quickly identify and resolve problems, we've put together a troubleshooting table covering common issues, their possible causes, and step-by-step solutions.
| Problem | Possible Cause | Solution |
|---|---|---|
| Equipment wobbles or rocks | Leveling feet not adjusted evenly; one or more feet not making contact with the floor | 1. Use a spirit level to check for unevenness. 2. Adjust each foot (lowering or raising) until the equipment is level. 3. Ensure all feet are in contact with the floor. 4. Retighten locking nuts. |
| Anti-slip pad losing grip; equipment slides on floor | Debris buildup on pad; pad worn or degraded; oil/grease on pad | 1. Clean pad with warm water and mild soap to remove debris/oil. 2. If pad is worn (cracks, smooth texture), replace with a new anti-slip pad. 3. Avoid getting lubricants on the pad during maintenance. |
| Adjustment mechanism stuck; can't raise/lower foot | Dry or dirty threads; locking nut seized; rust on stem | 1. Clean threads with a brush and compressed air. 2. Apply a light lubricant (e.g., machine oil) to threads and work the adjustment back and forth. 3. If locking nut is seized, tap gently with a rubber mallet and clean before loosening. 4. For rust, use a rust penetrant and let sit before adjusting. |
| Leveling foot loosens over time; keeps shifting position | Locking nut not tightened enough; threads worn; vibration from nearby equipment | 1. Retighten locking nut with a torque wrench to manufacturer's specs. 2. If threads are worn, replace the foot. 3. For vibration issues, add a thread-locking compound (e.g., Loctite) to the threads before tightening. |
| Foot stem bends or breaks under load | Overloading equipment; using a foot with insufficient weight rating; stem weakened by corrosion | 1. Check equipment load against foot weight rating; reduce load if overloaded. 2. replace with a foot rated for the equipment's weight. 3. Inspect for corrosion; replace any feet with deep rust or damage. |
Long-Term Care: Creating a Maintenance Schedule and Training Staff
For anti-slip adjustable leveling feet to remain effective over the long term, maintenance can't be a one-time task—it needs to be a consistent, scheduled effort. Creating a maintenance schedule tailored to your warehouse's needs ensures that inspections, cleaning, and lubrication don't fall through the cracks. Additionally, training staff to recognize issues and perform basic maintenance tasks empowers your team to keep equipment in top shape, reducing reliance on a single maintenance technician and catching problems earlier.
To create a maintenance schedule, start by inventorying all equipment with leveling feet: workbenches, turnover trolleys, material racks, etc. For each piece of equipment, note its location, usage frequency, and environment (e.g., humid, dusty, near chemicals). Then, assign inspection frequencies based on these factors: daily for high-use mobile equipment, weekly for medium-use equipment, and monthly for low-use stationary equipment. Include tasks like visual inspections, cleaning, lubrication, and adjustment, and assign responsibility to specific staff members (e.g., the warehouse team leads for daily checks, maintenance technicians for weekly deep cleans). Use a digital calendar, a whiteboard, or a maintenance management app to track when tasks are due and completed—this creates accountability and ensures nothing is missed.
Training staff is equally important. Even basic training can help employees spot issues during daily operations. For example, teach warehouse operators to check for wobbling when using a workbench, or to report if a turnover trolley feels unstable. Provide a quick-reference guide with photos of common issues (worn anti-slip pads, loose feet, stuck adjustments) and instructions on who to notify. For maintenance technicians, offer more detailed training: how to properly clean and lubricate feet, how to use a spirit level for adjustment, and how to replace worn parts. Hands-on training sessions, where technicians practice adjusting and replacing feet on spare equipment, are especially effective. Consider creating a maintenance manual specific to your warehouse's equipment, including manufacturer recommendations, part numbers for replacement feet, and step-by-step guides for common tasks. By investing in a schedule and training, you'll create a culture of proactive maintenance, ensuring that your leveling feet—and your equipment—remain reliable for years to come.
Conclusion: The Small Component with a Big Impact
Anti-slip adjustable leveling feet may be small in size, but their impact on warehouse safety, efficiency, and equipment longevity is enormous. These unassuming components work tirelessly to keep workbenches level, turnover trolleys stable, and material racks secure—preventing accidents, reducing downtime, and protecting both products and personnel. By following the maintenance tips outlined in this article—regular inspections, thorough cleaning, proper lubrication, careful adjustment, prompt repair/replacement of worn parts, and integration with caster and accessories—you can ensure that your leveling feet remain in top condition, providing reliable performance for years to come.
Remember, maintenance isn't just about fixing problems—it's about preventing them. A few minutes of inspection each week, a quick cleaning after a dusty shift, or a drop of lubricant when adjustment feels stiff can save hours of downtime and hundreds of dollars in repairs. By creating a maintenance schedule, training your team, and staying vigilant for signs of wear, you'll turn these small components into a big asset for your warehouse. So, the next time you walk through your facility, take a moment to look down at the feet supporting your equipment—they may not be glamorous, but they're the foundation of a safe, efficient, and successful operation.