- Company Articles
- Products and Technology
- Installation And Maintenance
- Maintenance Tips to Maximize Lean Pipe Clamp B Lifespan

Maintenance Tips to Maximize Lean Pipe Clamp B Lifespan
Related Product
Lean Pipe Clamp
Lean pipe clamp is used for rack system hang monitor or other panel for workbenck, flowrack in production daily use.
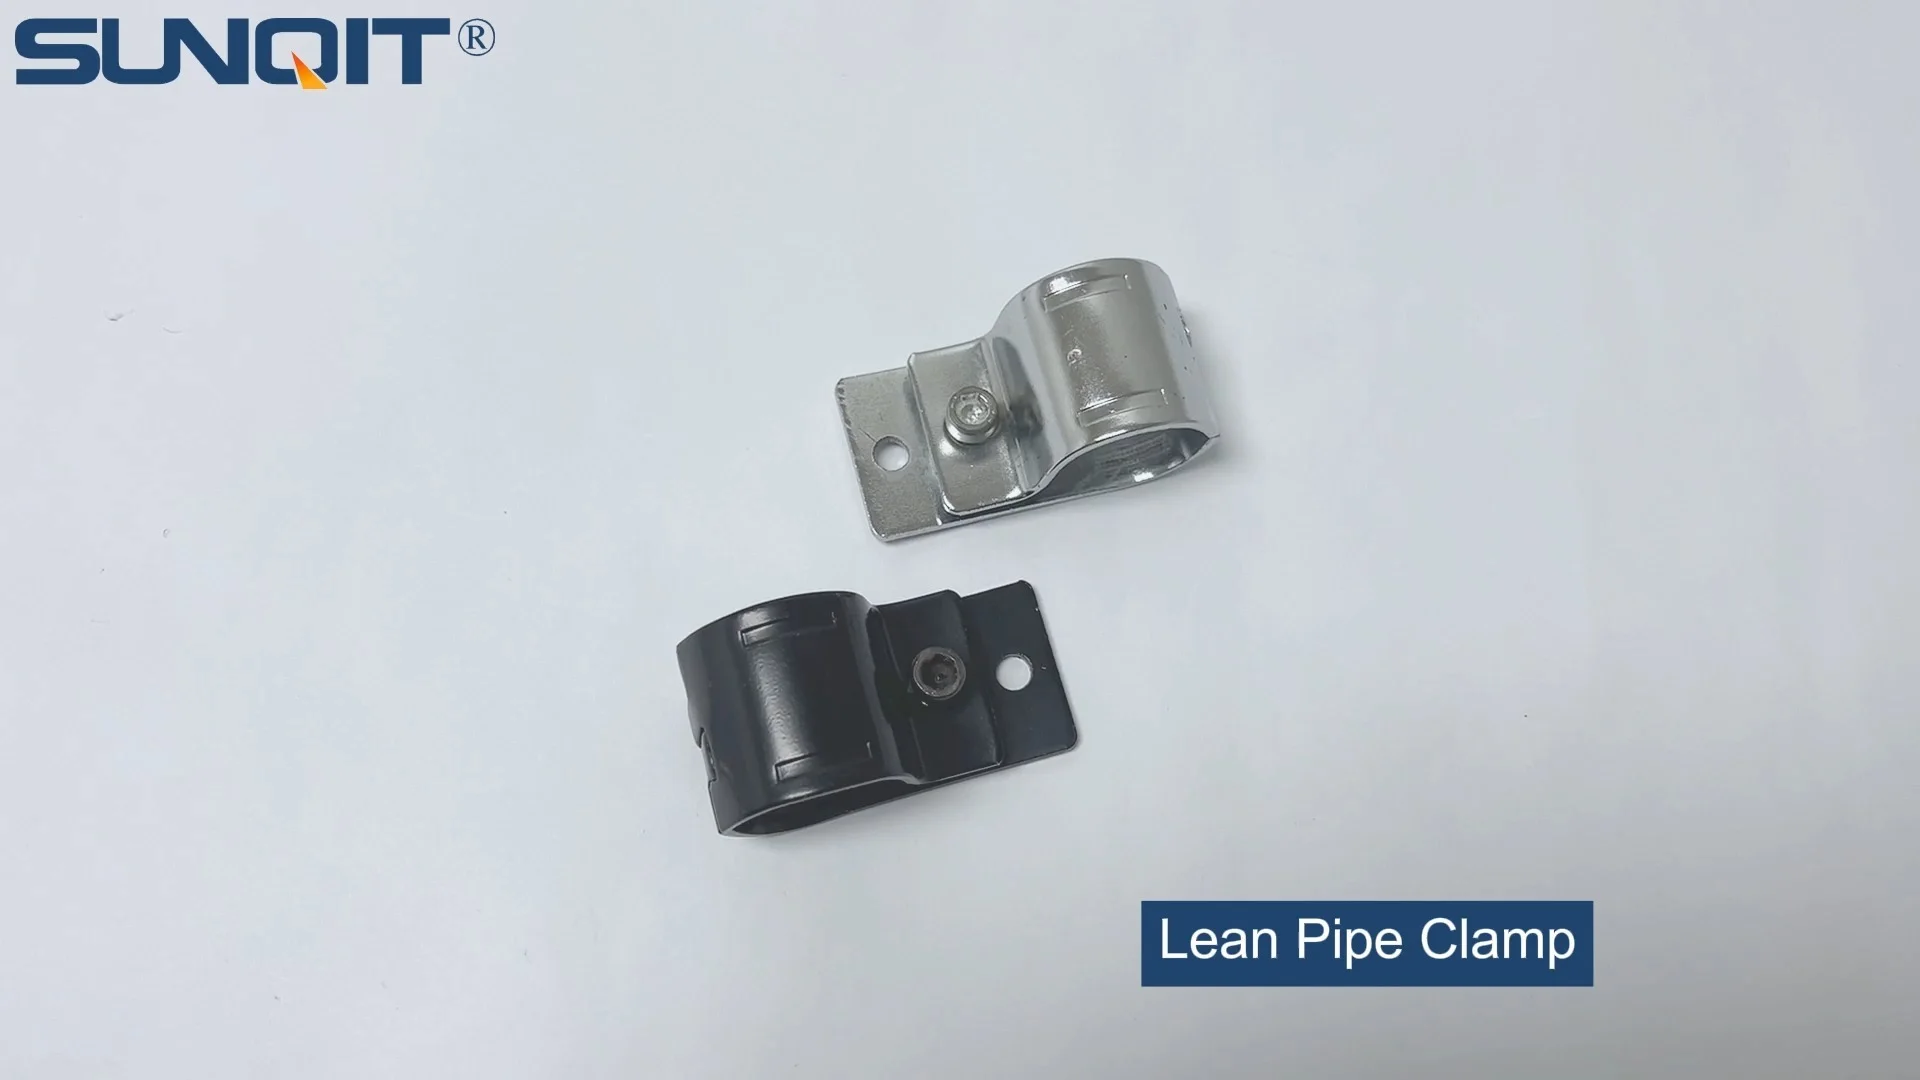
On a bustling production floor, where every second counts, the last thing anyone needs is a workflow disruption. Picture this: a team of assemblers is midway through a critical order, parts gliding smoothly along a roller track, when suddenly—a loud creak, a shift, and the entire line grinds to a halt. The culprit? A failed lean pipe clamp B. It's a small component, at first glance, but in the world of lean manufacturing, it's the unsung hero holding everything together. From supporting aluminum pipe structures to securing material racks, lean pipe clamp B plays a pivotal role in keeping operations efficient, safe, and on schedule. But like any hardworking tool, it needs care. In this guide, we'll walk through practical, actionable maintenance tips to extend the lifespan of your lean pipe clamp B, ensuring your production line stays strong, steady, and ready for whatever the day throws at it.
Why Lean Pipe Clamp B Deserves Your Attention
Before diving into maintenance, let's take a moment to appreciate what lean pipe clamp B does. These clamps are the connective tissue of lean systems, bridging aluminum pipe, stainless steel pipe series, and lean pipe joints to create sturdy workbenches, material racks, and assembly lines. They're designed to withstand constant pressure—whether it's the weight of heavy components on a shelf or the vibrations of a busy conveyor belt. But here's the thing: even the toughest tools wear down. A loose clamp can lead to wobbly workstations, increasing the risk of accidents. A corroded clamp might snap under stress, sending parts crashing to the floor. And every minute spent replacing a failed clamp is a minute your team isn't building, packing, or shipping. The good news? With regular maintenance, you can avoid these headaches, reduce replacement costs, and keep your lean system running like a well-oiled machine.
Know Your Clamp: Materials and Design Basics
Not all lean pipe clamp B units are created equal—and understanding what yours is made of will make maintenance easier. Most clamps are crafted from either aluminum or stainless steel, each with its own quirks. Aluminum clamps, often paired with aluminum pipe, are lightweight and resistant to rust in dry environments, but they can corrode if exposed to harsh chemicals or constant moisture. Stainless steel pipe series clamps, on the other hand, thrive in humid or wet settings (think food processing plants or outdoor storage areas) thanks to their corrosion-resistant properties. But they're heavier, so over-tightening can strain the threads.
Beyond materials, pay attention to the clamp's design. Most lean pipe clamp B models feature a pivot mechanism and a threaded bolt that tightens against the pipe. Some have rubber or plastic liners to grip the pipe without scratching it—these liners need their own checks, too! The key takeaway? Your clamp's material and design dictate how you'll clean, lubricate, and inspect it. For example, an aluminum clamp on an aluminum pipe might need gentler cleaning than a stainless steel clamp on a stainless steel pipe series rack.

Step 1: Master the Art of Regular Inspections
Inspection isn't just about "looking at things"—it's about knowing what to look for. Let's break it down into daily, weekly, and monthly routines that even the busiest teams can stick to.
Daily Visual Checks: Quick Glances That Save Time
Every morning, before the production line fires up, take 5 minutes to walk the floor and scan your lean pipe clamp B units. What should you notice? Start with the obvious: Is the clamp holding the pipe securely, or is there a gap? A loose clamp will let the pipe wiggle, which over time can wear out both the clamp and the lean pipe joint it's attached to. Next, check for visible damage: cracks near the pivot point, bent bolts, or rust spots (especially on aluminum clamps in damp areas). Even a tiny crack can grow under stress—imagine bending a paperclip back and forth; it starts small, then snaps. Finally, look at the contact area between the clamp and the pipe. Are the rubber liners intact, or are they peeling? A missing liner means metal-on-metal contact, which scratches the pipe and weakens the grip.
Weekly Detailed Inspections: Get Up Close and Personal
Once a week, grab a flashlight and a pair of gloves, and get hands-on. Gently wiggle each clamp—does it move more than 1/8 of an inch? If yes, it's time to tighten it (we'll cover how to do that properly later). Use the flashlight to check hard-to-see spots, like where the bolt meets the clamp body—this is a common area for corrosion to hide. For stainless steel pipe series clamps, look for discoloration; a dull, grayish tint might mean surface rust starting to form. For aluminum clamps, watch for white, powdery spots—this is aluminum oxide, a sign of corrosion that can eat away at the metal if left unchecked.
Monthly Deep Dives: Disassemble (When Needed)
Once a month, select a few clamps (especially those in high-stress areas, like under heavy material racks) and disassemble them partially. Loosen the bolt, remove the clamp from the pipe, and inspect the threads on both the bolt and the clamp body. Are they stripped, or do they have debris stuck in them? Run your finger along the pivot point—does it feel rough, or does it move smoothly? If it's rough, that's a sign it needs lubrication. This might seem time-consuming, but catching a stripped thread early beats replacing an entire clamp (and dealing with downtime) later.

Step 2: Clean Like a Pro—Debris and Corrosion Don't Stand a Chance
Dust, grease, and grime aren't just unsightly—they're silent killers of lean pipe clamp B. A layer of dust traps moisture, corrosion. Grease from the production line can make clamps slippery, weakening their grip. Here's how to clean your clamps effectively, based on their material.
Cleaning Aluminum Clamps (and Aluminum Pipe)
Aluminum is soft, so harsh cleaners (like bleach or abrasive scours) can scratch it. Instead, mix warm water with a mild dish soap (the kind you use in the kitchen) and dip a soft cloth or sponge into the solution. Wipe down the clamp, focusing on crevices where dust builds up. For stubborn grease, add a drop of rubbing alcohol to the cloth—just don't soak the clamp, as alcohol can dry out rubber liners. After cleaning, dry the clamp immediately with a clean towel—moisture is aluminum's worst enemy. If you spot white corrosion (aluminum oxide), gently scrub it with a soft-bristled brush (like an old toothbrush) dipped in soapy water; avoid steel wool, which will scratch the surface.
Cleaning Stainless Steel Pipe Series Clamps
Stainless steel is tougher, but it's not invincible. Fingerprints, for example, contain oils that can cause "tea staining" (brownish spots) over time. Use a solution of warm water and white vinegar (1:1 ratio) to cut through oils and grime. Wipe the clamp with a microfiber cloth, then rinse with clean water and dry. For heavier stains, a specialized stainless steel cleaner (available at hardware stores) works wonders—just follow the instructions on the bottle. Avoid using chloride-based cleaners (like bleach), as they can pit the stainless steel, creating weak spots.
Don't Forget the Lean Pipe Joints and Liners
While you're cleaning the clamp, take a second to wipe down the lean pipe joint it's connected to. Debris between the joint and the clamp can prevent a tight seal. And if your clamp has rubber or plastic liners, inspect them during cleaning—if they're cracked or peeling, replace them! A $2 liner is cheaper than a $20 clamp.

Step 3: Lubrication—The Secret to Smooth Operation
Think of lubrication as giving your clamp a "vitamin"—it keeps moving parts happy and prevents wear. But not all lubricants are created equal, and over-lubricating is just as bad as under-lubricating.
Choose the Right Lubricant for the Job
For the pivot point of your lean pipe clamp B, a light machine oil (like 3-in-1 oil) works well—it's thin enough to seep into small gaps but thick enough to stay put. Avoid heavy greases here; they attract dust and gunk, turning into a gritty paste that wears down the pivot. For the threaded bolt, a dry lubricant (like graphite powder or PTFE spray) is better. Why? Wet lubricants (like oil) can make the bolt loosen over time, especially on vertical clamps where gravity pulls downward. Dry lubes reduce friction without the mess.
Special case: If your clamp is near food processing or in a cleanroom, use food-grade lubricants (check the label for "NSF H1" certification). You don't want regular oil dripping onto products!
How and When to Lubricate
Lubricate the pivot point every 2–4 weeks, depending on usage. If the clamp is used multiple times a day (e.g., on a adjustable workbench), lubricate every 2 weeks. For clamps that rarely move (like on a fixed material rack), once a month is enough. Apply 1–2 drops of oil to the pivot, then move the clamp back and forth a few times to work the oil in. Wipe off excess oil with a cloth—you don't want it dripping onto the pipe or lean pipe joint.
For the threaded bolt, apply dry lubricant every 4–6 weeks. Sprinkle a small amount of graphite powder on the threads, or spray PTFE and let it dry for 5 minutes before tightening. This keeps the bolt turning smoothly, so you can get a snug fit without stripping the threads.
Step 4: Tightening—It's a Science, Not a Strength Contest
"Tighter is better" is a common myth—but over-tightening lean pipe clamp B can do more harm than good. Here's how to get the perfect fit.
The Golden Rule: Snug, Not Squeezed
A clamp should hold the pipe firmly, but you shouldn't need a cheater bar to tighten it. Most clamps are designed to withstand hand-tightening plus a quarter-turn with a wrench. If you're grunting to turn the bolt, you're overdoing it. Over-tightening can strip the threads on the clamp or the lean pipe joint, bend the bolt, or even warp the clamp body. On aluminum pipe, it can dent the metal, weakening the entire structure.
Torque Tips: When to Use Tools
For critical applications (like clamps holding heavy machinery), use a torque wrench. Most lean pipe clamp B manufacturers recommend 15–20 inch-pounds (in-lbs) of torque—check the manual for your specific model. If you don't have a torque wrench, use the "finger-tight plus a quarter-turn" method: tighten the bolt with your fingers until it's snug, then use a wrench to turn it 90 degrees. That's usually enough to secure the pipe without overdoing it.
Pro tip: If the bolt starts to "bind" (feel stuck) before it's tight, stop! It might be cross-threaded. Back it out, realign the threads, and try again. Cross-threading is a one-way ticket to a stripped clamp.
Step 5: Handling Wear and Tear—When to Repair vs. replace
Even with perfect maintenance, clamps wear out. The key is knowing when to fix a small issue and when to retire the clamp for good.
Repairable Issues: Small Fixes, Big Savings
Some problems are easy to fix: a missing rubber liner? Order a pack of replacements (they're cheap!). A bent bolt? Swap it out for a new one (make sure it's the same length and thread size). Surface rust on a stainless steel pipe series clamp? Scrub it with a vinegar-soaked cloth and apply a stainless steel protectant. These fixes take 10 minutes and cost next to nothing—no need to replace the entire clamp.
Red Flags: replace, Don't Risk It
Some damage is beyond repair. If you see any of these, swap the clamp immediately:
- Cracks in the clamp body (especially near the pivot or bolt hole)—these can't be glued or welded; the clamp will fail under stress.
- Stripped threads on the bolt or clamp body—no amount of tightening will hold it.
- Severe corrosion (pitting, large rust spots) that weakens the metal—this is common in aluminum clamps exposed to salt air or chemicals.
- A warped or bent clamp body—even if it still "works," it's under stress and will fail sooner than later.
Remember: A $15 clamp isn't worth risking a $1,000 accident (or worse, an injury). When in doubt, replace it.
Step 6: Store Spare Clamps Like They're Valuable (Because They Are)
If you keep spare lean pipe clamp B units in storage, how you store them matters. A damp, dusty shelf turns new clamps into corroded, useless ones. Here's how to keep spares in mint condition:
- Keep them dry: Store clamps in a sealed plastic bin with silica gel packets to absorb moisture. Avoid basements or garages with high humidity.
- Separate materials: Don't mix aluminum and stainless steel clamps in the same bin—aluminum can react with stainless steel in damp conditions, causing corrosion.
- Label them: Mark bins with the clamp type (e.g., "Aluminum Clamp B for 25mm Aluminum Pipe") so you grab the right one quickly.
- Check spares monthly: Even unused clamps can corrode. A quick once-over ensures they're ready when you need them.
Your Go-To Maintenance Checklist
| Task | Frequency | Tools Needed | Key Notes |
|---|---|---|---|
| Visual inspection for looseness/cracks | Daily | Flashlight | Check lean pipe joint connection too! |
| Wiggle test and bolt check | Weekly | Gloves | Clamp movement >1/8 inch = tighten |
| Clean with mild soap/water | Bi-weekly | Soft cloth, sponge | Dry immediately—no standing water! |
| Lubricate pivot and threads | 2–4 weeks | Machine oil, dry lube | Wipe excess oil; avoid grease on pivot |
| replace liners/bolts (if needed) | As needed | Screwdriver, replacement parts | Don't wait for liners to peel completely |
| Deep dive (disassemble, check threads) | Monthly | Wrench, flashlight | Focus on high-stress clamps (heavy racks) |
Final Thoughts: Maintenance = Peace of Mind
Caring for lean pipe clamp B might seem like one more task on a never-ending to-do list, but it's an investment—an investment in smoother workflows, fewer headaches, and a safer workplace. Think of it this way: You wouldn't drive a car without changing the oil; why run a production line without maintaining the clamps that hold it together? By following these steps—inspecting regularly, cleaning carefully, lubricating properly, and knowing when to replace—you'll extend the lifespan of your clamps, reduce downtime, and keep your team focused on what they do best: building great products.
And remember: Maintenance is a team effort. Train your operators to spot loose clamps or damaged liners—they're the ones using the equipment daily, and their eyes are your first line of defense. Together, you'll turn "small component care" into "big operational wins."