- Company Articles
- Products and Technology
- Installation And Maintenance
- Material Rack B Setup: Selecting the Right Saddle Pipe Clamp for Aluminum Pipes

Material Rack B Setup: Selecting the Right Saddle Pipe Clamp for Aluminum Pipes
Related Product
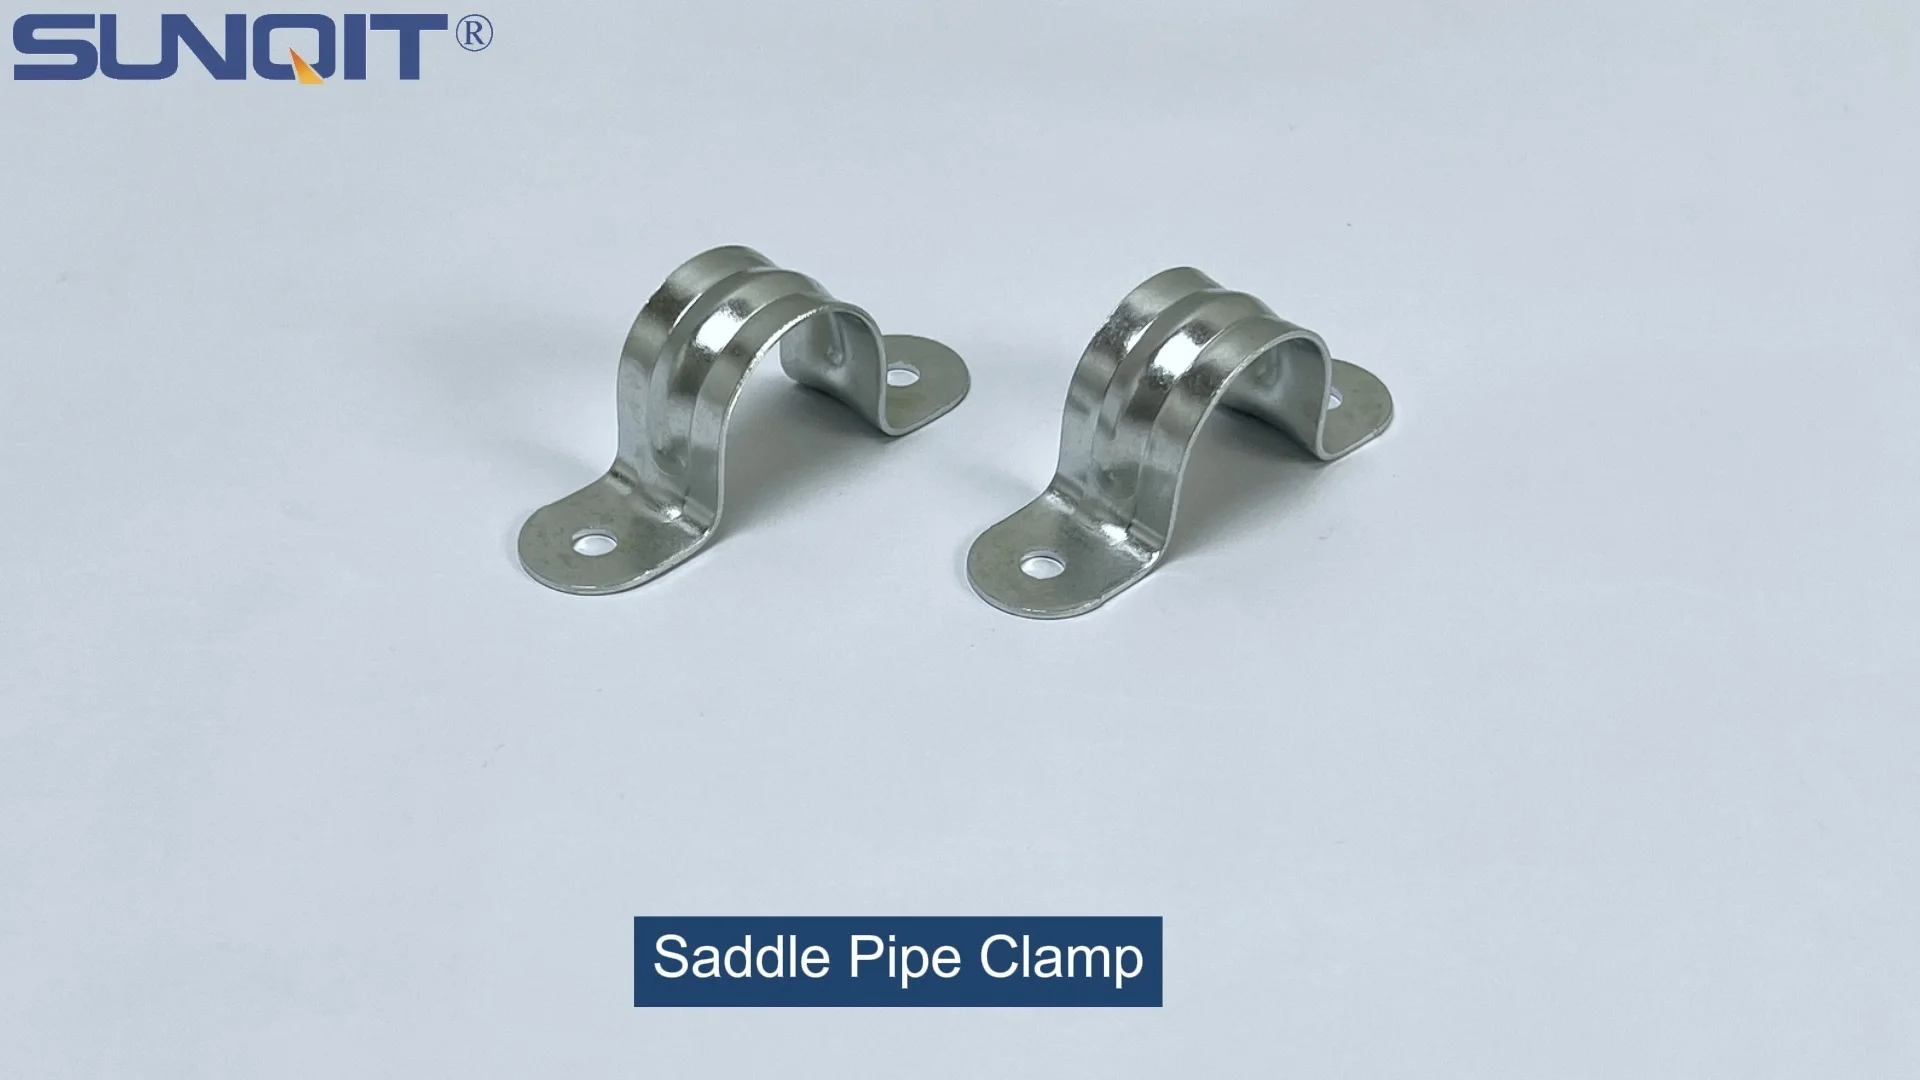
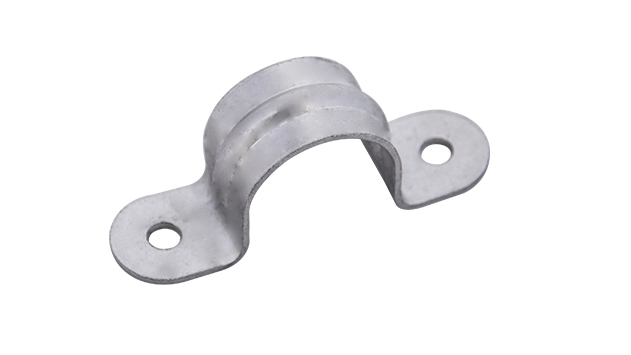
Saddle Pipe Clamp
Saddle pipe clamp, used for board connect with pipe, usually for table top installation.
Walk into any well-run production facility, and you'll notice a quiet rhythm—parts moving smoothly, workers accessing tools without hesitation, and materials organized in a way that feels almost intuitive. Behind that rhythm is often a network of lean solutions, and at the heart of many of those solutions sits a workhorse: the material rack. Today, we're zeroing in on one specific star of the show: Material Rack B (3 row and 3 floor) . This rack isn't just a storage unit; it's a backbone of lean production, designed to keep parts accessible, inventory visible, and workflows unbroken. But here's the thing: even the best-designed rack is only as strong as its weakest link. And more often than not, that link comes down to a tiny but critical component: the saddle pipe clamp.
If you've ever assembled a shelf or rack, you know the frustration of wobbly joints or pipes that slip out of place. That's where saddle pipe clamps step in—they're the unsung heroes that hold everything together, ensuring your rack stays stable, your materials stay secure, and your team stays productive. But not all clamps are created equal, especially when you're working with aluminum pipes. Aluminum brings unique advantages to the table—lightweight, corrosion-resistant, and easy to maneuver—but it also demands clamps that play by its rules. Choose the wrong one, and you could end up with a rack that sways under load, scratches your pipes, or even fails when you need it most.
In this guide, we're going to walk through everything you need to know to set up your Material Rack B (3 row and 3 floor) for success, with a laser focus on selecting the perfect saddle pipe clamp for your aluminum pipes. Whether you're a seasoned facility manager or a small business owner building your first production line, by the end, you'll understand why these little clamps matter so much, how to pick the right ones, and how to install them to keep your rack (and your workflow) rock-solid.
Understanding Material Rack B (3 row and 3 floor): More Than Just a Storage Shelf
First, let's get to know Material Rack B (3 row and 3 floor) a little better. This isn't your average garage shelf. Designed with lean principles in mind, it's built to maximize vertical space while keeping every level easily reachable. The "3 row and 3 floor" designation means it typically features three vertical columns (rows) and three horizontal shelves (floors), creating a grid of storage spaces that's both dense and organized. Think of it as a high-rise apartment for your parts—each "unit" has a clear address, so workers can grab what they need without hunting through piles.
Why does this design work so well in lean environments? For starters, it's all about visibility. With three floors, you can separate parts by stage of production, frequency of use, or product line—no more digging to the back of a deep shelf. It also encourages FIFO (First-In, First-Out) inventory management, a cornerstone of lean, since older stock is placed at the front and newer stock at the back. And because it's often built with aluminum lean pipe (more on that later), it's lightweight enough to reposition if your workflow changes, but sturdy enough to hold heavy components like automotive parts, electronics, or industrial tools.
But here's the catch: that versatility and durability depend entirely on how well it's assembled. Each row and floor is constructed from aluminum pipes connected by joints and brackets, and those pipes need to be secured tightly to the frame. That's where the saddle pipe clamp enters the picture. It's the component that fastens the horizontal shelves (the "floors") to the vertical columns (the "rows"), ensuring the entire structure stays rigid. Without a reliable clamp, even a small load could cause the shelves to sag or the columns to shift, turning your "lean solution" into a bottleneck.
Aluminum Pipes: Why Material Matters for Your Rack
Before we dive into clamps, let's talk about the star material here: aluminum pipe. If you've ever lifted a steel pipe versus an aluminum one, you know the difference—aluminum is significantly lighter, which makes assembling and moving your Material Rack B a breeze. But that's just the start. Aluminum is naturally resistant to rust and corrosion, which is a game-changer if your facility is humid, deals with liquids, or is located in a coastal area. Steel might rust over time, but aluminum? It'll keep its shine (and strength) for years with minimal maintenance.
But aluminum's lightweight nature also means it has different tolerance levels than steel. For example, it's more prone to bending under excessive pressure, and its surface is softer, which makes it easier to scratch or dent. That's why when you're selecting components to pair with aluminum pipes—like saddle pipe clamps—you can't just grab any old clamp off the shelf. You need one that's designed to work with aluminum's unique properties: gentle enough not to damage the pipe, strong enough to hold the load, and secure enough to prevent slipping.
Another key player here is aluminum lean pipe . Unlike standard aluminum pipes, lean pipes are often designed with modularity in mind, featuring smooth surfaces and compatibility with a range of aluminum profile accessories —joints, brackets, and yes, clamps. This modularity is what makes Material Rack B so adaptable; you can reconfigure it as your needs change, adding or removing shelves without rebuilding the entire structure. But again, that adaptability relies on clamps that can keep up—clamps that can be adjusted, tightened, and reused without losing their grip.
Saddle Pipe Clamps 101: What They Are and Why They're Critical
Let's break down the basics: what exactly is a saddle pipe clamp? At its core, it's a U-shaped or semi-circular bracket designed to wrap around a pipe (the "saddle") and fasten it to another surface—like the vertical column of your Material Rack B. Most clamps use bolts, screws, or nuts to tighten the saddle around the pipe, creating friction that holds it in place. Simple, right? But simplicity doesn't mean insignificance. Think of it like a seatbelt: it's a small part, but it's what keeps everything (and everyone) safe when things get moving.
In the context of Material Rack B, saddle pipe clamps have two main jobs: first, to secure the horizontal shelf pipes to the vertical columns, and second, to distribute the weight of the materials evenly across the structure. When you load up the third floor of your rack with heavy boxes, that weight travels down through the shelves, into the clamps, and then into the columns and base. If a clamp is loose or weak, that weight doesn't distribute evenly—instead, its on a single point, increasing the risk of the pipe bending or the clamp failing.
But saddle pipe clamps aren't just about strength—they're also about precision. A well-designed clamp will align the pipes perfectly, ensuring the shelves are level. Why does level matter? Because uneven shelves can cause materials to slide off, tools to roll away, or even put extra stress on the clamps themselves. Imagine a tilted shelf holding small parts—every time someone bumps the rack, parts could spill, leading to wasted time, lost inventory, or even safety hazards. A good clamp keeps the pipe straight and the shelf level, eliminating that risk.

Types of Saddle Pipe Clamps for Aluminum Lean Pipe
Now that we know why saddle pipe clamps matter, let's explore the different types available, and which ones work best with aluminum lean pipe. Not all clamps are designed for aluminum, so it's important to know what to look for.
1. Standard Saddle Pipe Clamps (Metal)
These are the most common type, typically made from steel or zinc-plated steel. They're durable, affordable, and work well for general-purpose applications. However, when used with aluminum pipes, plain metal clamps can be a double-edged sword. On the plus side, they're strong—great for holding heavier loads. On the downside, the metal-on-metal contact can scratch the aluminum's surface, especially if the clamp is over-tightened. Over time, those scratches can weaken the pipe or create points where corrosion (though rare with aluminum) might start. If you go with standard metal clamps, look for ones with a rubber or plastic coating on the saddle part—the coating acts as a buffer, protecting the aluminum from scratches and adding extra grip to prevent slipping.
2. Heavy-Duty Saddle Pipe Clamps
If your Material Rack B is going to hold particularly heavy items—think automotive components, large tooling, or bulk inventory—heavy-duty clamps are a must. These clamps are thicker, with reinforced saddles and stronger bolts, designed to handle loads upwards of 500 lbs per clamp (always check the manufacturer's specs). Like standard metal clamps, many heavy-duty options now come with rubberized saddles to protect aluminum pipes. They're a bit pricier, but the investment is worth it if you're pushing the rack's weight limits. Just make sure the clamp's bolt size and thread type match your aluminum profile accessories —nothing's more frustrating than buying a heavy-duty clamp only to find it won't fit your rack's joints.
3. Plastic or Nylon Saddle Clamps
For lighter loads or environments where scratching is a major concern (like when storing finished products or polished aluminum parts), plastic or nylon saddle clamps are a great alternative. These clamps are gentle on aluminum surfaces, won't rust, and are often more affordable than metal options. They're also resistant to chemicals, which is useful if your facility uses cleaning agents or coolants that might corrode metal. The downside? They're not as strong as metal clamps. Most plastic clamps are rated for lighter loads (under 100 lbs per clamp), so they're best for upper shelves holding small parts or lightweight materials. If you're using them, avoid over-tightening—the plastic can crack under too much pressure.
4. ESD-Safe Saddle Clamps
If your facility works with electronics or sensitive components (think circuit boards, semiconductors, or medical devices), you might need ESD-safe clamps. ESD (Electrostatic Discharge) can damage sensitive electronics, so ESD-safe clamps are made from materials that dissipate static electricity, preventing it from building up on the rack. These are often a specialized version of metal or plastic clamps, treated with anti-static coatings. While not everyone needs ESD-safe clamps, if your workflow involves static-sensitive parts, they're non-negotiable—even a small static discharge could ruin thousands of dollars in components.
| Clamp Type | Material | Best For | Max Load (Per Clamp) | Aluminum Pipe Protection | Pros | Cons |
|---|---|---|---|---|---|---|
| Standard Metal (Coated) | Steel with rubber/plastic coating | General-purpose, medium loads | 100–300 lbs | Good (coating prevents scratches) | Affordable, durable, versatile | Coating can wear off over time |
| Heavy-Duty Metal | Reinforced steel, often coated | Heavy inventory, 3rd-floor loads | 300–500+ lbs | Good (coated options available) | High strength, long-lasting | Heavier, more expensive |
| Plastic/Nylon | Polypropylene or nylon | Light parts, scratch-sensitive pipes | Up to 100 lbs | Excellent (no metal contact) | Gentle, corrosion-resistant, cheap | Not for heavy loads, prone to cracking |
| ESD-Safe | Anti-static plastic/coated metal | Electronics, sensitive components | Varies (100–300 lbs) | Good to Excellent | Prevents static damage | Specialized, higher cost |

Key Factors to Consider When Selecting Saddle Pipe Clamps
Now that you know the types of clamps available, let's walk through the critical factors to consider when choosing the right one for your Material Rack B (3 row and 3 floor). These aren't just minor details—they'll determine whether your clamp works for a month or a decade, and whether your rack stays stable or becomes a liability.
1. Pipe Diameter: Size Matters (A Lot)
This might seem obvious, but it's how many people grab a clamp without checking the pipe diameter first. Aluminum pipes come in various sizes—common diameters for lean pipes are 28mm, 30mm, or 40mm (about 1–1.5 inches). Your saddle pipe clamp needs to match this diameter exactly. If the clamp is too small, it won't fit around the pipe. If it's too large, it won't grip tightly, and the pipe will slip. Most clamps list the compatible pipe diameters on the packaging (e.g., "Fits 30mm aluminum pipe"), so double-check that number before buying.
Pro tip: If you're using aluminum lean pipe , measure the outer diameter with a caliper—don't just rely on the label. Sometimes, manufacturers list nominal sizes, which can vary slightly from the actual measurement. A 1mm difference might not seem like much, but it can mean the difference between a snug fit and a loose one.
2. Load Capacity: Know Your Weight Limits
Every clamp has a maximum load rating, which is the amount of weight it can safely hold without failing. This rating is usually listed in pounds or kilograms, and it's not a suggestion—it's a safety limit. When calculating the load for your Material Rack B, remember that each shelf's weight is distributed across multiple clamps. For example, a 3-row rack might have 6 clamps per shelf (2 per column). If your shelf holds 600 lbs, each clamp would need to handle at least 100 lbs (600 lbs ÷ 6 clamps). But here's the golden rule: always overestimate. Add a 20–30% buffer to account for unexpected weight (like someone placing a heavier box than planned) or uneven weight distribution. If your calculation says you need a 100-lb clamp, go for a 120–130-lb model to be safe.
Also, keep in mind that the load capacity can vary based on the pipe material. Aluminum is lighter than steel, but it's also less rigid, so even if the clamp can handle 300 lbs, the pipe itself might bend if the load is too concentrated. Always check the pipe's load rating too—your clamp is only as strong as the pipe it's holding.
3. Material Compatibility: Play Nice with Aluminum
We've touched on this, but it's worth repeating: aluminum and steel don't always play well together. When two dissimilar metals touch (a phenomenon called galvanic corrosion), they can react, especially in humid or wet environments. This reaction can weaken both the pipe and the clamp over time. To avoid this, look for clamps made from materials that are compatible with aluminum. For example, stainless steel clamps are less likely to cause galvanic corrosion than regular steel clamps. Alternatively, plastic or rubber-coated clamps create a barrier between the metal clamp and the aluminum pipe, preventing direct contact.
Another compatibility factor is the clamp's finish. Zinc-plated steel clamps are affordable, but the plating can wear off, exposing the steel underneath. If you're in a humid area, consider clamps with a powder-coated finish instead—they're more resistant to wear and corrosion, and they add an extra layer of protection for the aluminum pipe.
4. Installation and Adjustability: Easy to Tighten, Easy to Reuse
Lean production is all about adaptability, so your clamps should be too. Look for clamps that are easy to install and adjust. Most saddle pipe clamps use a bolt-and-nut system—turn the nut to tighten the clamp around the pipe. But some clamps have better designs than others. For example, clamps with wing nuts can be tightened by hand, which is great for quick adjustments. Clamps with hex nuts might require a wrench, but they often provide a tighter, more secure fit. Think about how often you'll need to reconfigure your rack: if you're always adding or removing shelves, wing nuts might save you time. If the rack stays static, hex nuts might be worth the extra effort for added security.
Also, check the clamp's design for "reusability." Some clamps can be tightened and loosened multiple times without losing their grip, while others (like cheap plastic clamps) might crack or strip after a few adjustments. If you plan to reconfigure your Material Rack B down the line, invest in clamps that can keep up with those changes.
5. Environmental Factors: Humidity, Chemicals, and Wear
Finally, think about your facility's environment. Is it dry, or humid? Do you use cleaning chemicals or coolants that might splash on the rack? Are there moving parts that could rub against the clamps? All of these factors will influence your clamp choice.
- Humid/Outdoor Environments: Go for stainless steel or plastic clamps—they resist rust and corrosion better than regular steel.
- Chemical Exposure: Plastic or nylon clamps are often chemical-resistant; avoid metal clamps that might react with harsh cleaners.
- High-Traffic Areas: If the rack is near a walkway or forklift path, look for clamps with rounded edges to prevent snags or injuries.
Step-by-Step: Installing Saddle Pipe Clamps on Material Rack B (3 row and 3 floor)
You've selected the perfect saddle pipe clamps—now it's time to install them. Follow these steps to ensure your Material Rack B is stable, secure, and ready to handle whatever you throw at it.
Step 1: Gather Your Tools and Materials
Before you start, make sure you have everything you need: your Material Rack B frame (vertical columns), aluminum pipes for the shelves, saddle pipe clamps, a measuring tape, a level, a pencil, and the appropriate tool for tightening the clamps (wrench, screwdriver, or just your hands for wing nuts). If you're using aluminum profile accessories like joint brackets, have those on hand too—some clamps attach directly to the columns via these brackets.
Step 2: Mark Your Pipe Positions
Lay out your vertical columns on a flat surface (or stand them upright if you have a helper). Measure and mark where each horizontal shelf pipe will go. For Material Rack B (3 row and 3 floor), you'll typically have three shelves, so mark three levels on each vertical column. Use a level to ensure the marks are even across all columns—uneven marks mean uneven shelves, which we're trying to avoid. A good rule of thumb: space the shelves at least 18–24 inches apart to allow easy access, but adjust based on the height of your materials.
Step 3: Attach the Clamps to the Columns
Now, attach the saddle pipe clamps to the vertical columns at your marked positions—don't fully tighten them yet; we'll do that after the pipes are in place. If your clamps attach via aluminum profile accessories (like T-slot brackets), slide the brackets into the columns' T-slots first, then attach the clamps to the brackets. Make sure the clamps are oriented correctly: the "saddle" part (the curved part that holds the pipe) should be facing outward, ready to receive the horizontal pipe.
Step 4: insert the Horizontal Pipes
Lift the aluminum pipe and place it into the saddle of each clamp on one level. For a 3-row rack, you'll have three vertical columns, so each shelf will have two horizontal pipes (one between column 1 and 2, one between column 2 and 3). Once the pipe is in place, gently close the clamp's top (if it has a two-piece design) or position the clamp's saddle around the pipe. Again, don't tighten fully—just snug enough to hold the pipe in place.
Step 5: Level the Shelves and Tighten the Clamps
This is the critical step. Place a level on top of the horizontal pipe to ensure it's perfectly horizontal. If it's not, adjust the clamps up or down slightly until the level reads even. Once the pipe is level, tighten the clamps—slowly and evenly. If you're using a wrench, avoid over-tightening, especially with aluminum pipes—you don't want to dent or bend the pipe. A good rule: tighten until the clamp is snug, then give it a quarter-turn more. Repeat this for all pipes on all three levels.
Step 6: Test the Stability
Once all clamps are tightened, give the rack a gentle shake. It should feel solid—no wobbling, no creaking, no pipes shifting. Place a few heavy boxes on the shelves (up to your calculated load limit) and check again. If anything moves or sags, recheck the clamps—you might need to tighten them more or adjust the level. Better to catch this now than when the rack is fully loaded!
Common Mistakes to Avoid (and How to Fix Them)
Even with the best intentions, it's easy to make missteps when setting up your Material Rack B. Here are the most common mistakes we see, and how to avoid them:
Mistake #1: Using the Wrong Clamp Size
We can't stress this enough: always check the pipe diameter. A clamp that's 2mm too large will never hold properly, no matter how tight you crank it. If you realize you've bought the wrong size, don't try to "make it work"—return them and get the right ones. It's better to delay setup by a day than to risk a rack failure later.
Mistake #2: Overloading the Rack
Just because the clamps are rated for 300 lbs doesn't mean you should stack 300 lbs on every shelf. Remember to distribute the weight evenly, and never exceed the rack's total load capacity (which is usually listed by the manufacturer). If you're unsure, err on the side of caution—leave extra space, or add more clamps to distribute the load.
Mistake #3: Ignoring Corrosion in Humid Areas
If your facility is humid or near water, metal clamps can rust, and aluminum pipes can develop white corrosion (aluminum oxide) if they're in contact with steel. To fix this, switch to stainless steel or plastic clamps, or add rubber gaskets between steel clamps and aluminum pipes to prevent direct contact.
Mistake #4: Skipping the Level Check
A wobbly shelf isn't just annoying—it's dangerous. Always use a level during installation, and double-check after tightening. If you notice a shelf is uneven after setup, loosen the clamps, adjust the pipe, and retighten.
Mistake #5: Forgetting Regular Maintenance
Clamps loosen over time, especially with vibrations from nearby machinery or frequent loading/unloading. Make it a habit to check your clamps monthly—tighten any that are loose, replace any that are damaged, and clean off any debris that might prevent a tight grip.
Conclusion: Your Rack, Your Workflow, Your Success
Setting up Material Rack B (3 row and 3 floor) might seem like a simple task, but as we've explored, the details matter—especially when it comes to selecting the right saddle pipe clamp for your aluminum pipes. These small components are the difference between a rack that lasts for years and one that fails under pressure, between a workflow that hums and one that stutters, between a team that trusts their tools and one that's constantly fixing them.
By now, you know the key players: Material Rack B's modular design, the unique needs of aluminum and aluminum lean pipe, the types of saddle pipe clamps available, and the critical factors to consider when choosing them. You also know how to install them properly, avoid common mistakes, and keep your rack in top shape.
At the end of the day, lean production is about more than just efficiency—it's about creating a workspace that works with your team, not against them. A well-built, stable material rack does exactly that: it keeps parts where they need to be, when they need to be there, so your team can focus on what they do best. And it all starts with choosing the right clamp.
So, the next time you're setting up a rack, take a moment to appreciate the saddle pipe clamp. It might be small, but it's holding up more than just pipes—it's holding up your workflow, your productivity, and your success. Choose wisely, install carefully, and watch your Material Rack B become the reliable workhorse your facility deserves.