- Company Articles
- Products and Technology
- Installation And Maintenance
- Material Rack B Upgrades: 3060 Aluminum Profile End Caps Installation Guide

Material Rack B Upgrades: 3060 Aluminum Profile End Caps Installation Guide
Related Product
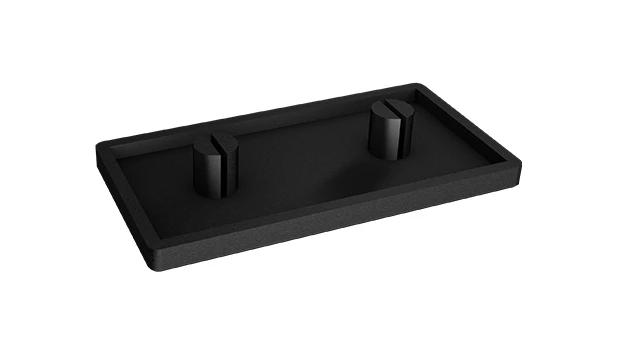
3060 Aluminum Profile End Cap
The aluminum profile end cap adds a finishing touch to your project and closes off profile ends to limit dust and debris buildup, also it can avaid some scratch for material and labor during the assemble work.
If you've spent any time in a busy workshop, factory floor, or warehouse, you know that the little details often make the biggest difference. Take Material Rack B (3 row and 3 floor), for example—the workhorse of many production lines. It's sturdy, reliable, and designed to keep parts, tools, and materials organized. But even the best equipment has room for improvement. Today, we're diving into a simple upgrade that'll make your Material Rack B safer, more durable, and easier to maintain: installing 3060 aluminum profile end caps. Let's break down why this matters, how to do it, and the surprising impact it can have on your daily workflow.
Why Bother with End Caps? The Hidden Risks of Overlooking Aluminum Profile Ends
Aluminum profile is the backbone of Material Rack B. Its sleek, modular design makes it easy to assemble and reconfigure, but those exposed profile ends? They're a silent troublemaker. Let me paint a picture: You're rushing to grab a box from the top shelf of your rack. Your arm brushes against the edge of an aluminum profile, and suddenly you're wincing—sharp, unfinished metal has nicked your skin. Or maybe you've noticed small scratches on plastic parts stored near the rack; those rough edges are wearing down your materials. Worse, over time, dust, debris, and even moisture can seep into the hollow ends of the profiles, leading to internal corrosion or buildup that's a hassle to clean.
That's where 3060 aluminum profile end caps come in. These small, unassuming pieces of aluminum profile accessories are like the "final touch" for your rack. They snap or press into the open ends of 3060 aluminum profiles, creating a smooth, sealed finish. Think of them as the bumper on a car—simple, but critical for protection and polish.
What Makes 3060 End Caps the Right Choice for Material Rack B?
First, let's clarify: "3060" refers to the size of the aluminum profile—30mm in width and 60mm in height. Material Rack B (3 row and 3 floor) is built using these 3060 profiles, so the end caps need to match that exact dimension. Using the wrong size would be like trying to put a square peg in a round hole—frustrating and ineffective.
But it's not just about size. 3060 aluminum profile end caps are designed with durability in mind. Made from high-grade aluminum (matching the profile itself), they resist rust, scratches, and daily wear. Unlike plastic caps, which can crack or fade under heavy use, aluminum end caps hold up to the bumps, knocks, and temperature changes of a busy workspace. Plus, they come in a neutral silver finish that blends seamlessly with the rack, keeping your setup looking professional.

Gearing Up: Tools You'll Need for a Smooth Installation
You don't need a workshop full of fancy tools for this project. In fact, you probably already have most of these items lying around. Here's what to gather before you start:
| Tool | Purpose | Pro Tip |
|---|---|---|
| 3060 Aluminum Profile End Caps | The star of the show—covers profile ends. | Buy a few extras! It's easy to misplace one or two. |
| Rubber Mallet | Taps end caps into place without damaging them. | Avoid metal hammers—they'll scratch the aluminum. |
| Microfiber Cloth | Cleans dust and debris from profile ends. | Dampen slightly for stubborn grime, but dry thoroughly before installing caps. |
| Tape Measure | Double-checks profile size (30mm x 60mm). | Measure twice, install once—no one likes (fǎn gōng, "rework")! |
| Work Gloves | Protects hands from sharp edges (yes, even before caps go on). | Opt for nitrile or leather—they grip better than cotton. |

Step-by-Step: Installing 3060 End Caps on Material Rack B
Now for the fun part—actually upgrading your rack! This process takes about 30 minutes (even if you're new to DIY), and the results are instant. Let's walk through it step by step.
Step 1: Prep Your Workspace (and the Rack)
Start by clearing off Material Rack B. Take down any boxes, tools, or materials—you need full access to all the profile ends. If the rack is loaded with heavy items, ask a coworker for help moving them to a temporary spot (safety first!). Once it's empty, give the rack a quick once-over with your microfiber cloth. Wipe down the ends of each 3060 profile to remove dust, grease, or bits of debris. A clean surface ensures the end caps stick properly and won't loosen later.
Step 2: Identify All Profile Ends
Material Rack B (3 row and 3 floor) has a lot of profile ends—don't miss any! Stand back and scan the rack from all angles: top, bottom, sides, and the ends of each shelf. Count them up to make sure you have enough end caps. A quick formula: Each vertical post has 2 ends (top and bottom), and each horizontal shelf has 2 ends per section. For a 3-row, 3-floor rack, that's roughly 24-30 ends (depending on design). Better to have extra caps than to run out mid-project!
Step 3: Align the End Cap with the Profile
Put on your work gloves (remember, those raw profile ends can still be sharp!). Take one 3060 end cap and hold it up to a profile end. You'll notice the cap has a slightly tapered edge—that's the side that goes into the profile. The flat, smooth side faces outward. Make sure the cap is oriented correctly: the longer side of the cap should match the longer side of the 3060 profile (60mm height). If it feels lopsided, flip it around—you'll know it's right when it sits flush against the profile.
Step 4: Press, Tap, and Secure
Now, gently press the end cap into the profile by hand. Most caps will "catch" with a soft click, staying in place loosely. If it's tight, don't force it—you might bend the cap. Instead, take your rubber mallet and tap the cap lightly around the edges. Start with small taps, moving in a circle (top, right, bottom, left) to seat it evenly. You'll feel it slide into place until the outer edge of the cap is flush with the profile. No gaps, no wobbles—that's the sweet spot.
Step 5: Double-Check and Repeat
After installing a cap, give it a gentle tug to make sure it's secure. It should stay put without popping out. If it feels loose, remove it, check for debris in the profile, and try again. Once you're happy with the first one, move on to the next profile end. Work systematically—start at the top left of the rack and move right, then down to the next shelf. This way, you won't skip any ends (trust me, it's easy to lose track!).
Step 6: Load the Rack Back Up (and Admire Your Work!)
Once all end caps are installed, it's time to reload Material Rack B. As you put materials back, take a moment to run your hand along the edges—notice how smooth they feel now? No more snags, no more rough spots. Pat yourself on the back—you've just upgraded your workspace in under an hour!
The Impact: How End Caps Boost Safety, Efficiency, and Lean System Goals
You might be thinking, "It's just a few caps—how much difference can they really make?" Let's break it down. In lean system terms, even small improvements add up to big wins by eliminating waste, reducing risk, and streamlining workflow. Here's how end caps contribute:
- Safety First: Sharp edges are a common cause of minor injuries in workshops—scraped hands, torn gloves, even snags on clothing. By covering those edges, end caps reduce the risk of accidents, keeping your team healthy and focused.
- Less Maintenance: Uncapped profiles collect dust, dirt, and even small parts (like screws or washers) that fall into the hollow ends. Over time, this buildup can weaken the profile or make it harder to reconfigure the rack. End caps seal out debris, cutting down on cleaning and repair time.
- Longer Rack Life: The ends of aluminum profiles are vulnerable to dents, chips, and corrosion—especially in humid or busy environments. End caps act as a barrier, protecting the profile's structural integrity and extending the life of your Material Rack B.
- Visual Order: A lean system thrives on visual clarity—when your workspace looks organized, it's easier to spot inefficiencies or missing items. End caps give the rack a polished, intentional look, reinforcing a culture of care and attention to detail.
Caring for Your End Caps: Simple Maintenance Tips
Like any part of your workspace, end caps need a little love to stay in top shape. Here's how to keep them (and your rack) looking great:
Weekly Wipe-Down: Include the end caps in your regular workspace cleaning. A quick wipe with a dry microfiber cloth removes dust and keeps them shiny.
Monthly Check-In: Every few weeks, give the caps a gentle push to ensure none have loosened. If one is wobbly, tap it back into place with your rubber mallet. If it's cracked or damaged, replace it ASAP—don't let a small flaw undo your hard work.
Seasonal Deep Clean: If your workspace gets particularly dusty (looking at you, woodworking shops!), use a soft-bristled brush to clean around the edges of the caps. For greasy environments (like auto repair shops), a mild degreaser (diluted with water) on a cloth works wonders—just dry thoroughly afterward to prevent water spots.
Final Thoughts: Small Upgrade, Big Results
Installing 3060 aluminum profile end caps on Material Rack B isn't just a DIY project—it's an investment in your workspace, your team, and your lean system goals. It's proof that you don't need fancy equipment or a huge budget to make meaningful improvements. Sometimes, the best upgrades are the ones that blend simplicity, functionality, and care.
So, the next time you walk past your Material Rack B, take a second to appreciate those little aluminum caps. They might not shout for attention, but they're quietly making your day smoother, safer, and more efficient. And isn't that what lean system is all about? Making the small things count so the big things can thrive.
Here's to sharper workflows, smoother edges, and racks that stand the test of time—one end cap at a time.