- Company Articles
- Products and Technology
- Installation And Maintenance
- Maximizing Lifespan: 6 Maintenance Habits for Straight Lean Pipe Joint Square End Chrome

Maximizing Lifespan: 6 Maintenance Habits for Straight Lean Pipe Joint Square End Chrome
Related Product
Straight Lean Pipe Joint Square End Chrome
Straight lean pipe joint square end, one side connect with 28mm round pipe, the other side connect with square tube.
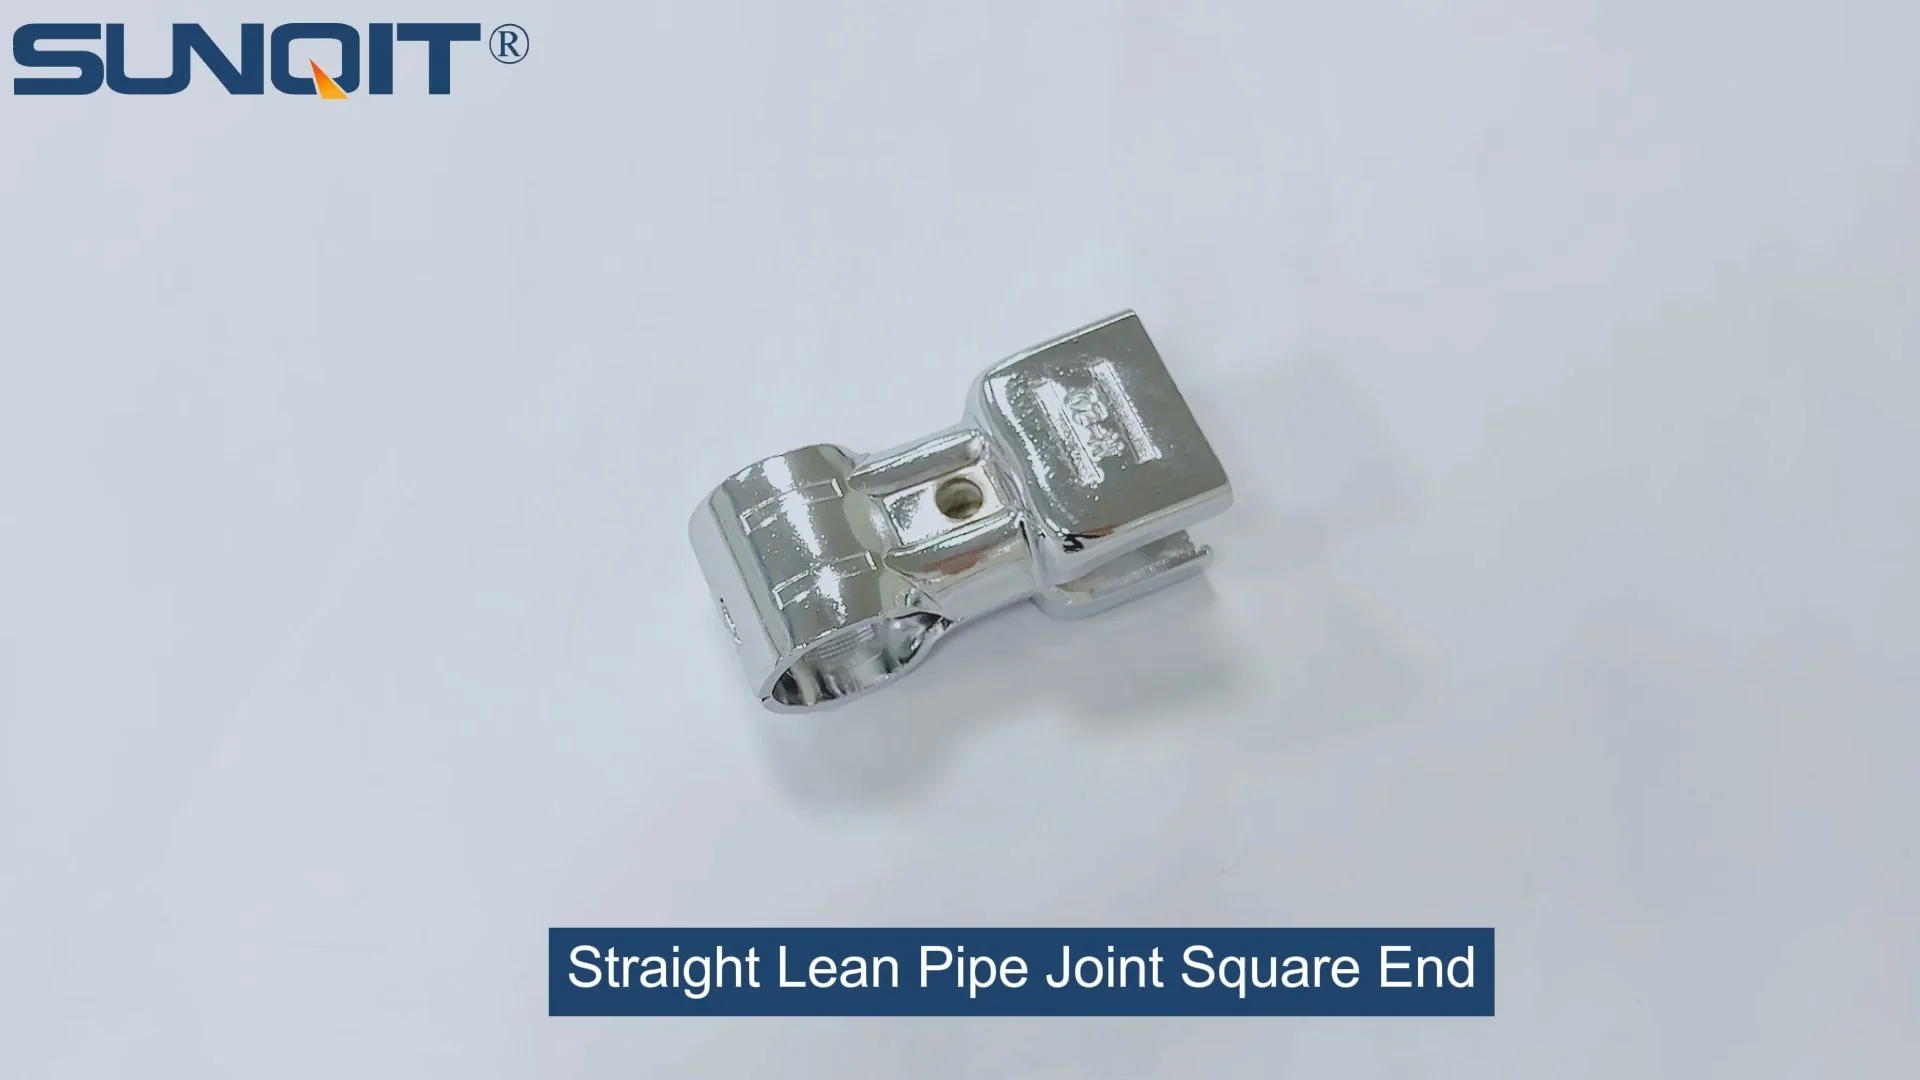
Walk into any manufacturing plant, warehouse, or assembly line, and you'll likely spot them—quietly holding everything together. They're not the flashy machines or high-tech robots, but the unsung heroes of lean systems: lean pipe joints. Specifically, the straight lean pipe joint square end chrome —a small but mighty component that forms the backbone of workbenches, flow racks, conveyor systems, and turnover trolleys. These joints don't just connect pipes; they connect efficiency to productivity, and safety to smooth operations. But here's the thing: even the sturdiest joints wear down over time if neglected. A loose joint today could mean a wobbly workbench tomorrow, a halted production line next week, or worse, a safety hazard. The good news? With the right maintenance habits, you can extend the lifespan of these critical components by years, saving time, money, and headaches. Let's dive into six actionable habits that will keep your straight lean pipe joint square end chrome (and your entire lean system) in top shape.
Habit 1: Regular Cleaning—Keep Dust and Debris at Bay
Dust, oil, metal shavings, and even spilled coolant—these are the silent enemies of your lean pipe joints. Over time, they build up in the crevices of the square end chrome finish, acting like sandpaper every time the joint moves or bears weight. For chrome-plated joints, this buildup can hide corrosion spots, while for aluminum lean pipe joints (a common companion in modern setups), debris traps moisture, accelerating rust. Cleaning isn't just about aesthetics; it's about preserving the joint's structural integrity.
So, how do you do it right? Start with a soft, lint-free cloth—microfiber works best—to wipe away surface dust. For stuck-on grime, dampen the cloth with warm water and a mild detergent (avoid harsh chemicals like bleach or ammonia, which can strip the chrome or damage aluminum). Gently scrub the joint's edges, threads, and connection points, paying extra attention to where the joint meets the pipe—this is where debris loves to hide. If you're dealing with oil or grease buildup (common in machine shops), a small amount of isopropyl alcohol on the cloth can cut through the mess without harming the finish. After cleaning, dry the joint thoroughly with a clean cloth to prevent water spots or moisture retention. Aim to do a quick wipe-down daily if the joint is in a high-debris area, and a deeper clean weekly. Trust me, a few minutes with a cloth now beats replacing a corroded joint later.
Habit 2: Thorough Inspection—Catch Issues Before They Escalate
Cleaning sets the stage for the next critical habit: inspection. You can't fix what you can't see, and even a "minor" issue like a hairline crack or loose thread can snowball into a major problem. Inspection should be a mix of visual checks, tactile tests, and functional trials. Let's break it down.
Visual Checks: After cleaning, examine the joint closely. Look for signs of wear: chips in the chrome plating, discoloration (a telltale sign of rust), or uneven surfaces. Check the square end for bending or warping—even a tiny twist can throw off the joint's alignment with the pipe. For threaded areas, inspect for stripped or damaged threads; if they look "chewed up," the joint won't grip the pipe securely. Don't forget to check the connection points where the joint attaches to other lean pipe and accessories —like roller tracks or caster wheels. Gaps here mean stress is unevenly distributed.
Tactile Tests: Run your finger along the joint's edges. Do you feel rough spots, sharp burrs, or unusual bumps? These could indicate internal damage. Wiggle the joint gently (with the system unloaded, of course)—it should feel firm, not loose or "squishy." If it moves more than 1-2mm, the threads or clamping mechanism may be failing.
Functional Trials: Load the system as you normally would (e.g., place tools on the workbench or roll materials along the flow rack) and observe the joint. Does it creak, shift, or "give" under weight? Creaking often signals friction from dry or damaged parts, while shifting means the joint can't handle the load. Note: If you hear or see movement, unload the system immediately—safety first.
To make inspection easier, create a simple checklist. Below is a quick reference table for common issues and what to do when you spot them:
| Inspection Type | What to Look For | Action If Found |
|---|---|---|
| Visual | Chrome chips, rust, bent square end, stripped threads | replace joint if chips/rust are severe; repair minor bends with pliers (if safe) |
| Tactile | Rough edges, loose movement (>2mm wiggle) | Sand rough edges with fine-grit sandpaper; retighten or replace if loose |
| Functional | Creaking, shifting under load, gaps at connections | Lubricate if creaking; retighten connections; replace if shifting persists |
How often should you inspect? Quick visual/tactile checks can be done daily during pre-shift setup. A deeper inspection (including functional tests) should happen weekly. For high-use systems—like conveyor joints that run 8+ hours a day—step it up to twice a week. And once a month, do a full system audit: unload the structure, disassemble non-critical joints, and inspect every nook and cranny. It's time-consuming, but it's how you catch problems before they shut down production.

Habit 3: Strategic Lubrication—Keep the "Move" in Movement
Many lean pipe joints, including the straight square end chrome variety, have moving parts—like internal hinges or rotating components—that rely on smooth motion. Without proper lubrication, these parts grind against each other, causing wear, noise, and eventually failure. But lubrication isn't a "one-size-fits-all" task; you need the right product, applied the right way, at the right time.
Choose the Right Lubricant: Avoid heavy oils—they attract dust and debris, turning into a gritty paste that accelerates wear. Instead, opt for silicone-based lubricants or dry PTFE sprays. Silicone is water-resistant (great for humid environments) and won't damage chrome or aluminum. Dry sprays leave a thin, friction-reducing film without the mess of liquid lubricants, making them ideal for joints near electronics or cleanrooms.
Where to Lubricate: Focus on pivot points, threaded areas, and any part that rotates or slides. For the square end joint, the connection between the joint and the pipe's threading is a key spot—lubricating here reduces friction when tightening or adjusting the joint. If the joint has a clamping mechanism (common in modular systems), lubricate the lever or knob's moving parts to keep them easy to operate.
How to Apply: Less is more. A tiny drop or a light spray is enough—over-lubricating leads to drips, which attract dirt. Use a precision applicator (like a small brush or a straw attached to the lubricant can) to target hard-to-reach areas. After applying, move the joint gently back and forth to distribute the lubricant evenly, then wipe away excess with a cloth. Frequency depends on use: high-use joints (e.g., on conveyor roller tracks) may need lubrication every 2-3 weeks, while low-use ones (like stationary workbench joints) can go 1-2 months.

Habit 4: Proper Torque and Tightening—Avoid the "Too Tight" or "Too Loose" Trap
Here's a common mistake: grabbing the nearest wrench and cranking a joint "as tight as possible." Or, conversely, leaving it loose because "it feels secure enough." Both are recipes for disaster. Over-tightening strips threads, warps the square end, or cracks the joint (especially in aluminum lean pipe setups). Under-tightening leads to looseness, which causes vibration, uneven stress, and premature wear. The solution? Use the right torque—measured force—to tighten the joint just enough to hold securely without damaging it.
First, check the manufacturer's specs. Most lean pipe joint suppliers provide torque guidelines (usually in Newton-meters or inch-pounds) based on the joint's size and material. For example, a 20mm straight square end chrome joint might require 15-20 Nm of torque. If you don't have the specs, err on the side of caution: start with a lower torque, test the joint's stability, and gradually increase until it's firm but not strained.
Invest in a torque wrench—they're affordable and prevent guesswork. Avoid using pipe wrenches or adjustable spanners, which can slip and damage the joint's chrome finish. When tightening, hold the wrench at the end of the handle for better control, and turn slowly to avoid sudden jerks. If the joint has a locknut, tighten the main nut first to the correct torque, then secure the locknut against it—this prevents loosening over time.
Pro tip: Mark the joint and pipe with a small line of paint after tightening. Later, during inspections, you can check if the lines have shifted—this tells you if the joint has loosened without needing to retighten it unnecessarily. And if you need to adjust the joint (e.g., repositioning a workbench), loosen it gradually, not all at once—this prevents sudden stress on the threads.
Habit 5: Load Management—Respect the Joint's Limits
Lean pipe joints are designed to handle specific loads, and exceeding those limits is a fast track to failure. A joint rated for 50kg shouldn't be asked to hold 100kg—even if it "seems" okay at first. Overloading causes the joint to flex beyond its tolerance, weakening the material over time. The square end may bend, the threads may stretch, or the chrome plating may crack under stress. So, how do you manage loads properly?
First, know the joint's load rating. This info is usually on the supplier's label or datasheet—if you can't find it, contact your lean pipe supplier (they'll be happy to help). When designing your system, factor in not just the static load (e.g., tools on a workbench) but also dynamic loads (e.g., materials sliding on a flow rack or casters rolling over uneven floors). Dynamic loads add extra stress, so size up your joints if needed.
Distribute weight evenly. A workbench with all tools piled on one corner puts excessive strain on the nearest joint, even if the total load is under the limit. Use dividers, bins, or shelves to spread weight across multiple joints. For conveyor systems, avoid slamming heavy items onto roller tracks—impact loads can jolt joints loose.
Train your team to spot overloading. Teach them to recognize warning signs: sagging structures, creaking joints, or pipes that bow under weight. Encourage them to report these issues immediately—better to pause work for 10 minutes to redistribute a load than to replace a broken joint (and fix the damage it caused).
Habit 6: Smart Storage—Protect Joints When Not in Use
What happens to extra joints or disassembled components? If they're tossed into a bin with other metal parts, they'll bang around, get scratched, or rust. Proper storage is just as important as in-use maintenance, especially for chrome-plated or aluminum lean pipe joints that are prone to finish damage.
Store joints in a dry, cool area—avoid damp basements or areas near radiators. Use divided bins or plastic organizers to keep joints separate from heavier parts (like caster wheels or steel pipes) that could dent them. For long-term storage, wrap chrome joints in acid-free paper to prevent tarnishing, or place them in sealed plastic bags with a silica gel packet to absorb moisture. If you're storing assembled sections (e.g., a disassembled workbench frame), cover them with a breathable tarp to keep dust off but allow air circulation (trapped moisture is a rust risk).
Label stored joints clearly. Note their size, type (e.g., "straight square end chrome"), and load rating—this saves time when you need to replace a joint quickly. And rotate stock: use older joints first to prevent them from sitting unused for years, which can lead to seized threads or degraded lubricants.
Final Thoughts: Small Habits, Big Results
Maintaining straight lean pipe joint square end chrome isn't glamorous work, but it's the foundation of a reliable, efficient lean system. These six habits—cleaning, inspection, lubrication, proper torque, load management, and storage—are simple, actionable, and surprisingly effective. Think of it this way: each minute you spend maintaining a joint today saves you hours of downtime, repair costs, and frustration tomorrow. And when your joints last longer, your entire system runs smoother—your team stays productive, your customers stay happy, and your bottom line stays healthy. So, grab that cloth, pick up your torque wrench, and start building these habits. Your lean system (and your future self) will thank you.