- Company Articles
- Products and Technology
- Installation And Maintenance
- Multi-Angle Fixed Aluminum Joint Installation Tools: What You Need

Multi-Angle Fixed Aluminum Joint Installation Tools: What You Need
Related Product
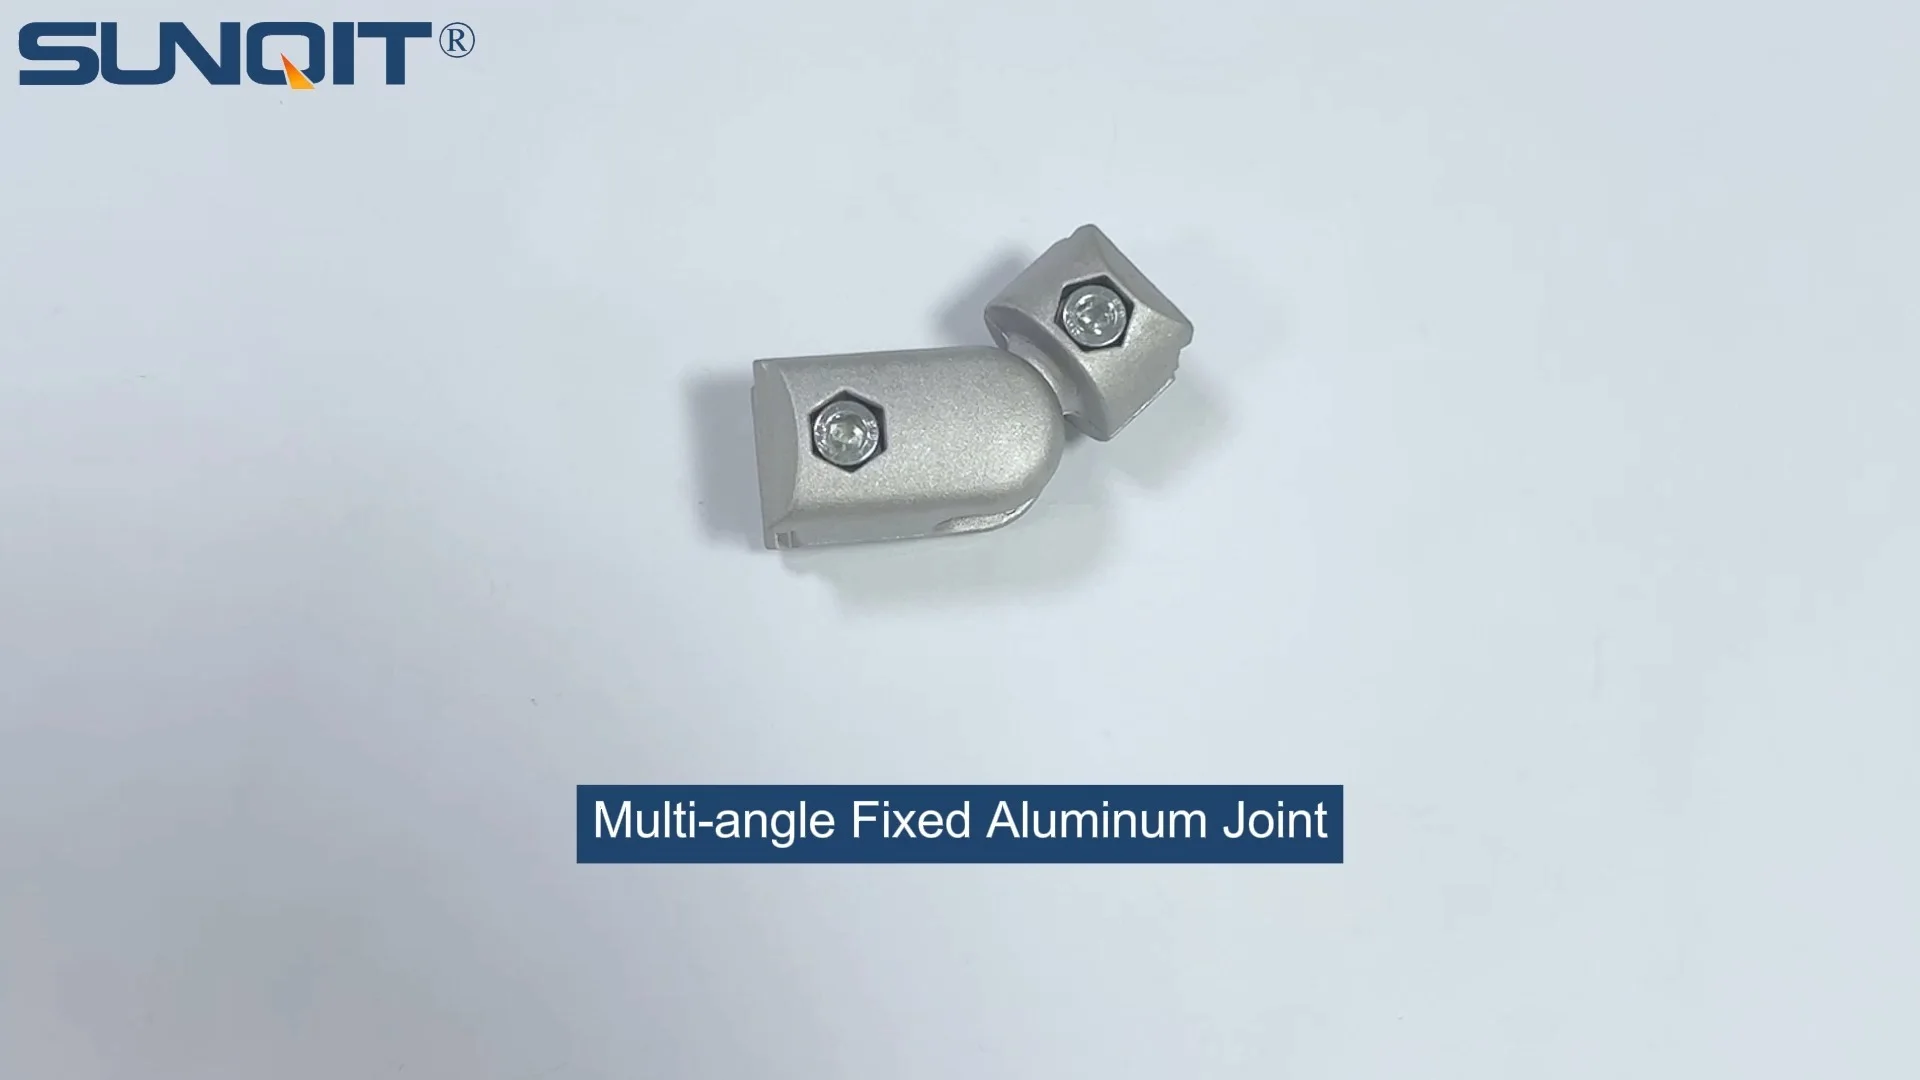
Multi-angle Fixed Aluminum Joint
Aluminum joint pipe connection for two pipe connection and work in mutiple angle.
Walk into any modern manufacturing facility, workshop, or even a tech-savvy garage, and you'll likely spot a common sight: sleek, modular workbenches, material racks, and conveyor systems that seem to bend and adapt to the space around them. These aren't just random structures—they're the result of careful planning, quality materials, and one unsung hero: multi-angle fixed aluminum joints . These small, unassuming components are the glue that holds together aluminum lean pipe systems, allowing for endless configurations that grow and change with your needs. But here's the catch: even the best joints won't deliver a sturdy, reliable structure if you don't have the right tools to install them properly. Whether you're a seasoned facility manager or a DIY enthusiast building your first workbench, having the right toolkit can mean the difference between a wobbly rack that lasts months and a rock-solid setup that serves you for years. In this guide, we'll break down everything you need to know about the tools required to install multi-angle fixed aluminum joints, from the basics you can't start without to pro-level gear that makes the job faster and smoother. Let's dive in.
Understanding Multi-Angle Fixed Aluminum Joints: Why They Matter
Before we jump into tools, let's take a minute to appreciate what makes multi-angle fixed aluminum joints so essential. Unlike rigid, one-size-fits-all connectors, these joints are designed to pivot and lock into place at various angles—30°, 45°, 90°, 135°, and more—giving you the flexibility to build everything from straight workbenches to zigzagging material racks. Made from high-grade aluminum, they're lightweight yet surprisingly strong, resistant to corrosion, and compatible with a wide range of aluminum lean pipe and accessories. Think of them as the Swiss Army knife of structural components: one joint can replace multiple traditional fasteners, simplifying assembly and reducing waste.
But their real value shines in modularity . A decade ago, if you needed a new workbench, you'd either buy a prefab model that never quite fit your space or hire a welder to build something custom. Today, with multi-angle joints and aluminum lean pipe, you can design, build, and reconfigure a bench in an afternoon—no welding required. This flexibility is a game-changer for small businesses and large facilities alike, cutting down on costs and downtime when workflows change. However, this flexibility relies entirely on how well the joints are installed. A joint that's slightly loose, misaligned, or damaged during setup can turn a sturdy rack into a safety hazard. That's why having the right tools isn't just a "nice-to-have"—it's critical.
Pro Insight:
Not all aluminum joints are created equal. Look for joints with precision-machined threads, reinforced stress points, and a smooth finish. Cheap knockoffs might save you a few dollars upfront, but they'll strip, bend, or loosen over time, forcing you to rebuild sooner than later. Pair them with high-quality aluminum lean pipe (we recommend 1.5mm wall thickness for most applications) and you'll have a setup that can handle daily wear and tear.
Essential Installation Tools: The Foundation of a Solid Setup
Now, let's get to the heart of the matter: the tools. While the exact toolkit might vary slightly based on your project (a small workbench needs fewer tools than a 20-foot conveyor system), there are 10 core tools that should be in every installer's arsenal. Below, we've broken them down by category, explaining what they do, why you need them, and how to choose the best ones for your needs.
| Tool Category | Must-Have Tools | Primary Use | Key Features to Look For |
|---|---|---|---|
| Measuring & Marking | Tape Measure, Carpenter's Pencil, Speed Square | Ensuring pipes are cut to exact lengths and joints are aligned at precise angles | Tape measure with locking mechanism; pencil with strong, smudge-resistant lead; speed square with clear angle markings (30°, 45°, 90°) |
| Cutting | Pipe Cutter, Hacksaw (with aluminum-specific blade), Deburring Tool | Cutting aluminum lean pipe to length; smoothing rough edges post-cut | Pipe cutter with replaceable blades; hacksaw blade with 32 teeth per inch (TPI); deburring tool with both internal and external blades |
| Fastening & Torquing | Hex Key Set (Allen Wrenches), Torque Wrench, Ratchet Set | Tightening joint screws to manufacturer specs; securing joints to pipes | Hex keys with ball ends (for hard-to-reach angles); torque wrench with 10–50 Nm range; ratchet set with socket sizes matching joint hardware |
| Alignment & Leveling | Spirit Level (24-inch), Laser Level, Clamps | Ensuring vertical posts are plumb, horizontal beams are level, and joints are aligned before final tightening | Spirit level with magnified vials; laser level with self-leveling feature; clamps with non-marring jaws (to avoid scratching aluminum) |
| Safety & Finishing | Work Gloves, Safety Glasses, File Set, End Caps | Protecting hands and eyes during cutting; smoothing sharp edges; covering exposed pipe ends | Gloves with cut resistance (level 3+); impact-resistant safety glasses; fine-tooth file for detailed smoothing; end caps matching pipe diameter (typically 28mm or 40mm) |
This table covers the basics, but let's dig deeper into each category—because not all tools are created equal, and knowing what to look for can save you frustration (and money) down the line.
Measuring & Marking Tools: The "Measure Twice, Cut Once" Essentials
You've probably heard the old carpenter's adage: "Measure twice, cut once." Nowhere is this truer than when working with aluminum lean pipe and multi-angle joints. A single miscalculation—even by a quarter-inch—can throw off an entire structure, leading to misaligned joints, gaps, or uneven weight distribution. That's why investing in reliable measuring tools is step one.
Start with a tape measure . Skip the flimsy, dollar-store versions—opt for a 25-foot retractable tape with a sturdy lock and a blade that doesn't bend under its own weight. Look for one with both metric and imperial markings (since aluminum profile accessories often list dimensions in millimeters) and a magnetic hook to hold it in place while you mark measurements. I've had good luck with brands like Stanley or Milwaukee; their tapes hold up to daily drops and bumps without jamming.
Next, a carpenter's pencil might seem basic, but it's non-negotiable. Regular pencils smudge easily, and ink from markers can bleed into the aluminum, leaving permanent stains. A carpenter's pencil has a flat, rectangular lead that sharpens to a wide, durable point—perfect for making bold, visible marks on shiny aluminum pipes. Pro tip: Sharpen it with a utility knife instead of a pencil sharpener for a longer, stronger point.
For angles, a speed square is your best friend. This triangular tool fits in your pocket and lets you quickly mark 30°, 45°, 60°, and 90° angles—exactly the angles you'll need for most multi-angle joint configurations. Hold it against the pipe, align the edge with your measurement, and draw along the square's hypotenuse for a precise angle mark. I keep two in my toolkit: one for marking and one for double-checking measurements (because even the best tools can slip).
Quick Hack:
When marking angles for joints, use masking tape instead of drawing directly on the pipe. The tape gives you a clean, erasable surface, and you can write directly on it with your carpenter's pencil. Plus, peeling it off leaves no residue—critical if you're working with anodized aluminum that you want to keep looking new.
Cutting Tools: Getting Clean, Precise Cuts Every Time
Once you've measured and marked your aluminum lean pipe, it's time to cut. Aluminum is softer than steel, but that doesn't mean any old tool will work. Dull blades or the wrong cutter can leave jagged edges, bent pipes, or even damage the pipe's structural integrity. Here's what you need:
Pipe Cutter: For most DIYers and small projects, a manual pipe cutter is the way to go. These tools clamp around the pipe and use a rotating blade to score and cut through the aluminum as you tighten the handle. Look for a cutter with a replaceable, high-speed steel (HSS) blade—these stay sharp longer than standard blades and produce cleaner cuts. Avoid cheap plastic-handled cutters; they flex under pressure, leading to uneven cuts. Instead, go for a metal-bodied cutter with a comfortable grip—you'll thank yourself after cutting 10+ pipes.
For larger jobs or thicker pipes (1.5mm+ wall thickness), consider a ratcheting pipe cutter . These use a ratcheting mechanism to apply pressure, making it easier to cut through tough material without straining your hands. I recently used one to cut 20 feet of 40mm aluminum pipe for a material rack, and it reduced my cutting time by half compared to a manual cutter.
If you don't have a pipe cutter, a hacksaw with an aluminum-specific blade will work—but it requires more effort. Look for a blade with 32 teeth per inch (TPI); fewer teeth will tear the aluminum, while more teeth will clog quickly. Secure the pipe in a vice (with rubber jaws to avoid scratches) before cutting, and let the blade do the work—don't press down hard. Keep the saw at a 45° angle and use smooth, even strokes. It's slower than a pipe cutter, but for occasional cuts, it's a solid backup.
No matter how you cut, you'll end up with burrs—those rough, jagged edges left behind by the blade. Left unaddressed, burrs can tear gaskets, scratch hands, or prevent joints from seating properly. That's where a deburring tool comes in. These small, handheld tools have a rotating blade that trims both internal and external burrs in seconds. Run the external blade around the pipe's edge, then flip it and use the internal blade to smooth the inside. I've seen too many people skip this step, only to have joints that won't tighten all the way or pipes that leak (if they're used for fluid transfer). Spend the $10 on a deburring tool—it's cheap insurance against future headaches.
Fastening Tools: Tightening Joints Like a Pro
Now comes the moment of truth: attaching the multi-angle fixed aluminum joints to the pipes. This is where precision matters most—too loose, and the joint will wobble; too tight, and you risk stripping the threads or cracking the joint. Here's what you need to get it right:
Hex Key Set (Allen Wrenches): Most multi-angle joints use hex screws (Allen bolts) to lock the joint onto the pipe. A good hex key set includes both metric and imperial sizes (common sizes for aluminum joints are 4mm, 5mm, and 6mm), and preferably ball-end keys. Ball-end keys have a rounded tip that lets you turn the screw at an angle—critical when joints are close together and you can't get a straight shot with a standard key. Look for a set with a folding handle or a case that keeps the keys organized; there's nothing more frustrating than hunting for a 5mm key in a messy toolbox.
For larger projects or joints that require consistent torque (like those holding heavy material racks), a torque wrench is a game-changer. Multi-angle joints often come with a recommended torque spec (e.g., 15 Nm) to ensure the screw is tight enough to hold but not so tight it damages the joint. A torque wrench lets you set the exact torque and clicks when you reach it, taking the guesswork out of tightening. I use a 10–50 Nm adjustable torque wrench for aluminum joints—it covers the range most manufacturers recommend. If you're on a budget, a beam-style torque wrench works too; just make sure to read it at eye level to avoid parallax errors.
For joints with nuts instead of hex screws, a ratchet set with sockets is essential. Match the socket size to the nut (most aluminum profile accessories use M6 or M8 nuts), and opt for deep sockets to reach nuts recessed inside the joint. A 3/8-inch drive ratchet is versatile enough for most jobs, but if you're working with large, heavy-duty joints, a 1/2-inch drive will give you more leverage.
One final tool to consider: a screwdriver with interchangeable bits . Some joints use Phillips or flat-head screws to secure covers or gaskets, and having a multi-bit driver means you won't have to carry a dozen separate screwdrivers. Look for one with magnetic bits to hold screws in place—especially useful when working overhead or in tight spaces.
Alignment & Leveling Tools: Ensuring Your Structure Stands Straight
You've cut your pipes, deburred the edges, and started attaching joints—but before you fully tighten everything down, you need to make sure the structure is level and plumb. A wobbly workbench or leaning rack isn't just annoying; it's dangerous. Here's how to avoid that:
Spirit Level: A 24-inch spirit level is the most basic (and essential) tool for this job. It has two vials: one for checking horizontal level (left to right) and one for vertical plumb (up and down). Place it on top of a horizontal beam to ensure it doesn't slope, or hold it against a vertical post to make sure it doesn't lean. Look for a level with magnified vials—they make it easier to see the bubble, even in dimly lit workshops. I prefer one with rubber end caps; they absorb shocks when you drop it (and trust me, you will drop it).
For larger structures (like a 10-foot material rack), a laser level is worth the investment. These tools project a straight, visible laser line across walls, floors, or pipes, making it easy to align multiple joints or beams. Self-leveling laser levels are best—they automatically adjust if you set them slightly off-kilter, ensuring the line is perfectly straight. Use it to align the top edges of horizontal pipes or the sides of vertical posts; it's a huge time-saver compared to moving a spirit level from one end to the other.
To hold everything in place while you check alignment, clamps are a must. Bar clamps, C-clamps, or quick-grip clamps work well—just make sure they have non-marring jaws (or wrap the jaws in tape) to avoid scratching the aluminum. Clamp the joints loosely to the pipes, then use your level to adjust angles and positions before tightening the screws. Without clamps, the pipes will shift as you tighten, undoing all your careful alignment work.
Pro tip: Start from the bottom and work your way up. Align and secure the base frame first, then add vertical posts, then horizontal beams. This "bottom-up" approach ensures the structure's foundation is solid before you add weight on top. I learned this the hard way years ago when I built a workbench starting with the top shelf—the whole thing shifted when I added the legs, and I had to take it apart and start over. Lesson learned: foundation first.

Pre-Installation Prep: Setting Yourself Up for Success
Now that you have your tools, let's talk about prep work. Even the best tools can't save you if you start assembling without a plan. Here's how to get ready:
Gather Your Materials (and Check for Quality)
Lay out all your materials before you start: aluminum lean pipe (cut to size, if possible), multi-angle fixed joints, aluminum profile accessories (end caps, gaskets, brackets), and any additional hardware like screws or washers. Take a minute to inspect everything—look for dents or bends in the pipes, cracks in the joint threads, or missing parts in the accessories. I once spent an hour trying to figure out why a joint wouldn't tighten, only to realize the threads were stripped right out of the box. A quick inspection would have saved me the hassle.
If you're cutting pipes yourself, double-check the lengths against your design. It's easy to mix up a 36-inch pipe with a 35-inch one, and that extra inch can throw off your entire structure. Stack pipes by length and label them with masking tape (e.g., "Left Leg," "Top Beam") to avoid confusion. Trust me, in the middle of assembly, you won't remember which pipe goes where.
Clear Your Workspace
You'll need room to spread out—at least twice the size of the structure you're building. Sweep the floor to remove debris that could trip you up or scratch pipes. If you're working on a concrete floor, lay down a sheet of plywood or cardboard to protect the aluminum from scratches. I keep a 4x8 sheet of plywood in my workshop specifically for this purpose; it's saved countless pipes from getting dented by stray screws or tools.
Set up a workbench or sawhorses to elevate the project off the ground. Bending over to work on the floor strains your back, and it's harder to keep pipes level. A pair of sawhorses ($20 at most hardware stores) is all you need—just make sure they're the same height so your work surface is level.
Read the Joint Instructions (Yes, Really)
Multi-angle joints come in different designs, and some have specific tightening sequences or torque specs. For example, some joints require tightening the top screw first, then the bottom, to ensure even pressure. Others have a maximum torque to avoid cracking the aluminum. Most manufacturers include a small instruction sheet with the joints—read it. It might seem like overkill, but those instructions are there for a reason. I ignored them once and overtightened a joint, cracking the housing. The replacement cost me $15 and a trip to the supplier—not worth the time I thought I was saving.

Step-by-Step Installation: Putting It All Together
Now, let's walk through the installation process with a real-world example: building a simple material rack using aluminum lean pipe, multi-angle fixed joints, and a few basic accessories. This is a common project, and the steps will apply to most joint installations.
Step 1: Lay Out the Base Frame
Start with the base: two long pipes (front and back) and two short pipes (sides), connected by 90° joints. Lay the pipes on your work surface and attach the joints loosely—just enough to hold them together. Use your speed square to ensure the corners are 90°, then clamp the joints in place. Check for square by measuring diagonally from corner to corner—the distances should be equal. If not, adjust the angles until they are. Once square, tighten the joint screws to the recommended torque (usually 12–15 Nm for most aluminum joints).
Step 2: Add Vertical Posts
Next, attach vertical posts to the base frame using 90° multi-angle joints. Stand the posts upright and use a spirit level to ensure they're plumb (vertical). Clamp the posts to the base joints, then tighten the screws. If your rack is tall (over 4 feet), brace the posts with temporary supports to keep them from falling while you work.
Step 3: Install Horizontal Beams
Now, add horizontal beams between the vertical posts. These will hold the shelves or material trays. Use multi-angle joints to set the angle—for a standard rack, 90° is fine, but if you want sloped shelves (to let materials slide forward), use 15° or 30° angles. Measure the distance between posts to ensure the beams are the right length, then attach the joints loosely. Use a spirit level to check that the beams are level, clamp them in place, and tighten the screws.
Step 4: Test Stability (and Fix Wobbles)
Once the main structure is up, give it a gentle shake. If it wobbles, check for loose joints or misaligned pipes. Tighten any screws that have come loose, and use your level to realign beams or posts. If the wobble is severe, you may need to add diagonal braces (using 45° joints) for extra support—this is common in tall racks or those holding heavy loads.
Step 5: Add Finishing Touches
Finally, install aluminum profile accessories like end caps on pipe ends (to prevent cuts), gaskets between joints (to reduce rattling), and brackets for shelves or hooks. Wipe down the entire structure with a microfiber cloth to remove fingerprints or smudges, and you're done!

Troubleshooting Common Issues (and How to Fix Them)
Even with the right tools, you might run into problems. Here are the most common issues and how to solve them:
Problem: Joints Keep Loosening
If joints loosen after a few weeks of use, the issue is likely torque. Either you didn't tighten them enough initially, or the screws are backing out due to vibration. Solution: Retighten using a torque wrench to the manufacturer's spec. For high-vibration environments (like near machinery), add a drop of thread-locking fluid (blue, not red—red is permanent) to the screw threads before tightening. This prevents loosening without making future disassembly impossible.
Problem: Pipes Don't Fit Into Joints
Aluminum lean pipe comes in standard diameters (28mm, 40mm, etc.), but sometimes pipes are slightly oversized due to manufacturing tolerances. If a pipe won't slide into a joint, check for burrs (even small ones can cause a tight fit) and deburr again. If that doesn't work, gently sand the pipe end with fine-grit sandpaper (220 grit) to reduce the diameter slightly. Be careful not to sand too much—you want a snug fit, not a loose one.
Problem: Joints Crack When Tightening
Cracking usually happens when you overtighten the screws. Aluminum is strong, but it's also brittle compared to steel. If a joint cracks, stop tightening immediately—you'll need to replace it. To prevent this, always use a torque wrench and follow the manufacturer's specs. If you don't have a torque wrench, tighten until the screw is snug, then give it a 1/8-turn more—any more and you risk cracking.
Maintaining Your Tools (and Joints) for Longevity
Your tools and joints are investments—with proper care, they'll last for years. Here's how to maintain them:
Clean Your Tools: After each use, wipe cutting tools (pipe cutters, hacksaws) with a dry cloth to remove aluminum shavings. Oil the moving parts of ratchets and torque wrenches to prevent rust. Store hex keys in a case to avoid bending or losing them.
Inspect Joints Regularly: Check for loose screws, cracks, or corrosion every few months. Tighten screws as needed, and replace any damaged joints immediately—don't wait for them to fail.
Protect Pipes from Corrosion: If you're using your structure in a damp environment (like a garage or food processing facility), wipe down pipes with a mild detergent and dry thoroughly. For extra protection, apply a thin coat of car wax to the aluminum—this repels water and prevents oxidation.
Final Thoughts: Tools Make the Difference
Installing multi-angle fixed aluminum joints isn't rocket science, but it does require the right tools and a little patience. From measuring tapes to torque wrenches, each tool plays a role in ensuring your structure is safe, sturdy, and built to last. Whether you're building a simple workbench or a complex conveyor system, investing in quality tools and taking the time to do the job right will pay off in the long run. And remember: the best tool in your kit isn't a wrench or a level—it's attention to detail. Measure twice, cut once, align carefully, and tighten to spec. With these steps, you'll create a workspace that's not just functional, but flexible enough to grow with your needs. Now go grab your tools, and start building—your future self (and your back) will thank you.