- Company Articles
- Products and Technology
- Product knowledge
- 2020 Aluminum Profile End Caps for Flow Racks: Smooth Operation Guide

2020 Aluminum Profile End Caps for Flow Racks: Smooth Operation Guide
Related Product
2020 Aluminum Profile End Cap
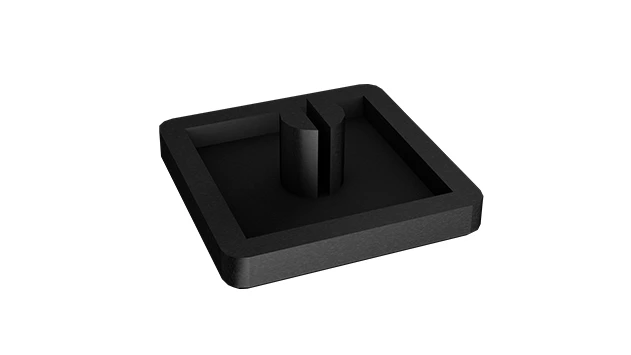
The aluminum profile end cap adds a finishing touch to your project and closes off profile ends to limit dust and debris buildup, also it can avaid some scratch for material and labor during the assemble work.
Introduction: The Unsung Heroes of Your Flow Rack
Let's talk about flow racks. You've seen them in warehouses, factories, and even small workshops—those sturdy structures with roller tracks that let materials glide from one end to the other, making picking and assembly a breeze. They're the backbone of efficient workflows, ensuring parts move smoothly, reducing manual lifting, and keeping everything organized. But here's the thing: while we often marvel at the big components—the aluminum profiles, the heavy-duty roller tracks, the clever caster wheels—there's a tiny part that quietly does some of the most important work: the end cap. Specifically, the 2020 aluminum profile end cap.
Think about it: every aluminum profile in your flow rack has open ends. Without something to cover them, those sharp edges could scratch workers, snag gloves or clothing, or even damage the parts sliding along the roller track. Worse, over time, dust, debris, and moisture could seep into the hollow profiles, weakening them from the inside out. That's where end caps step in. They're like the finishing touch that turns a functional structure into a safe, durable, and long-lasting one.
In this guide, we're going to dive deep into everything you need to know about 2020 aluminum profile end caps—what they are, why they matter, how to choose the right ones, and how to keep them doing their job. Whether you're setting up a new flow rack, upgrading an old one, or just trying to solve that annoying "clicking" sound from your roller track, this article is for you. Let's start by getting to know the star of the show: the 2020 aluminum profile.
Think about it: every aluminum profile in your flow rack has open ends. Without something to cover them, those sharp edges could scratch workers, snag gloves or clothing, or even damage the parts sliding along the roller track. Worse, over time, dust, debris, and moisture could seep into the hollow profiles, weakening them from the inside out. That's where end caps step in. They're like the finishing touch that turns a functional structure into a safe, durable, and long-lasting one.
In this guide, we're going to dive deep into everything you need to know about 2020 aluminum profile end caps—what they are, why they matter, how to choose the right ones, and how to keep them doing their job. Whether you're setting up a new flow rack, upgrading an old one, or just trying to solve that annoying "clicking" sound from your roller track, this article is for you. Let's start by getting to know the star of the show: the 2020 aluminum profile.
Understanding 2020 Aluminum Profiles: The Backbone of Modern Flow Racks
First off, what's a "2020 aluminum profile"? If you're new to the world of industrial workbenches and flow racks, the numbers might seem confusing. But it's actually simple: "2020" refers to the profile's cross-section dimensions—20mm by 20mm. That's it! These compact, lightweight profiles are a favorite in manufacturing and logistics because they strike the perfect balance between strength and versatility.
Unlike bulkier profiles (we're looking at you, 4040 or 8080), 2020 profiles are ideal for structures that need to be nimble. Think small parts flow racks in electronics assembly lines, workbenches for precision tasks, or even custom shelving for tight spaces. They're strong enough to support roller tracks, material bins, and even light tools, but not so heavy that they make the entire setup cumbersome.
Here's where it gets interesting: 2020 profiles are part of a larger family of aluminum extrusion profiles, all designed with T-slots along their length. These slots let you attach accessories—like connectors, roller track placon mounts, or caster wheels—without drilling holes or welding. It's this modularity that makes aluminum profiles so popular. But even the most modular system needs to start with the basics, and that includes capping off those open ends.
Let's put this in context. Imagine you're building a flow rack for small electronic components. You use 2020 aluminum profiles for the side frames because they're lightweight and easy to assemble. You attach roller tracks to the T-slots so circuit boards can slide down to the picking station. Everything looks great—until you notice the sharp edges of the profile ends. A worker reaches for a board and gets a small cut on their arm. Or a plastic bin slides off the roller track and scrapes against the raw aluminum, leaving a mark. These might seem like minor issues, but they add up: downtime, worker frustration, and even damaged inventory. That's why 2020 aluminum profile end caps aren't just "nice to have"—they're essential.
Unlike bulkier profiles (we're looking at you, 4040 or 8080), 2020 profiles are ideal for structures that need to be nimble. Think small parts flow racks in electronics assembly lines, workbenches for precision tasks, or even custom shelving for tight spaces. They're strong enough to support roller tracks, material bins, and even light tools, but not so heavy that they make the entire setup cumbersome.
Here's where it gets interesting: 2020 profiles are part of a larger family of aluminum extrusion profiles, all designed with T-slots along their length. These slots let you attach accessories—like connectors, roller track placon mounts, or caster wheels—without drilling holes or welding. It's this modularity that makes aluminum profiles so popular. But even the most modular system needs to start with the basics, and that includes capping off those open ends.
Let's put this in context. Imagine you're building a flow rack for small electronic components. You use 2020 aluminum profiles for the side frames because they're lightweight and easy to assemble. You attach roller tracks to the T-slots so circuit boards can slide down to the picking station. Everything looks great—until you notice the sharp edges of the profile ends. A worker reaches for a board and gets a small cut on their arm. Or a plastic bin slides off the roller track and scrapes against the raw aluminum, leaving a mark. These might seem like minor issues, but they add up: downtime, worker frustration, and even damaged inventory. That's why 2020 aluminum profile end caps aren't just "nice to have"—they're essential.

The Role of End Caps in Flow Racks: More Than Just a Cover-Up
So, what exactly do end caps do? Let's break it down into four key roles that might surprise you.
1. Protecting the Aluminum Profile Itself Aluminum extrusion profiles are tough, but their open ends are vulnerable. Without end caps, moisture, dust, and even small debris can get inside the hollow core. Over time, this can lead to corrosion (especially in humid environments) or buildup that weakens the profile's structural integrity. End caps act as a barrier, keeping the inside of the profile clean and dry. Think of them like a raincoat for your aluminum—simple, but effective.
2. Preventing Workplace Injuries This is non-negotiable. Raw aluminum edges are sharp. Even a small nick from a profile end can lead to a cut, which might require first aid, paperwork, or worse. In busy environments where workers are moving quickly, the risk of accidental contact goes up. End caps soften those edges, turning a potential hazard into a smooth, safe surface. Some end caps even have rounded corners for extra protection—ideal for high-traffic areas.
3. Ensuring Smooth Roller Track Operation You might not think end caps affect roller tracks, but they do. Flow racks rely on roller tracks to let materials glide freely. If the aluminum profiles holding the roller track are misaligned or damaged, the rollers won't spin smoothly. End caps help maintain the profile's shape by preventing the ends from warping (yes, even aluminum can warp under constant stress). A straight profile means a straight roller track, which means materials move exactly where they need to—no jams, no delays.
4. Maintaining Aesthetics and Brand Image Okay, maybe this isn't a "critical" function, but it's worth mentioning. A flow rack with raw, unfinished profile ends looks unprofessional. It sends the message that corners were cut. On the other hand, a rack with clean, matching end caps looks polished and intentional. For customer-facing areas or facilities that prioritize 5S (Sort, Set in Order, Shine, Standardize, Sustain), this attention to detail matters. It shows you care about the little things—and that translates to how you care about your products and your team.
1. Protecting the Aluminum Profile Itself Aluminum extrusion profiles are tough, but their open ends are vulnerable. Without end caps, moisture, dust, and even small debris can get inside the hollow core. Over time, this can lead to corrosion (especially in humid environments) or buildup that weakens the profile's structural integrity. End caps act as a barrier, keeping the inside of the profile clean and dry. Think of them like a raincoat for your aluminum—simple, but effective.
2. Preventing Workplace Injuries This is non-negotiable. Raw aluminum edges are sharp. Even a small nick from a profile end can lead to a cut, which might require first aid, paperwork, or worse. In busy environments where workers are moving quickly, the risk of accidental contact goes up. End caps soften those edges, turning a potential hazard into a smooth, safe surface. Some end caps even have rounded corners for extra protection—ideal for high-traffic areas.
3. Ensuring Smooth Roller Track Operation You might not think end caps affect roller tracks, but they do. Flow racks rely on roller tracks to let materials glide freely. If the aluminum profiles holding the roller track are misaligned or damaged, the rollers won't spin smoothly. End caps help maintain the profile's shape by preventing the ends from warping (yes, even aluminum can warp under constant stress). A straight profile means a straight roller track, which means materials move exactly where they need to—no jams, no delays.
4. Maintaining Aesthetics and Brand Image Okay, maybe this isn't a "critical" function, but it's worth mentioning. A flow rack with raw, unfinished profile ends looks unprofessional. It sends the message that corners were cut. On the other hand, a rack with clean, matching end caps looks polished and intentional. For customer-facing areas or facilities that prioritize 5S (Sort, Set in Order, Shine, Standardize, Sustain), this attention to detail matters. It shows you care about the little things—and that translates to how you care about your products and your team.

Materials Matter: Choosing Between Plastic and Aluminum End Caps
Now that we know why end caps are important, let's talk about what they're made of. The two most common materials are plastic and aluminum. Each has its pros and cons, and the right choice depends on your workflow, environment, and budget. Let's break them down.
Plastic End Caps: The Budget-Friendly Workhorse Plastic end caps are the go-to for many workshops, and for good reason. They're cheap, lightweight, and come in a variety of colors—so you can match them to your flow rack or use color-coding for different zones. Most are designed to snap onto the profile end, which means installation is a breeze: just push until you hear a "click," and you're done.
But there are trade-offs. Standard plastic caps (think polypropylene) can crack if they're hit repeatedly or exposed to extreme temperatures. They also might not hold up as well in environments with oils, solvents, or heavy chemicals. That said, if you're using your flow rack for lightweight items—like paper documents or small plastic parts—plastic caps should work just fine.
Pro tip: Look for "reinforced plastic" or "nylon" end caps if you need a bit more durability. They're still affordable but can handle more wear and tear than basic plastic.
Aluminum End Caps: The Heavy-Duty Option Aluminum end caps are the luxury choice—and for good reason. They're nearly indestructible. drop a heavy bin on them? No problem. Expose them to high humidity or chemicals? They'll rust (unless they're anodized) but won't crack or shatter. They also have a sleek, metallic finish that matches the aluminum profiles, giving your flow rack a cohesive look.
The downside? They're pricier. And because they're metal, they require a tighter fit. Most aluminum end caps come with a small set screw or adhesive backing to keep them in place—no "snap-on" here. This means installation takes a bit longer, but once they're on, they're not going anywhere.
When should you choose aluminum? If your flow rack is in a high-traffic area, handles heavy materials, or needs to comply with strict safety standards (like in automotive or aerospace facilities), aluminum caps are worth the investment. They'll outlast plastic caps by years, saving you money on replacements in the long run.
| Feature | Plastic End Caps | Aluminum End Caps |
|---|---|---|
| Cost | More affordable, ideal for budget projects | Higher upfront cost, but longer lifespan |
| Weight | Lightweight, won't add extra load to the rack | Slightly heavier, but still negligible for 2020 profiles |
| Durability | Good for low-impact areas; may crack under heavy stress | Highly durable, resistant to dents and cracks |
| ESD Compatibility | Available in ESD-safe versions (great for electronics) | Conductive, which can be a pro or con depending on needs |
| Installation | Snap-on design, no tools needed (but may loosen over time) | Often require screws or adhesive for a tight fit |
Plastic End Caps: The Budget-Friendly Workhorse Plastic end caps are the go-to for many workshops, and for good reason. They're cheap, lightweight, and come in a variety of colors—so you can match them to your flow rack or use color-coding for different zones. Most are designed to snap onto the profile end, which means installation is a breeze: just push until you hear a "click," and you're done.
But there are trade-offs. Standard plastic caps (think polypropylene) can crack if they're hit repeatedly or exposed to extreme temperatures. They also might not hold up as well in environments with oils, solvents, or heavy chemicals. That said, if you're using your flow rack for lightweight items—like paper documents or small plastic parts—plastic caps should work just fine.
Pro tip: Look for "reinforced plastic" or "nylon" end caps if you need a bit more durability. They're still affordable but can handle more wear and tear than basic plastic.
Aluminum End Caps: The Heavy-Duty Option Aluminum end caps are the luxury choice—and for good reason. They're nearly indestructible. drop a heavy bin on them? No problem. Expose them to high humidity or chemicals? They'll rust (unless they're anodized) but won't crack or shatter. They also have a sleek, metallic finish that matches the aluminum profiles, giving your flow rack a cohesive look.
The downside? They're pricier. And because they're metal, they require a tighter fit. Most aluminum end caps come with a small set screw or adhesive backing to keep them in place—no "snap-on" here. This means installation takes a bit longer, but once they're on, they're not going anywhere.
When should you choose aluminum? If your flow rack is in a high-traffic area, handles heavy materials, or needs to comply with strict safety standards (like in automotive or aerospace facilities), aluminum caps are worth the investment. They'll outlast plastic caps by years, saving you money on replacements in the long run.
ESD Alert!
If you work with sensitive electronics (like circuit boards or semiconductors), static electricity is a big risk. Plastic end caps are available in ESD-safe versions, which dissipate static charges to prevent damage to components. Aluminum caps, being conductive, can either help or hurt here—if your flow rack is grounded, they'll safely channel static away. If not, they might actually attract static. Always check your facility's ESD requirements before choosing!
Installation Guide: How to Fit End Caps Like a Pro
Installing end caps might seem like a no-brainer, but there's a right way and a wrong way to do it. A poorly installed cap can fall off, leaving the profile end exposed—or worse, it might not seal properly, letting debris inside. Let's walk through the steps for both plastic and aluminum end caps, so you can get it right the first time.
Tools You'll Need Don't worry, you won't need a toolbox full of gadgets. For most end caps, you'll only need:
Step 1: Prep the Profile End This is the most overlooked step! Before installing the end cap, take a clean cloth and wipe the inside and outside of the profile end. Dust, grease, or metal shavings (from cutting the profile to length) can prevent the cap from fitting snugly. For aluminum profiles that were recently cut, use a file or sandpaper to smooth any burrs—sharp edges on the profile itself can damage the cap or make installation harder.
Step 2: Choose the Right Size This might sound obvious, but 2020 profiles come in different "wall thicknesses." A standard 2020 profile has walls that are 1mm thick, but some heavy-duty versions are 1.5mm or 2mm. This changes the inner diameter of the end, which means a cap that fits a 1mm profile might be too loose on a 2mm one. Always check the product specs: end caps should list the "profile compatibility" (e.g., "fits 2020 aluminum profiles with 1mm wall thickness").
Step 3: Installing Plastic End Caps Most plastic caps are "press-fit" or "snap-fit." Here's how to do it: 1. Align the cap with the profile end, making sure any tabs or grooves on the cap line up with the profile's T-slots (if applicable). 2. Push firmly with your thumbs around the edges of the cap. You should feel it start to "grip" the profile. 3. If it's tight, gently tap the cap with a rubber mallet (don't use a metal hammer—you'll crack the plastic!). Work your way around the cap to ensure it's seated evenly. 4. Give it a tug to test: it should stay in place without wiggling. If it comes off easily, try cleaning the profile again or check if you have the right size.
Step 4: Installing Aluminum End Caps Aluminum caps often require a bit more work, but the payoff is a permanent fit: 1. Some aluminum caps have a small set screw on the side. insert the cap into the profile end, then tighten the screw with a Phillips-head screwdriver until it's snug (don't over-tighten—you might strip the screw). 2. Others use adhesive. Peel off the backing from the adhesive pad, align the cap, and press firmly for 30 seconds. For best results, let the adhesive cure for 24 hours before using the flow rack heavily. 3. Pro tip: If you're using adhesive, add a drop of Loctite or thread locker to the set screw (if included) to prevent it from loosening over time.
Common Mistake to Avoid Rushing the installation! It's tempting to just "slap on" the end cap and move on, but a loose cap will fall off eventually. Take an extra 30 seconds to ensure it's seated evenly and secure. Trust us—you'll save time in the long run by not having to track down missing caps later.
Tools You'll Need Don't worry, you won't need a toolbox full of gadgets. For most end caps, you'll only need:
- A clean cloth (to wipe down the profile end)
- A rubber mallet (optional, for tight-fitting caps)
- A small Phillips-head screwdriver (for aluminum caps with set screws)
- Adhesive (optional, for extra security)
Step 1: Prep the Profile End This is the most overlooked step! Before installing the end cap, take a clean cloth and wipe the inside and outside of the profile end. Dust, grease, or metal shavings (from cutting the profile to length) can prevent the cap from fitting snugly. For aluminum profiles that were recently cut, use a file or sandpaper to smooth any burrs—sharp edges on the profile itself can damage the cap or make installation harder.
Step 2: Choose the Right Size This might sound obvious, but 2020 profiles come in different "wall thicknesses." A standard 2020 profile has walls that are 1mm thick, but some heavy-duty versions are 1.5mm or 2mm. This changes the inner diameter of the end, which means a cap that fits a 1mm profile might be too loose on a 2mm one. Always check the product specs: end caps should list the "profile compatibility" (e.g., "fits 2020 aluminum profiles with 1mm wall thickness").
Step 3: Installing Plastic End Caps Most plastic caps are "press-fit" or "snap-fit." Here's how to do it: 1. Align the cap with the profile end, making sure any tabs or grooves on the cap line up with the profile's T-slots (if applicable). 2. Push firmly with your thumbs around the edges of the cap. You should feel it start to "grip" the profile. 3. If it's tight, gently tap the cap with a rubber mallet (don't use a metal hammer—you'll crack the plastic!). Work your way around the cap to ensure it's seated evenly. 4. Give it a tug to test: it should stay in place without wiggling. If it comes off easily, try cleaning the profile again or check if you have the right size.
Step 4: Installing Aluminum End Caps Aluminum caps often require a bit more work, but the payoff is a permanent fit: 1. Some aluminum caps have a small set screw on the side. insert the cap into the profile end, then tighten the screw with a Phillips-head screwdriver until it's snug (don't over-tighten—you might strip the screw). 2. Others use adhesive. Peel off the backing from the adhesive pad, align the cap, and press firmly for 30 seconds. For best results, let the adhesive cure for 24 hours before using the flow rack heavily. 3. Pro tip: If you're using adhesive, add a drop of Loctite or thread locker to the set screw (if included) to prevent it from loosening over time.
Common Mistake to Avoid Rushing the installation! It's tempting to just "slap on" the end cap and move on, but a loose cap will fall off eventually. Take an extra 30 seconds to ensure it's seated evenly and secure. Trust us—you'll save time in the long run by not having to track down missing caps later.
Compatibility with Aluminum Profile Accessories: End Caps and the Big Picture
Here's a secret about aluminum profile systems: nothing works in isolation. Your 2020 end caps don't just cap off the profile—they interact with the other accessories in your flow rack. Let's take a closer look at how end caps play nice (or not) with common components like roller tracks, connectors, and caster accessories.
Roller Tracks and End Caps: A Critical Pair Roller tracks are the heart of any flow rack. They're the reason materials glide instead of requiring manual lifting. But roller tracks attach to the aluminum profiles via brackets or placon mounts, which often sit near the top or bottom of the profile. If your end cap is too thick or protrudes too far, it might interfere with these mounts.
For example, imagine you install a bulky plastic end cap that sticks out 10mm beyond the profile end. When you try to attach a roller track placon mount to the T-slot near the end of the profile, the mount might hit the end cap, preventing it from seating flush. The result? A wobbly roller track that causes materials to jam.
Solution: Choose "low-profile" end caps for areas where roller tracks or other accessories are mounted near the profile ends. These caps sit flush with the profile, so they don't get in the way. Most manufacturers list the "protrusion length" in the specs—aim for 2mm or less if you're mounting accessories near the end.
Connectors and End Caps: Avoiding Interference Aluminum profiles are connected using joints—like 90° aluminum profile connectors, three-way connectors, or parallel aluminum joints. These joints often slide into the T-slots and are secured with bolts. If you install an end cap too close to a connector, you might block the T-slot, making it impossible to tighten the joint properly.
Rule of thumb: Leave at least 20mm of space between the end cap and any connector. This gives you enough room to access the T-slot with a hex key or wrench when you need to adjust the joint.
Caster Accessories and Mobile Flow Racks If your flow rack is on wheels (thanks to caster accessories like swivel caster wheels), you need to think about vibration. Every time the rack is moved, the end caps vibrate too. Loose caps can rattle, fall off, or even scratch the floor. For mobile racks, aluminum end caps with set screws are a better choice than snap-on plastic caps—they'll stay put no matter how bumpy the floor is.
Roller Tracks and End Caps: A Critical Pair Roller tracks are the heart of any flow rack. They're the reason materials glide instead of requiring manual lifting. But roller tracks attach to the aluminum profiles via brackets or placon mounts, which often sit near the top or bottom of the profile. If your end cap is too thick or protrudes too far, it might interfere with these mounts.
For example, imagine you install a bulky plastic end cap that sticks out 10mm beyond the profile end. When you try to attach a roller track placon mount to the T-slot near the end of the profile, the mount might hit the end cap, preventing it from seating flush. The result? A wobbly roller track that causes materials to jam.
Solution: Choose "low-profile" end caps for areas where roller tracks or other accessories are mounted near the profile ends. These caps sit flush with the profile, so they don't get in the way. Most manufacturers list the "protrusion length" in the specs—aim for 2mm or less if you're mounting accessories near the end.
Connectors and End Caps: Avoiding Interference Aluminum profiles are connected using joints—like 90° aluminum profile connectors, three-way connectors, or parallel aluminum joints. These joints often slide into the T-slots and are secured with bolts. If you install an end cap too close to a connector, you might block the T-slot, making it impossible to tighten the joint properly.
Rule of thumb: Leave at least 20mm of space between the end cap and any connector. This gives you enough room to access the T-slot with a hex key or wrench when you need to adjust the joint.
Caster Accessories and Mobile Flow Racks If your flow rack is on wheels (thanks to caster accessories like swivel caster wheels), you need to think about vibration. Every time the rack is moved, the end caps vibrate too. Loose caps can rattle, fall off, or even scratch the floor. For mobile racks, aluminum end caps with set screws are a better choice than snap-on plastic caps—they'll stay put no matter how bumpy the floor is.
Pro Compatibility Hack:
If you're unsure whether an end cap will work with your accessories, do a "dry fit" before installing everything permanently. Assemble the profile, cap, and accessory loosely, then check for gaps, interference, or wobbling. It's easier to swap out a cap now than to disassemble the entire rack later!
Troubleshooting Common End Cap Issues
Even with the best planning, end caps can cause headaches. Let's troubleshoot the most common problems and how to fix them.
Issue #1: End Caps Keep Falling Off This is the most frustrating problem. You install a cap, and a week later, it's on the floor. Why? - Cause: The cap is the wrong size (too loose) or the profile end is dirty/greasy. - Fix: Check the size first—measure the inner diameter of the profile end with calipers and compare it to the cap's specs. If the size is right, clean the profile end with rubbing alcohol (to remove grease) and add a drop of super glue to the cap before reinstalling (just a tiny drop—you don't want to glue it permanently!). For plastic caps, wrapping a small piece of electrical tape around the cap's edge can add friction and help it stay in place.
Issue #2: End Caps Crack or Break Plastic caps are especially prone to this. - Cause: Impact (dropping heavy items), exposure to extreme temperatures, or using the wrong material for the environment. - Fix: replace with a more durable material—like reinforced plastic or aluminum. If the cracking is happening in a specific spot (e.g., near a roller track where bins hit the cap), add a small rubber bumper to absorb the impact.
Issue #3: End Caps Don't Fit Non-Standard Profiles Not all "2020" profiles are created equal. Some manufacturers make "custom" profiles with unique T-slot designs or wall thicknesses. - Cause: The profile isn't a standard 2020 extrusion. - Fix: Contact the profile manufacturer and ask for compatible end caps—they might make custom caps for their unique profiles. If that's not an option, you can buy "universal" end caps and trim them with a utility knife to fit (this works best for plastic caps).
Issue #4: ESD Problems with Aluminum Caps In electronics manufacturing, static electricity can fry components. Aluminum is conductive, so aluminum end caps can act as a path for static discharge—good if you want to ground the rack, bad if you don't. - Cause: Aluminum caps aren't grounded, leading to static buildup. - Fix: If you need ESD protection, use ESD-safe plastic caps instead. If you must use aluminum caps, connect the profile to a grounding strap using the T-slot—this will channel static away from sensitive components.
Issue #1: End Caps Keep Falling Off This is the most frustrating problem. You install a cap, and a week later, it's on the floor. Why? - Cause: The cap is the wrong size (too loose) or the profile end is dirty/greasy. - Fix: Check the size first—measure the inner diameter of the profile end with calipers and compare it to the cap's specs. If the size is right, clean the profile end with rubbing alcohol (to remove grease) and add a drop of super glue to the cap before reinstalling (just a tiny drop—you don't want to glue it permanently!). For plastic caps, wrapping a small piece of electrical tape around the cap's edge can add friction and help it stay in place.
Issue #2: End Caps Crack or Break Plastic caps are especially prone to this. - Cause: Impact (dropping heavy items), exposure to extreme temperatures, or using the wrong material for the environment. - Fix: replace with a more durable material—like reinforced plastic or aluminum. If the cracking is happening in a specific spot (e.g., near a roller track where bins hit the cap), add a small rubber bumper to absorb the impact.
Issue #3: End Caps Don't Fit Non-Standard Profiles Not all "2020" profiles are created equal. Some manufacturers make "custom" profiles with unique T-slot designs or wall thicknesses. - Cause: The profile isn't a standard 2020 extrusion. - Fix: Contact the profile manufacturer and ask for compatible end caps—they might make custom caps for their unique profiles. If that's not an option, you can buy "universal" end caps and trim them with a utility knife to fit (this works best for plastic caps).
Issue #4: ESD Problems with Aluminum Caps In electronics manufacturing, static electricity can fry components. Aluminum is conductive, so aluminum end caps can act as a path for static discharge—good if you want to ground the rack, bad if you don't. - Cause: Aluminum caps aren't grounded, leading to static buildup. - Fix: If you need ESD protection, use ESD-safe plastic caps instead. If you must use aluminum caps, connect the profile to a grounding strap using the T-slot—this will channel static away from sensitive components.
Maintenance Tips: Keeping Your End Caps (and Flow Rack) in Top Shape
End caps are low-maintenance, but a little care goes a long way. Here's how to keep them doing their job for years:
Regular Inspections Add end caps to your weekly 5S checklist. Walk around your flow rack and give each cap a gentle tug—if it wiggles, tighten it or replace it. Look for cracks, chips, or discoloration (a sign of chemical exposure). Pay extra attention to caps near roller tracks or high-traffic areas—they take the most abuse.
Cleaning Dust and grime can build up on end caps, especially in busy warehouses. Wipe them down with a damp cloth every month. For plastic caps, avoid harsh cleaners like bleach or acetone—they can cause discoloration or cracking. For aluminum caps, a mild soap and water solution works best. If they're anodized, you can use a metal polish to keep them shiny.
Replacement Schedule There's no hard-and-fast rule for when to replace end caps, but here are some signs it's time: - Plastic caps: Cracks, chips, or if they no longer stay in place even after cleaning/adjusting. - Aluminum caps: Heavy rust (if not anodized), bent or deformed edges, or stripped set screws. As a general guideline, plan to replace plastic caps every 1–2 years in high-use areas, and aluminum caps every 5–7 years.
Stock Spare Caps End caps are small and easy to lose. Keep a handful of spares in your toolbox or maintenance closet. That way, if one falls off or breaks, you can replace it immediately—no waiting for a new order to arrive. Trust us, you don't want to leave a profile end exposed for days while you wait for a $2 part!
Regular Inspections Add end caps to your weekly 5S checklist. Walk around your flow rack and give each cap a gentle tug—if it wiggles, tighten it or replace it. Look for cracks, chips, or discoloration (a sign of chemical exposure). Pay extra attention to caps near roller tracks or high-traffic areas—they take the most abuse.
Cleaning Dust and grime can build up on end caps, especially in busy warehouses. Wipe them down with a damp cloth every month. For plastic caps, avoid harsh cleaners like bleach or acetone—they can cause discoloration or cracking. For aluminum caps, a mild soap and water solution works best. If they're anodized, you can use a metal polish to keep them shiny.
Replacement Schedule There's no hard-and-fast rule for when to replace end caps, but here are some signs it's time: - Plastic caps: Cracks, chips, or if they no longer stay in place even after cleaning/adjusting. - Aluminum caps: Heavy rust (if not anodized), bent or deformed edges, or stripped set screws. As a general guideline, plan to replace plastic caps every 1–2 years in high-use areas, and aluminum caps every 5–7 years.
Stock Spare Caps End caps are small and easy to lose. Keep a handful of spares in your toolbox or maintenance closet. That way, if one falls off or breaks, you can replace it immediately—no waiting for a new order to arrive. Trust us, you don't want to leave a profile end exposed for days while you wait for a $2 part!
Why Invest in Quality End Caps: It's About More Than Just the Cap
Let's be real: end caps are cheap. A pack of 10 plastic caps might cost $5–$10. So why bother investing in "quality" caps? Because the cost of a bad end cap is way higher than the cap itself.
Long-Term Cost Savings A cheap plastic cap might cost $0.50, but if it cracks every 6 months, you're replacing it twice a year. A $2 aluminum cap, on the other hand, might last 5 years. Do the math: $0.50 x 10 replacements (over 5 years) = $5, vs. $2 once. Plus, every time you replace a cap, you're spending time—time that could be spent on more important tasks. Quality caps save you both time and money in the long run.
Safety Compliance OSHA and other safety regulations require that workplace equipment is "free from recognized hazards that are causing or are likely to cause death or serious physical harm." Sharp, exposed profile ends are a recognized hazard. Using proper end caps helps you comply with safety standards, reducing the risk of fines or worker's compensation claims.
Improved Workflow Efficiency A flow rack with missing or broken end caps is a workflow killer. Materials get stuck on sharp edges, workers slow down to avoid injuries, and you're constantly stopping to fix small issues. A rack with quality end caps runs smoothly—materials glide, workers focus on their tasks, and everything moves faster. In manufacturing, time is money—and a smooth workflow is worth every penny spent on end caps.
Long-Term Cost Savings A cheap plastic cap might cost $0.50, but if it cracks every 6 months, you're replacing it twice a year. A $2 aluminum cap, on the other hand, might last 5 years. Do the math: $0.50 x 10 replacements (over 5 years) = $5, vs. $2 once. Plus, every time you replace a cap, you're spending time—time that could be spent on more important tasks. Quality caps save you both time and money in the long run.
Safety Compliance OSHA and other safety regulations require that workplace equipment is "free from recognized hazards that are causing or are likely to cause death or serious physical harm." Sharp, exposed profile ends are a recognized hazard. Using proper end caps helps you comply with safety standards, reducing the risk of fines or worker's compensation claims.
Improved Workflow Efficiency A flow rack with missing or broken end caps is a workflow killer. Materials get stuck on sharp edges, workers slow down to avoid injuries, and you're constantly stopping to fix small issues. A rack with quality end caps runs smoothly—materials glide, workers focus on their tasks, and everything moves faster. In manufacturing, time is money—and a smooth workflow is worth every penny spent on end caps.
Conclusion: The Little Part That Makes a Big Difference
At the end of the day, 2020 aluminum profile end caps are easy to overlook. They're small, cheap, and don't have the "wow factor" of a shiny new roller track or a heavy-duty caster wheel. But as we've seen, they play a critical role in keeping your flow rack safe, durable, and efficient.
Whether you choose plastic or aluminum, snap-on or screw-on, the key is to prioritize fit, durability, and compatibility with your other aluminum profile accessories. Take the time to measure your profiles, check the specs, and invest in quality caps—your team, your workflow, and your bottom line will thank you.
So the next time you walk past a flow rack, take a second look at those end caps. They might be small, but they're the unsung heroes keeping everything running smoothly. And when it's time to build or upgrade your own rack? Don't skimp on the end caps. They're the finishing touch that turns a good flow rack into a great one.
Whether you choose plastic or aluminum, snap-on or screw-on, the key is to prioritize fit, durability, and compatibility with your other aluminum profile accessories. Take the time to measure your profiles, check the specs, and invest in quality caps—your team, your workflow, and your bottom line will thank you.
So the next time you walk past a flow rack, take a second look at those end caps. They might be small, but they're the unsung heroes keeping everything running smoothly. And when it's time to build or upgrade your own rack? Don't skimp on the end caps. They're the finishing touch that turns a good flow rack into a great one.