- Company Articles
- Products and Technology
- Product knowledge
- 38 Aluminum Roller Track Black ESD: How to Test ESD Performance On-Site

38 Aluminum Roller Track Black ESD: How to Test ESD Performance On-Site
Related Product
38 Aluminum Roller Track Black ESD
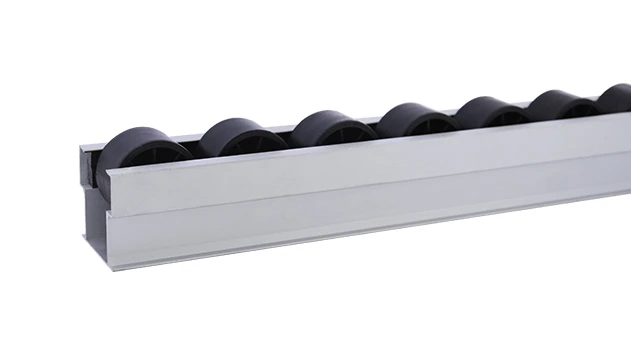
Durable and smooth-running modular roller rails. The system is fully assembled. The roller rail profile contains plastic rollers mounted on steel axles. Aluminum frame with plastic wheel make it anti corrosion,and material convey more smooth.
38 Aluminum Roller Track Black ESD: How to Test ESD Performance On-Site
Static electricity is a silent killer in industries like 3C assembly, medical device manufacturing, and electronics production. A single discharge—often too small to feel—can fry a delicate circuit board, ruin a medical sensor, or render a smartphone component useless. That's why ESD (Electrostatic Discharge) protection isn't just a box to tick; it's a critical part of maintaining product quality and production efficiency. The 38 Aluminum Roller Track Black ESD is a key component in this protection network, commonly used in flow racks, conveyor systems, and ESD workstations to safely move sensitive parts. But how do you know if it's working as it should? On-site testing is the answer, and this guide will walk you through every step to do it right.
What Is the 38 Aluminum Roller Track Black ESD?
Before we dive into testing, let's get to know the star of the show: the 38 Aluminum Roller Track Black ESD. This track is made from high-quality aluminum with a black ESD coating that prevents static buildup. The 38mm size is perfect for medium to heavy loads, making it ideal for flow racks in 3C assembly lines or medical device warehouses. It's designed to integrate seamlessly with aluminum profile accessories like roller track connectors and caster wheels, so you can build flexible, ESD-safe systems that fit your production needs. Whether you're using it to move circuit boards or medical tools, this track is built to keep static at bay—if it's maintained properly.
Pre-Test Tools You'll Need
Testing ESD performance doesn't require a lab full of fancy equipment, but you do need the right tools to get accurate results. Here's what you should gather before starting:
| Tool Name | Purpose | Key Notes |
|---|---|---|
| Surface Resistance Meter | Measures how well static electricity flows through the track's surface | Choose a meter that complies with ANSI/ESD S20.20 standards |
| Grounding Strap | Prevents static from your body affecting test results | Make sure it's connected to a valid ESD ground before testing |
| Environmental Meter | Checks temperature and humidity levels in the testing area | ESD performance varies with environment—ideal ranges: 20-25°C, 40-60% RH |
| Test Leads | Connects the resistance meter to the track or grounding points | Use leads with alligator clips for easy attachment |
| ESD-Safe Cleaning Cloth | Wipes dust or debris from the track before testing | Avoid regular cloths—they can leave lint or static |
Step-by-Step On-Site Test Guide
Testing the ESD performance of your 38 Aluminum Roller Track Black ESD is straightforward, but it requires attention to detail. Follow these steps to ensure accurate results:
| Step | Action | Key Points | Acceptance Criteria |
|---|---|---|---|
| 1 | Prepare the Track | Wipe the track with an ESD-safe cloth to remove dust, oil, or debris. Ensure the track is properly installed with aluminum profile accessories (like connectors and brackets). | Track surface is clean and free of obstructions; all connections are tight. |
| 2 | Check Environmental Conditions | Use the environmental meter to measure temperature and humidity in the area where the track is installed. | Temp: 20-25°C; Humidity:40-60% RH. If outside this range, note it in your test report. |
| 3 | Verify Grounding | Connect one test lead to the track and the other to the facility's ESD ground (or the ESD workstation's ground point). Use the surface resistance meter to measure the resistance. | Resistance between track and ground: 1×10⁶ to 1×10⁹ ohms (per ANSI/ESD S20.20). |
| 4 | Test Surface Resistance | Place the meter's probes 10cm apart on the track surface. Take readings at 5 different spots (ends, middle, joints). Repeat the test 3 times for each spot. | Surface resistance:1×10⁴ to1×10¹¹ ohms. All readings should be within this range. |
| 5 | Check Roller Continuity | Place probes on adjacent rollers (one on each roller). Measure resistance between them. Do this for 10 pairs of rollers across the track. | Resistance <1×10⁶ ohms (indicates good conductivity between rollers). |
| 6 | Load Test (Optional) | Place a typical load (e.g., a 3C component box or medical device tray) on the track. Slide it along the track and re-test surface resistance and continuity. | Resistance values remain within acceptable ranges; no sudden spikes. |
Common Issues & Troubleshooting
Even with proper installation, you might encounter issues during testing. Here's how to fix them:
| Issue | Possible Causes | Solutions |
|---|---|---|
| High Surface Resistance | 1. Dust/oil buildup on the track; 2. Damaged ESD coating;3. Poor grounding. | 1. Clean with ESD-safe cleaner;2. replace the track if coating is damaged;3. Check grounding wires and re-tighten connections. |
| Inconsistent Readings | 1. Fluctuating humidity/temperature;2. Loose roller connections;3. Probe placement errors. | 1. Stabilize environment (use humidifiers/dehumidifiers);2. Tighten aluminum profile accessories (connectors, brackets);3. Ensure probes are firmly pressed on the track surface. |
| No Continuity Between Rollers | 1. Rusted roller axles;2. Loose roller pins;3. Damaged connectors. | 1. replace rusted axles;2. Re-tighten pins;3. Swap out damaged aluminum profile accessories. |
| Grounding Resistance Too High | 1. Broken grounding wire;2. Loose ground connection;3. Dirty ground point. | 1. replace broken wires;2. Re-tighten ground clamps;3. Clean ground point with ESD-safe cloth. |
Maintenance Tips for Long-Lasting ESD Performance
Regular maintenance keeps your 38 Aluminum Roller Track Black ESD working at its best. Follow these tips:
Clean the track once a week with an ESD-safe cleaner. Avoid harsh chemicals (like bleach or ammonia) that can damage the ESD coating.
Check grounding connections monthly. Ensure wires are not frayed and clamps are tight.
Inspect aluminum profile accessories (connectors, brackets, roller pins) quarterly. replace any worn or damaged parts immediately.
Maintain consistent environmental conditions. Use HVAC systems or humidifiers to keep temp and humidity within the ideal range.
Train your team to handle the track with care. Avoid dragging heavy loads across the rollers (this can wear down the ESD coating).
Real-World Example: How Testing Saves Money
Let's take a look at a 3C assembly plant that uses flow racks with the 38 Aluminum Roller Track Black ESD. A few months ago, the plant started seeing an increase in defective circuit boards. After investigating, they found that static discharges from the roller tracks were frying the boards. They decided to test the tracks on-site and discovered that half of the tracks had high surface resistance due to oil buildup from the assembly line. Cleaning the tracks with ESD-safe cleaner fixed the issue, and the defect rate dropped by 80%—saving them over $50,000 in a month.
This example shows why on-site testing is so important. It's not just about compliance; it's about protecting your bottom line. The 38 Aluminum Roller Track Black ESD is a reliable component, but it needs regular checks to ensure it's doing its job. When combined with lean pipe systems and ESD workstations, it creates a safe, efficient production environment that reduces waste and improves quality.
Conclusion
The 38 Aluminum Roller Track Black ESD is more than just a piece of metal—it's a critical part of your ESD protection strategy. On-site testing ensures that it's working correctly, preventing costly static damage to your products. By following the steps outlined in this guide, you can keep your track in top condition and maintain a safe production environment. Remember: ESD protection is an ongoing process, not a one-time task. Regular testing and maintenance will help you avoid unexpected issues and keep your production line running smoothly.