- Company Articles
- Products and Technology
- Installation And Maintenance
- 40 Aluminum Roller Track White Installation Tools: What You Need

40 Aluminum Roller Track White Installation Tools: What You Need
Related Product
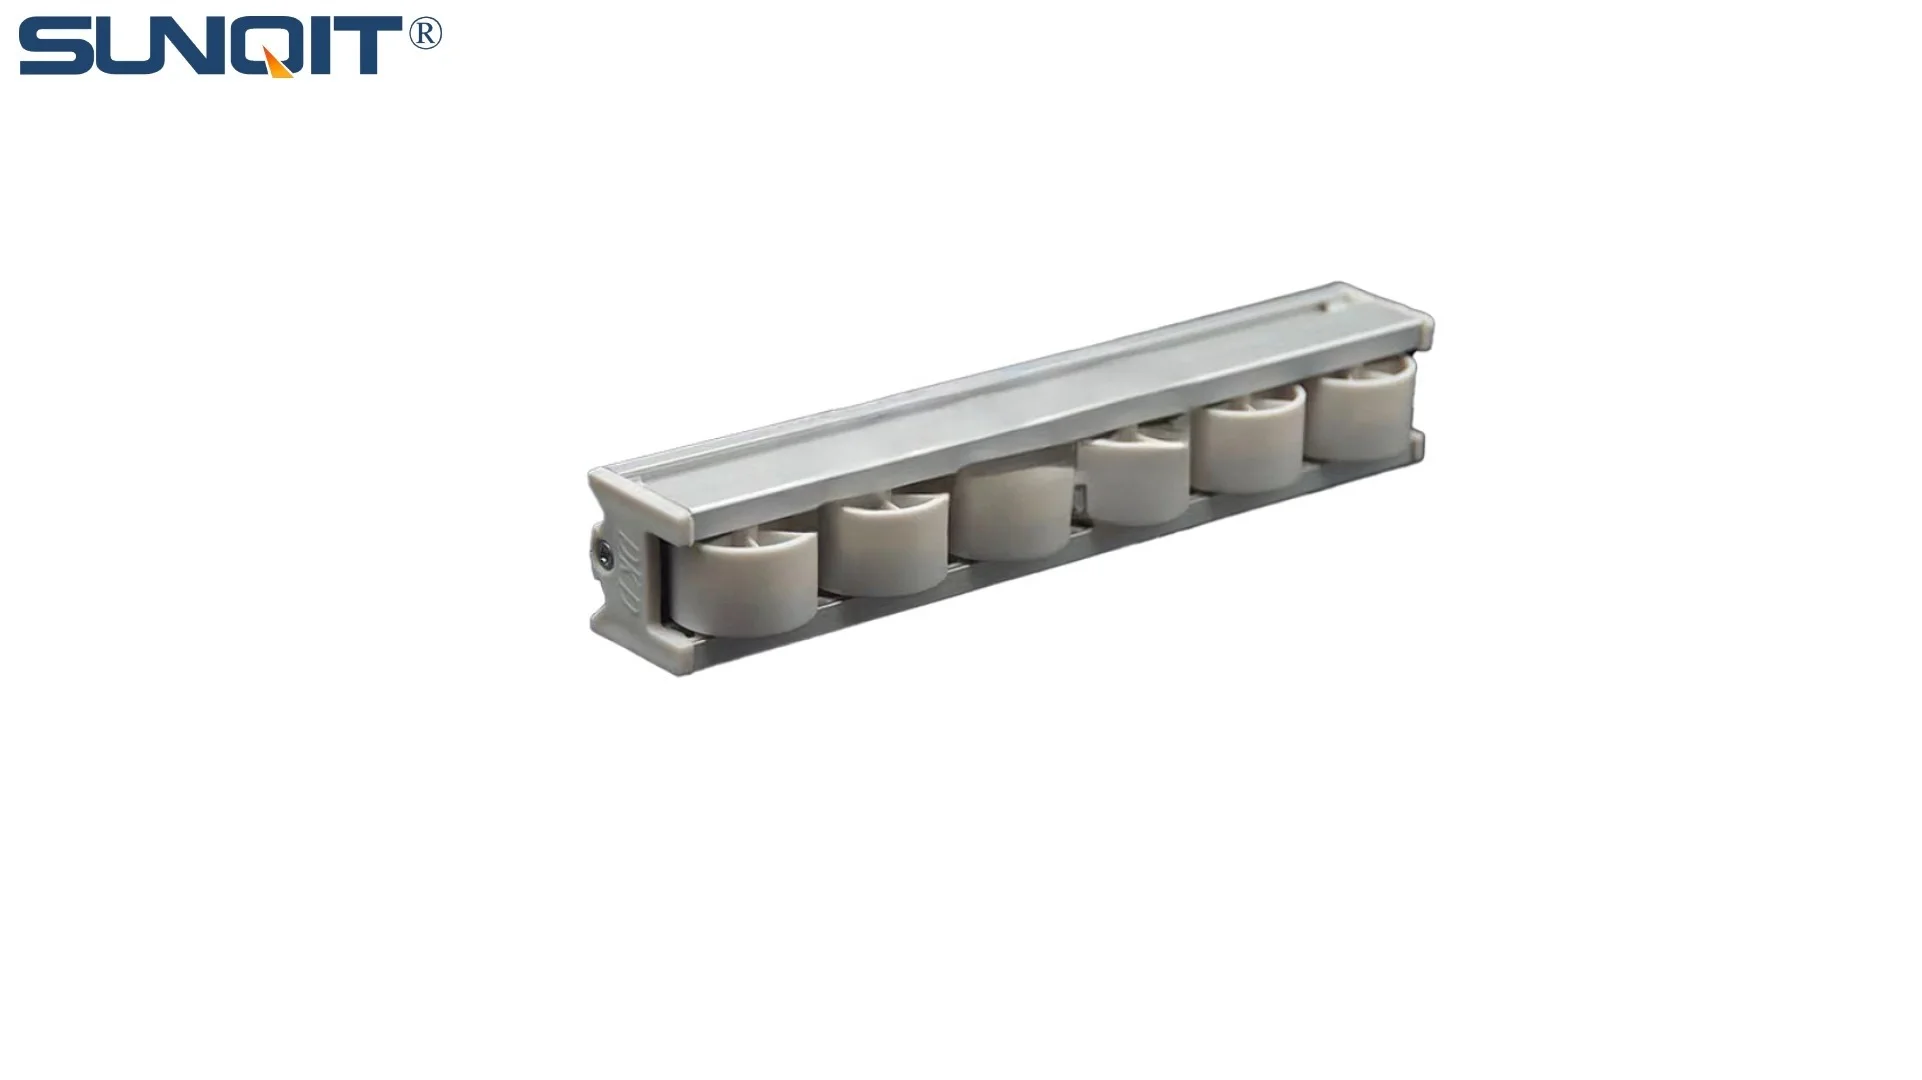
40 Aluminum Roller Track White
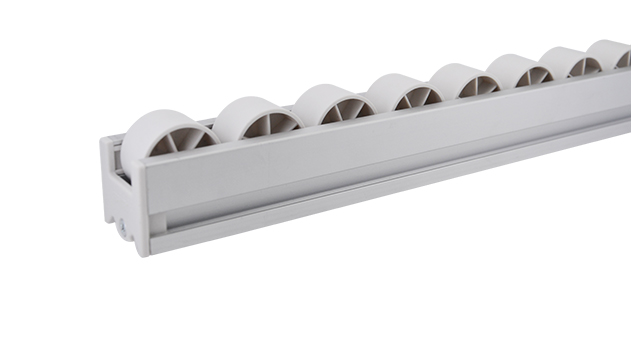
Durable and smooth-running modular roller rails. The system is fully assembled. The roller rail profile contains plastic rollers mounted on steel axles. Aluminum frame with plastic wheel make it anti corrosion,and material convey more smooth.
Let's start with a scenario we've all lived through, even if we don't realize it: You've just unboxed a new piece of furniture—a bookshelf, maybe, or a desk. You're excited to set it up, but as you spread out the parts, you notice the instruction manual mentions a "Phillips-head screwdriver" and a "rubber mallet." You rummage through your toolbox and find a rusty flathead, a hammer that's seen better days, and a tape measure that stopped retracting three years ago. Two hours later, the bookshelf is wobbly, a screw is stripped, and you're wondering why something that looked "easy to assemble" turned into a morning of frustration. Sound familiar? Now, imagine that same feeling, but amplified—because instead of a bookshelf, you're installing a 40 Aluminum Roller Track White, a critical component of your workshop, warehouse, or production line. This isn't just about keeping books upright; it's about ensuring materials glide smoothly, workflows stay efficient, and your team can rely on the track day in and day out. The difference between a seamless installation and a stressful, error-prone one? The tools you use.
In this guide, we're diving deep into the world of 40 Aluminum Roller Track White installation tools. We'll break down the essentials, explain why each tool matters, and even share tips to help you avoid common pitfalls. Whether you're a seasoned facility manager, a small business owner setting up your first assembly station, or a DIY enthusiast building a home workshop, this article is your roadmap to getting the job done right. And yes—we'll keep it conversational. No jargon, no overly technical specs, just practical advice from someone who's been there (and learned the hard way that a dull drill bit can turn a 30-minute task into a two-hour headache).
Why Tools Matter More Than You Think
Before we jump into the specific tools, let's talk about why they're so important. The 40 Aluminum Roller Track White isn't just a length of metal with wheels—it's a precision component designed to move materials with minimal friction. Even a tiny misalignment can cause jams, slow down production, or wear out the track prematurely. Using the wrong tools (or no tools at all) is like trying to paint a masterpiece with a toothbrush: you might get something on the canvas, but it won't be what you envisioned.
Consider this: If you use a tape measure that's off by 1/8 of an inch, that error multiplies over the length of the track. By the time you reach the end, your track could be misaligned by several inches, leading to items getting stuck or rolling off course. Or, if you skimp on a quality level and eyeball the alignment, you might end up with a track that slopes downward, causing materials to race through too fast, or upward, making them hard to push. Even something as simple as using the wrong drill bit for aluminum profile fasteners can strip the threads, leaving you with a loose connection that wobbles over time.
The right tools don't just make installation easier—they make it reliable . They ensure your 40 Aluminum Roller Track White performs as intended, lasts longer, and keeps your workspace safe. And let's not forget the time factor: using the right tools cuts down on installation time. What might take a novice with mismatched tools a full day could take an experienced installer with the proper gear just a few hours. Time saved is money saved, especially in a production environment where downtime equals lost opportunities.
The Essential Tools: Your Installation Toolkit
Now, let's get to the good stuff: the tools you actually need. We'll break them down into categories to keep things organized, and for each tool, we'll explain what it does, why you need it, and a few pro tips to help you use it effectively.
1. Measuring and Marking Tools: The Foundation of Precision
You can't build (or install) anything well without knowing where to put it. Measuring and marking tools are the first step in ensuring your 40 Aluminum Roller Track White is aligned, level, and the right length for your space.
Tape Measure : Not just any tape measure—look for one that's at least 25 feet long (7.6 meters) with clear markings in both inches and centimeters. A retractable tape with a lock is a must, and if you can splurge on one with a magnetic tip, even better—it'll stick to metal surfaces like aluminum profile, freeing up your hands to mark measurements. Pro tip: Avoid cheap tape measures with flimsy blades; they bend easily, leading to inaccurate readings.
Speed Square : This triangular tool is a lifesaver for marking straight lines and 90-degree angles. When cutting the 40 Aluminum Roller Track White to length (more on cutting tools later), a speed square ensures your cuts are precise, so the track pieces fit together seamlessly. Look for one made of aluminum (it's lightweight and durable) with etched markings that won't wear off over time.
Marker or Pencil : A basic tool, but not all markers are created equal. For aluminum surfaces, use a fine-tipped permanent marker (like a Sharpie) that won't smudge or wipe off easily. If you need to make temporary marks, a pencil works, but be sure to sharpen it—dull pencil marks are hard to see, and that leads to mistakes.
Level : A 4-foot (1.2-meter) spirit level is ideal for checking both horizontal and vertical alignment. Look for one with at least two vials (one for level, one for plumb) and a magnetic edge to attach to metal surfaces like aluminum profile. Avoid bubble levels that are too short—they can give false readings if the surface isn't perfectly flat. Pro tip: Always check the level in multiple spots along the track; a single reading might not catch a subtle slope.
2. Cutting Tools: Trimming to Perfection
Unless your space is exactly the length of the pre-cut 40 Aluminum Roller Track White (which, let's be real, almost never happens), you'll need to cut the track to fit. Cutting aluminum requires tools designed for the material—aluminum is softer than steel, but it can still dull blades quickly if you're not careful.
Miter Saw with Aluminum Blade : If you're cutting multiple pieces or need very straight cuts, a miter saw is worth the investment. Look for a blade specifically labeled for aluminum (it will have more teeth—around 80-100 teeth per inch) to prevent chipping or bending the track. Pro tip: Secure the track firmly with a clamp before cutting to avoid vibrations that can cause rough edges.
Hacksaw with Fine-Tooth Blade : For smaller jobs or if you don't have a miter saw, a hacksaw works. Again, use a fine-tooth blade (32 teeth per inch) and saw slowly with light pressure. Let the blade do the work—pushing too hard can bend the track or break the blade.
Deburring Tool : After cutting, aluminum edges can be sharp and jagged. A deburring tool (a small hand tool with a blade) smooths these edges, preventing cuts and ensuring the track pieces fit together without gaps. This is especially important if you're using roller track placon mount accessories, which need a clean surface to attach to. Pro tip: Always deburr both the inside and outside edges of the cut—sharp edges on the inside can damage materials sliding through the track.
3. Fastening Tools: Securing the Track in Place
Once your track is cut to length and marked for installation, you'll need to fasten it to a surface—most commonly, an aluminum profile or a workbench. This is where fastening tools come in, and choosing the right ones depends on the fasteners you're using (screws, bolts, etc.).
Cordless Drill/Driver : A must-have for driving screws into aluminum profile or other mounting surfaces. Look for a drill with variable speed control—lower speeds are better for driving screws, as high speeds can strip the threads. A lithium-ion battery is ideal for portability, and a keyless chuck makes changing bits quick and easy. Pro tip: Invest in a set of high-quality drill bits designed for metal; they'll stay sharp longer and reduce the risk of stripping.
Hex Key Set (Allen Wrenches) : Many fasteners for aluminum profile and roller track placon mount accessories use hex heads (Allen bolts). A hex key set with both metric and standard sizes ensures you have the right fit. Look for a set with ball-end keys—they allow you to reach bolts at an angle, which is handy in tight spaces. Pro tip: Keep the hex keys organized in a case; there's nothing more frustrating than hunting for the right size in a jumbled pile.
Screwdriver Set : Even with a drill, there are times when a manual screwdriver is better—like when you need to gently tighten a screw without overdoing it. A set with Phillips, flathead, and Torx bits covers most bases. Look for screwdrivers with rubberized handles for grip—your hands will thank you after hours of installation.
Clamps : Before you fasten the track permanently, you'll want to hold it in place to check alignment. C-clamps or bar clamps work well for this. They keep the track steady while you drill pilot holes or drive screws, preventing it from shifting. Pro tip: Use clamp pads or wrap the clamp jaws in tape to avoid scratching the aluminum finish of the track or profile.
4. Alignment Tools: Keeping It Straight and Level
We touched on levels earlier, but alignment tools go beyond just checking if the track is horizontal. They help ensure the track is parallel to other surfaces, centered on the aluminum profile, and properly spaced for the materials you'll be moving.
Laser Level : For longer tracks (10 feet or more), a laser level is a game-changer. It projects a straight, visible line across the installation surface, making it easy to align multiple track sections. Some laser levels also have a plumb function, which is useful if you're installing vertical supports for the track. Pro tip: Use a laser level with a magnetic base to attach it to metal surfaces—no need to hold it steady with one hand while marking with the other.
Straightedge : A long, rigid straightedge (at least 6 feet) helps check for bowing or warping in the track itself. Lay it across the track; if there's a gap between the straightedge and the track, the track is bent and needs to be replaced or adjusted. Pro tip: A aluminum straightedge is lightweight and won't warp over time, making it more reliable than a wooden one.
Feeler Gauge : This small tool with thin metal blades is used to measure gaps between the track and the mounting surface (like aluminum profile) or between track sections. Even a tiny gap can cause the track to wobble, so a feeler gauge helps you ensure everything is flush. Pro tip: Start with the thinnest blade and work your way up to find the exact gap size—this is especially useful when using roller track placon mount accessories, which have specific gap tolerances.
5. Safety Gear: Protecting Yourself (Because Accidents Happen)
Last but never least: safety gear. Installing a 40 Aluminum Roller Track White involves cutting metal, drilling, and handling sharp edges—all of which can be dangerous if you're not protected. Don't skip these tools; they're the most important ones in your toolkit.
Safety Glasses : Flying metal shavings, dust, or debris from cutting or drilling can damage your eyes. Look for ANSI Z87.1-rated safety glasses—they're impact-resistant and meet strict safety standards. Pro tip: Choose glasses with anti-fog coating if you're working in a humid environment; there's nothing worse than constantly wiping foggy lenses.
Work Gloves : Aluminum edges can be sharp, especially after cutting, and deburring tools can slip. A pair of leather or cut-resistant gloves protects your hands from cuts and scrapes. Pro tip: Avoid gloves that are too bulky—you need dexterity to handle small fasteners and tools.
Dust Mask or Respirator : Cutting aluminum creates fine dust that can irritate your lungs. A disposable dust mask works for short jobs, but for longer installations, a half-face respirator with a dust filter is better. Pro tip: If you're using a power saw, wear the respirator even if you're working outdoors—the dust can still kick up and linger.
Ear Protection : Power tools like miter saws or drills are loud, and prolonged exposure can damage your hearing. Foam earplugs or earmuffs reduce noise levels to a safe range. Pro tip: Keep a pair of earplugs in your toolbox so you never forget them—they're small, cheap, and essential.
Tool Comparison Table: At a Glance
To help you keep track of all these tools, here's a handy table summarizing their functions, key features to look for, and pro tips for use:
| Tool Category | Specific Tool | Function | Key Features | Pro Tips |
|---|---|---|---|---|
| Measuring & Marking | Tape Measure | Measure track length and mounting positions | 25+ feet, retractable, lockable, magnetic tip | Check for blade straightness before use; avoid bending |
| Speed Square | Mark 90-degree angles for cutting | Aluminum construction, etched markings | Hold firmly against the track edge to prevent slipping | |
| Marker/Pencil | Mark cut lines and mounting points | Fine-tipped permanent marker (Sharpie) or sharp pencil | Test marker on scrap aluminum first to ensure it doesn't smudge | |
| Level (4-foot) | Check horizontal and vertical alignment | Two vials (level/plumb), magnetic edge | Check level in 2-3 spots per track section for accuracy | |
| Cutting | Miter Saw with Aluminum Blade | Cut track to length (straight, precise cuts) | 80-100 teeth per inch blade, adjustable angle | Clamp track securely; let the blade cut—don't force it |
| Hacksaw with Fine-Tooth Blade | Manual cutting for small jobs | 32 teeth per inch blade, comfortable grip | Saw in short, smooth strokes; avoid twisting the blade | |
| Deburring Tool | Smooth sharp edges after cutting | Interchangeable blades, ergonomic handle | Deburr both inside and outside edges to prevent cuts | |
| Fastening | Cordless Drill/Driver | Drive screws and drill pilot holes | Variable speed, lithium-ion battery, keyless chuck | Use metal drill bits; start with a pilot hole smaller than the screw |
| Hex Key Set | Tighten hex-head bolts (common in aluminum profile) | Metric and standard sizes, ball-end keys | Store in a labeled case to avoid losing small keys | |
| Screwdriver Set | Manual driving of screws (for precision) | Phillips, flathead, Torx bits; rubberized grip | Match the screwdriver size to the screw head to avoid stripping | |
| Clamps (C-clamp/Bar clamp) | Hold track in place during alignment/fastening | Adjustable jaw, padded grips | Use tape on clamp jaws to prevent scratching aluminum | |
| Alignment | Laser Level | Project straight line for long-track alignment | Magnetic base, visible laser (red or green) | Use in low light for better laser visibility |
| Straightedge (6+ feet) | Check for track bowing/warping | Aluminum construction, rigid (no flex) | Lay across track and check for gaps; replace bent tracks | |
| Feeler Gauge | Measure gaps between track and mounting surface | Thin metal blades in various thicknesses | Start with the thinnest blade to find exact gap size | |
| Safety Gear | Safety Glasses | Protect eyes from debris | ANSI Z87.1-rated, anti-fog coating | Wear even for "quick" jobs—shavings fly unexpectedly |
| Work Gloves | Protect hands from cuts/sharp edges | Cut-resistant or leather, dexterous fit | Avoid bulky gloves; you need to handle small parts | |
| Dust Mask/Respirator | Filter aluminum dust | Disposable mask or half-face respirator with dust filter | Wear when cutting or drilling—dust irritates lungs | |
| Ear Protection | Reduce noise from power tools | Foam earplugs or earmuffs | Keep a spare pair in your toolbox for forgetful days |

Step-by-Step Installation: Putting Your Tools to Work
Now that you have your toolkit assembled, let's walk through a basic installation process for the 40 Aluminum Roller Track White. We'll highlight how each tool comes into play, so you can see exactly why you need them.
Step 1: Plan and Measure
Before you touch a single tool, plan your installation. Where will the track go? How long does it need to be? Will it be mounted on aluminum profile, a wall, or a workbench? Once you have a plan, use your tape measure to measure the installation area. Mark the start and end points with your marker , then use your speed square to ensure the marks are straight and square to the mounting surface. Pro tip: Measure twice, cut once—this old saying exists for a reason!
Step 2: Cut the Track (If Needed)
If your track is longer than needed, use your miter saw with an aluminum blade (or hacksaw) to cut it to length. Secure the track in a vice or with clamps to prevent movement. Line up the cut mark with the saw blade, then cut slowly and steadily. After cutting, use your deburring tool to smooth the edges. Pro tip: If using a hacksaw, apply light pressure and let the blade do the work—pushing too hard will bend the track.
Step 3: Prepare the Mounting Surface
If you're mounting the track on aluminum profile (a common choice for its durability and adjustability), use your drill/driver to pre-drill holes in the profile where the track will attach. Use a drill bit slightly smaller than the screws you'll be using to ensure a tight fit. Pro tip: Use a center punch to mark the drill points—this prevents the drill bit from slipping.
Step 4: Align the Track
Lay the track on the mounting surface (aluminum profile, etc.) and use clamps to hold it in place. Place your 4-foot level on top of the track to check for level. If you're installing a long track, use your laser level to ensure all sections are aligned. Adjust the track as needed until it's perfectly level and straight. Pro tip: Use your straightedge to check for bowing—if the track curves upward or downward, it will cause material jams.
Step 5: Fasten the Track
With the track aligned, use your drill/driver to drive screws through the track and into the mounting surface. If the fasteners are hex-head bolts (common in aluminum profile installations), use your hex key set to tighten them. Be careful not to over-tighten—this can strip the threads or warp the track. Pro tip: Tighten screws in a crisscross pattern (like tightening lug nuts on a car) to ensure even pressure.
Step 6: Install Accessories (e.g., Roller Track Placon Mount)
Depending on your setup, you may need to install accessories like roller track placon mount brackets to connect track sections or attach the track to aluminum profile. Use your feeler gauge to ensure there's no gap between the placon mount and the track—this ensures a secure connection. Tighten the placon mount fasteners with your screwdriver or hex key. Pro tip: Refer to the manufacturer's instructions for torque specifications—over-tightening can crack plastic or aluminum accessories.
Step 7: Test and Adjust
Once the track is installed, test it by rolling a few items along it (similar to what you'll be using in your workspace). If items get stuck, use your level to check for misalignment or your feeler gauge to check for gaps. Tighten loose fasteners with your hex key or screwdriver, and adjust as needed. Pro tip: Test with different weights—light items might roll smoothly, but heavier ones could reveal alignment issues.

Troubleshooting: When Things Go Wrong (And How Tools Fix Them)
Even with the best tools, installation can hit snags. Here are some common issues and how your tools can help fix them:
Problem: Track is wobbly after installation. Solution : Use your level to check for uneven mounting—one side might be higher than the other. Use your feeler gauge to check for gaps between the track and mounting surface; add shims if needed. Tighten loose fasteners with your hex key or screwdriver.
Problem: Items get stuck halfway along the track. Solution : Use your straightedge to check for bowing—if the track dips or rises, it will slow items down. Loosen the fasteners, adjust the track with clamps , then retighten. Also, check for debris in the rollers and clean if needed.
Problem: Fasteners keep stripping. Solution : Ensure you're using the correct drill bit size (smaller than the screw) and a sharp bit. Use your drill/driver on a low speed to drive screws, and stop when you feel resistance—over-tightening is the main cause of stripped threads.
Problem: Track sections don't line up. Solution : Use your laser level to align the sections before fastening. If they're still off, check if the mounting surface (aluminum profile) is straight—use your straightedge to verify. Warped profiles will cause track misalignment.
Conclusion: Invest in Your Tools, Invest in Your Workspace
Installing a 40 Aluminum Roller Track White might seem like a straightforward task, but as we've seen, the right tools make all the difference. From measuring and cutting to fastening and alignment, each tool plays a role in ensuring your track is installed correctly, performs reliably, and lasts for years.
Think of your tools as an investment. A quality tape measure, level, or drill might cost a bit more upfront, but they'll save you time, frustration, and money in the long run. They'll help you avoid costly mistakes, reduce downtime, and keep your workspace efficient. And let's not forget the peace of mind that comes with knowing you've done the job right—the first time.
So, before you start your next installation, take a look at your toolkit. Do you have everything you need? If not, make a list and invest in the essentials. Your 40 Aluminum Roller Track White (and your sanity) will thank you.
Happy installing!