
- Company Articles
- Products and Technology
- Installation And Maintenance
- 40 Aluminum Roller Track Yellow Troubleshooting: Common Issues & Fixes
Imagine standing on a busy production floor—conveyors hum, workers move with purpose, and materials glide from one station to the next like clockwork. At the heart of that seamless flow? Often, it's the unassuming 40 Aluminum Roller Track Yellow. Lightweight yet tough, with its bright yellow guides that make material paths easy to spot, this roller track is a workhorse in lean systems, from assembly lines to material racks. But even the most reliable tools hit snags. Maybe your rollers have started sticking, or there's a high-pitched squeal every time a bin slides across. When that happens, downtime creeps in, frustration builds, and suddenly that "unassuming" track becomes the center of attention.
This guide is for the problem-solvers—the technicians, floor managers, and lean system enthusiasts who need to get things moving again, fast. We'll walk through the most common headaches with the 40 Aluminum Roller Track Yellow, why they happen, and how to fix them. No jargon, no guesswork—just practical, step-by-step solutions rooted in real-world use. Let's dive in.
First, Let's Get to Know Your Roller Track
Before we troubleshoot, it helps to understand what makes the 40 Aluminum Roller Track Yellow tick. This isn't just a strip of metal with wheels—it's a precision tool designed for efficiency. The "40" refers to its width (typically 40mm), while "aluminum" highlights its lightweight, corrosion-resistant build. The bright yellow plastic roller track guide rail isn't just for visibility; it's engineered to reduce friction, ensuring smooth material flow. Underneath, you'll find aluminum extrusion profiles that provide rigidity, paired with roller track placon mounts for aluminum profile flat (those handy brackets that secure the track to frames or workbenches). Add in steel or plastic rollers (depending on your model) and connectors like roller track placon mount connectors, and you've got a system built to handle daily wear and tear—when maintained right.
Commonly used in production assemble lines, material rack B (3 row and 3 floor) setups, and even alongside workbenches, this track thrives on consistency. But consistency is exactly what breaks down when issues arise. Let's tackle the top problems you're likely to face.
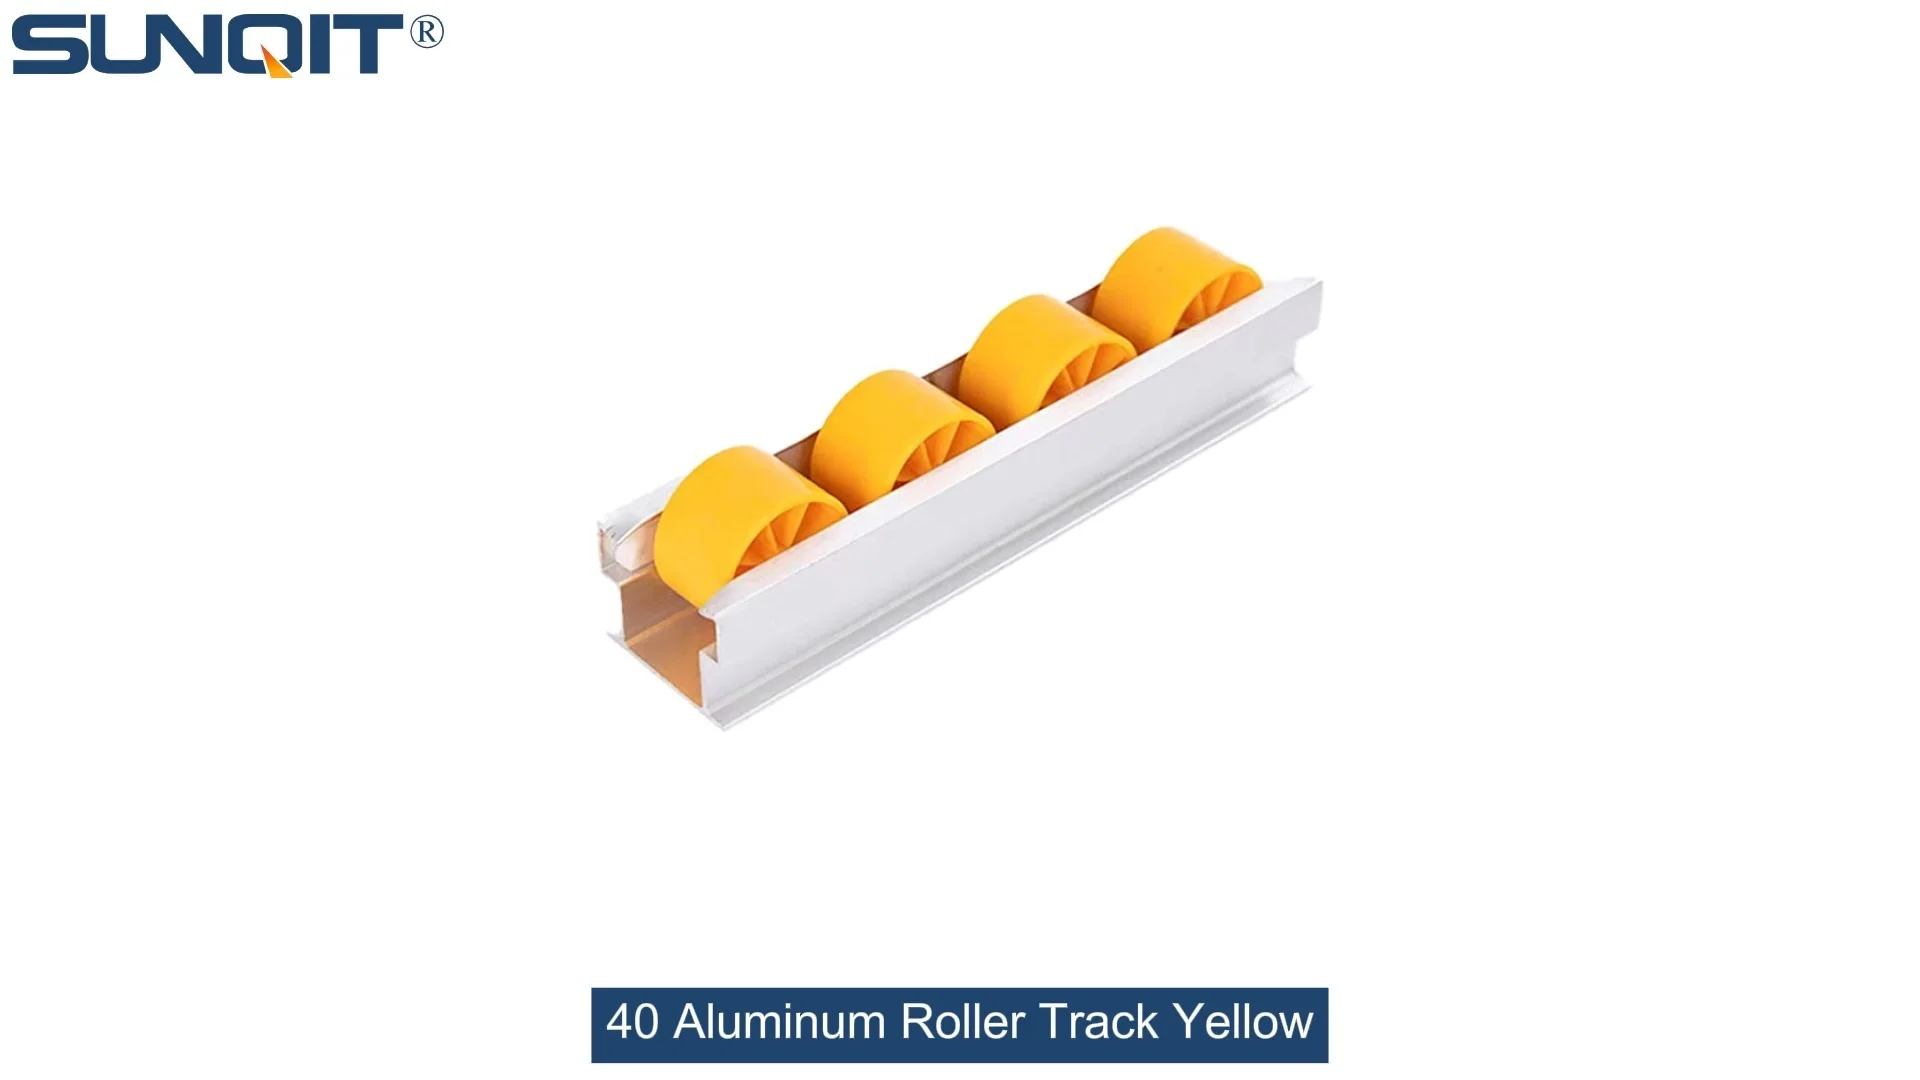
Troubleshooting Common Issues: A Step-by-Step Guide
Issue 1: Rollers Are Sticking or Moving Unevenly
Symptoms: You push a bin, and instead of gliding, it feels like dragging a brick. Some rollers spin freely, others barely move. In severe cases, materials get stuck mid-track, requiring a team lift to free them.
Why it happens: Let's start with the basics—dirt and debris. Production floors are messy places: metal shavings, dust, even spilled lubricants (ironically) can gunk up the works. Over time, this grime builds up around the roller axles, creating friction. If your track is near a machining area, metal particles might even scratch the roller surfaces, making movement uneven. Another culprit? Lack of lubrication. Rollers have tiny bearings that need a little TLC—without it, they dry out and seize. Bent or warped rollers are less common but still possible, especially if something heavy (way over the track's weight limit) was dropped on them.
How to fix it:
- Clean first, lubricate second. Start by shutting down the track (safety first!). Use compressed air to blow out debris from around the rollers and axles—focus on the nooks where dirt hides. For stubborn grime, wipe the rollers and rails with a rag dampened in mild detergent (avoid harsh chemicals; they can damage the yellow plastic guide rail). Let everything dry completely before moving on.
- Lubricate the right way. Not all lubricants are created equal. Skip the thick grease—it attracts more dirt. Instead, use a lightweight machine oil or silicone spray (WD-40 works in a pinch, but for long-term, a dedicated bearing oil is better). Apply a drop to each roller axle, then spin the roller by hand to distribute the oil. You'll feel the difference immediately—smooth, quiet movement.
- Check for bent or worn rollers. Spin each roller individually. If one wobbles, feels rough, or doesn't spin at all, it's time to replace it. Most suppliers (like your go-to roller track supplier) sell replacement rollers in packs—keep a few on hand for quick swaps. To replace, simply pop out the old roller (they're usually held in place by clips or pins) and snap the new one in. Pro tip: If multiple rollers are bent, double-check your track's weight limit—you might be overloading it.
Issue 2: The Track Is Misaligned (Materials Keep Veering Off)
Symptoms: Bins or parts start sliding to one side, scraping the edge of the track. Over time, you notice uneven wear on the yellow guide rail, or worse, materials fall off entirely. You've tried pushing them straight, but they just veer again.
Why it happens: Misalignment is often a sneaky culprit. It can start small—maybe a loose roller track placon mount for aluminum profile flat (the bracket that attaches the track to your material rack or workbench). As the bracket loosens, the track shifts. Or maybe the floor itself is uneven—concrete settles, or a caster wheel on your workbench is stuck, throwing the whole system off-kilter. Even temperature changes can play a role: aluminum expands and contracts slightly, and if the track is bolted down too tightly without room to move, it can warp.
How to fix it:
- Tighten the connections. Start with the obvious: check all the roller track placon mount brackets and connectors. These are the metal pieces that secure the track to its frame. Grab a wrench or screwdriver (depending on the fasteners) and snug them up—don't overtighten, though; aluminum can strip if you crank too hard. Pay extra attention to joints where two track sections meet—these are common weak points for misalignment.
- Level the track. If the track is mounted on a workbench or material rack, use a spirit level to check if it's flat. Place the level along the length of the track—if the bubble is off-center, you've got a leveling issue. Adjust the feet of the rack or workbench (many have adjustable leveling feet) to raise or lower one side until the bubble is centered. If the floor is uneven, you might need to add shims under the feet—cardboard or thin metal shims work in a pinch.
- Check for warping. If tightening and leveling don't work, the track itself might be bent. Lay a straightedge (like a long level or a piece of aluminum profile) along the track. If there's a gap between the straightedge and the track, it's warped. Minor warps can sometimes be gently bent back (use a rubber mallet to tap the track straight), but severe warps mean it's time to replace the section. Again, your roller track supplier can help with replacement parts.
Issue 3: That Annoying Squeak (Or Rattle, Or Grinding Noise)
Symptoms: Every time a material slides across the track, there's a high-pitched squeal, a rattling, or even a grinding sound. It's not just annoying—it's a sign something's wrong.
Why it happens: Noise is usually a cry for help from moving parts. Squeaking often means dry rollers (we covered lubrication earlier), but it can also come from misaligned track sections rubbing against each other. Rattling might point to loose brackets—like the roller track placon mount center support bracket that holds long track sections steady. Grinding? That's more serious—it could mean metal-on-metal contact, like a worn roller axle scraping against the track frame, or a foreign object (like a loose screw) caught between rollers.
How to fix it:
- Track the noise to its source. This sounds obvious, but noise can echo on a busy floor. Have a colleague slide a bin across the track while you listen closely—crouch down, put your ear near the track, and pinpoint exactly where the sound is coming from. Is it a single roller? A joint between track sections? A bracket?
- Attack the squeak. If it's a roller, go back to the lubrication step—you might have missed an axle. If it's a track joint, check the roller track placon mount connector that links the sections. These connectors should fit snugly; if they're loose, tighten them. If the joint still squeaks, apply a tiny bit of silicone grease to the connection point (avoid oil here—it can make the track slippery for materials).
- Stop the rattle. Tighten all brackets, especially the center support brackets on long tracks. If a bracket is bent or cracked, replace it—don't just tighten it; a damaged bracket won't hold. For extra stability, add a second bracket near the noisy area (most tracks have pre-drilled holes for easy mounting).
- Eliminate grinding. This is urgent—metal-on-metal wear can destroy your track fast. Inspect the area for loose screws, bolts, or debris. If you find a foreign object, remove it immediately. If the grinding is from a roller axle, replace the roller (as we did in Issue 1). If the track frame itself is bent and rubbing, you might need to realign or replace that section.
Issue 4: Premature Wear (Scratches, Cracks, or Faded Rails)
Symptoms: The yellow plastic guide rail is scratched or cracked, the aluminum frame has dents, or the track just looks "tired" before its time.
Why it happens: Roller tracks are built to last, but they're not indestructible. Overloading is a big culprit—if you're sliding 50kg bins down a track rated for 30kg, you're asking for trouble. Abrasive materials (like rough plastic bins or metal parts with sharp edges) can scratch the yellow guide rail. Even sunlight can fade the yellow color over time if the track is near a window. And let's not forget human error—accidental bumps with forklifts or pallet jacks can dent the aluminum frame.
How to fix it (and prevent it):
- Respect the weight limit. Check the manufacturer's specs for your track—most 40 Aluminum Roller Tracks Yellow are rated for 20-40kg per linear meter. If you regularly need to move heavier loads, talk to your roller track supplier about upgrading to a heavier-duty model (like a steel roller track) or adding support brackets.
- Protect the rails. Scratched guide rails can slow materials and cause jams. For abrasive materials, line bins with rubber mats or use plastic bins with smooth edges. To cover existing scratches, apply a clear plastic film (like the kind used on phone screens) to the yellow rail—it won't affect movement and adds a layer of protection. For cracks, small ones can be filled with plastic epoxy (let it dry completely before use), but large cracks mean replacing the rail section.
- Shield from damage. If the track is near high-traffic areas (like forklift paths), install guardrails or bumper strips to prevent accidental bumps. Even simple foam pipe insulation around the track frame can absorb impacts. And if the track is in direct sunlight, consider adding a shade or using a UV-resistant spray (test it on a small, hidden area first to avoid discoloration).
Issue 5: Headaches with Installation (Or Reconfiguration)
Symptoms: You're setting up a new track section or reconfiguring your line, and the track just won't align with existing sections. The roller track placon mount for aluminum profile flat won't fit properly, or the connectors won't lock into place.
Why it happens: Installation issues usually boil down to two things: using the wrong accessories or skipping prep steps. Maybe you grabbed a roller track placon mount for aluminum profile high instead of the flat version (they look similar but aren't interchangeable). Or the aluminum profile you're mounting to isn't straight, throwing off the track alignment. Even something as simple as not cleaning the mounting surface (grease or dirt prevents brackets from sitting flat) can cause problems.
How to fix it:
- Double-check your accessories. This is key. The 40 Aluminum Roller Track Yellow uses specific brackets and connectors—mixing and matching with other track types (like steel or mini aluminum roller track) won't work. Compare the part numbers on your brackets (like "roller track placon mount for aluminum profile flat") with the supplier's specs to ensure they're compatible. When in doubt, call your roller track supplier—they'll help you confirm you have the right parts.
- Prep the mounting surface. Whether you're attaching the track to a workbench, material rack, or aluminum extrusion profile, the surface needs to be clean and flat. Wipe it down with a degreaser, then use a level to ensure it's straight. If mounting to a material rack B (3 row and 3 floor), check that the rack itself is level—wobbly racks make for wobbly tracks.
- Take it slow. Rushing installation leads to mistakes. Start by loosely attaching the brackets to the mounting surface, then place the track on top. Align the track with existing sections (use a string line for long runs to keep it straight), then tighten the brackets one by one. Don't overtighten—aluminum bends easily. Finally, test the track by sliding a bin across it—if it moves smoothly, you're good to go.

Quick Reference: Troubleshooting Table
For those "in-the-moment" fixes, here's a handy table summarizing the issues, causes, and quick solutions we've covered:
| Issue | Common Causes | Quick Fix |
|---|---|---|
| Rollers sticking/uneven movement | Dirt/debris, dry axles, bent rollers | Clean with compressed air, lubricate axles, replace bent rollers |
| Track misalignment | Loose brackets (e.g., placon mounts), uneven floor, warped track | Tighten brackets, level the track, replace warped sections |
| Excessive noise (squeak/rattle/grind) | Dry rollers, loose brackets, misaligned joints, foreign objects | Lubricate, tighten brackets, remove debris, realign joints |
| Premature wear (scratches, cracks) | Overloading, abrasive materials, impacts, UV exposure | Respect weight limits, use protective film, add guardrails |
| Installation/reconfiguration issues | Wrong accessories, dirty/uneven mounting surface, rushing | Verify accessory compatibility, clean/prep surface, align slowly |

Preventive Maintenance: Keep It Running Smoothly
They say an ounce of prevention is worth a pound of cure, and that's never truer than with roller tracks. A little regular maintenance can save you hours of downtime and frustration. Here's a simple weekly checklist to follow:
- Inspect: Walk the track, checking for loose brackets, bent rollers, or debris. Spin a few rollers—they should move freely.
- Clean: Use compressed air to blow out dust and debris. Wipe the yellow guide rail with a dry rag.
- Lubricate: If rollers feel stiff, add a drop of oil to axles (you don't need to lubricate every week—once a month is usually enough, unless the track is in a dirty environment).
- Tighten: Give all brackets and connectors a quick check with a wrench—tighten any that are loose.
And once a quarter, do a deeper dive: check weight limits are being followed, inspect for wear on rails and rollers, and test the track with a variety of bin sizes/weights to ensure consistent performance.

When to Call in the Pros
Most issues with the 40 Aluminum Roller Track Yellow are DIY-friendly, but there are times to loop in your roller track supplier or a technician. If you're seeing repeated warping, widespread roller failure, or structural damage to the track frame, it might point to a larger issue (like a manufacturing defect or incompatible system design). Your supplier can help diagnose the root cause and recommend solutions—whether that's upgrading parts, adjusting your setup, or even redesigning your material flow.
Final Thoughts: Your Track, Your Flow, Your Success
The 40 Aluminum Roller Track Yellow might not be the flashiest part of your lean system, but it's one of the most critical. When it works, it fades into the background, letting your team focus on what matters: building, assembling, and delivering. When it doesn't, it's a reminder that even the smallest tools deserve attention.
Armed with this guide, you've got the knowledge to troubleshoot jams, silence squeaks, and keep materials flowing. Remember: every problem has a solution, and most of them are simpler than they seem. So the next time your track acts up, take a deep breath, grab your wrench and oil, and tackle it like the problem-solver you are. Your production line (and your sanity) will thank you.