- Company Articles
- Products and Technology
- Installation And Maintenance
- 4040 Aluminum Profile End Cap Adhesives: Glue vs. Snap-Fit Installation

4040 Aluminum Profile End Cap Adhesives: Glue vs. Snap-Fit Installation
Related Product
4040 Aluminum Profile End Cap
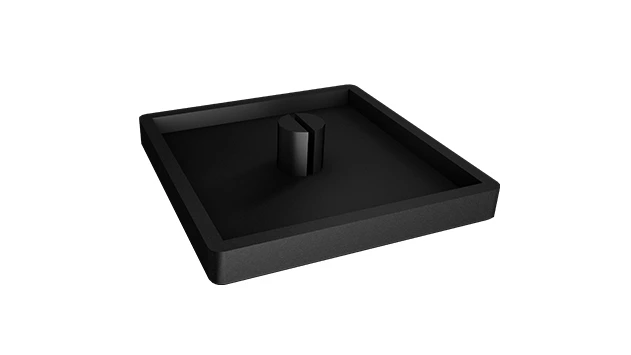
The aluminum profile end cap adds a finishing touch to your project and closes off profile ends to limit dust and debris buildup, also it can avaid some scratch for material and labor during the assemble work.
Walk into any modern manufacturing facility, automotive workshop, or even a DIY enthusiast's garage, and you'll likely encounter a silent workhorse of industrial design: the aluminum extrusion profile. These lightweight, durable structures form the backbone of everything from assembly line workbenches and material racks to conveyor systems and machine guards. Among the most popular of these profiles is the 4040 aluminum profile—a versatile, 40mm x 40mm extrusion that balances strength and flexibility, making it a staple in lean manufacturing and modular setups. But for all its robustness, the 4040 profile has a vulnerable spot: its open ends. That's where end caps come in. Small, unassuming, and often overlooked, these aluminum profile accessories play a critical role in protecting both the profile and the people working around it. Today, we're diving deep into the two most common ways to install these end caps: glue adhesives and snap-fit mechanisms. By the end, you'll understand which method suits your project, why it matters, and how to avoid the pitfalls that can turn a simple installation into a frustrating headache.
The Unsung Hero: Why 4040 Aluminum Profile End Caps Matter
Before we compare installation methods, let's take a moment to appreciate why end caps are non-negotiable for anyone working with aluminum extrusion profiles. At first glance, they might seem like a "nice-to-have" finishing touch, but their impact is far more practical than cosmetic.
First, safety. Raw aluminum extrusion profiles have sharp, unfinished edges that can slice hands, catch on clothing, or damage delicate materials sliding across work surfaces. In a busy factory where employees are moving quickly, a single unprotected end cap can lead to cuts, scrapes, or even more serious injuries. End caps blunt these edges, turning a hazard into a smooth, safe surface.
Second, protection for the profile itself. The hollow interior of a 4040 aluminum profile is prone to collecting dust, debris, and moisture—especially in environments like warehouses or outdoor workshops. Over time, this buildup can corrode the aluminum from the inside out or clog the T-slots, which are essential for attaching aluminum profile fixings like brackets, shelves, or tool holders. End caps seal off these openings, extending the life of the profile and ensuring its T-slots remain functional.
Third, aesthetics. Let's be honest: a row of aluminum profiles with exposed, jagged ends looks unprofessional. Whether you're building a customer-facing display or a back-of-house storage rack, clean, uniform end caps give the structure a polished, intentional look. This attention to detail might seem minor, but in industries where presentation matters (like retail or trade shows), it can make a big difference in how your setup is perceived.
Finally, structural integrity—indirectly. While end caps don't add significant strength to the profile, they prevent foreign objects from entering the hollow core. Imagine a material rack where a loose screw falls into an open profile end; over time, that screw could rattle around, scratching the interior or even jamming T-slot accessories when they're adjusted. End caps keep the inside of the profile clear, ensuring smooth operation for years to come.
Glue Installation: The Sticky Solution
Glue installation is exactly what it sounds like: using an adhesive to bond the end cap to the 4040 aluminum profile. It's a method that's been around for decades, and for good reason—when done right, it creates a strong, permanent seal. But not all glues are created equal, and the process requires precision to avoid messy mistakes or weak bonds.
Choosing the Right Adhesive
The first step in glue installation is selecting the correct adhesive. Not every glue will work with aluminum and the plastic or rubber end caps commonly used (most end caps are made of PVC, ABS, or polyethylene for flexibility and cost-effectiveness). Here are the top options:
- Cyanoacrylate (CA) Glue (Super Glue): Fast-drying and strong, CA glue is a popular choice for small, lightweight end caps. It works well on non-porous surfaces like aluminum and plastic, but it's not ideal for high-temperature environments (it can become brittle above 80°C/176°F) or applications with heavy vibration.
- Epoxy Resin: A two-part adhesive (resin + hardener) that forms a tough, heat-resistant bond. Epoxy is better for larger end caps or profiles exposed to harsh conditions, as it's more flexible than CA glue and can withstand temperatures up to 120°C/248°F. The downside? It takes longer to cure (anywhere from 30 minutes to 24 hours, depending on the formula).
- Polyurethane Adhesive: Flexible and waterproof, polyurethane glue expands slightly as it cures, filling gaps for a tight seal. It's great for outdoor use or profiles that might flex under load, but it can be messy to apply and requires clamping while it dries.
- Anaerobic Adhesive: Designed for metal-to-metal bonds, anaerobic glue cures in the absence of air—perfect for the tight space between an end cap and the profile's inner wall. It's commonly used in industrial settings for permanent installations but is overkill for most DIY or light commercial projects.
For most 4040 aluminum profile end cap installations, epoxy or high-quality CA glue will do the trick. Always check the adhesive's label to ensure it's compatible with both aluminum and your end cap's material (PVC, ABS, etc.).
The Glue Installation Process: Step-by-Step
Glue installation might seem straightforward, but skipping steps can lead to end caps that pop off or glue that oozes out, ruining the profile's appearance. Follow this process for a clean, strong bond:
- Clean the Surfaces: This is the most critical step. Aluminum profiles often have factory residues, oil, or dust on their ends, and end caps can collect mold release agents from manufacturing. Wipe both the profile end and the inner surface of the end cap with isopropyl alcohol (90%+ concentration) or a degreaser like acetone. Let them dry completely—even a small amount of moisture or oil will weaken the bond.
- Test the Fit: Before applying glue, slide the end cap onto the profile to ensure it's the right size. A loose fit means the glue will have to bridge gaps, which reduces strength; a tight fit might require sanding the end cap's inner edges slightly for a snug (but not forced) connection.
- Apply the Glue: Less is more here. For CA glue, apply a thin, even layer to the inner rim of the end cap (avoid the center, as excess glue can squeeze out and block T-slots). For epoxy, mix the two parts according to the instructions, then apply a small bead around the end cap's edge. Never apply glue directly to the profile—this makes cleanup harder if you misalign the end cap.
- Align and Press: Slide the end cap onto the profile, making sure it's centered and flush with the edge. Apply firm, even pressure for 30 seconds to 2 minutes (depending on the glue type) to ensure full contact. If glue oozes out, wipe it away immediately with a cloth dampened with alcohol (for CA glue) or acetone (for epoxy—test on a scrap piece first to avoid damaging the end cap's finish).
- Cure Time: Let the glue cure fully before handling the profile. CA glue sets in minutes but reaches full strength in 24 hours; epoxy may take 4–6 hours for a partial cure and 24 hours for maximum strength. Avoid moving or stressing the end cap during this time.
Pros and Cons of Glue Installation
Glue installation has its fans and critics. Let's break down the advantages and drawbacks:
Pros:
- Permanent Bond: Once cured, glued end caps are hard to remove without damaging the profile or end cap, making them ideal for long-term, stationary setups like fixed workbenches or wall-mounted racks.
- Seamless Look: No visible gaps or tabs, giving the profile a clean, finished appearance—great for customer-facing applications.
- Works with Irregular Shapes: If your end cap or profile has minor manufacturing defects (e.g., a slightly warped end), glue can fill small gaps for a tight seal.
- Cost-Effective: Glue is cheap compared to specialized snap-fit end caps, especially for large projects.
Cons:
- Messy and Time-Consuming: Glue can drip, ooze, or stain, and curing times slow down assembly. In high-volume production, this adds up quickly.
- Difficult to Repair: If the end cap gets damaged or needs to be removed (e.g., to clean the profile's interior), you'll likely have to pry it off, risking scratches to the aluminum or broken end caps.
- Environmental Sensitivity: Humidity, temperature, and surface contaminants can all weaken the bond. In damp workshops or outdoor settings, glue may fail prematurely.
- Not Reusable: Once glued, end caps and profiles can't be repurposed easily—a problem for modular setups that need frequent reconfiguration.

Snap-Fit Installation: The Tool-Free Alternative
Snap-fit installation relies on mechanical pressure instead of adhesives: the end cap has flexible tabs or ridges that "snap" into the profile's T-slots or inner walls, creating a friction-based hold. It's a modern, user-friendly method that's gained popularity in modular systems, where speed and reusability matter most.
How Snap-Fit End Caps Work
Snap-fit end caps are designed with precision. Most have 2–4 plastic tabs that bend inward when inserted into the profile, then spring back outward to lock into place. Some use a ribbed design, where the end cap's outer diameter is slightly larger than the profile's inner diameter, creating a tight interference fit. For 4040 aluminum profiles, which have standardized T-slot sizes, snap-fit end caps are often molded to match the profile's specific dimensions, ensuring a consistent fit.
Materials matter here: snap-fit end caps are typically made of nylon, polypropylene, or ABS—plastics that are flexible enough to bend during installation but rigid enough to hold their shape afterward. Cheaper end caps may use brittle plastic that cracks over time, so investing in high-quality aluminum profile accessories pays off.
The Snap-Fit Installation Process: Step-by-Step
Snap-fit installation is refreshingly simple, making it a favorite for DIYers and production lines alike:
- Clean the Profile End: While less critical than with glue, wiping the profile end with alcohol removes dust or debris that could prevent the end cap from seating properly.
- Inspect the End Cap: Check for cracked tabs, warping, or manufacturing defects. A damaged end cap won't snap in securely and may fall off later.
- Align the End Cap: Hold the end cap so the tabs (if present) are aligned with the profile's T-slots or inner walls. For ribbed end caps, ensure the ribbed section is facing the profile.
- Press or Tap into Place: Push the end cap onto the profile with your thumbs, applying even pressure around the edges. If it's tight, gently tap the end cap with a rubber mallet (never a metal hammer—you'll crack the plastic) until it's flush with the profile edge. You'll feel a "snap" or a sudden give when the tabs lock into place.
- Test the Fit: Tug lightly on the end cap to ensure it doesn't pull off. If it moves easily, it may be misaligned or the tabs may be worn—try removing it (by prying gently with a flathead screwdriver, if needed) and reinstalling.
That's it. No waiting for glue to dry, no messy cleanup—just a few seconds per end cap.
Pros and Cons of Snap-Fit Installation
Snap-fit installation offers a different set of benefits and challenges:
Pros:
- Tool-Free and Fast: Install end caps in seconds, with no glue, clamps, or curing time. This is a game-changer for large projects or production lines where efficiency is key.
- Reusable and Removable: Snap-fit end caps can be popped off and reused, making them perfect for modular setups (e.g., lean pipe workstations that get reconfigured regularly) or profiles that need periodic cleaning.
- Low Risk of Damage: No glue residue to clean, no risk of staining the profile or end cap, and no need to pry off stuck end caps (though you should still be gentle to avoid breaking tabs).
- Consistent Fit: High-quality snap-fit end caps are mass-produced to match standard profiles like the 4040 aluminum profile, so you get a uniform result every time.
Cons:
- Weaker in High-Vibration Environments: Over time, vibration (e.g., from nearby machinery) can loosen snap-fit end caps, causing them to fall off. Tabs may also wear down with repeated removal and reinstallation.
- Not Waterproof: While snap-fit end caps seal out dust, they're not as water-tight as glued ones—moisture can seep in around the tabs or gaps.
- Costlier Upfront: Snap-fit end caps are more expensive per unit than basic plastic end caps + glue, though the time saved in installation often offsets this.
- Profile Compatibility Issues: Off-brand or poorly made end caps may not fit non-standard or imported 4040 profiles, leading to loose fits or difficulty installing.

Glue vs. Snap-Fit: A Head-to-Head Comparison
To help you decide which method is right for your project, let's compare glue and snap-fit installation across key factors:
| Factor | Glue Installation | Snap-Fit Installation |
|---|---|---|
| Installation Time | 5–10 minutes per end cap (including curing prep and cleanup) | 10–30 seconds per end cap |
| Bond Strength | High (permanent, hard to remove) | Medium (removable, may loosen over time) |
| Reusability | Low (end cap/profile may be damaged during removal) | High (can be removed and reinstalled multiple times) |
| Environmental Resistance | Good (waterproof, heat-resistant with epoxy) | Fair (dust-resistant, less waterproof; tabs may degrade in UV light) |
| Cost (Materials) | Low (cheap glue + basic end caps) | Medium (more expensive snap-fit end caps) |
| Labor Cost | High (time-consuming, requires skill to avoid mess) | Low (simple, no training needed) |
| Best For | Permanent, stationary setups; high-temperature/vibration environments; customer-facing aesthetics | Modular systems; frequent reconfiguration; quick assembly; DIY projects |
Choosing the Right Method: Key Considerations
There's no "one-size-fits-all" answer—your choice depends on your project's specific needs. Ask yourself these questions:
1. Is the setup permanent or temporary? If you're building a fixed workbench that will stay in place for years, glue offers peace of mind. If you're creating a modular material rack that might be rearranged next quarter, snap-fit is the way to go.
2. What's the environment like? Profiles in damp, dusty, or high-temperature areas (e.g., near ovens or welding stations) benefit from glue's superior sealing and heat resistance. Snap-fit works better in clean, dry environments with minimal vibration.
3. How important is aesthetics? Glue leaves no visible gaps, making it better for showrooms or customer areas. Snap-fit end caps may have small tabs or seams, though high-quality ones are nearly invisible.
4. What's your budget? If you're on a tight budget and have time to spare, glue is cheaper upfront. If labor costs are high or you need to assemble quickly, snap-fit's speed justifies the higher material cost.
5. Will you need to access the profile's interior? If you ever need to run wires, clean out debris, or repair the profile, snap-fit end caps let you remove and replace them easily. Glue makes this a hassle.
Common Mistakes and Troubleshooting
Even the best methods fail when executed poorly. Here are the most common mistakes and how to fix them:
For Glue Installation:
- Mistake: Skipping surface cleaning. Solution: Always clean with alcohol—oils from fingers alone can weaken the bond.
- Mistake: Using too much glue. Solution: A thin, even layer is all you need. Excess glue oozes into T-slots, blocking future accessory installations.
- Mistake: Rushing the cure time. Solution: Let the glue fully cure—24 hours for most types. Testing too early leads to premature failure.
- Mistake: Using the wrong glue for the material. Solution: Check the end cap's material (PVC, ABS, etc.) and the glue's compatibility chart. CA glue won't bond well to polyethylene, for example.
For Snap-Fit Installation:
- Mistake: Forcing a misaligned end cap. Solution: If it doesn't slide on easily, check alignment—tabs may be catching on T-slot edges. Wiggle gently while pressing to guide it in.
- Mistake: Using low-quality end caps. Solution: Invest in brand-name aluminum profile accessories—cheap end caps have brittle tabs that snap off during installation.
- Mistake: Ignoring vibration. Solution: For high-vibration setups, add a drop of CA glue to the tabs after snapping in (hybrid method) for extra security.
- Mistake: Reusing damaged end caps. Solution: If tabs are cracked or bent, replace the end cap—damaged tabs won't hold.
The Future of Aluminum Profile End Caps
As aluminum extrusion profiles continue to evolve, so do their accessories. Manufacturers are now experimenting with hybrid end caps that combine the best of glue and snap-fit: built-in adhesive strips that activate with pressure, or snap-fit designs with integrated O-rings for better waterproofing. 3D-printed end caps are also on the rise, allowing custom shapes for non-standard profiles or branding (e.g., logos embedded in the end cap).
Sustainability is another trend: end caps made from recycled plastics or biodegradable materials are gaining traction, appealing to eco-conscious manufacturers. And for industrial applications, smart end caps with embedded RFID tags could one day track inventory or monitor profile stress levels—though that's still in the prototype stage.
Final Thoughts: It's the Little Things That Count
At the end of the day, choosing between glue and snap-fit installation for 4040 aluminum profile end caps comes down to your project's unique needs. Glue offers permanence and precision, while snap-fit delivers speed and flexibility. Both methods have their place, and neither is "better"—they're just different tools for different jobs.
But here's the thing: whether you're gluing or snapping, paying attention to these small aluminum profile accessories is critical. A loose end cap might seem trivial, but it can lead to injuries, damaged equipment, or a unprofessional appearance. By taking the time to choose the right method and execute it carefully, you're not just finishing a project—you're building something that lasts.
So the next time you reach for an end cap, remember: it's the little details that turn a good aluminum extrusion profile setup into a great one. Choose wisely, install carefully, and your profiles will thank you for years to come.