- Company Articles
- Products and Technology
- Installation And Maintenance
- 4040 Aluminum Profile End Cap Installation Mistakes to Avoid: Expert Warnings

4040 Aluminum Profile End Cap Installation Mistakes to Avoid: Expert Warnings
Related Product
4040 Aluminum Profile End Cap
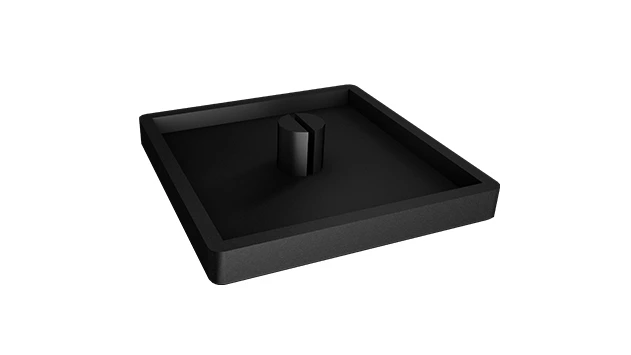
The aluminum profile end cap adds a finishing touch to your project and closes off profile ends to limit dust and debris buildup, also it can avaid some scratch for material and labor during the assemble work.
Walk into any modern workshop, manufacturing facility, or even a DIY enthusiast's garage, and you'll likely spot the clean, industrial lines of aluminum extrusion profiles. These versatile structures—used in everything from workbenches and material racks to conveyor systems and machine guards—are the backbone of efficient, flexible workspaces. But for all their strength and adaptability, even the sturdiest aluminum extrusion profile relies on small, often overlooked components to perform at its best. Enter the 4040 aluminum profile end cap: a humble accessory that's far more critical than its size suggests.
At first glance, end caps might seem like afterthoughts—simple plastic or metal plugs that snap onto the open ends of aluminum profiles. But ask any seasoned facility manager or maintenance technician, and they'll tell you: a poorly installed end cap can turn a well-designed system into a source of frustration, downtime, and even danger. From loose caps that rattle and fall off to misaligned ones that leave sharp edges exposed, the consequences of cutting corners during installation are surprisingly significant.
In this guide, we're diving deep into the world of 4040 aluminum profile end cap installation. We'll unpack the most common mistakes professionals and hobbyists alike make, explain why they happen, and share expert tips to ensure your end caps stay secure, functional, and safe for years to come. Whether you're assembling a new workstation, upgrading an existing material rack, or simply replacing worn-out end caps, this article will help you avoid the pitfalls that plague even the most well-intentioned projects.
Mistake #1: Choosing the Wrong Size or Type of End Cap
It's easy to assume that all "4040 aluminum profile end caps" are created equal. After all, the profile is labeled 4040—shouldn't the end cap just… fit? Unfortunately, that's rarely the case. Aluminum extrusion profiles, even those marketed as "4040," can vary slightly in dimensions depending on the manufacturer, extrusion process, and even batch. Add to that the wide range of end cap designs—from press-fit to adhesive-backed, plastic to metal, and standard to custom—and it's no wonder so many people end up with ill-fitting caps.
Take, for example, a facility that ordered 4040 profiles from two different suppliers. Supplier A's profiles have inner dimensions of 38.2mm x 38.2mm, while Supplier B's are 38.5mm x 38.5mm. A generic "4040 end cap" might fit Supplier A's profiles snugly but feel loose on Supplier B's, or vice versa. Even minor differences like this can lead to end caps that pop off with minimal vibration or, worse, get stuck halfway and require brute force to remove (damaging both the cap and the profile in the process).
The Consequences: A loose end cap isn't just an annoyance. It can rattle during operation, distracting workers and signaling potential instability in the system. Over time, constant movement can wear down the profile's inner edges, making future end cap installations even harder. In extreme cases, a (falling off) end cap can leave sharp, exposed aluminum edges—ripe for cuts, scrapes, or snagged clothing. For profiles used in high-traffic areas or near moving parts, this becomes a serious safety hazard.
Expert Fix: Start by measuring your specific profile before buying end caps. Use a caliper to check the inner width and height of the profile's open end—don't rely on the "4040" label alone. Next, match the end cap type to your application: Press-fit caps work well for low-vibration environments, while adhesive-backed or screw-on caps are better for high-movement setups (like conveyor rails or mobile trolleys). When in doubt, ask your aluminum profile accessories supplier for samples—testing a cap on your actual profile before bulk ordering can save hours of frustration later.
Mistake #2: Neglecting Surface Preparation Before Installation
You've got the right size end cap—great! Now, it's time to snap it on, right? Not so fast. One of the most overlooked steps in end cap installation is preparing the surface of the aluminum extrusion profile itself. Aluminum, especially when freshly cut or handled, can accumulate a layer of oil, dust, metal shavings, or oxidation (that dull, chalky film) on its inner edges. When you press an end cap onto this dirty surface, you're not just attaching the cap—you're trapping debris between the cap and the profile. Over time, this debris can degrade the cap's grip, leading to looseness or failure.
Consider this scenario: A technician cuts a 4040 profile to length using a saw, leaving metal burrs and shavings on the cut end. They wipe it quickly with a rag and install the end cap. At first, it feels tight. But within weeks, the trapped shavings shift, creating tiny gaps between the cap and the profile. Moisture seeps in, causing the aluminum to oxidize further. Soon, the cap starts to wiggle, and eventually, it falls off. All because of a few minutes skipped during cleaning.
The Consequences: Poor surface preparation isn't just about debris. Oil from fingerprints, cutting fluids, or storage can act as a lubricant, reducing the friction that keeps press-fit caps in place. Oxidation, on the other hand, creates a rough, uneven surface that prevents the cap from seating properly. In the case of adhesive-backed end caps, contaminants like oil or dust can completely (ruin) the adhesive bond, causing the cap to peel off within days.
Expert Fix: Treat surface preparation like a critical step, not an afterthought. Start by removing burrs with a deburring tool or fine sandpaper—even small metal protrusions can prevent the end cap from seating flush. Next, clean the inner edges of the profile with isopropyl alcohol or a degreaser, using a lint-free cloth to avoid leaving fibers behind. For adhesive-backed caps, let the cleaned surface dry completely (at least 10 minutes) before applying the cap. For press-fit caps, a quick wipe with alcohol removes oils and ensures maximum friction between the cap and the profile.

Mistake #3: Using Improper Tools (or No Tools at All)
Press-fit end caps are designed to "snap" into place, so it's tempting to install them with nothing but your hands. While this might work for small, lightweight caps on thin-walled profiles, 4040 aluminum profiles—known for their sturdiness—often require a bit more force. The problem? Using your bare hands or the wrong tools can lead to uneven pressure, bent caps, or even injury.
Many people make the mistake of using a hammer directly on the end cap to force it into place. This is a recipe for disaster: the hard surface of the hammer can crack plastic caps or dent metal ones, ruining their shape and grip. Others try to twist or pry the cap into place with a screwdriver, which can scratch the profile's finish or create stress fractures in the cap itself.
The Consequences: A cap installed with brute force is rarely installed correctly. Uneven pressure can cause the cap to seat crookedly, leaving one side sticking out and the other sunken in. This not only looks unprofessional but also weakens the cap's hold—crooked caps are far more likely to loosen over time. In extreme cases, using the wrong tool can damage the aluminum extrusion profile itself, requiring costly replacements.
Expert Fix: Invest in a rubber mallet or a soft-faced hammer—these tools deliver even, controlled force without damaging the cap or profile. For tight-fitting caps, apply a small amount of rubbing alcohol to the inner edges of the profile first; this acts as a temporary lubricant to help the cap slide into place more easily (it evaporates quickly, so it won't weaken the grip). If you're installing adhesive-backed caps, use a roller tool to press the cap firmly against the profile, ensuring full contact between the adhesive and the aluminum. And remember: if the cap feels like it's resisting, stop and check for debris or misalignment—don't just force it.

Mistake #4: Overlooking Environmental Factors
Aluminum extrusion profiles and their accessories are tough, but they're not immune to the elements. Temperature, humidity, and even exposure to chemicals can all affect how well an end cap adheres or stays in place. Yet many installers treat end cap installation as a "one-size-fits-all" process, ignoring the environment where the profile will live.
For example, installing a plastic end cap in a freezing cold workshop is a bad idea: cold temperatures make plastic rigid and brittle, increasing the risk of cracking during installation. Conversely, installing an adhesive-backed cap in a hot, humid environment can cause the adhesive to soften or fail prematurely. Even something as simple as direct sunlight can warp plastic caps over time if they're not UV-resistant—a detail often missed until the caps start to deform months later.
The Consequences: Environmental mismatches can lead to end caps that fail long before their expected lifespan. Cold temperatures might cause a press-fit cap to shrink, losing its grip. High humidity can weaken adhesive bonds, causing caps to peel. Chemical exposure—like oils, solvents, or cleaning agents in a manufacturing setting—can degrade plastic caps or dissolve adhesives, turning a secure installation into a maintenance headache.
Expert Fix: Always consider the profile's final location before choosing and installing end caps. For cold environments, opt for flexible, low-temperature-resistant plastic caps or metal caps that won't brittle. In hot or humid areas, use heat-resistant adhesives and UV-stabilized plastics. If the profile will be exposed to chemicals, check the end cap's material compatibility (many suppliers provide chemical resistance charts for their aluminum profile accessories). When possible, acclimate the end caps to the installation environment for 24 hours before installing—this helps them adjust to temperature and humidity, reducing post-installation warping or shrinking.
Mistake #5: Skipping Post-Installation Checks and Maintenance
You've installed the end cap, it feels tight, and it looks good—job done! Or is it? One of the biggest mistakes installers make is assuming that once the cap is on, it's set for life. In reality, end caps, like any component, need periodic checks to ensure they're still secure and functional. Vibration from machinery, regular use, and even thermal expansion/contraction can cause caps to loosen over time—especially in high-traffic or high-movement areas.
Consider a material rack in a busy warehouse: every time a worker loads or unloads items, the rack vibrates slightly. Over weeks and months, this vibration can gradually loosen press-fit end caps. Without regular checks, these caps might go unnoticed until they fall off, leaving sharp edges or creating a tripping hazard. Similarly, adhesive-backed caps can degrade slowly, with the adhesive losing strength over time—by the time you notice the cap is loose, it might be too late to re-adhere it properly.
The Consequences: Skipping maintenance turns small, fixable issues into big problems. A loose end cap today could be a safety hazard tomorrow. In industrial settings, this can lead to OSHA violations, worker injuries, or production downtime. Even in home workshops, a (falling) end cap can damage tools, materials, or the profile itself, costing time and money to repair.
Expert Fix: Add end cap checks to your regular maintenance routine. For high-use systems (like workbenches or conveyor rails), inspect end caps monthly. For lower-use setups, quarterly checks should suffice. During inspections, gently tug on each cap to check for looseness. If a press-fit cap is loose, remove it, clean the profile end, and re-install with fresh lubricant (if needed). For adhesive-backed caps, if the adhesive is failing, remove the cap, clean the surface, and re-apply with a new adhesive pad or a small amount of industrial-grade glue. And don't wait for a cap to fall off—replace any cap that shows signs of cracking, warping, or significant wear. Remember: proactive maintenance is always cheaper than reactive repairs.
Quick Reference: Common Mistakes & Expert Fixes
| Mistake Number | Common Mistake | Potential Consequences | Expert Fix |
|---|---|---|---|
| 1 | Choosing the wrong size/type of end cap | Loose caps, safety hazards, profile damage | Measure profile inner dimensions; test samples before bulk ordering |
| 2 | Neglecting surface preparation | Poor adhesion, trapped debris, premature loosening | Deburr, clean with alcohol, and dry surface before installation |
| 3 | Using improper tools | Crooked caps, cracked plastic, profile damage | Use rubber mallets or soft-faced hammers; avoid brute force |
| 4 | Ignoring environmental factors | Adhesive failure, warping, brittleness | Choose caps rated for the profile's environment; acclimate before installation |
| 5 | Skipping post-installation checks | Unexpected loosening, safety risks, downtime | Inspect monthly/quarterly; re-tighten or replace loose/worn caps |
Conclusion: Small Details, Big Impact
At first glance, 4040 aluminum profile end caps might seem like minor players in the grand scheme of industrial or workshop setups. But as we've explored, these small accessories play a critical role in safety, durability, and functionality. From choosing the right size to preparing the surface, using the proper tools, accounting for the environment, and maintaining regularly—every step in the installation process matters.
The good news is that avoiding these mistakes doesn't require advanced technical skills or expensive equipment. It just takes attention to detail, a little patience, and a commitment to doing the job right the first time. By taking the time to measure your profiles, clean the surfaces, use the right tools, and check your work, you'll ensure that your end caps stay secure, your profiles stay protected, and your workspace stays safe and efficient.
Remember: aluminum extrusion profiles are investments in productivity and organization. The accessories that go with them—like end caps—deserve the same care and consideration. So the next time you reach for a 4040 aluminum profile end cap, take a moment to follow these expert tips. Your future self (and your team) will thank you for it.