- Company Articles
- Products and Technology
- Installation And Maintenance
- 4040 Aluminum Profile End Cap Installation Tools: What You Need to Get Started

4040 Aluminum Profile End Cap Installation Tools: What You Need to Get Started
Related Product
4040 Aluminum Profile End Cap
The aluminum profile end cap adds a finishing touch to your project and closes off profile ends to limit dust and debris buildup, also it can avaid some scratch for material and labor during the assemble work.
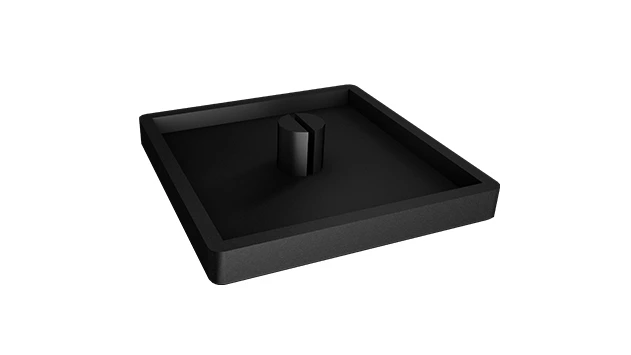
Let's be real—when you're knee-deep in setting up a workshop, assembling a production line, or even building a custom storage rack, the little parts can feel like an afterthought. But here's the thing: those "little parts" often make the biggest difference in safety, durability, and how professional your final setup looks. Take the 4040 aluminum profile end cap, for example. It's small, unassuming, and easy to overlook… until someone brushes against a sharp, unfinished aluminum profile end and walks away with a cut. Or until dust and debris clog the T-slots, making it impossible to attach accessories later. Suddenly, that tiny end cap doesn't seem so trivial anymore.
If you're working with aluminum profiles—whether you're a hobbyist building a DIY workbench or a manufacturer outfitting an entire facility—installing end caps is a step you can't skip. And to do it right, you need the right tools. In this guide, we'll walk through why 4040 aluminum profile end caps matter, the essential tools you'll need, a step-by-step installation process, and even troubleshooting tips to avoid common headaches. Let's dive in.
Why 4040 Aluminum Profile End Caps Are Non-Negotiable
Before we talk tools, let's make sure we're on the same page about why these small caps deserve your attention. Aluminum profiles are workhorses—they're strong, lightweight, and versatile, used in everything from workbenches to conveyor systems. But their raw ends? They're sharp. Think about it: aluminum extrusion leaves the factory with clean but unfinished edges. Run your hand along one (carefully!) and you'll feel the potential for scrapes, cuts, or even more serious injuries, especially in busy workplaces where people are moving fast.
Then there's protection for the profile itself. The T-slots on aluminum profiles are designed to hold brackets, shelves, and other accessories. If those slots get filled with dust, dirt, or metal shavings, attaching hardware later becomes a frustrating battle. End caps seal off the ends, keeping debris out and ensuring your T-slots stay functional for years. And let's not forget aesthetics—unfinished profile ends look unprofessional. Whether you're building something for your own garage or a client's facility, clean, capped ends signal attention to detail and quality.
Essential Tools for the Job: What You'll Need
Installing 4040 aluminum profile end caps isn't rocket science, but using the wrong tools can turn a 5-minute task into a frustrating mess (or worse, damage your profiles). Here's a breakdown of the tools you'll need, from the basics to a few "nice-to-haves" that make the process smoother.
1. Basic Hand Tools: Your Everyday Heroes
These are the tools you probably already have in your toolbox, but let's make sure you're using them correctly:
- Hex Key Set (Allen Wrenches): Many 4040 aluminum profile end caps come with small set screws to secure them in place (especially if they're designed for heavy-duty use). A quality hex key set—preferably with ball ends for easier access—will let you tighten these screws without stripping them. Look for a set with sizes ranging from 1.5mm to 6mm; most end cap screws fall in the 2mm–4mm range.
- Rubber Mallet: For end caps that press-fit (no screws), a rubber mallet is your best friend. Unlike a metal hammer, it delivers enough force to seat the end cap firmly without denting or scratching the aluminum profile. Opt for one with a soft rubber head and a comfortable grip—you'll be tapping gently but consistently, so hand fatigue matters.
- Soft Microfiber Cloth: Before installing the end cap, you need to clean the profile's end. Dust, oil, or metal shavings can prevent the cap from seating properly. A microfiber cloth picks up debris without leaving lint behind—much better than a paper towel, which can tear and leave bits behind.
- Small Flathead Screwdriver: Useful for prying off old or damaged end caps (if you're replacing them) or gently adjusting a misaligned cap. Go for a slim, precision screwdriver to avoid scratching the profile.
2. Specialized Tools: Worth the Investment
If you're installing end caps regularly (say, in a manufacturing or workshop setting), these tools will save you time and hassle:
- End Cap Installation Tool: Some aluminum profile suppliers offer specialized tools designed to press end caps into place evenly. These tools have a flat, padded surface that distributes pressure across the end cap, reducing the risk of cracking (a common issue with plastic end caps). They're not essential for occasional use, but if you're doing bulk installations, they're a game-changer.
- T-Slot Cleaning Brush: A small, stiff-bristled brush (think a pipe cleaner on steroids) designed to fit into T-slots. It's more effective than a cloth at removing stubborn debris, like dried grease or metal filings, from the profile's end. Look for one with nylon bristles—they're tough enough to clean but won't scratch the aluminum.
- Digital Calipers: If you're working with multiple profile sizes (or if you've ordered end caps from a new supplier), calipers let you double-check that the end cap's inner diameter matches the profile's outer diameter. A 4040 profile, for example, should pair with a 4040-specific end cap—even a 1mm mismatch can make installation impossible.
3. Safety Gear: Don't Skip This
Even simple tasks can lead to injuries if you're not careful. Here's what to keep handy:
- Nitrile Gloves: They give you better grip on slippery end caps and protect your hands from sharp edges on the profile. Avoid latex gloves if you're working with oils or lubricants—nitrile is more chemical-resistant.
- Safety Glasses: When tapping end caps into place, tiny pieces of plastic or aluminum can fly off (especially if the cap is brittle). Safety glasses with side shields keep your eyes protected.
4. Aluminum Profile Accessories That Make Life Easier
These aren't tools, exactly, but they're accessories that pair perfectly with your installation process:
- Alignment Pins: If you're installing end caps on multiple profiles (like the legs of a workbench), alignment pins help ensure all caps are positioned the same way. Just insert a pin into the T slot of one capped profile, then align the next profile's end cap with the pin—no more guessing if they're straight.
- Mild Lubricant (Soap or Silicone Spray): For press-fit end caps that are tight (a common issue with new profiles), a tiny bit of lubricant can help them slide into place. Dish soap mixed with water (applied with a cloth) works well for plastic end caps—just wipe off excess afterward to avoid attracting dust.
- Storage Case for End Caps: 4040 end caps are small and easy to lose. A divided plastic storage case keeps them organized by size, so you're not hunting through a jumbled bin when you need one.
Tool Comparison: Which Tools Are Right for You?
Not sure which tools to prioritize? This table breaks down the essentials by use case:
| Tool | Primary Purpose | Skill Level Needed | Best For | Sourcing Tip |
|---|---|---|---|---|
| Hex Key Set | Tightening set screws on end caps | Easy | All users (DIY to industrial) | Hardware stores or online (look for SAE/metric combo) |
| Rubber Mallet | Press-fitting end caps gently | Easy (gentle taps!) | DIYers, small workshops | Home improvement stores (avoid cheap plastic handles) |
| End Cap Installation Tool | Even pressure for bulk installations | Moderate | Manufacturing, large workshops | Reputable aluminum profile supplier |
| T-Slot Cleaning Brush | Removing debris from profile ends | Easy | All users (critical for longevity) | Online tool retailers or aluminum profile accessories sections |
| Nitrile Gloves | Grip and hand protection | Easy | All users (safety first!) | Pharmacies or industrial supply stores |

Step-by-Step: Installing Your 4040 Aluminum Profile End Cap
Now that you have your tools ready, let's walk through the installation process. We'll focus on press-fit end caps (the most common type), but we'll note where screws come into play.
Step 1: Prep Your Workspace
Find a clean, flat surface to work on—a workbench or table is ideal. Lay down a towel or piece of cardboard to protect the aluminum profile from scratches. Make sure you have good lighting—you need to see if there's debris in the profile's end or if the end cap is aligned correctly.
Step 2: Inspect and Clean the Aluminum Profile
Take the aluminum profile and check the end where you'll install the cap. Look for burrs (tiny metal protrusions) from cutting or extrusion—these can tear the end cap or make it sit unevenly. If you see burrs, gently file them down with a fine-grit sandpaper (400 grit or higher) until the edge is smooth. Then, use your T-slot cleaning brush to sweep out any dust or debris from the profile's end and T-slots. Follow up with a microfiber cloth to wipe away any remaining particles.
Step 3: Check the End Cap for Fit and Defects
Take your 4040 aluminum profile end cap and hold it up to the profile's end. It should match the profile's dimensions exactly—no gaps, no overhang. Check the cap for cracks, warping, or missing set screws (if it uses them). If the cap feels flimsy or doesn't align, don't use it—low-quality end caps won't protect your profile or last long. Grab a new one from your storage case.
Step 4: Align the End Cap
Place the end cap on the profile's end, making sure it's centered. If the cap has openings for T-slots (common in caps designed for workbenches or racks), align those openings with the profile's T-slots. This ensures you can still attach accessories to the end of the profile if needed. For press-fit caps, apply gentle pressure with your hands to see if it starts to seat—if it's too tight, add a tiny bit of soapy water to the profile's end (just a damp cloth swipe) to lubricate.
Step 5: Secure the End Cap
For press-fit caps: Hold the cap in place with one hand, then use your rubber mallet to tap it gently around the edges. Start with light taps—you want to seat it evenly, not bash it on. Work your way around the cap's perimeter (top, bottom, left, right) to avoid uneven pressure, which can crack the cap or misalign it. Keep tapping until the cap is flush with the profile's end—no part should stick out.
For screw-on caps: Once the cap is aligned, insert the set screws into the pre-drilled holes (usually on the side of the cap). Use your hex key to tighten them—snug, but not too tight! Over-tightening can strip the screw or crack the cap. A good rule: tighten until you feel resistance, then stop.
Step 6: Verify the Fit
Give the end cap a gentle wiggle—there should be no movement. Run your hand along the edge where the cap meets the profile; it should feel smooth and flush. If it's loose, check for debris you missed or misalignment. If it's cracked, remove it (use the flathead screwdriver to pry gently) and replace with a new cap.

Troubleshooting: When Things Go Wrong (and How to Fix Them)
Even with the right tools, you might run into snags. Here's how to handle common issues:
End Cap Won't Stay On
If the cap pops off after installation, the problem is usually one of two things: (1) The profile's end is bent or warped, so the cap can't seat properly. Check the profile with a straightedge—if it's bent, you may need to replace the profile or gently bend it back (if it's minor). (2) The end cap is the wrong size. Double-check the profile dimensions (4040 means 40mm x 40mm) and ensure the cap is labeled for 4040 profiles. Mixing up 3030 or 2020 caps is easier than you think!
End Cap Cracks When Tapping
Cracking usually happens for two reasons: You're using too much force with the mallet, or the cap is made of cheap, brittle plastic. If it's the former, switch to lighter taps and work more slowly. If it's the latter, invest in higher-quality end caps—look for ones made from impact-resistant ABS plastic or nylon. They cost a bit more but are worth it for durability.
T-Slot Debris Blocks Installation
If the cap gets stuck halfway because debris is blocking it, stop! Forcing it will damage the cap or profile. Remove the cap (use the flathead screwdriver to pry gently), then re-clean the profile's end with the T-slot brush and cloth. If debris is really stuck, try a can of compressed air to blast it out.
Pro Tips for Smoother Installations
Want to make end cap installation even easier? Try these pro tricks:
- Batch Process: If you're installing end caps on multiple profiles (like a workbench with four legs), do all the prep work first (cleaning, inspecting) before moving to installation. This saves time and keeps you in a rhythm.
- Label Your End Caps: If you work with different profile sizes (4040, 3030, etc.), label your storage case compartments clearly. Mix-ups happen, and trying to force a 3030 cap onto a 4040 profile is a recipe for frustration.
- Use a Guide for Multiple Caps: For projects where end caps need to line up perfectly (like a shelf with profiles on both ends), clamp a straightedge to the profiles as a guide. This ensures all caps are installed at the same height and angle.
- Invest in Quality Aluminum Profile Accessories: From end caps to alignment pins, buying from a reputable aluminum profile supplier means better fit and durability. Cheap accessories might save money upfront, but they'll cost you time (and replacements) later.
Final Thoughts: Small Caps, Big Impact
Installing 4040 aluminum profile end caps might seem like a small step, but it's one that pays off in safety, durability, and professionalism. With the right tools—hex keys, a rubber mallet, a cleaning brush, and maybe a few aluminum profile accessories—you can get the job done quickly and correctly. Remember: The goal isn't just to "cap" the profile, but to protect the people using it, keep your equipment functioning smoothly, and take pride in the details of your work.
So next time you're assembling that workbench, conveyor system, or storage rack, don't skip the end caps. Grab your tools, take your time, and enjoy the peace of mind that comes with knowing you've built something that's not just functional, but safe and built to last.