- Company Articles
- Products and Technology
- Installation And Maintenance
- 4080 Aluminum Profile End Caps for Workbench E: Installation Mistakes to Avoid

4080 Aluminum Profile End Caps for Workbench E: Installation Mistakes to Avoid
Related Product
4080 Aluminum Profile End Cap
The aluminum profile end cap adds a finishing touch to your project and closes off profile ends to limit dust and debris buildup, also it can avaid some scratch for material and labor during the assemble work.
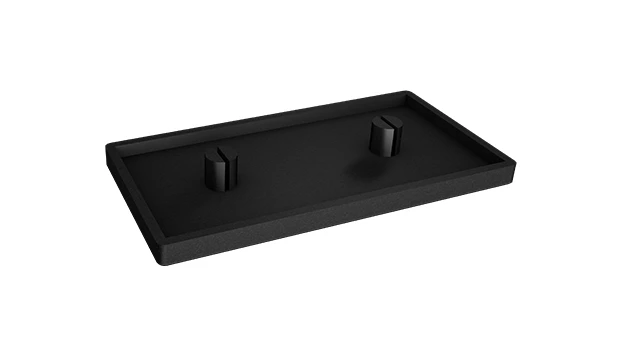
If you've ever set up a Workbench E (single deck-without caster) in your workshop or production line, you know the satisfaction of seeing that sturdy, clean aluminum frame come together. Workbench E is a staple in many production assemble environments—its single, flat deck offers ample space for tools, materials, and projects, while its caster-free design keeps it stable during heavy use. But here's the thing: even the most well-built workbench relies on tiny details to perform at its best. Today, we're talking about one of those "small but mighty" components: the 4080 aluminum profile end caps. These little caps might seem insignificant, but get their installation wrong, and you could be looking at damaged profiles, safety hazards, or a workbench that just doesn't hold up over time. Let's dive into why these end caps matter, the common mistakes people make when installing them, and how to avoid those pitfalls—because your Workbench E deserves the best care, right down to the last accessory.
Why 4080 Aluminum Profile End Caps Deserve Your Attention
First, let's get clear on what a 4080 aluminum profile end cap actually does. Aluminum extrusion profiles like the 4080 (named for its 40mm x 80mm cross-section) are the backbone of Workbench E. Their sleek, modular design makes them perfect for building sturdy structures, but their cut ends can be sharp—think of the raw edge of a metal bar. That's where end caps come in: they snap or press into the open ends of the aluminum profile, covering those sharp edges. But their job doesn't stop there.
These caps also protect the T-slots—the long, narrow grooves running along the profile—from collecting dust, debris, or moisture. Over time, gunk in T-slots can make it hard to slide in accessories like brackets or shelves, or even corrode the aluminum from the inside. Plus, end caps give your Workbench E a polished, professional look. A frame with exposed, jagged profile ends looks unfinished; end caps tie the whole design together, making your workspace feel intentional and well-maintained.
Most importantly, they keep people safe. Imagine a new team member leaning against the workbench or reaching across it—without end caps, they could catch a hand or arm on that sharp aluminum edge. Even a small cut can lead to downtime, not to mention frustration. So, while they might cost just a few dollars each, 4080 aluminum profile end caps are an investment in safety, durability, and aesthetics. Now, let's talk about how to install them the right way—by avoiding these all-too-common mistakes.
Mistake #1: Choosing the Wrong End Cap Size
This might sound obvious, but you'd be surprised how often people grab the first end cap they see and assume it'll fit. Aluminum profiles come in different sizes—2020, 3030, 4040, 4080, and so on—and each needs a specific end cap. A 3030 end cap, for example, is way too small for a 4080 profile; it'll pop out immediately. A 4040 cap might *seem* close, but 4080 is wider (80mm vs. 40mm), so the cap won't cover the entire end, leaving sharp edges exposed.
How does this happen? Maybe you ordered a bulk pack of aluminum profile accessories and mixed up the sizes, or you borrowed end caps from an old 4040 workbench assuming they'd work. Either way, the result is the same: wasted time, and a workbench that's not safe to use.
| End Cap Size | Compatible Aluminum Profile | Key Dimension (Width x Height) |
|---|---|---|
| 2020 | 2020 aluminum profile | 20mm x 20mm |
| 3030 | 3030 aluminum profile | 30mm x 30mm |
| 4040 | 4040 aluminum profile | 40mm x 40mm |
| 4080 | 4080 aluminum profile | 40mm x 80mm |
How to avoid it: Always check the label or product code before installing. Most 4080 end caps will have "4080" printed or molded into the plastic. If not, measure the opening of your aluminum profile—40mm by 80mm means you need a 4080 cap. When ordering, double-check that the end caps are listed as compatible with 4080 aluminum extrusion profiles. It's a 30-second step that saves you from headaches later.

Mistake #2: Forcing the End Cap (or "If It Doesn't Fit, Push Harder!")
So you've got the right size end cap—great! Now, it's time to pop it into place. But if it feels tight, resist the urge to hammer it in with a screwdriver handle or twist it like a corkscrew. Aluminum profiles are durable, but they're not indestructible, and end caps (usually made of plastic or rubber) are even more prone to damage when mishandled.
Forcing an end cap can warp the plastic, leaving cracks that let dust into the T-slots. Worse, if you push too hard at an angle, you might scratch or dent the aluminum profile's edges—ruining that smooth finish and creating new sharp spots. I've seen cases where someone used pliers to "help" the cap fit, only to crack the end cap and leave metal shavings on the profile. Not only does that look unprofessional, but those shavings can also scratch tools or materials later.
Why it happens: End caps are designed to be a snug fit, but "snug" doesn't mean "impossible to install by hand." If it's requiring excessive force, there's usually a reason—like debris in the T-slot (we'll get to that next) or a manufacturing quirk (sometimes end caps have tiny mold flash that needs trimming).
How to avoid it: Start by aligning the end cap straight with the profile end. Gently press the center first, then work your way around the edges—top, bottom, left, right—using even pressure. If it still feels stuck, check for mold flash (small plastic bumps from manufacturing) and trim them off with a utility knife. For rubber end caps, a tiny dab of soapy water on the edges can help them slide in smoothly (just wipe off excess water afterward to prevent mold). Remember: if it takes more than two fingers of pressure, stop and troubleshoot.

Mistake #3: Ignoring T-Slot Debris (Dust, Chips, and the "Out of Sight, Out of Mind" Trap)
Aluminum extrusion profiles are pretty tough, but their T-slots—the long, narrow grooves that let you attach accessories like shelves or tool holders—are magnets for debris. When you're building Workbench E, sawdust, metal chips, or even tiny plastic bits from unpacking can fall into those slots. And if you don't clean them out before installing end caps, you're trapping that gunk inside.
Why does this matter? Over time, trapped debris can corrode the aluminum from the inside, especially in humid environments. It can also prevent the end cap from seating flush, leaving gaps where more dirt can sneak in. I once visited a workshop where a Workbench E had end caps that kept popping off; turns out, sawdust had built up in the T-slots, acting like a wedge that pushed the cap out. The fix? A quick clean with a pipe cleaner and the caps stayed put for years after.
How to avoid it: Before installing end caps, take 30 seconds to clean each profile end. Use a small brush (a toothbrush works!) to sweep out loose debris, then run a pipe cleaner or compressed air (on low pressure) through the T-slots to dislodge any stubborn bits. For metal chips, a magnet on a stick can help pull out ferrous debris. It's a simple step, but it's the difference between an end cap that lasts and one that fails in a month.
Mistake #4: Skipping the "Post-Install Check" (Did It Actually Seat Properly?)
You've aligned, pressed, and cleaned—now the end cap is on! Time to move on to the next profile, right? Not so fast. Even if it looks seated, a quick check can save you from future issues. A poorly seated end cap might stay on for a week, a month, or even a year… until someone bumps the workbench, and suddenly it pops off, leaving a sharp edge exposed.
What to check: Run your finger along the edge where the end cap meets the profile—there should be no gaps. Gently tug the cap (side to side, not straight out) to see if it shifts. If it moves, or if you can see light between the cap and the profile, it's not seated right. Common culprits here are uneven pressure during installation (you pressed harder on one side) or leftover debris you missed.
Quick fix: If the cap shifts, pop it off (gently!), re-clean the T-slot, and try again—this time pressing more evenly around the edges. For caps that won't stay put, a tiny drop of plastic-compatible adhesive (like cyanoacrylate glue) on the *inside* edges can help, but use this as a last resort. Most end caps shouldn't need glue if installed correctly, and glue can make future replacement (if the cap cracks) a hassle.
Mistake #5: Using Damaged End Caps (Because "It's Just a Spare, Right?")
We've all done it: rummaged through the toolbox and found a cracked or bent end cap, thought "eh, it'll work for now," and installed it anyway. But damaged end caps are a false economy. A crack in the plastic means dust and moisture can seep into the T-slot, and a bent cap won't cover the profile edge properly—leaving that sharp aluminum exposed.
Why risk it? End caps are cheap—usually less than $2 each. Using a damaged one to save a few cents now could cost you later when you have to replace the entire aluminum profile because of corrosion, or deal with a workplace injury from an exposed edge. It's like using a frayed extension cord—you know it's not safe, but you do it anyway, and hope for the best. Spoiler: hope isn't a tool.
How to avoid it: Inspect end caps before installation. Look for cracks, chips, or warping (if the cap is bent, it won't sit flush). If the cap has been sitting in storage for a while, check for brittleness (common in old plastic caps). When ordering aluminum profile accessories, buy a few extras—having spares on hand means you'll never be tempted to use a damaged one.
Troubleshooting: When Even "Correct" Installation Goes Wrong
You did everything right: checked the size, cleaned the T-slots, pressed gently, and used undamaged caps. But somehow, the end cap still won't stay on, or it looks lopsided. Here are a few common "mystery" issues and how to fix them:
- End cap pops off after a day: Check if the profile end is slightly bent. If you cut the aluminum extrusion profile yourself, the end might be uneven (a hacksaw can leave rough edges). File down any burrs with a metal file, then re-install the cap.
- Cap sits crooked, even with even pressure: The T-slot might have a manufacturing defect, like a misaligned groove. Try rotating the cap 180 degrees—sometimes flipping it helps it seat better.
- Rubber end cap feels sticky: Old rubber caps can develop a tacky surface. Wipe them with a cloth dampened with rubbing alcohol to remove the stickiness before installing.
The Bottom Line: Small Parts, Big Impact
Installing 4080 aluminum profile end caps on your Workbench E (single deck-without caster) might seem like a trivial task, but it's the small details that make a workspace safe, efficient, and long-lasting. By avoiding these common mistakes—choosing the right size, not forcing the cap, cleaning T-slots, inspecting for damage, and double-checking the fit—you'll ensure your workbench looks professional, stays durable, and protects everyone who uses it.
Remember, aluminum extrusion profiles are built to last decades, but they need care. The end caps are the first line of defense against dust, debris, and sharp edges—so treat them like the important component they are. Next time you're setting up a Workbench E, take an extra minute with those end caps. Your future self (and your team) will thank you.