- Company Articles
- Products and Technology
- Product knowledge
- One Way Rotatory Straight Lean Pipe Joint Chrome: Temperature Resistance & Performance

One Way Rotatory Straight Lean Pipe Joint Chrome: Temperature Resistance & Performance
Related Product
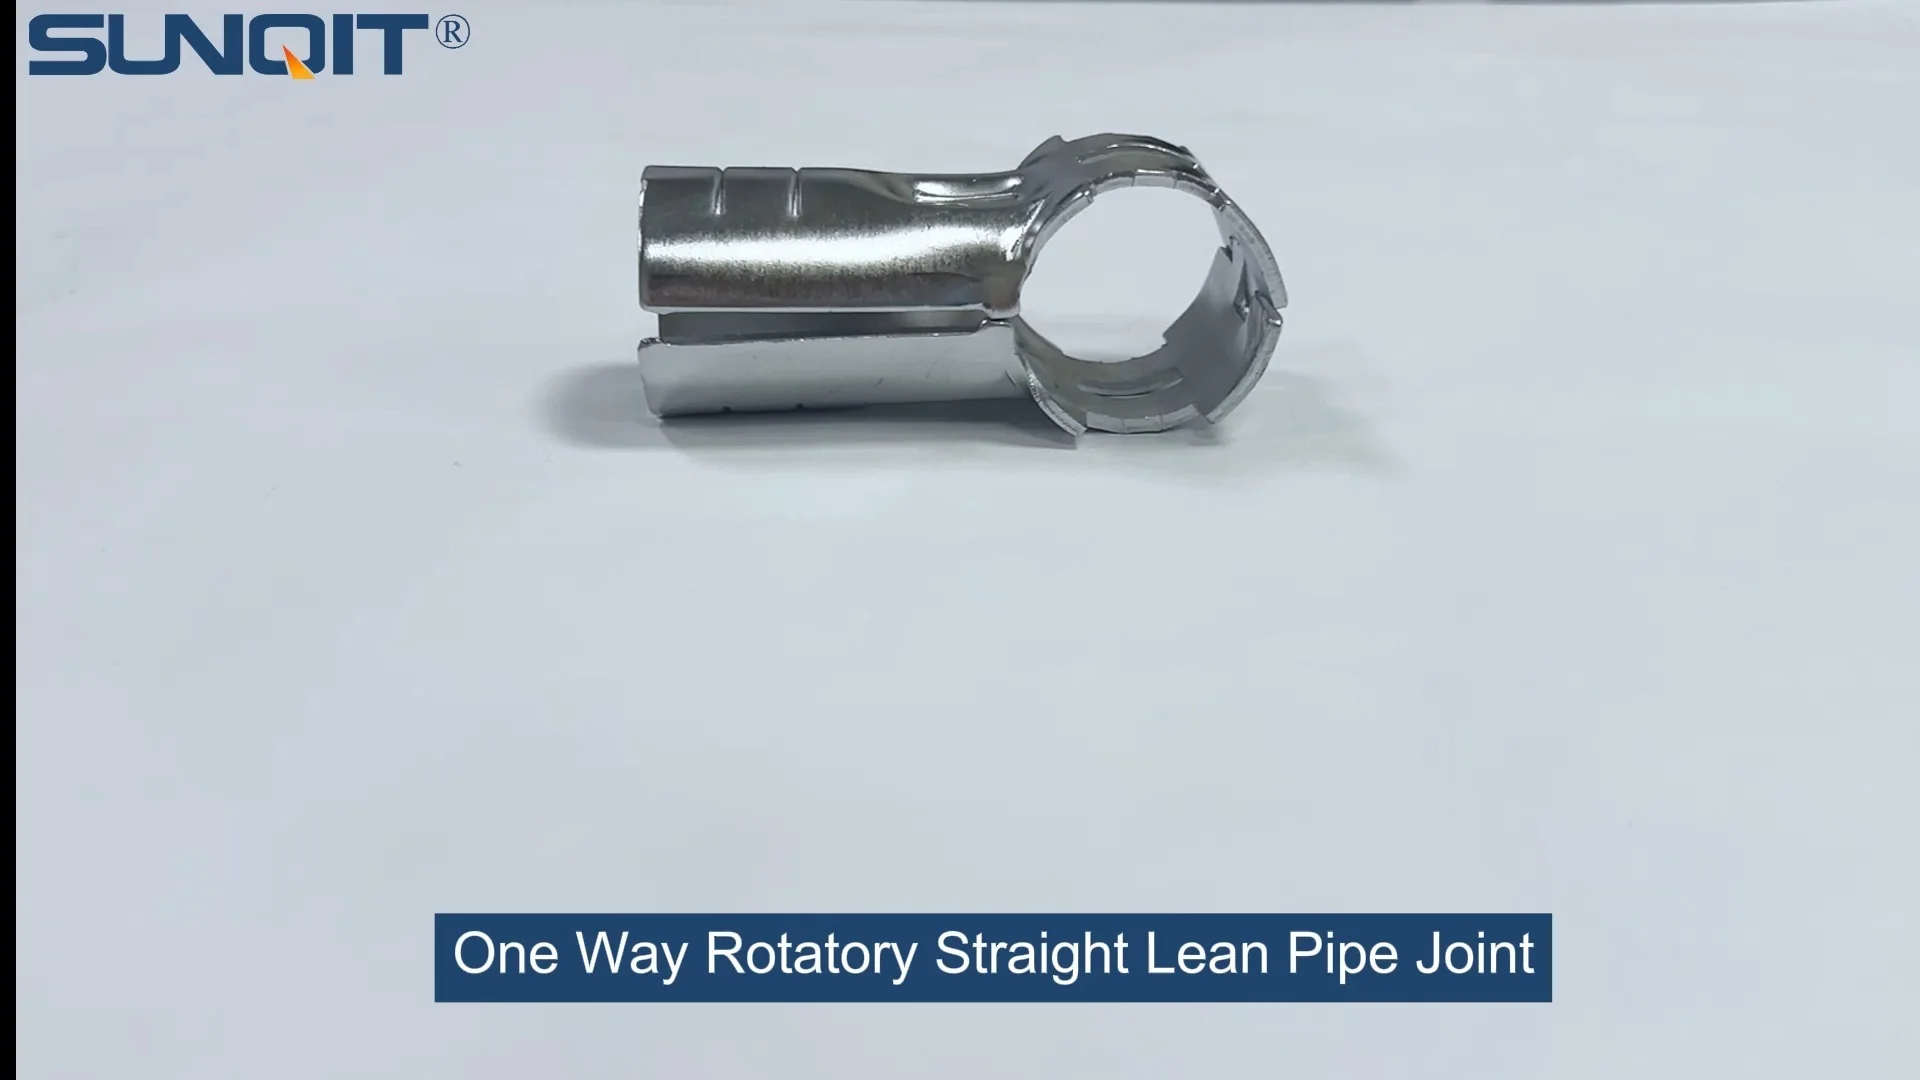
One Way Rotatory Straight Lean Pipe Joint Chrome
Two way lean pipe joint for 2 pcs 28MM lean pipe connection in straight angle with rotatory fucntion, which used widely in workbench, flow rack, hand trolley frame connection.
Introduction: The Unsung Hero of Lean Systems
On a typical factory floor, where the hum of machinery blends with the rhythm of assembly lines, there's a silent workhorse that keeps operations flowing smoothly: the lean pipe joint. These small, unassuming components are the backbone of lean systems, holding together everything from workbenches to roller tracks, and ensuring that production environments remain flexible, efficient, and adaptable. Among the many types of lean pipe joints available, the
one way rotatory straight lean pipe joint chrome
stands out for its unique combination of flexibility, durability, and temperature resistance. In this article, we'll dive deep into what makes this joint a game-changer for manufacturers, warehouses, and anyone invested in optimizing their workflow. We'll explore its design, key features like temperature resistance, real-world applications in settings like workbench assembly and roller track systems, and how it compares to other joint types. By the end, you'll understand why this seemingly simple component is a cornerstone of modern lean manufacturing.
What Is the One Way Rotatory Straight Lean Pipe Joint Chrome?
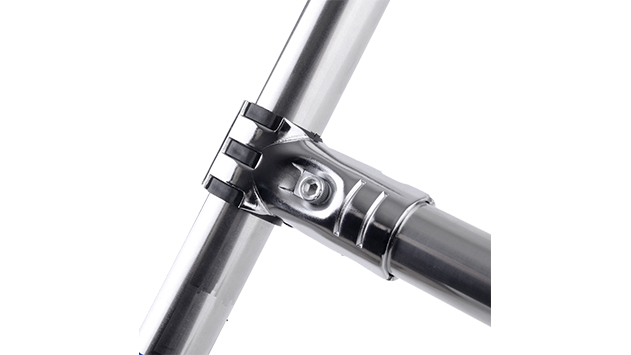
Let's start with the basics. The one way rotatory straight lean pipe joint chrome is a specialized connector designed to link lean pipes (also known as or "lean tubes") in industrial setups. What sets it apart from fixed joints is its ability to rotate in one direction while maintaining a straight connection between pipes. This rotation isn't 360 degrees—instead, it's controlled, allowing for precise adjustments without compromising stability. The "chrome" in its name refers to its surface finish: a thin layer of chromium plating that not only gives it a sleek, silver appearance but also enhances its resistance to corrosion and wear.
Under the chrome plating, the joint is typically made from high-grade steel, chosen for its strength and ability to withstand heavy loads. This combination of materials—steel core and chrome coating—makes the joint both robust and long-lasting, even in demanding environments. But what truly makes it indispensable is its versatility. Unlike fixed joints that lock pipes into rigid angles, the one way rotatory design lets operators adjust the angle of connected pipes within a specific range, making it easier to reconfigure workstations, material racks, or conveyor systems as production needs change. This flexibility is at the heart of lean manufacturing, where minimizing waste and maximizing adaptability are key principles.
Key Feature 1: Temperature Resistance—Performing in Extreme Conditions
In industrial settings, temperatures can vary dramatically. A warehouse in summer might swelter under the sun, while a production line near a furnace or welding station could face intense heat. Conversely, cold storage facilities or outdoor loading docks might expose equipment to freezing temperatures. For lean pipe joints, which are often critical to structural stability, temperature resistance isn't just a nice-to-have—it's a necessity.
The one way rotatory straight lean pipe joint chrome excels here. Its steel core is inherently resistant to thermal expansion and contraction, meaning it won't warp or weaken when temperatures rise or fall. The chrome plating adds another layer of protection: chromium has a high melting point (over 1,900°C) and doesn't oxidize easily, so even in hot environments, the joint's surface remains intact. Testing shows that this joint can operate reliably in temperatures ranging from -20°C to 120°C (-4°F to 248°F), making it suitable for everything from refrigerated warehouses to automotive factories with heat-generating machinery.
Why does this matter? Imagine a food processing plant where conveyor systems move products through both refrigerated and ambient zones. A joint that fails in cold temperatures could disrupt the entire line, leading to delays and wasted inventory. Similarly, in a electronics manufacturing facility, where precision is paramount, a joint that warps under heat might misalign sensitive components, causing defects. The one way rotatory joint's temperature resistance ensures consistent performance, reducing the risk of downtime and costly errors.

Key Feature 2: Performance That Stands Up to Daily Wear
Temperature resistance is just one part of the equation. A lean pipe joint must also withstand the daily grind of industrial use: constant vibrations, heavy loads, and frequent adjustments. Here, the one way rotatory straight lean pipe joint chrome shines again, thanks to its precision engineering and durable materials.
Let's talk load capacity. On average, this joint can support loads of up to 200 kg (440 lbs) when properly installed, making it suitable for everything from lightweight material racks to heavy-duty workbenches. Its rotatory mechanism is designed with smooth, low-friction components that allow for easy adjustment without sacrificing stability. Unlike some cheaper joints that become stiff or loose over time, this chrome-plated joint maintains its rotational smoothness even after thousands of adjustments, thanks to its high-quality bearings and tight tolerances.
Wear resistance is another standout feature. The chrome plating acts as a barrier against scratches, dents, and corrosion, ensuring the joint looks and functions like new for years. In environments where chemicals or moisture are present—such as pharmaceutical labs or automotive paint shops—this resistance to corrosion is especially valuable. Even when exposed to oils, solvents, or cleaning agents, the joint's surface won't degrade, reducing the need for frequent replacements.
Perhaps most importantly, the joint's one-way rotation adds a layer of safety. Unlike fully swiveling joints, which can rotate unexpectedly, this design limits movement to one direction, preventing accidental disalignment. This is crucial in high-traffic areas where workers or machinery might bump into the structure; the controlled rotation minimizes the risk of collapse or damage.
Applications: Where This Joint Makes a Difference
Now that we understand its features, let's look at how the one way rotatory straight lean pipe joint chrome is used in real-world settings. Its versatility makes it a staple in several key areas of lean manufacturing and material handling.
Workbench Assembly:
Workbenches are the heart of any production line, and their design directly impacts worker efficiency. With the one way rotatory joint, manufacturers can create adjustable workbenches that adapt to different tasks. For example, a workbench used for both assembly and quality control might need a tilting surface to inspect components. By using rotatory joints, operators can angle the workbench top as needed, then lock it in place—no tools required. This flexibility reduces the need for multiple specialized workbenches, saving space and cost.
Roller Track Systems:
Roller tracks are essential for moving materials quickly and smoothly through a facility. Whether it's boxes in a warehouse or parts on an assembly line, the goal is to minimize friction and maximize flow. The one way rotatory joint plays a key role here by allowing roller tracks to be adjusted for (slope) or alignment. For instance, if a section of track starts to sag due to heavy use, operators can rotate the joint to realign the rollers, ensuring materials glide seamlessly. This is far easier than replacing fixed joints, which would require disassembling the entire track.
Compatibility with Aluminum Profiles:
Many modern lean systems use
aluminum profiles
for their lightweight yet strong properties. The one way rotatory joint is designed to work seamlessly with these profiles, thanks to its adjustable clamping mechanism. Whether you're building a custom material rack or a mobile workstation, the joint can connect steel lean pipes to aluminum profiles without the need for adapters, simplifying assembly and reducing part counts. This compatibility is a boon for facilities transitioning from traditional steel systems to aluminum, as it allows for incremental upgrades without replacing existing components.
How Does It Compare to Other Lean Pipe Joints? A Quick Comparison
To truly appreciate the one way rotatory straight lean pipe joint chrome, it helps to see how it stacks up against other common joint types. Below is a comparison table highlighting key differences:
| Joint Type | Rotation Capability | Temperature Resistance Range | Primary Material | Best For |
|---|---|---|---|---|
| One Way Rotatory Straight (Chrome) | One-way rotation (0-90°) | -20°C to 120°C | Chrome-plated steel | Adjustable workbenches, roller tracks, adaptable systems |
| Fixed 90° Lean Pipe Joint | None (fixed angle) | -10°C to 80°C | Zinc-plated steel | Rigid structures, static racks |
| Parallel Lean Pipe Joint | Parallel adjustment only | -15°C to 100°C | Steel (no plating) | Horizontal/vertical pipe alignment |
| Swivel 360° Joint | Full 360° rotation | -10°C to 90°C | Plastic-coated steel | Light-duty, highly flexible systems |
As the table shows, the one way rotatory joint offers a unique balance of rotation, temperature resistance, and durability. Fixed joints are cheaper but lack flexibility; swivel 360° joints offer more rotation but can be less stable and have lower temperature tolerance. For most industrial applications where adaptability and reliability are key, the one way rotatory straight lean pipe joint chrome is the clear winner.
Installation and Maintenance Tips for Long-Lasting Performance
To get the most out of your one way rotatory straight lean pipe joint chrome, proper installation and maintenance are essential. Here's a step-by-step guide to installation:
Installation Steps:
1.
Prepare the Pipes:
Ensure the ends of the lean pipes are clean and free of burrs. If using aluminum profiles, check that the slots are clear of debris.
2.
Align the Joint:
Slide the joint onto one pipe until it's flush with the end. Then, align the second pipe with the joint's opposite end, making sure both pipes are straight (or at the desired angle for rotation).
3.
Tighten the Clamps:
Use a hex key (typically 5mm or 6mm) to tighten the joint's clamping screws. Avoid over-tightening, as this can strip the threads or damage the pipe. A firm, snug fit is enough to ensure stability.
4.
Test Rotation:
After installation, gently rotate the joint to ensure it moves smoothly within its range. If it's stiff, loosen the screws slightly and adjust the pipe alignment.
Maintenance Tips:
-
Clean Regularly:
Wipe the joint with a damp cloth to remove dust and debris. For greasy or oily environments, use a mild detergent to clean the chrome surface, then dry thoroughly to prevent water spots.
-
Lubricate Sparingly:
If the rotation becomes stiff, apply a small amount of silicone-based lubricant to the joint's moving parts. Avoid oil-based lubricants, which can attract dust and cause buildup.
-
Inspect for Wear:
Every 6 months, check the joint for signs of damage: cracks in the steel, peeling chrome, or loose screws. replace any damaged joints immediately to prevent failure.
By following these steps, you can ensure your joint performs reliably for years, even in heavy-use environments.
Real-World Success Story: A Automotive Plant's Experience
To put this all in context, let's look at a real-world example. A mid-sized automotive parts manufacturer in Michigan was struggling with inefficient assembly lines. Their workbenches were fixed in place, making it hard to reconfigure stations when production needs changed. Material racks were rigid, and roller tracks often jammed due to misalignment, leading to frequent downtime.
After consulting with a lean system supplier, the plant decided to upgrade to one way rotatory straight lean pipe joint chrome, paired with aluminum profiles and roller tracks. The results were dramatic:
-
Faster Reconfiguration:
Workers could adjust workbench heights and angles in minutes, reducing the time to switch between production runs by 40%.
-
Smarter Material Flow:
The rotatory joints allowed roller tracks to be (fine-tuned) for slope, eliminating jams and increasing throughput by 25%.
-
Reduced Downtime:
The joint's temperature resistance proved critical in the plant's paint shop, where ambient temperatures often exceeded 40°C (104°F). Unlike the previous plastic-coated joints, which warped and failed, the chrome-plated joints remained stable, cutting maintenance-related downtime by 60%.
Today, the plant has expanded its use of these joints to nearly all its lean systems, from material trolleys to assembly fixtures. As the plant manager put it: "These joints are small, but they've had a huge impact on our bottom line. We're more flexible, more efficient, and we spend less time fixing things and more time making parts."
Conclusion: Why the One Way Rotatory Straight Lean Pipe Joint Chrome Is a Must-Have
In the world of lean manufacturing, every component counts. The one way rotatory straight lean pipe joint chrome may be small, but its impact is significant. Its unique combination of temperature resistance, durability, and flexibility makes it ideal for modern industrial environments, where adaptability and reliability are non-negotiable. Whether you're building workbenches, roller tracks, or custom material handling systems, this joint ensures your setup can evolve with your needs—without sacrificing performance.
From cold warehouses to hot production lines, from small workshops to large factories, the one way rotatory straight lean pipe joint chrome delivers consistent, long-lasting results. It's a testament to the idea that great lean systems are built not just on big-picture strategies, but on the quality of their smallest parts. So the next time you walk through a factory or warehouse, take a closer look at the structures holding everything together—chances are, you'll spot this unsung hero hard at work.