- Company Articles
- Products and Technology
- Product knowledge
- Parallel Fixation Aluminum Pipe Joints for Material Racks: Material Rack B Setup

Parallel Fixation Aluminum Pipe Joints for Material Racks: Material Rack B Setup
Related Product
Parallel Fixation Aluminum Pipe Joint
Aluminum parallel joint for two pcs 28mm aluminum pipe connected by parallel direction.
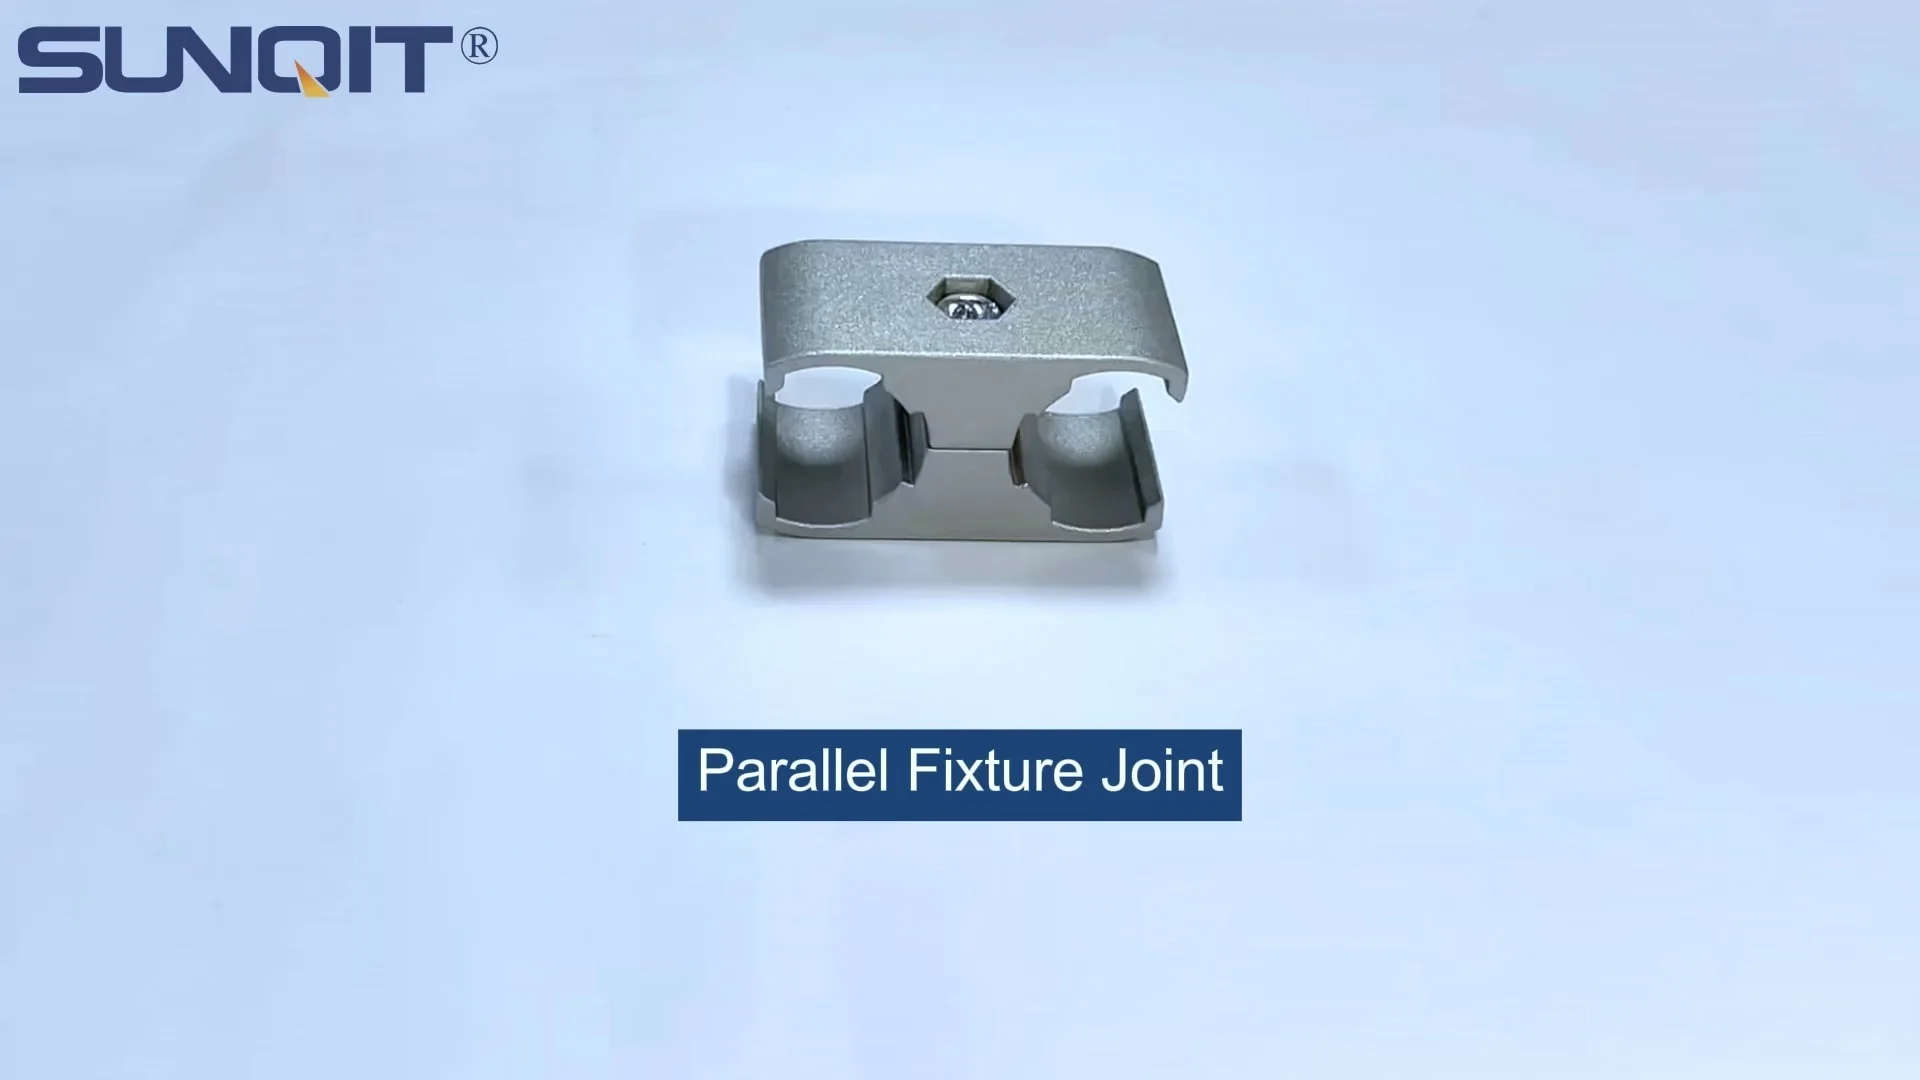
Understanding Parallel Fixation Aluminum Pipe Joints: The "Glue" That Holds It All Together
Before we jump into building Material Rack B, let's talk about the star of the show: Parallel Fixation Aluminum Pipe Joints. If you've ever assembled furniture that felt flimsy after five minutes, you know the importance of a strong joint. These aren't your average hardware store connectors—they're engineered for precision, durability, and adaptability, specifically designed for aluminum pipe systems.
What makes them special? Unlike rigid, one-size-fits-all joints, Parallel Fixation Aluminum Pipe Joints are built to keep aluminum pipes aligned perfectly parallel, even under heavy loads. They feature a unique clamping mechanism that grips the pipe tightly, preventing twisting or shifting over time. Most importantly, they're tool-friendly —no welding, no complicated machinery. Just a hex key, a little elbow grease, and you've got a connection that can withstand the daily bumps, vibrations, and weight of stacked materials.
Another perk? They're reusable. Need to reconfigure your rack next quarter because your inventory has changed? Simply loosen the joint, adjust the pipes, and retighten. It's that easy. This flexibility is a game-changer for small businesses and large facilities alike—no need to buy a whole new rack when your needs evolve.
Pro Tip:
When shopping for these joints, look for ones with corrosion-resistant coating. Aluminum itself is naturally rust-resistant, but the joint's moving parts (like screws or levers) can benefit from an extra layer of protection, especially if your workspace is humid or exposed to oils and chemicals.
Material Rack B (3 Row and 3 Floor): A Rack Designed for Real-World Needs
Now that we've covered the joints, let's focus on the structure they'll build: Material Rack B (3 row and 3 floor). This isn't a generic "shelf on legs"—it's a thoughtfully designed storage solution built for versatility. As the name suggests, it features 3 horizontal rows and 3 vertical floors, creating 9 distinct storage spaces (3 rows x 3 floors) to separate and organize different materials. Whether you're storing small electronic components, bulky toolboxes, or raw aluminum profiles, there's a spot for everything.
But what really sets Material Rack B apart is its compatibility with aluminum profile systems. Aluminum profile isn't just lightweight; it's surprisingly strong. A standard 30x30mm aluminum profile can support up to 150kg per linear meter, making it ideal for heavy-duty storage. When paired with Parallel Fixation Aluminum Pipe Joints, the rack becomes a modular system—you can adjust shelf heights, add dividers, or even extend the width by adding more pipes and joints.
Let's break down the specs that matter:
- Dimensions: Typically, Material Rack B measures around 1200mm in width, 500mm in depth, and 1800mm in height (adjustable, of course). This size strikes a balance between maximizing vertical space and keeping shelves accessible without a ladder.
- Load Capacity: Each floor can hold 80-100kg, depending on the thickness of the aluminum profile and the quality of the joints. That means you can stack heavy parts without worrying about sagging or collapse.
- Assembly Time: With pre-cut pipes and Parallel Fixation Joints, a team of two can assemble the entire rack in under 2 hours—no prior experience needed.
The beauty of this design is its simplicity. It doesn't overcomplicate things with unnecessary features, but it nails the basics: strength, adjustability, and ease of use. And because it's built with aluminum, it's lightweight enough to move (with a little help) if you need to rearrange your workspace later.

Step-by-Step: Building Material Rack B with Parallel Fixation Aluminum Pipe Joints
Ready to roll up your sleeves? Let's walk through assembling Material Rack B from start to finish. We'll assume you've already gathered your materials: aluminum pipes (we recommend 30mm diameter for the frame and 20mm for the shelves), Parallel Fixation Aluminum Pipe Joints (you'll need around 24-30, depending on shelf count), aluminum profile accessories like end caps (to prevent snags), a hex key set, a rubber mallet, and a measuring tape. Let's get started.
Step 1: Prep Your Workspace and Lay Out Components
First, clear a flat area—preferably the spot where the rack will live, so you don't have to move it later. Lay out all your pipes and joints, and double-check the lengths: you'll need 4 vertical corner pipes (the height of your rack, e.g., 1800mm), 8 horizontal pipes for the frame (4 for the top, 4 for the bottom, each 1200mm long), and 12 shelf pipes (3 rows x 4 sides, 500mm each).
Pro tip: Use painter's tape on the floor to mark the rack's footprint (1200mm x 500mm) so you can align the vertical pipes evenly.
Step 2: Build the Base Frame
Start with the bottom frame—the foundation of your rack. Take 4 horizontal pipes (1200mm each) and connect them using 4 Parallel Fixation Joints to form a rectangle. Make sure the joints are loosely tightened at first—you'll want to adjust for squareness before finalizing. Once the rectangle is formed, stand the 4 vertical corner pipes (1800mm) in each corner, attaching them to the base frame with more Parallel Fixation Joints. Again, keep the joints loose for now.
Alignment Check:
To ensure the frame is square, measure the diagonals of the base rectangle. If they're equal, it's square. If not, gently push or pull the corners until the measurements match. A square base prevents the rack from leaning later.
Step 3: Add the Top Frame and Stabilize the Structure
Now, attach the top frame using the remaining 4 horizontal pipes (1200mm). Connect them to the top of the vertical corner pipes with Parallel Fixation Joints, forming a rectangle that mirrors the base. Once the top frame is in place, go back and tighten all the joints on the vertical and horizontal pipes—snug, but not so tight you strip the threads. At this point, you should have a tall, rectangular "cage" that's sturdy enough to stand on its own.
Step 4: Install the Shelves (3 Rows x 3 Floors)
Here's where the "3 row and 3 floor" magic happens. Using your measuring tape, mark the vertical pipes at three equal heights (e.g., 600mm, 1200mm, and 1800mm from the bottom) to place the shelves. For each floor, connect 4 shelf pipes (500mm each) using Parallel Fixation Joints to form a smaller rectangle (matching the rack's depth of 500mm). Then, attach these shelf frames to the vertical pipes at your marked heights.
Remember: Parallel Fixation Joints are designed to keep pipes aligned, so take a moment to ensure each shelf is level. A quick check with a bubble level will save you from uneven shelves later.
Step 5: Add Finishing Touches and Test Stability
Once all shelves are installed, add aluminum profile accessories like end caps to the pipe ends—this prevents sharp edges and keeps dust from collecting inside the pipes. Then, give the rack a gentle shake to test stability. If it wobbles, check for loose joints and tighten them. Finally, load a few boxes or materials onto the shelves (starting with lighter items) to ensure the structure holds.
| Step | Key Action | Common Mistake to Avoid |
|---|---|---|
| 1 | Lay out components and check pipe lengths | Using mismatched pipe lengths (e.g., 1100mm instead of 1200mm) leads to uneven frames. |
| 2 | Build base frame and ensure squareness | Skipping the diagonal measurement—this causes the rack to lean. |
| 3 | Tighten joints snugly (not overly tight) | Over-tightening strips threads; under-tightening leads to wobbling. |
| 4 | Level shelves with a bubble level | Eyeballing it—materials will slide off uneven shelves. |
| 5 | Test stability with light loads first | Loading heavy items immediately risks stressing weak joints. |

Why Aluminum Profile Matters: Durability Without the Weight
You might be wondering: Why aluminum? Why not steel or wood? Let's break it down. Steel is strong, but it's heavy—moving a steel rack requires a forklift, and it's prone to rust if not painted. Wood is cheap, but it warps with moisture and can't handle heavy loads without sagging. Aluminum profile, on the other hand, hits the sweet spot: it's 30% lighter than steel, naturally resistant to corrosion (no rust, even in damp environments), and just as strong when paired with the right joints.
Another advantage? Aluminum is infinitely recyclable, making it a sustainable choice for businesses looking to reduce their environmental footprint. And because it's so lightweight, you can reconfigure your rack without calling in extra help—perfect for small teams or facilities with limited space.
When combined with Parallel Fixation Aluminum Pipe Joints, aluminum profile becomes even more versatile. The joints' precision fit means you can add cross-braces for extra stability, attach hooks for tools, or even mount bins to the sides—all without drilling holes or damaging the pipes. It's a system that grows with you, not against you.

Real-World Results: How One Manufacturer Boosted Efficiency with Material Rack B
Let's ground this in reality with a quick story. A mid-sized electronics manufacturer I worked with a few years back was struggling with a common problem: their old wooden shelves were overcrowded, parts were mixed up, and workers were spending 15-20 minutes per hour just hunting for components. They'd tried cheaper metal racks, but the joints kept loosening, and the shelves sagged under the weight of circuit boards and tools.
We recommended switching to Material Rack B with Parallel Fixation Aluminum Pipe Joints and aluminum profile. Within a week of installation, their team noticed a difference. Parts were organized by project on the 3 rows, with frequently used items on the middle floor (easy reach), and bulk supplies on the top and bottom. The rigid, stable shelves meant no more "tipping" when grabbing a heavy box, and the adjustable joints let them add dividers between rows to separate screws, wires, and casings.
The result? A 25% reduction in time spent searching for materials, and a 10% increase in daily production. As their production manager put it: "It's not just a rack—it's like giving our team a new set of hands."
Maintenance Tips: Keeping Your Rack Strong for Years
A well-built rack shouldn't need constant attention, but a little maintenance goes a long way. Here's how to keep your Material Rack B and Parallel Fixation Joints in top shape:
- Check joints monthly: A quick once-over with a hex key to tighten any loose joints—vibrations from daily use can cause them to loosen over time.
- Clean aluminum profiles quarterly: Wipe down the pipes with a damp cloth and mild soap to remove dust, oil, or grime. Avoid harsh chemicals that can damage the aluminum's finish.
- replace worn accessories: If end caps crack or feet start to slip, swap them out immediately. Aluminum pipe accessories are affordable and easy to find, so there's no need to wait.
- Don't overload: Stick to the recommended weight limits (80-100kg per shelf). Overloading can bend pipes or strain joints, even with strong aluminum.
Conclusion: More Than a Rack—A Foundation for Growth
At the end of the day, Material Rack B (3 row and 3 floor) with Parallel Fixation Aluminum Pipe Joints isn't just about storing materials—it's about investing in your team's efficiency, your workspace's organization, and your business's ability to adapt. These aren't just "parts"—they're tools that turn chaos into order, frustration into productivity, and a cluttered floor into a space where your team can thrive.
Whether you're a small workshop just starting out or a large facility looking to upgrade, the combination of durable aluminum profile, reliable Parallel Fixation Joints, and a thoughtfully designed rack like Material Rack B is a choice that pays off every day. So go ahead—build something sturdy, build something adaptable, and watch your operations run smoother than ever.