- Company Articles
- Products and Technology
- Installation And Maintenance
- Parallel Fixation Aluminum Pipe Joints for Workbenches: Workbench E Assembly Tips

Parallel Fixation Aluminum Pipe Joints for Workbenches: Workbench E Assembly Tips
Related Product
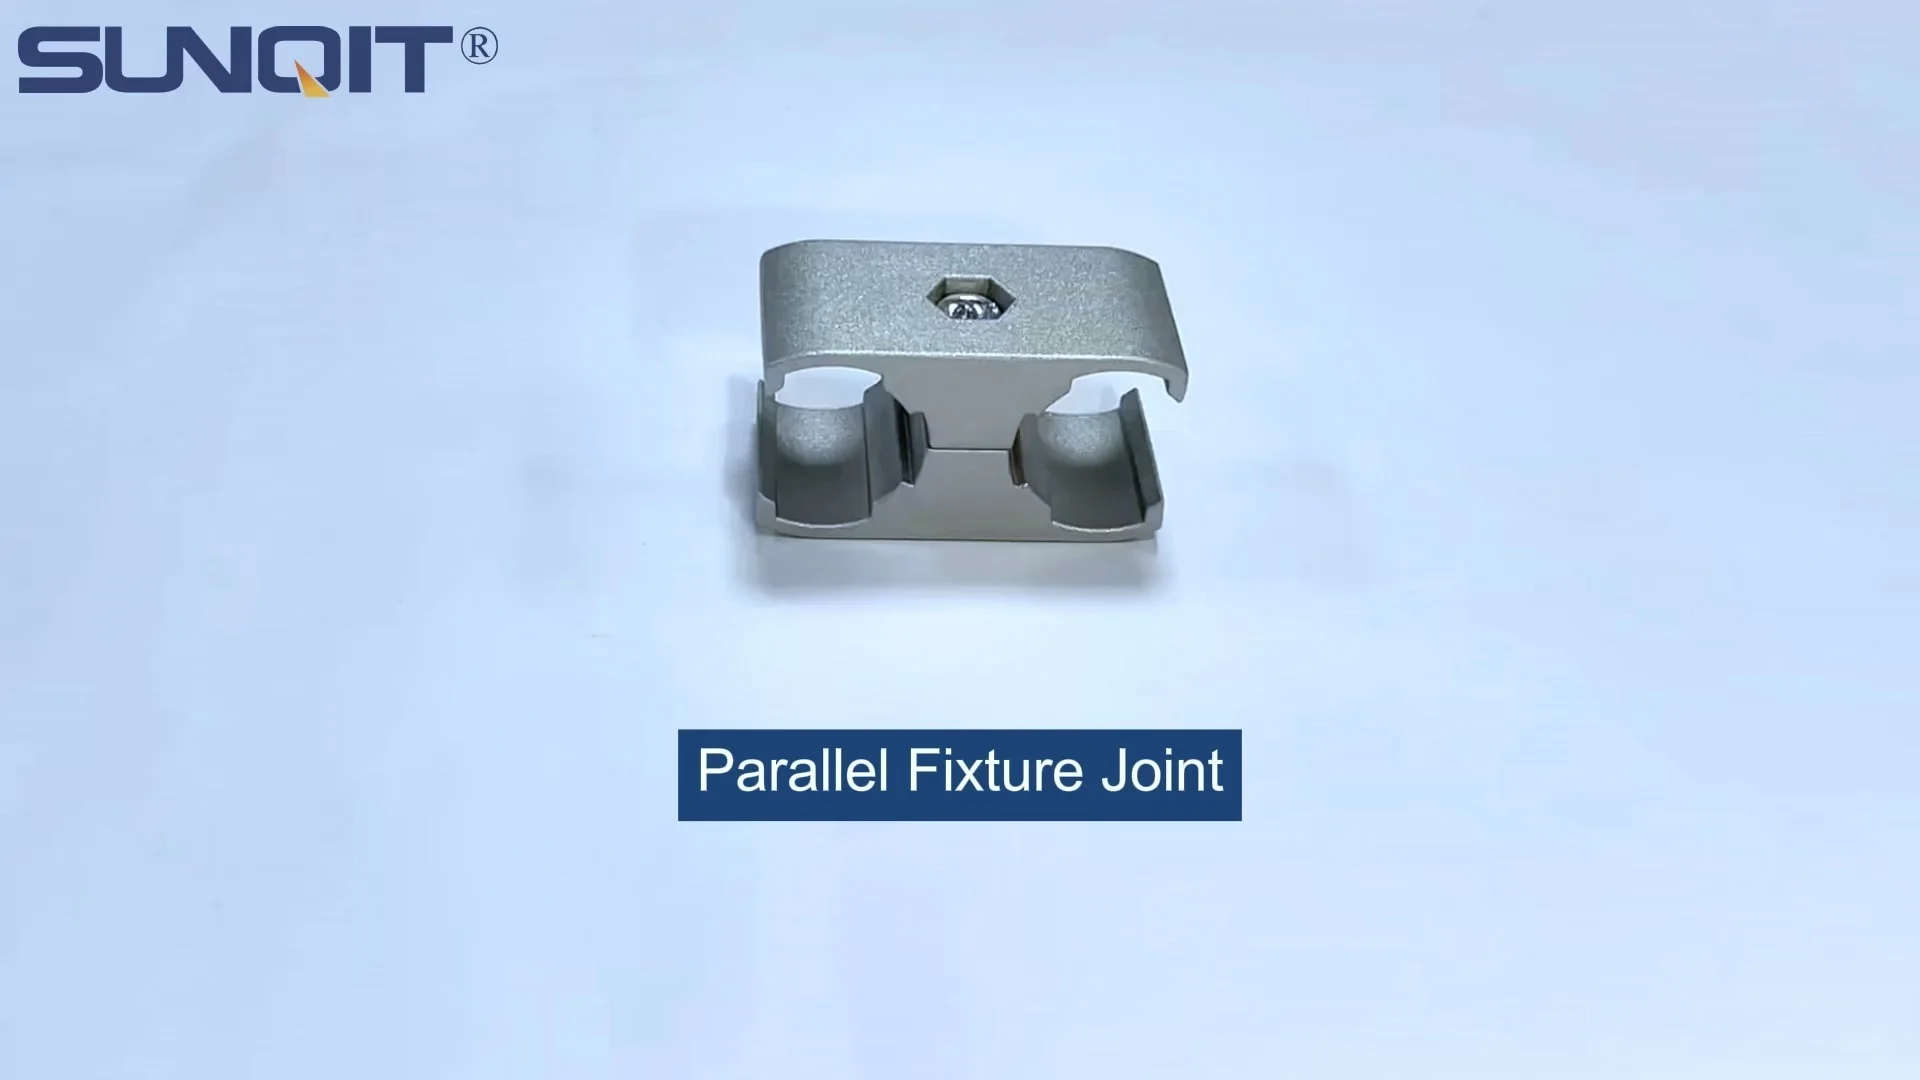
Parallel Fixation Aluminum Pipe Joint
Aluminum parallel joint for two pcs 28mm aluminum pipe connected by parallel direction.
If you've ever spent hours setting up a workbench only to have it wobble, creak, or fail to fit your team's needs, you know the frustration of poor assembly. In manufacturing and production spaces, where efficiency and reliability are everything, a sturdy, well-built workbench isn't just a piece of furniture—it's the backbone of your workflow. Today, we're diving deep into one of the most versatile and dependable options out there: the Workbench E (single deck-without caster), and how parallel fixation aluminum pipe joints make all the difference in creating a stable, customizable, and long-lasting workspace. Whether you're a seasoned production manager or new to lean systems, this guide will walk you through assembly tips, key tools, and why aluminum lean pipe and its accessories are game-changers for modern workshops.
Understanding Workbench E and Parallel Fixation Aluminum Pipe Joints
First, let's get familiar with the star of the show: Workbench E. Designed as a single-deck, caster-free unit, it's built for stability and simplicity—perfect for tasks that require a fixed workspace, like assembly, inspection, or packing. What sets it apart, though, is its reliance on parallel fixation aluminum pipe joints. These joints are the unsung heroes of modular workbench design, allowing you to connect aluminum lean pipes securely while maintaining alignment and strength. Unlike rigid, welded frames, parallel fixation joints let you adjust, disassemble, and reconfigure the workbench as your needs change—no welding torches or specialized tools required.
Aluminum lean pipe itself is a lightweight yet durable material, often paired with aluminum profile accessories to add functionality. Think of it as building blocks for adults: the pipes form the frame, the joints hold them together, and accessories like aluminum guide rail A or roller track turn a basic table into a workflow powerhouse. For Workbench E, the parallel fixation joints are critical because they ensure the frame stays square and level, even under heavy loads—no more wobbly surfaces when you're tightening bolts or placing heavy components.
Pro Tip:
Always check that your parallel fixation joints are rated for the weight you'll be placing on the workbench. Most aluminum lean pipe joints can handle 50-100kg per connection, but double-checking specs prevents overloading ands the life of your setup.
Pre-Assembly Preparation: Tools and Materials You'll Need
Before you starting joints or cutting pipes, gathering the right tools and materials will save you time and headaches. Here's a breakdown of what you'll need, plus why each item matters:
| Tool/Material | Purpose | Quick Tips |
|---|---|---|
| Aluminum Lean Pipes (Basic Aluminum Tube) | Frame construction (legs, rails, supports) | Measure twice, cut once! Use a pipe cutter for clean edges to ensure joints fit snugly. |
| Parallel Fixation Aluminum Pipe Joints | Connecting pipes at parallel angles (critical for Workbench E's square frame) | Hand-tighten first, then use a hex key to secure—over-tightening can strip threads. |
| Aluminum Profile Accessories (e.g., Aluminum Guide Rail A) | Adding edges, stops, or guides to the workbench surface | Aluminum Guide Rail A is great for aligning materials—install it along the deck edge to prevent parts from sliding off. |
| Workbench Deck (Plywood, MDF, or Aluminum Honeycomb Panel) | Flat working surface | Opt for an aluminum honeycomb panel if you need lightweight durability—resistant to scratches and easy to clean. |
| Hex Keys (Allen Wrenches) | Tightening joint bolts | Keep a set with different sizes handy—joints often use 4mm or 5mm hex bolts. |
| Level (Bubble or Digital) | Ensuring the workbench is flat and even | Check level in both directions (side-to-side and front-to-back) before finalizing joints. |
| Tape Measure and Pencil | Marking pipe lengths and positioning joints | Use a pencil with light marks—aluminum is easy to clean, but deep scratches can weaken the pipe. |
| Rubber Mallet | Gently seating pipes into joints (no dents!) | A soft tap helps pipes slide into joints without damaging the aluminum finish. |

Step-by-Step Assembly Guide: Building Workbench E the Right Way
Step 1: Lay Out the Frame Dimensions
Start by mapping out the workbench size on a flat surface (the floor works well). For Workbench E, common dimensions are 1200mm (length) x 600mm (width) x 800mm (height), but adjust based on your space. Use tape measure and pencil to mark where each pipe will go: four legs, two long side rails (connecting the top of the legs), two short front/back rails (connecting the sides), and optional cross-braces for extra stability.
Step 2: Assemble the Leg Frames with Parallel Fixation Joints
Begin with the vertical legs. Take four aluminum lean pipes (legs) and attach parallel fixation joints to the top and bottom of each. These joints will connect the legs to the horizontal rails. Pro move: Use a square tool to ensure the joints are at 90-degree angles—this keeps the frame from skewing. Once the joints are on, connect the long side rails to the top joints of two legs, forming a rectangular "side frame." Repeat for the other two legs, then connect the front and back rails to link the two side frames into a complete rectangle. At this point, you should have a standing frame—give it a gentle shake to check for wobbles. If it moves, double-check the joint tightness and angle alignment.
Step 3: Add Cross-Braces for Extra Stability
For most Workbench E setups, adding cross-braces between the legs (diagonally or horizontally) is a smart move, especially if you'll be placing heavy tools or materials on the deck. Use shorter aluminum lean pipes and parallel fixation joints to attach these braces. Diagonal braces work best for preventing side-to-side movement, while horizontal braces (midway up the legs) add rigidity. Remember: the goal is to create a "triangle" of support—triangles are inherently stable, so this simple addition can make your workbench feel rock-solid.
Step 4: Install the Workbench Deck
Now it's time to add the deck. Place your chosen surface (plywood, MDF, or aluminum honeycomb panel) on top of the frame. To secure it, use aluminum pipe with board holder accessories—these clamp onto the frame rails and hold the deck in place without drilling holes. If you're using an aluminum honeycomb panel, which is lighter and more resistant to dents, you can also use T-slot bolts (part of aluminum profile accessories) to fasten it directly to the frame. Make sure the deck is centered and overhangs evenly on all sides—this prevents uneven weight distribution.
Step 5: Customize with Aluminum Profile Accessories
Here's where Workbench E truly shines: customization. Aluminum profile accessories let you tailor the workbench to your team's specific tasks. For example:
-
Aluminum Guide Rail A:
Install along the deck edges to create a "lip" that keeps small parts from rolling off. Great for assembly lines where screws, washers, or components might slide around.
-
Roller Track:
Mount a section of roller track to one side of the workbench for easy material transfer. If your workflow involves passing parts to the next station, roller track lets items glide smoothly without manual lifting.
-
Tool Hooks or Shelves:
Use aluminum pipe clamps to add hooks under the deck for hanging tools, or attach small shelves above the deck for storing manuals or supplies.
The best part? Since these accessories use the same T-slot system as the frame, you can add or remove them anytime without reworking the entire bench.

Troubleshooting Common Assembly Hiccups
Even with careful planning, assembly can hit snags. Here are the most common issues and how to fix them:
Problem:
The frame is wobbly after assembly.
Solution:
Check for loose joints first—parallel fixation joints can loosen during initial setup. Tighten them with a hex key, but don't overdo it. If wobbling persists, add cross-braces (we told you they were important!) or use a level to ensure the legs are all the same length. Sometimes, uneven flooring is the culprit—shimming one leg slightly with a rubber pad can make all the difference.
Problem:
Aluminum profile accessories won't fit into the T-slots.
Solution:
Not all accessories are universal! Double-check that your accessories (like Aluminum Guide Rail A) are compatible with the size of your aluminum lean pipe (e.g., 2020, 3030, or 4040 profiles). Most suppliers list compatibility specs, so keep those handy. If the accessory is slightly loose, use T-slot nuts with rubber gaskets to create a tighter fit.
Problem:
The deck sags under weight.
Solution:
This usually means the deck material is too thin or the frame lacks center support. Add a middle rail (along the length of the frame) to support the deck from below, or upgrade to a thicker panel. For example, switching from 12mm plywood to a 18mm aluminum honeycomb panel adds rigidity without much extra weight.

Why Aluminum? The Benefits of Aluminum Lean Pipe for Workbenches
You might be wondering: Why aluminum lean pipe instead of steel, wood, or other materials? Let's break down the advantages that make aluminum the top choice for Workbench E and lean systems in general:
- Lightweight but Strong: Aluminum is about 1/3 the weight of steel, making assembly and reconfiguration a one-person job. Don't let the lightness fool you, though—aluminum lean pipe can handle 200-300kg of evenly distributed weight, more than enough for most workbench tasks.
- Corrosion-Resistant: Unlike steel, aluminum doesn't rust, even in humid or damp environments (hello, warehouses near the coast!). This means your Workbench E will look and perform like new for years, without costly repainting or replacements.
- Easy to Modify: With parallel fixation joints and T-slot accessories, changing the workbench's layout takes minutes, not hours. Need to shorten it for a new production line? Disassemble and cut the pipes. Want to add a shelf? Screw in an accessory. This flexibility is key for lean manufacturing, where adaptability equals efficiency.
- Cost-Effective Long-Term: While aluminum might cost a bit more upfront than wood or basic steel, its durability and reusability save money over time. You won't need to replace warped wood or rusted steel frames, and old pipes/accessories can be recycled or repurposed for new projects.
- Clean and Professional Look: Aluminum has a sleek, modern finish that fits well in any workspace. It's easy to wipe down (no splinters like wood!), making it ideal for cleanrooms or areas where hygiene matters.
Real-World Applications: Workbench E in Action
To see Workbench E's impact, let's look at a real example: a small electronics assembly shop that switched from wooden workbenches to aluminum lean pipe setups. Before, their wooden benches were heavy, hard to move, and prone to warping—resulting in uneven surfaces that made precise component placement tricky. They also struggled with customization; adding a simple shelf meant drilling holes, which weakened the wood over time.
After switching to Workbench E with parallel fixation joints, the team noticed immediate changes. The aluminum frame was light enough to reposition when the production line rearranged, and the parallel joints kept the deck perfectly level, reducing errors during assembly. They added aluminum guide rail A to the edges, which cut down on lost screws and small parts by 40%. Roller track installed on one side let them pass completed circuit boards to the testing station without bending or lifting, easing ergonomic strain on workers. Best of all, when they needed to add a second deck for tools, they simply attached new aluminum lean pipes and joints—no tools beyond a hex key required.
This isn't an isolated case. From automotive repair shops to small-batch manufacturing, Workbench E and parallel fixation aluminum pipe joints are becoming staples in lean systems, helping teams work smarter, not harder.
Maintenance Tips for Longevity
Like any tool, your Workbench E will last longer with a little care. Here's how to keep it in top shape:
Clean Regularly: Wipe down the aluminum pipes and deck with a damp cloth to remove dust, grease, or debris. For stubborn grime, use mild soap and water—avoid harsh chemicals that can damage the aluminum finish.
Check Joints Quarterly: Parallel fixation joints can loosen over time with vibration or heavy use. Give them a quick tighten with a hex key every few months to prevent wobbling.
Lubricate Moving Parts: If you've added roller track or swivel components, lubricate the bearings annually with a light machine oil to keep them rolling smoothly.
replace Worn Accessories: Aluminum profile accessories like hooks or guide rails can wear out with heavy use. Keep spares on hand (most suppliers offer bulk packs) to swap out when needed—this is cheaper than replacing the entire workbench.
Disassemble Carefully When Needed: If you need to move or reconfigure the workbench, take it apart gently. Label joints and pipes with tape to remember their positions—this saves time during reassembly.
Final Thoughts: Why Parallel Fixation Joints and Aluminum Lean Pipe Matter
At the end of the day, a workbench is more than just a table—it's a foundation for your team's productivity, safety, and success. Workbench E, with its parallel fixation aluminum pipe joints and customizable aluminum profile accessories, isn't just a piece of equipment; it's an investment in efficiency and adaptability. Whether you're assembling electronics, packing products, or testing machinery, the stability, light weight, and versatility of aluminum lean pipe make it the clear choice for modern workspaces.
So, the next time you're setting up a new workbench or upgrading an old one, remember: the right joints and materials can turn a frustrating chore into a smooth, rewarding process. With Workbench E, parallel fixation aluminum pipe joints, and a little know-how, you'll build a workspace that grows with your team—strong, flexible, and ready for whatever the production line throws at it.