- Company Articles
- Products and Technology
- Product knowledge
- Parallel Lean Pipe Joint One Side Rotatory: Ideal for Custom Material Rack B Construction

Parallel Lean Pipe Joint One Side Rotatory: Ideal for Custom Material Rack B Construction
Related Product
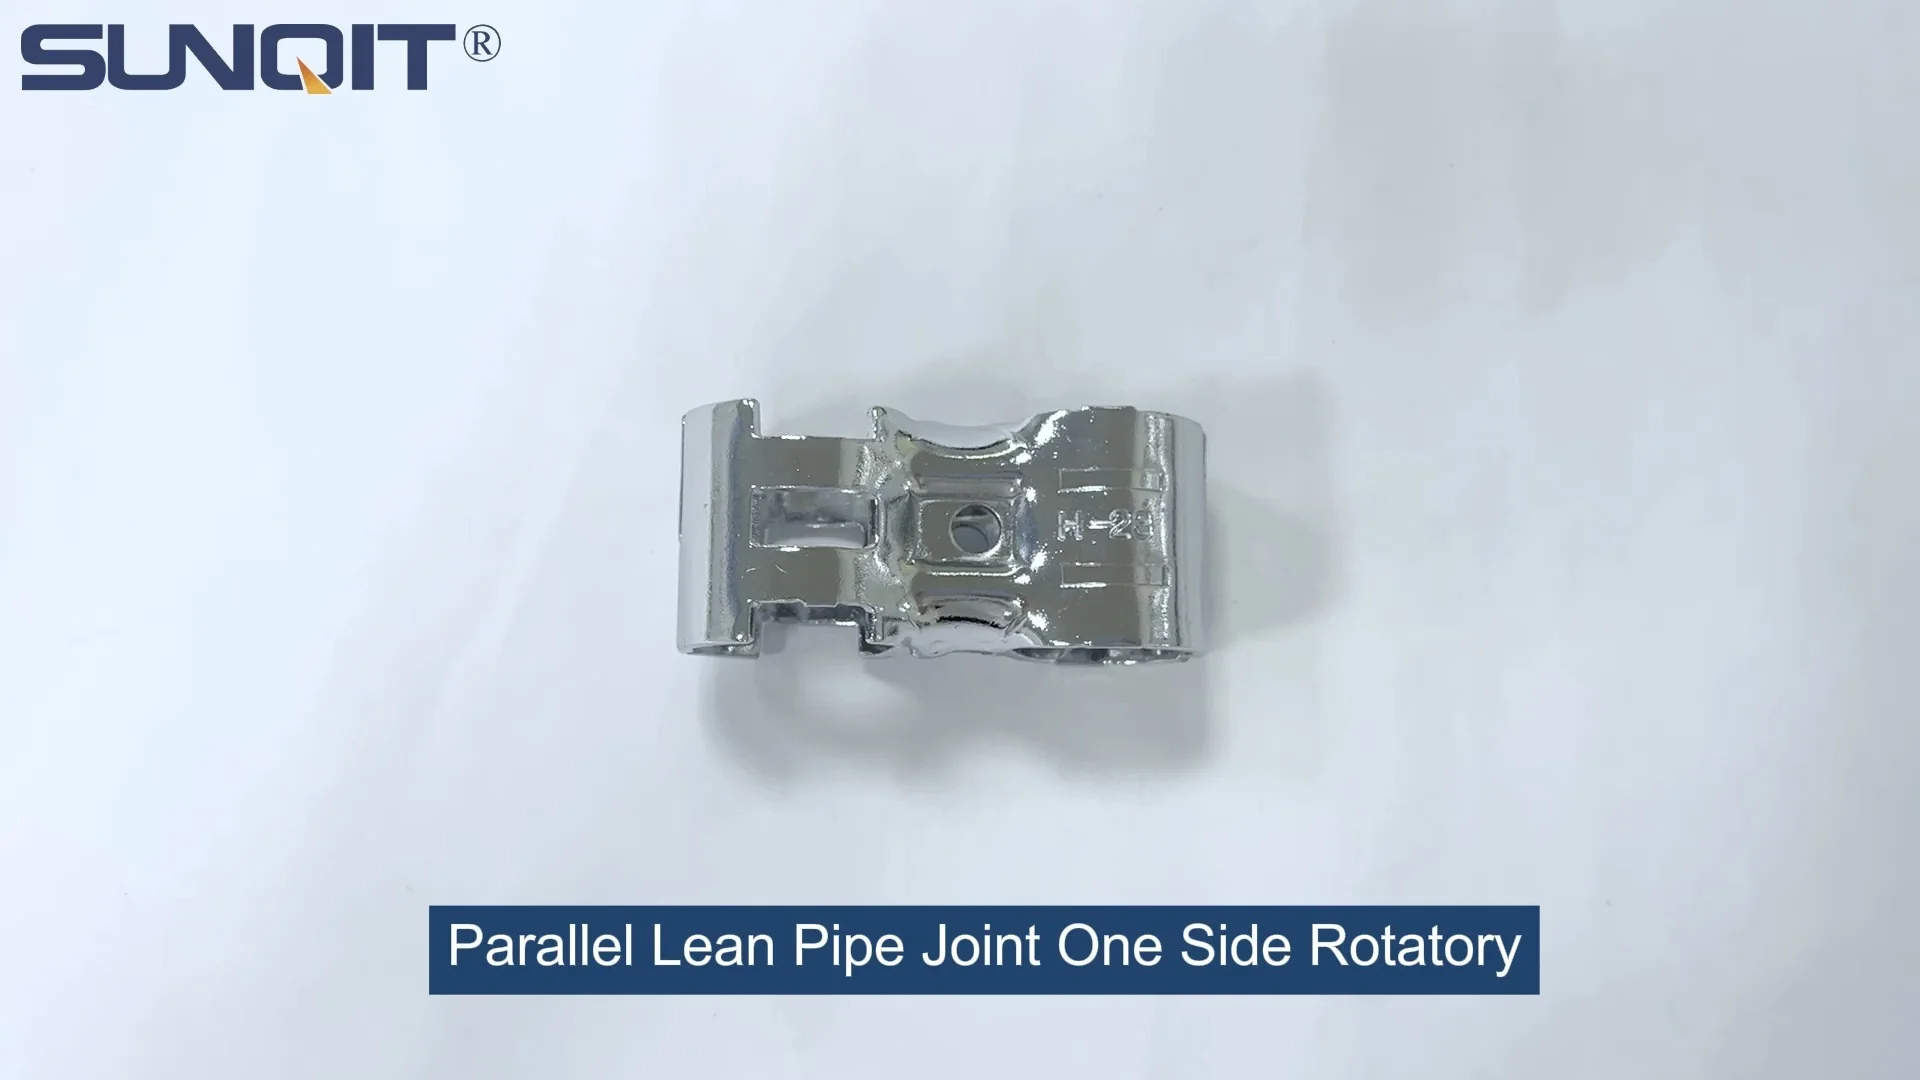
Parallel Lean Pipe Joint One Side Rotatory
Parallel rotatory lean pipe joint, for 2 pcs 28mm pipe conenction in parallel direction with one side rotatory function.
The Backbone of Efficient Production: Why Material Racks Matter
Walk into any manufacturing facility, and you'll quickly notice that the difference between chaos and productivity often boils down to one thing: organization. When tools, parts, and materials are scattered, workers waste precious minutes hunting for what they need. When they're neatly stored and easily accessible, the entire production line hums like a well-tuned engine. That's where material racks come in—not just as storage units, but as silent partners in keeping operations running smoothly.
For years, many factories relied on rigid, one-size-fits-all metal racks. They were sturdy, sure, but they came with a big downside: inflexibility. If your production needs changed—say, you started manufacturing a larger component or needed to rearrange your workflow—those racks became dead weight. You'd either have to buy new ones (costly) or try to jury-rig the old ones (risky, and rarely effective). Then came lean manufacturing, and with it, a game-changer: lean pipe systems. These modular setups, built from lightweight yet durable pipes and joints, promised adaptability. But even within lean systems, not all components are created equal. Today, we're zeroing in on a unsung hero that's transforming how teams build custom storage: the
Parallel Lean Pipe Joint One Side Rotatory
. And we'll show you why it's the perfect fit for constructing
Material Rack B (3 row and 3 floor)
—a workhorse of a rack designed to keep your materials flowing without slowing down your team.
Lean Pipe Systems: Flexibility Redefined
Before diving into the specifics of the joint, let's take a quick step back to appreciate why lean pipe systems have become so popular. At their core, these systems are built around the idea of "lean"—eliminating waste, optimizing space, and adapting to change. Traditional racks are fixed; lean pipe racks are
evolvable
. They're made by connecting
lean pipe
(typically coated steel or aluminum) with various joints, allowing you to build, modify, and expand racks as your needs shift.
What makes lean pipe so special? For starters, it's lightweight enough to be handled by a single person but strong enough to hold heavy loads—think boxes of hardware, plastic components, or even small machinery parts. And because the pipes and joints are standardized, you don't need specialized tools or welding skills to assemble them. A wrench, a few minutes, and a clear plan are all it takes. But here's the catch: not all joints offer the same level of flexibility. Fixed joints work for straight, simple structures, but when you need to create angled shelves, adjust heights on the fly, or build a rack with multiple tiers (like Material Rack B's 3 rows and 3 floors), you need something more versatile. That's where the Parallel Lean Pipe Joint One Side Rotatory enters the picture.

Meet the Star: Parallel Lean Pipe Joint One Side Rotatory
Let's break down the name first—it sounds technical, but it's actually pretty straightforward. "Parallel" means it's designed to connect pipes that run alongside each other (think horizontal shelves attached to vertical supports). "One Side Rotatory" is the key: one end of the joint is fixed, while the other can rotate up to 180 degrees. This rotation lets you adjust the angle of the connected pipe without having to disassemble the entire structure. No more loosening bolts, realigning holes, or starting over if you get the angle wrong. Just pivot, tighten, and you're good to go.
So, what does this look like in practice? Imagine you're building a shelf for Material Rack B. The vertical support pipe is fixed, but you need the horizontal shelf pipe to slope slightly downward to help materials "flow" toward the front (a common feature in
flow rack
designs). With a fixed joint, you'd have to measure the angle precisely before attaching—one mistake, and the shelf is uneven. With the rotatory joint? Attach the fixed end to the vertical pipe, rotate the other end to your desired angle, and lock it in place. It's like having a built-in protractor that lets you fine-tune as you go.
Durability is another win. These joints are typically made from high-strength aluminum or steel, coated to resist rust and wear. They're built to handle the daily bumps and vibrations of a busy factory floor, so you won't have to worry about shelves sagging or joints slipping over time. And because they're part of the lean pipe ecosystem, they're compatible with standard lean pipes and most
aluminum pipe accessories
—clamps, end caps, and brackets—so you can mix and match components without compatibility headaches.

Building Material Rack B: Step-by-Step with the Rotatory Joint
Material Rack B (3 row and 3 floor) is designed for density: 3 rows of shelves, each with 3 floors, giving you 9 separate storage spaces in a compact footprint. It's perfect for small to medium-sized parts—think electronics components, automotive fasteners, or packaging materials. Let's walk through how the Parallel Lean Pipe Joint One Side Rotatory simplifies constructing this rack, step by step.
Step 1: Gather Your Materials
You'll need: lean pipes (we recommend 28mm diameter for stability), Parallel Lean Pipe Joint One Side Rotatory (plan for 2-3 per shelf connection), aluminum pipe accessories (like end caps to prevent sharp edges), leveling feet (to keep the rack steady on uneven floors), and shelf boards (plywood or metal, depending on your load needs). Step 2: Build the Vertical Frame
Start with four vertical support pipes—these are the legs of your rack. Connect them at the bottom with horizontal pipes (using fixed joints for stability) to form a square base. Add diagonal braces if you're worried about wobbling (though with the rotatory joint's tight grip, this is often unnecessary for standard loads). Step 3: Attach the Rotatory Joints for Shelves
Here's where the magic happens. For each of the 3 floors, you'll attach the fixed end of the rotatory joint to the vertical supports. Space them evenly—typically 12-18 inches apart, depending on how much weight the shelf needs to hold. Once the fixed ends are secure, rotate the movable ends to set the shelf angle. For Material Rack B, a slight 5-10 degree slope is ideal: enough to let materials slide forward when the front is emptied, but not so steep that they tip over. Tighten the joint's locking nut, and the angle stays locked in place. Step 4: Add Horizontal Shelf Pipes
Slide the horizontal lean pipes into the movable ends of the rotatory joints. Since the joints are already angled, the shelves will naturally slope. For extra stability, add cross-braces between the horizontal pipes (again, using rotatory joints if you need to adjust their angle). Step 5: Install Shelf Boards and Finishing Touches
Lay your shelf boards across the horizontal pipes. If you're using a flow rack design, you could even add roller tracks (another common aluminum pipe accessory) instead of solid boards, letting materials glide even more smoothly. Finally, cap the pipe ends with aluminum end caps to prevent scratches on parts or workers' hands. The best part? If next month you need to adjust the shelf angle (maybe you're storing heavier parts that need a steeper slope), you don't have to take the whole rack apart. Just loosen the rotatory joint's nut, pivot, and retighten. It's that simple.
You'll need: lean pipes (we recommend 28mm diameter for stability), Parallel Lean Pipe Joint One Side Rotatory (plan for 2-3 per shelf connection), aluminum pipe accessories (like end caps to prevent sharp edges), leveling feet (to keep the rack steady on uneven floors), and shelf boards (plywood or metal, depending on your load needs). Step 2: Build the Vertical Frame
Start with four vertical support pipes—these are the legs of your rack. Connect them at the bottom with horizontal pipes (using fixed joints for stability) to form a square base. Add diagonal braces if you're worried about wobbling (though with the rotatory joint's tight grip, this is often unnecessary for standard loads). Step 3: Attach the Rotatory Joints for Shelves
Here's where the magic happens. For each of the 3 floors, you'll attach the fixed end of the rotatory joint to the vertical supports. Space them evenly—typically 12-18 inches apart, depending on how much weight the shelf needs to hold. Once the fixed ends are secure, rotate the movable ends to set the shelf angle. For Material Rack B, a slight 5-10 degree slope is ideal: enough to let materials slide forward when the front is emptied, but not so steep that they tip over. Tighten the joint's locking nut, and the angle stays locked in place. Step 4: Add Horizontal Shelf Pipes
Slide the horizontal lean pipes into the movable ends of the rotatory joints. Since the joints are already angled, the shelves will naturally slope. For extra stability, add cross-braces between the horizontal pipes (again, using rotatory joints if you need to adjust their angle). Step 5: Install Shelf Boards and Finishing Touches
Lay your shelf boards across the horizontal pipes. If you're using a flow rack design, you could even add roller tracks (another common aluminum pipe accessory) instead of solid boards, letting materials glide even more smoothly. Finally, cap the pipe ends with aluminum end caps to prevent scratches on parts or workers' hands. The best part? If next month you need to adjust the shelf angle (maybe you're storing heavier parts that need a steeper slope), you don't have to take the whole rack apart. Just loosen the rotatory joint's nut, pivot, and retighten. It's that simple.

Why Rotatory Joints Beat Traditional Joints for Material Rack B
Still on the fence about whether the Parallel Lean Pipe Joint One Side Rotatory is worth the investment? Let's put it head-to-head with traditional fixed joints in a quick comparison:
| Feature | Traditional Fixed Joints | Parallel Lean Pipe Joint One Side Rotatory |
|---|---|---|
| Angle Adjustment | None—angle is fixed during assembly | 180° rotation; adjust anytime without disassembly |
| Assembly Time | Longer—requires precise pre-measurement of angles | Shorter—adjust on the fly; no need for perfect initial measurements |
| Reusability | Low—difficult to repurpose for racks with different angles | High—easily reconfigured for new rack designs or load requirements |
| Compatibility with Flow Rack Designs | Poor—sloped shelves require custom-cut pipes or shims | Excellent—built-in rotation makes sloped shelves simple to install |
| Long-Term Cost | Higher—may need to replace racks when needs change | Lower—one rack can adapt to multiple uses over time |
As the table shows, the rotatory joint isn't just a "nice-to-have"—it's a cost-saver and time-saver, especially for dynamic environments where needs evolve. For Material Rack B, which is all about maximizing storage density without sacrificing accessibility, this flexibility is a game-changer.
Beyond the Joint: Complementary Accessories for Material Rack B
The Parallel Lean Pipe Joint One Side Rotatory is the star, but even stars need a supporting cast. To get the most out of your Material Rack B, pair the rotatory joint with these aluminum pipe accessories:
End Caps
: These plastic or rubber caps snap onto the ends of lean pipes, preventing sharp edges from damaging parts or injuring workers. They're cheap, easy to install, and a must-have for any rack.
Leveling Feet
: Factory floors are rarely perfectly flat. Leveling feet screw into the bottom of vertical pipes, letting you adjust each leg's height to keep the rack stable and shelves even.
Roller Tracks
: For true flow rack functionality, add roller tracks to your shelves. These aluminum or plastic tracks let materials slide forward as items are removed, so the next part is always at the front. They're especially useful for Material Rack B's 3 rows, where reaching the back of a shelf could otherwise mean stretching or straining.
Pipe Clamps
: If you need to attach tools, label holders, or small bins to the rack, pipe clamps secure them tightly without damaging the pipes. They're adjustable, so you can move them as your needs change.
Together, these accessories turn a basic rack into a customized storage solution that works
for
your team, not against them.
Real-World Results: How One Factory Transformed with Material Rack B
Let's hear from a real user. John, a production supervisor at a mid-sized electronics manufacturer, was struggling with his team's old storage setup. "We were using these bulky wooden shelves that we'd had for years," he told me. "They were wobbly, and since they were flat, workers had to reach all the way to the back to grab parts. It was slow, and we kept having issues with parts falling off the back."
When John's team switched to Material Rack B with Parallel Lean Pipe Joint One Side Rotatory, the change was immediate. "The rotatory joints let us slope the shelves just enough that parts roll forward on their own," he said. "Now, when someone takes the front part, the next one slides into place. No more stretching, no more wasted time. We estimate we've cut down on 'hunting for parts' time by about 20%—that adds up to hours every week."
He also mentioned the flexibility: "Last quarter, we started making a new circuit board that's a bit taller than our old ones. With the old shelves, we would've had to build a whole new rack. With the rotatory joints? We just loosened the nuts, tilted the shelves up a bit to make more vertical space, and tightened them back. Done in 10 minutes. That's the kind of adaptability we need to stay competitive."
Caring for Your Rotatory Joints: Simple Maintenance Tips
Like any tool, your Parallel Lean Pipe Joint One Side Rotatory will last longer with a little care. Here's how to keep them in top shape:
Keep Them Clean
: Factory floors can get dusty or greasy. Wipe down the joints with a dry cloth every month or so to prevent debris from gumming up the rotation mechanism.
Tighten Regularly
: Over time, vibrations from the production line can loosen the locking nut. Give it a quick twist with a wrench every few weeks to make sure the angle stays secure.
Lubricate Sparingly
: If the rotation starts to feel stiff, a drop of machine oil on the joint's pivot point will smooth things out. Avoid over-lubricating—excess oil can attract dust.
replace When Worn
: If the locking nut strips or the pivot point becomes too loose to hold angle, replace the joint. Most suppliers offer affordable replacements, and it's better to swap out one joint than risk a shelf collapsing.
Final Thoughts: Invest in Flexibility, Invest in Productivity
Material Rack B (3 row and 3 floor) is more than just a storage unit—it's a tool for efficiency. And the Parallel Lean Pipe Joint One Side Rotatory is the key to unlocking its full potential. By letting you adjust angles on the fly, simplify assembly, and adapt to changing needs, this joint turns a basic rack into a long-term investment in your team's productivity.
So, if you're tired of rigid, outdated storage solutions that hold your production back, it's time to make the switch. Pair the rotatory joint with lean pipe, aluminum pipe accessories, and a little creativity, and you'll wonder how you ever worked without it. After all, in manufacturing, the best systems aren't just built to last—they're built to evolve.