- Company Articles
- Products and Technology
- Installation And Maintenance
- Parallel Rotatory Lean Pipe Joint Chrome for Workbench E: Installation Guide

Parallel Rotatory Lean Pipe Joint Chrome for Workbench E: Installation Guide
Related Product
Parallel Rotatory Lean Pipe Joint
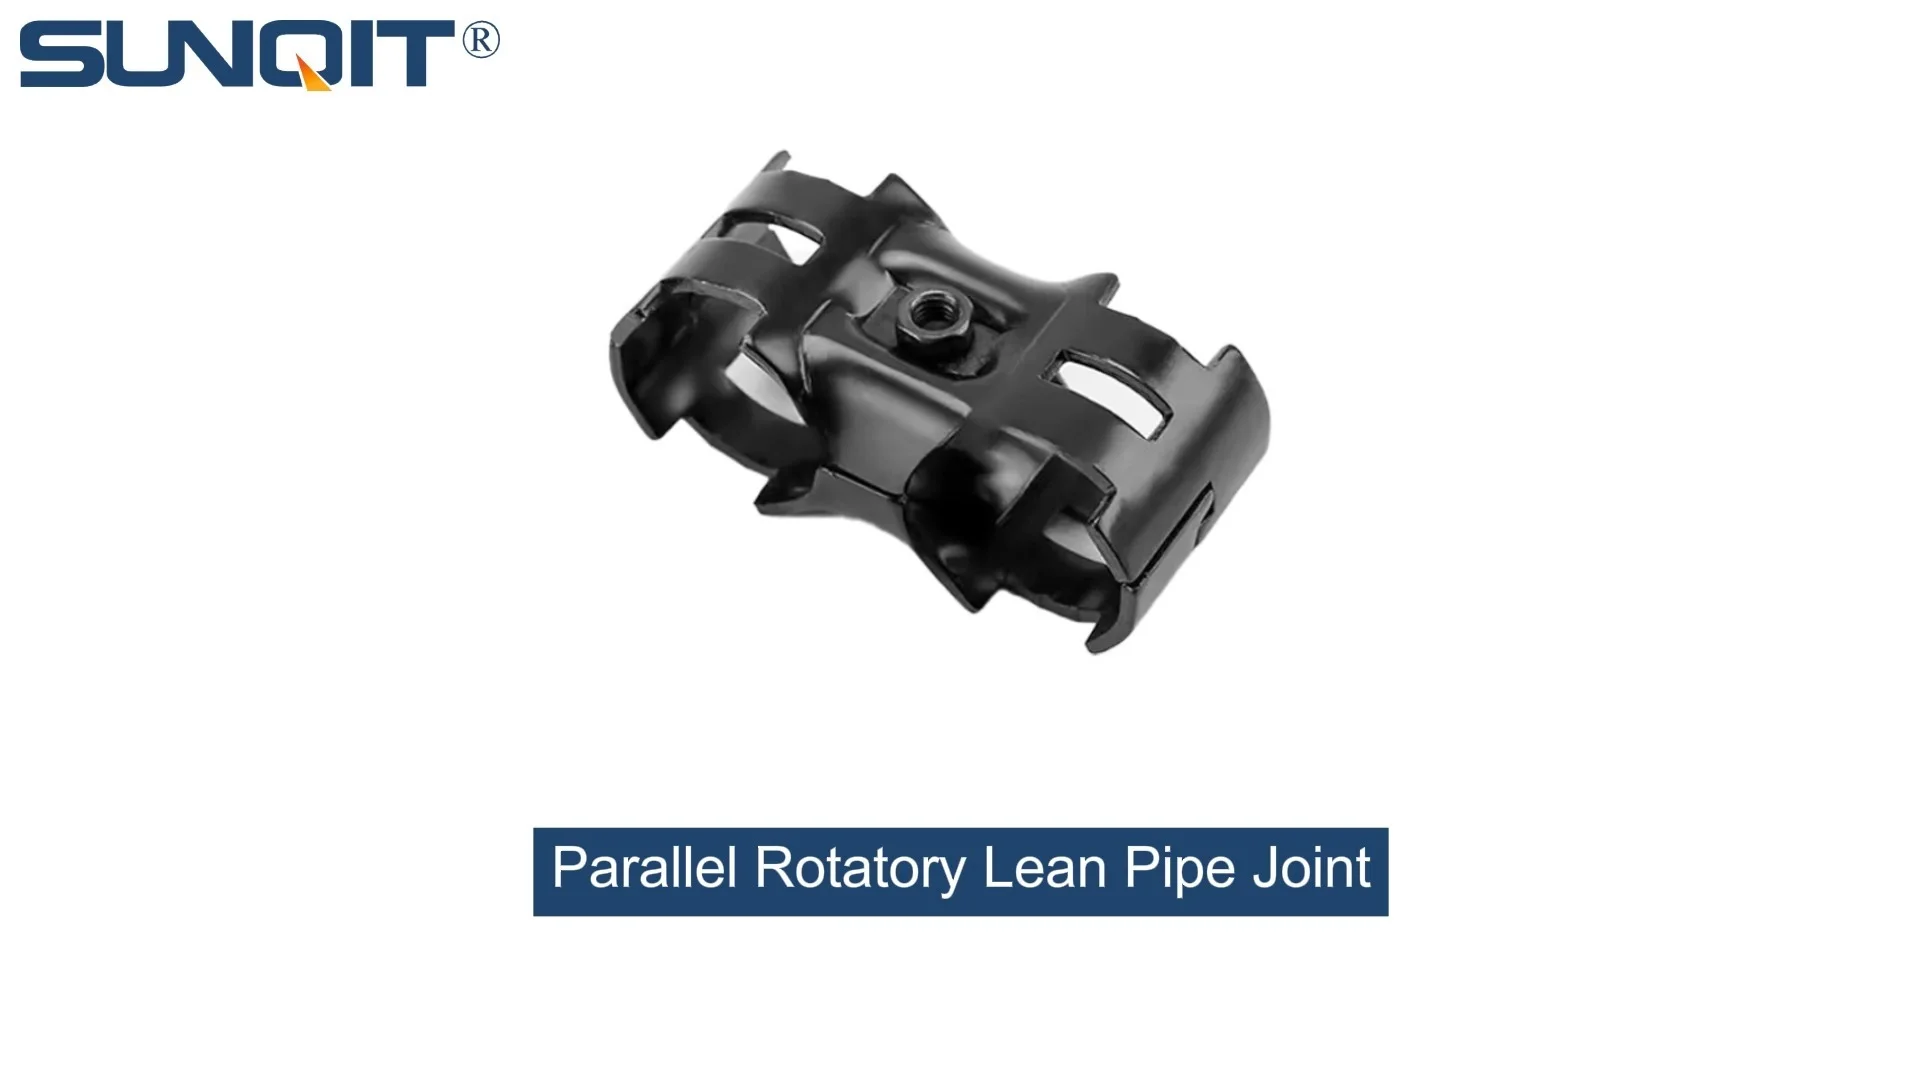
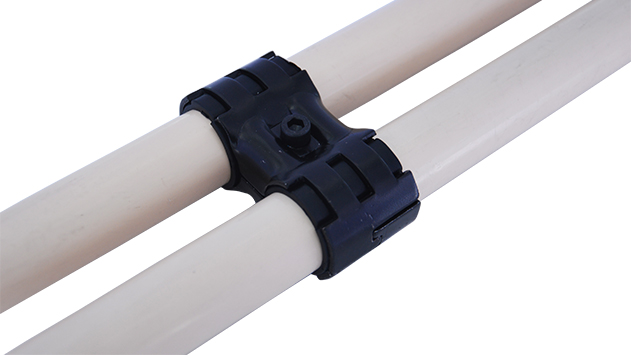
Parallel rotatory lean pipe joint, for 2 pcs pipe conenction in parallel direction with rotatory function.
Walk into any bustling production facility, and you'll notice the heartbeat of the operation: workstations. They're where ideas turn into products, where teams collaborate, and where efficiency can make or break a day's output. Among these workhorses, Workbench E (single deck-without caster) stands out for its simplicity and adaptability—designed to keep tools, parts, and projects organized without the bulk of casters, making it a staple in assembly lines, labs, and small-scale production setups. But even the most reliable workbench relies on one critical detail: the connections that hold it together. That's where the Parallel Rotatory Lean Pipe Joint Chrome comes in. This unassuming component isn't just a "part"—it's the bridge between rigidity and flexibility, ensuring your Workbench E stays sturdy while letting you reconfigure it as your needs change. In this guide, we'll walk through everything you need to know to install this joint properly, from gathering tools to testing the final setup. Whether you're a seasoned facility manager or a new technician setting up your first workstation, this step-by-step process will help you build a workbench that's not just functional, but built to grow with your team.
What Is the Parallel Rotatory Lean Pipe Joint Chrome?
Before we dive into installation, let's take a moment to understand why this joint matters. The Parallel Rotatory Lean Pipe Joint Chrome is a specialized connector designed for lean pipe systems—those modular setups that use pipes and joints to create workbenches, racks, and trolleys. Unlike fixed joints that lock pipes in place, this one has a unique rotatory feature: it lets connected pipes pivot parallel to each other, giving you the freedom to adjust angles or reposition components without disassembling the entire structure.
What makes it "chrome"? The outer surface is plated with chrome, a finish known for two key benefits: durability and resistance. In factory environments where dust, moisture, or occasional spills are common, chrome resists rust and corrosion, ensuring the joint stays smooth and functional for years. It also adds a sleek, professional look—small detail, but one that makes your workstation feel intentional, not just thrown together.
And why pair it with Workbench E (single deck-without caster) ? Workbench E is built for stability, with a single flat deck that holds up under heavy tools or materials. But stability shouldn't mean rigidity. Maybe you need to angle a shelf to better reach parts, or pivot a side rail to accommodate a larger project. The parallel rotatory joint lets you do that on the fly, turning a static workbench into a dynamic workspace. It's the kind of flexibility that makes lean manufacturing work—adapting quickly to new tasks without wasting time or money on new equipment.
Tools You'll Need
Installing the Parallel Rotatory Lean Pipe Joint Chrome doesn't require a fully equipped machine shop, but having the right tools on hand will make the process smoother and ensure a secure fit. Here's what you'll need:
| Tool | Use | Pro Tip |
|---|---|---|
| Hex Key Set (Metric) | Tightening the set screws on the joint | Look for a set with ball-end hex keys—they're easier to use in tight spaces. |
| Adjustable Wrench | Holding pipes steady while tightening joints | Wrap the jaws in tape to avoid scratching the chrome finish. |
| Measuring Tape | Ensuring pipes are aligned correctly before attaching the joint | Opt for a tape with both metric and imperial units—lean systems often use metric, but double-checking never hurts. |
| Level (2-foot or longer) | Checking that the workbench frame is straight and level | A bubble level works best here—digital levels can be finicky on uneven floors. |
| Rubber Mallet | Gently tapping pipes into place without damaging them | Avoid metal hammers—they can dent aluminum pipes or scratch chrome. |
| Clean Cloth | Wiping down pipes and joints to remove dust or oil before installation | Microfiber cloths work best—they pick up debris without leaving lint. |
| Thread Locker (Medium Strength) | Securing set screws to prevent loosening over time | Use sparingly—too much can make future adjustments hard. A drop on each screw is enough. |
You'll also need the parts themselves: the Parallel Rotatory Lean Pipe Joint Chrome , the pipes for your Workbench E frame (typically aluminum or steel lean pipe), and any additional Lean Pipe and Accessories like washers or locknuts that came with your joint. Double-check that all parts are included and undamaged before starting—missing a washer or having a bent joint can derail the process later.
Step-by-Step Installation Guide
Now that you have your tools and parts ready, let's walk through installing the Parallel Rotatory Lean Pipe Joint Chrome on your Workbench E (single deck-without caster) . We'll break this down into six clear steps, with tips to avoid common mistakes along the way.
Step 1: Unbox and Inspect the Joint and Parts
Start by unpacking the Parallel Rotatory Lean Pipe Joint Chrome and any accompanying Lean Pipe and Accessories . Lay everything out on a clean, flat surface—maybe a spare table or the floor. Check the joint for any visible damage: dents, cracks, or chipped chrome. The rotatory mechanism should spin smoothly when you turn it by hand; if it's stiff or makes grinding noises, the joint might be defective, and you should contact your supplier for a replacement.
Next, count the set screws (small, hexagonal screws that secure the joint to the pipes). Most parallel rotatory joints come with 4–6 set screws—make sure you have all of them. If any are missing, don't improvise with generic screws; they might not fit properly and could weaken the connection. Reach out to your lean pipe supplier for replacements instead.
Step 2: Prepare the Workbench Frame
Your Workbench E (single deck-without caster) frame is likely made of aluminum lean pipes—lightweight, strong, and easy to work with. Before attaching the joint, take a moment to clean the pipes where the joint will connect. Use a clean cloth to wipe away dust, oil, or fingerprints. Even small amounts of debris can prevent the joint from seating properly, leading to loose connections later.
Now, measure and mark where the joint will go. For most Workbench E setups, the parallel rotatory joint is used on the side rails or the crossbars that support the deck. Let's say you're attaching it to a side rail to add a pivotable shelf. Measure the distance from the top of the workbench leg to the desired height of the shelf—let's say 30 cm. Mark that spot on the side rail with a pencil (the mark will off later). Do the same on the opposite side rail to ensure both joints are at the same height—this is where the level comes in handy. Place the level across the two marks to confirm they're even; if not, adjust the marks until they are.
Step 3: Attach the Parallel Rotatory Lean Pipe Joint Chrome
Now, it's time to attach the joint to the pipe. Slide the joint over the marked spot on the side rail. Make sure the rotatory part of the joint (the section that spins) is facing the direction you want the shelf or component to pivot—for example, if you want the shelf to swing toward the workbench deck, face the rotatory end inward. Hold the joint in place with one hand, and with the other, insert the first set screw into the threaded hole on the joint. Use the hex key to tighten it just enough to hold the joint in place—don't fully tighten yet; we'll do that after aligning everything.
Repeat this process for the second set screw on the same joint (most joints have screws on opposite sides to secure the pipe). Now, move to the opposite side rail and attach the second parallel rotatory joint the same way, making sure it's aligned with the first one. Once both joints are loosely attached, place a crossbar (another aluminum pipe) between them, sliding the ends into the rotatory parts of the joints. This crossbar will support your shelf or other component, so make sure it's centered and level. Use the measuring tape to check that the distance between the joints is the same on both ends—if not, slide the joints along the rails until they are.
Step 4: Secure with Lean Pipe and Accessories
With the crossbar in place, it's time to secure all connections. Take the hex key and tighten the set screws on the side rail joints first—turn each screw a quarter-turn at a time, alternating between them to ensure even pressure. This prevents the joint from warping or bending the pipe. Stop when the screw is snug—you should feel resistance, but don't over-tighten. Stripping the threads is a common mistake here, and it's hard to fix without replacing the joint.
Next, secure the crossbar to the rotatory ends of the joints. These might have their own set screws or could use a different type of fastener, depending on the joint model. If your Lean Pipe and Accessories include lock washers, place one between the screw and the joint before tightening—they help prevent the screw from loosening due to vibration. Again, tighten snugly but not excessively. Once all screws are tight, give the crossbar a gentle shake to test stability. It should feel solid, with no wobbling or creaking.
Step 5: Add Aluminum Guide Rail A (Optional but Recommended)
To take your Workbench E setup to the next level, consider adding Aluminum Guide Rail A to the pivotable crossbar. This guide rail is designed to support smooth material flow—think sliding bins, tools, or parts across the shelf without them getting stuck. It's especially useful if you're using the shelf to hold components for assembly; the guide rail keeps everything organized and easy to reach.
To install Aluminum Guide Rail A, first measure the length of the crossbar and cut the guide rail to match (if needed—most suppliers sell pre-cut lengths). Then, attach the rail to the top of the crossbar using small brackets or clips (these usually come with the guide rail as part of lean pipe and accessories ). Align the rail so it's centered on the crossbar and use the hex key to tighten the brackets. Once installed, give a test slide with a small bin or tool— it should glide smoothly along the rail. If it sticks, check for misalignment or debris and adjust as needed.
Step 6: Test the Rotation and Make Final Adjustments
The last step is testing the rotatory function of the joint. Gently push the crossbar (with the Aluminum Guide Rail A attached) to pivot it. It should move smoothly, with no jerks or resistance. If it's stiff, check the set screws on the rotatory part of the joint—they might be too tight. Loosen them slightly (a quarter-turn) and test again. If it's too loose and swings freely, tighten the screws a bit more. The goal is a balance: easy to pivot by hand, but stable enough to hold its position when not in use.
Once the rotation feels right, do a final check of all connections. Use the adjustable wrench to hold the pipes and give each set screw a tiny tweak to ensure they're tight. Wipe down the joint with a clean cloth to remove any fingerprints or smudges from the chrome finish. Stand back and admire your handiwork—you've just turned a basic Workbench E into a flexible, functional workspace!

Troubleshooting Common Issues
Even with careful installation, you might run into a few hiccups. Here's how to fix the most common problems:
Joint is Loose After Installation
If the joint wobbles or the pipe slides inside it, the set screws might not be tight enough—or they might not be biting into the pipe properly. Try this: Loosen the screws, rotate the joint slightly (so the screws press into a new spot on the pipe), then retighten. Pipes can sometimes have smooth spots where the screws don't grip; rotating the joint fixes that. If it still loosens, apply a drop of thread locker to the screws before retightening—this creates a bond that resists vibration.
Rotation is Jerky or Stiff
Stiff rotation is often caused by debris in the rotatory mechanism or overtightened screws. First, wipe the joint with a dry cloth to remove dust. If that doesn't work, check the set screws on the rotatory part—loosen them by a quarter-turn. If it's still stiff, apply a small amount of silicone lubricant (not oil—oil attracts dust) to the rotatory joint and work it back and forth a few times. The rotation should smooth out.
Workbench Frame is Crooked
If the entire workbench leans to one side after installing the joint, the problem is likely with the initial frame alignment. Loosen the joint screws, use the level to realign the pipes, then retighten. If the floor itself is uneven (common in older factories), place shims under the workbench legs to level it out before reattaching the joint.

Maintaining Your Parallel Rotatory Lean Pipe Joint Chrome
To keep your joint (and Workbench E) working like new, a little maintenance goes a long way. Here's a quick routine:
- Weekly Cleaning: Wipe the joint with a dry microfiber cloth to remove dust and grime. If it's extra dirty, dampen the cloth with water (no soap—harsh chemicals can damage the chrome) and dry immediately.
- Monthly Lubrication: Apply a drop of silicone lubricant to the rotatory mechanism to keep it spinning smoothly. Avoid WD-40 or oil-based lubricants—they can attract dust and gum up the joint over time.
- Quarterly Tightening: Check all set screws with the hex key and tighten any that feel loose. Factories and workshops are noisy, and vibration can loosen fasteners over time.
- Annual Inspection: Look for signs of wear, like rust spots on the chrome, stripped screws, or cracks in the joint. If you notice any, replace the joint immediately—compromised connections can lead to accidents or damage to tools/parts.
Why This Matters for Your Workspace
You might be thinking, "It's just a joint—does it really make that much difference?" The short answer: yes. The Parallel Rotatory Lean Pipe Joint Chrome transforms your Workbench E (single deck-without caster) from a static table into a tool that adapts to you. Need to rearrange the workspace for a new product? Pivot the shelf out of the way. Have a taller team member using the bench? Adjust the height of the pivotable rail. It's the kind of flexibility that saves time, reduces frustration, and keeps your team focused on what matters: getting the job done.
Durability is another key benefit. Chrome plating resists rust and corrosion, even in humid or dusty environments, so the joint will last for years with minimal upkeep. And because it's compatible with standard lean pipe and accessories , you won't have to hunt for specialty parts if you need to replace something down the line—most lean pipe suppliers carry these joints in stock.
Finally, there's the cost factor. Investing in a quality parallel rotatory joint might cost a few dollars more upfront than a cheap, fixed joint, but it pays off in the long run. You won't have to replace it as often, and you'll avoid the downtime that comes with loose or broken connections. Plus, the flexibility to reconfigure your workspace means you won't need to buy a whole new workbench when your needs change—that's lean manufacturing at its best.
Final Thoughts
Installing the Parallel Rotatory Lean Pipe Joint Chrome on your Workbench E (single deck-without caster) is more than just a DIY project—it's an investment in your team's efficiency and your workspace's longevity. With the right tools, a little patience, and this guide, you can create a setup that's sturdy, flexible, and built to handle whatever the production floor throws at it. Remember: the key to success is taking your time, checking alignment often, and not cutting corners on tightening screws or maintenance. Your future self (and your team) will thank you.
So go ahead—grab your hex key, clean those pipes, and start building. Before you know it, you'll have a workbench that doesn't just hold your tools, but grows with your business. And isn't that the point of lean manufacturing? To work smarter, not harder. Happy building!