- Company Articles
- Products and Technology
- Installation And Maintenance
- Parallel Rotatory Lean Pipe Joint Chrome Installation Mistakes to Avoid

Parallel Rotatory Lean Pipe Joint Chrome Installation Mistakes to Avoid
Related Product
Parallel Rotatory Lean Pipe Joint
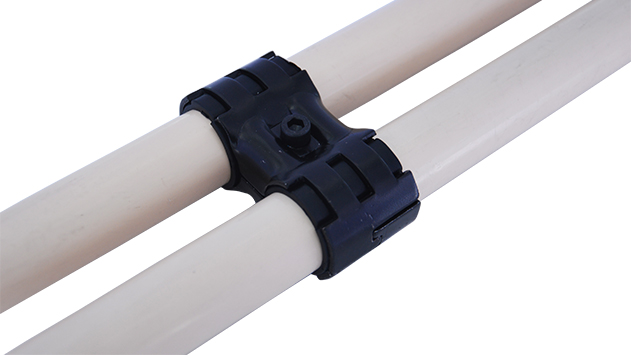
Parallel rotatory lean pipe joint, for 2 pcs pipe conenction in parallel direction with rotatory function.
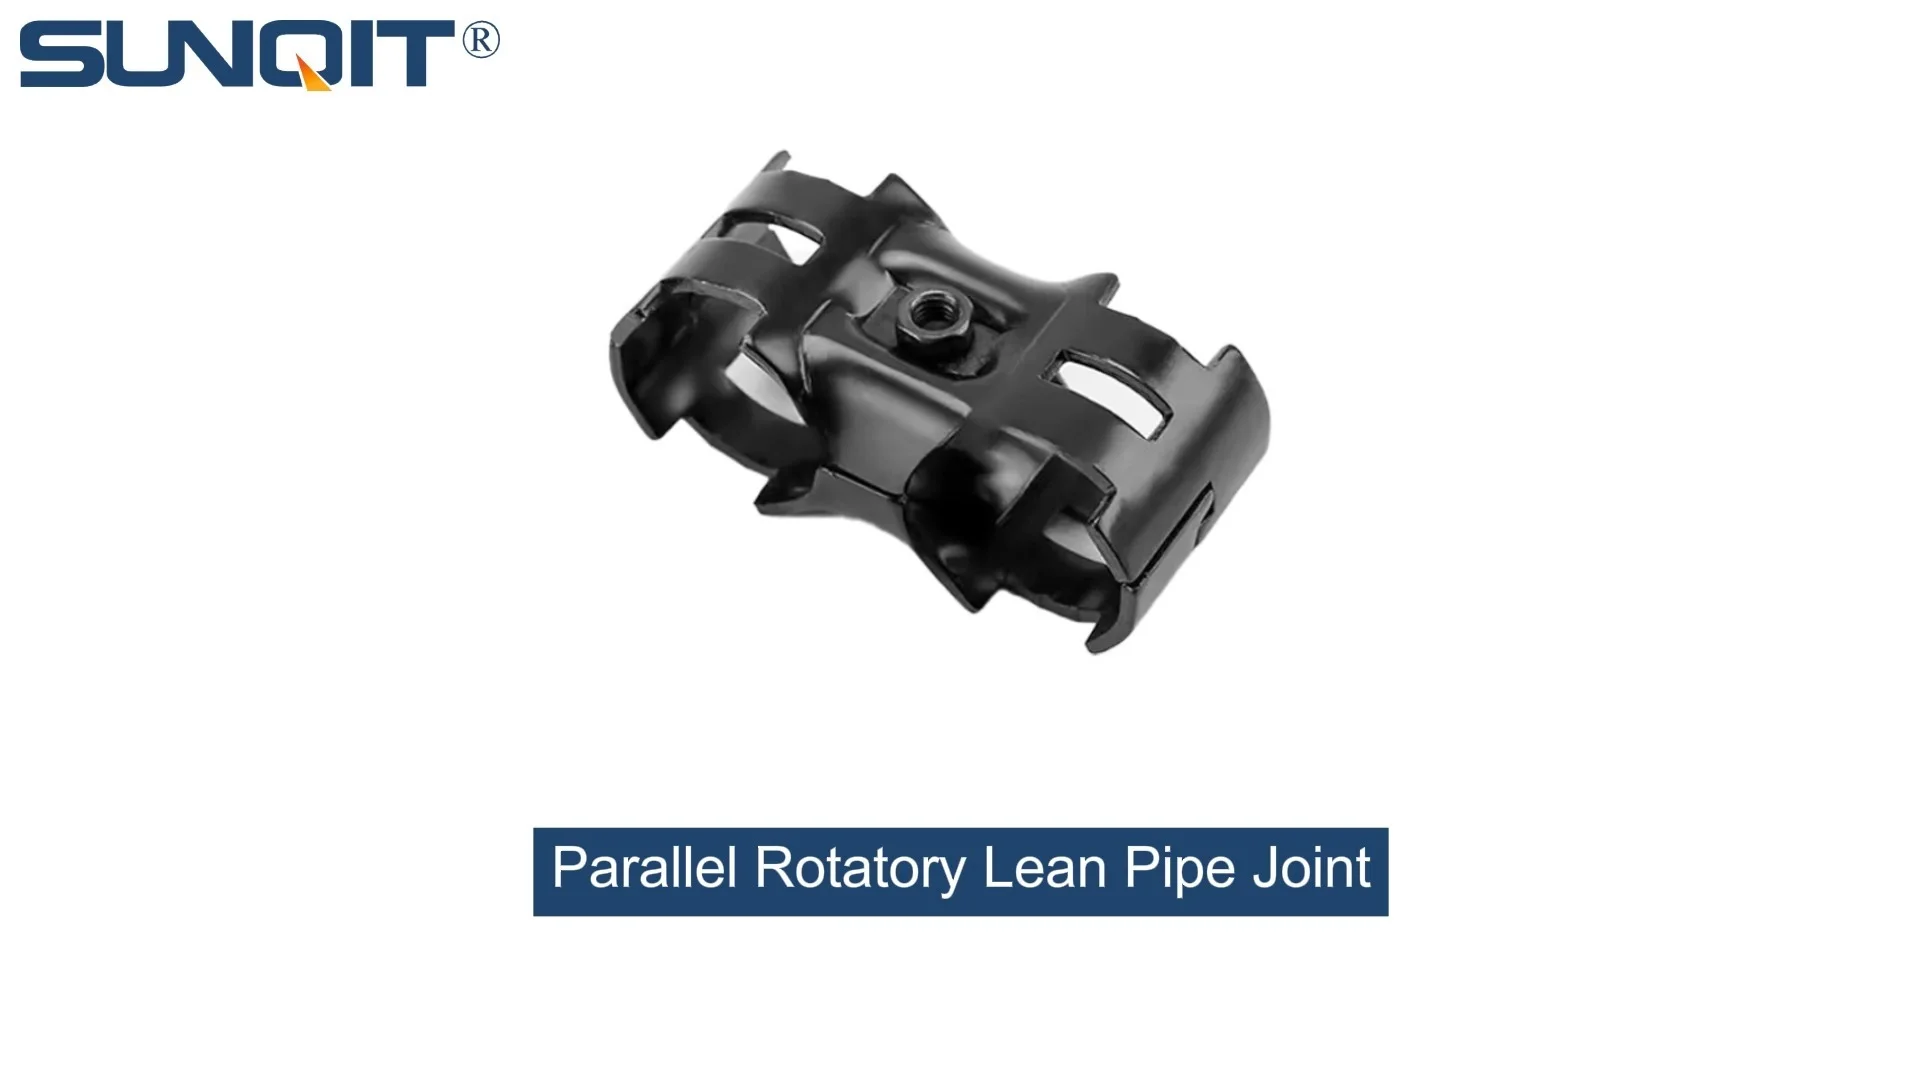
If you've ever worked on setting up a lean manufacturing system—whether it's a workbench, a material rack, or a production line conveyor—you know that the smallest components can make the biggest difference. Take the parallel rotatory lean pipe joint chrome, for example. This unassuming piece, with its shiny chrome finish and smooth rotational design, is the unsung hero of flexible, efficient workflows. It connects lean pipes, secures aluminum profiles, and allows for the kind of adjustability that keeps lean systems adaptable to changing needs. But here's the thing: install it wrong, and suddenly that "hero" becomes a liability. Loose joints, wobbly workbenches, failed load capacities, even safety hazards—these are just a few of the headaches that come from cutting corners during installation.
In this guide, we're diving deep into the most common mistakes people make when installing parallel rotatory lean pipe joint chrome. I've spent over a decade helping factories, workshops, and assembly lines optimize their lean setups, and I've seen firsthand how these tiny errors can snowball into major operational disruptions. We'll walk through why each mistake happens, the real-world consequences, and—most importantly—how to avoid them. Whether you're a seasoned technician or a team lead tackling your first lean system build, this article will save you time, money, and plenty of frustration.
Understanding the Parallel Rotatory Lean Pipe Joint Chrome
Before we jump into mistakes, let's make sure we're all on the same page about what this joint actually does. The parallel rotatory lean pipe joint chrome is a specialized connector designed for lean pipe systems—those modular setups used in manufacturing, warehousing, and assembly to create everything from workbenches to flow racks. What sets it apart is its ability to rotate along a parallel axis, allowing connected pipes or aluminum profiles to pivot smoothly without losing stability. The chrome plating adds corrosion resistance, making it ideal for environments where moisture or chemicals might be present (think automotive shops or food processing plants).
These joints are typically used in applications where adjustability is key. For example, a workbench with a rotating tool holder, or a material rack where shelves need to tilt to feed parts to an assembly line. When installed correctly, they handle moderate loads (usually up to 50kg per joint, depending on the model) and maintain their rotation for years. But get the installation wrong, and that rotation becomes stiff, or worse, the joint fails entirely.
Real-World Impact: A electronics manufacturer I worked with once had to halt production for two days because their parallel rotatory joints, used to feed circuit boards onto a conveyor, had seized up. The root cause? The installer had skipped cleaning the threads before tightening, and debris had gunked up the mechanism. What should have been a 10-minute maintenance check turned into a costly shutdown. Don't let that be you.
Mistake #1: Using the Wrong Tools (Or No Tools at All)
Let's start with the basics: tools. You'd think this would be straightforward, but I'm constantly surprised by how many teams try to install parallel rotatory lean pipe joint chrome with whatever's lying around the workshop. Pliers, adjustable wrenches, even screwdrivers—these are not the tools for the job. And while "hand-tightening" might seem like a quick fix, it's a recipe for disaster.
Why This Happens
Mostly, it's a mix of overconfidence and time pressure. "It's just a joint—how tight can it be?" I've heard that more times than I can count. Or, "We're in a hurry; we'll come back and torque it later." Spoiler: "Later" never comes, and that loose joint will haunt you.
The Problem
Parallel rotatory joints rely on precise torque to balance two needs: holding the lean pipe or aluminum profile securely, and allowing smooth rotation. Use pliers, and you'll either strip the chrome plating (ruining corrosion resistance) or over-tighten the threads, warping the joint's internal mechanism. Under-tighten with just your hands, and the joint will loosen over time, especially under vibration (common in production environments). That looseness leads to wobbling, which stresses the joint and the connected components—think bent lean pipes or cracked aluminum profiles.
How to Avoid It
The fix here is simple: use the right tools. Every parallel rotatory lean pipe joint chrome comes with a recommended torque specification (usually between 8-12 Nm for standard models). You'll need a torque wrench with a socket that fits the joint's nut—most are either 10mm or 13mm. If the joint has set screws (some models do, to lock rotation in place), you'll also need a hex key (Allen wrench) of the correct size (often 4mm or 5mm).
Pro tip: Invest in a torque wrench with a digital readout if you can. They're more precise than analog models, and you'll avoid the guesswork. And never, ever use impact drivers—their sudden force can shatter the joint's internal bearings.
Tools You Actually Need (A Quick Reference)
| Tool | Purpose | Why It's Essential | Common Substitutes to Avoid |
|---|---|---|---|
| Torque wrench (8-20 Nm range) | Precise tightening of the joint nut | Ensures torque matches manufacturer specs | Pliers, adjustable wrench, "elbow grease" |
| Hex key set (metric) | Tightening set screws (if applicable) | Prevents stripping of screw heads | Flathead screwdriver, knife (yes, really) |
| Wire brush or deburring tool | Cleaning threads and mating surfaces | Removes debris that causes binding | Your finger, compressed air alone |
| Bubble level (6-inch or longer) | Checking alignment during installation | Ensures joint is straight, reducing stress | Eyeballing it, "it looks straight" |
Mistake #2: Ignoring Surface Preparation (Dirt, Rust, and Grease Are the Enemy)
You've got the right tools—great! Now, let's talk about what you're attaching the joint to: the lean pipe, aluminum profile, or whatever surface it's mating with. Here's a scenario I see all the time: a team unboxes the joint, grabs a lean pipe, and starts screwing them together without so much as a wipe. Big mistake. Dirt, factory grease, even tiny rust spots on the pipe can sabotage the installation.
Why This Happens
Surface prep feels like a "nice-to-have" rather than a "must-do." After all, the joint is chrome-plated, so it's "tough," right? Wrong. The mating surfaces—where the joint connects to the lean pipe or aluminum profile—need to be clean and smooth to create a tight, stable bond. Grease or oil on the threads will prevent the nut from tightening properly, leading to slippage. Dirt or rust creates gaps, which mean the joint isn't fully seated, increasing stress points.
The Problem
Let's break it down. If there's grease on the lean pipe threads, when you tighten the joint, the nut will feel tight, but it's actually just sliding on the grease. Over time, as the grease wears off, the joint loosens. Dirt or metal shavings (common if the pipe was cut recently) can scratch the chrome plating, creating weak spots for corrosion. And rust? It acts like a wedge, pushing the joint and pipe apart, leading to wobble.
How to Fix It
Surface prep takes 2 minutes per joint—don't skip it. Here's the process:
- Clean the lean pipe: Use a wire brush to scrub the threads and the area where the joint will sit. If there's heavy grease, wipe with a rag dampened with isopropyl alcohol (avoid harsh solvents—they can damage plastic components if your lean pipe is PE-coated).
- Deburr the pipe (if cut): If you've cut the lean pipe to length, use a deburring tool to remove sharp edges or metal shavings from the end. A file works in a pinch, but a deburring tool is faster and cleaner.
- Inspect the joint: Check the joint's threads and mating surface for dirt or factory grease (some joints come lightly oiled for shipping). Wipe with a clean rag—no need for alcohol here, as you don't want to strip any protective coatings.
- Dry thoroughly: Moisture + metal = rust. Make sure everything is dry before assembly.
Pro Tip: For aluminum profiles (which are often used with these joints), use a microfiber cloth to clean the T-slot where the joint mounts. Aluminum oxidizes quickly, and that oxide layer can prevent the joint from seating flush. A quick wipe removes the oxide and ensures a tight fit.

Mistake #3: Misaligning with Aluminum Profiles (A Hidden Stress Risk)
Parallel rotatory lean pipe joint chrome is often used to connect lean pipes to aluminum profiles—think a workbench frame where the legs are aluminum profile and the shelves are lean pipe. When this happens, alignment is everything. Even a tiny 2-3 degree misalignment can put massive stress on the joint, leading to premature failure.
Why This Happens
Aluminum profiles have precise T-slots, and lean pipes are round—matching the two requires care. Installers often rush to get the joint in place, eyeballing alignment instead of using a level. Or, they overtighten one side first, pulling the joint out of square before they can adjust the other side.
The Problem
Imagine a workbench where the front legs are 5mm closer together than the back legs. The top, connected with parallel rotatory joints, will warp slightly to compensate. That warp puts stress on the joints—one side is pulled tight, the other is loose. Over time, the tight side's threads will strip, and the loose side will start to rotate unexpectedly. In extreme cases, the aluminum profile itself can bend, as the joint acts like a lever, amplifying the misalignment force.
How to Get Alignment Right
Alignment is a two-person job if you're working with long pipes or large profiles, but even solo, you can do it with a few tricks:
- Use a bubble level: Place the level along the lean pipe once the joint is loosely attached to the aluminum profile. Adjust the joint until the pipe is perfectly horizontal (or vertical, depending on the setup).
- Measure diagonally: For rectangular frames (like a workbench top), measure the diagonal distance from corner to corner. If the distances are equal, the frame is square. If not, adjust the joints until they match.
- Tighten in stages: Don't fully tighten one joint first. Snug all joints loosely, check alignment, then tighten each a little at a time, alternating sides. This prevents pulling the frame out of square.
- Mark the position: If you're installing multiple joints along an aluminum profile, use a pencil to mark where each joint should sit before attaching. This ensures they're evenly spaced and aligned.

Mistake #4: Overlooking Load Capacity (Your Joint Isn't Superman)
"It's just a few extra pounds—what's the worst that can happen?" A lot, actually. Parallel rotatory lean pipe joint chrome is designed for specific load limits, and exceeding them is one of the fastest ways to cause failure. I've seen joints snap clean in half because someone loaded a 100kg toolbox onto a shelf supported by joints rated for 50kg.
Why This Happens
Load capacity specs are often buried in the product manual, and let's be honest—most people don't read manuals. Or, teams assume that "if it fits, it works." They also forget that dynamic loads (like a part sliding off a tilted shelf) are harder on joints than static loads (a box sitting still).
The Problem
Every parallel rotatory joint has two load ratings: static (weight when stationary) and dynamic (weight when moving/rotating). Exceed either, and the joint's internal bearings or threads will fail. Static overload usually leads to bending or cracking of the joint body. Dynamic overload? The rotation mechanism seizes, or the joint pops loose entirely. And when a joint fails under load, it's not just the joint that's damaged—whatever it's holding (tools, parts, even a worker's arm) can come crashing down.
How to Avoid Overloading
First, find the load rating. It's usually on the product label, in the manual, or on the supplier's website. Most standard parallel rotatory lean pipe joint chrome handles 30-50kg static and 20-35kg dynamic. If you need more, look for heavy-duty models (they'll have thicker walls or reinforced threads).
Then, calculate your actual load. A good rule of thumb: assume the load is 20% higher than you think. If you're putting a shelf with 40kg of parts on two joints, that's 20kg per joint—well within the 50kg static rating. But if you add a rotating tool holder that weighs 15kg, now each joint is handling 27.5kg. Still okay, but push it to 60kg total, and you're at 30kg per joint—getting close to the dynamic limit if the holder rotates often.
When in doubt, add more joints. Extra support never hurt, and it extends the life of your entire lean system.
Mistake #5: Skipping the Test Rotation (Smoothness = Longevity)
You've tightened, aligned, and loaded—now you're done, right? Wrong. The final step, and one that's often skipped, is testing the joint's rotation. If it doesn't spin smoothly, all your hard work is for nothing.
Why This Happens
After hours of installing, it's tempting to call it a day. "It's tight, it's aligned—what more do I need to check?" But rotation is the joint's whole purpose. A stiff or jerky rotation means something's wrong, and it will only get worse over time.
The Problem
Stiff rotation is usually caused by one of three things: over-tightening the set screw (if the joint has one), debris in the bearing, or misalignment. If you ignore it, every time someone tries to rotate the joint, they'll put extra force on it, wearing down the internal components. Eventually, the joint will seize, or the set screw will strip, leaving you with a non-rotating joint that's useless for its intended purpose.
How to Test (and Fix) Rotation
Testing is simple: grasp the lean pipe or attached component and rotate it through its full range of motion (usually 180 degrees for these joints). It should move smoothly, with no "catch" or resistance. If it's stiff:
- Check the set screw: If the joint has a set screw to lock rotation (common in applications where you want to fix the angle), loosen it 1/4 turn. Sometimes it's tightened too much, jamming the mechanism.
- Clean the bearing: If there's debris, spray a tiny amount of dry lubricant (like graphite powder) into the joint's rotation point. Avoid oil-based lubricants—they attract dirt.
- Recheck alignment: Misalignment can cause the joint to bind. Loosen the mounting bolts, realign, and retighten.
If rotation is too loose (wobbles when moving), the opposite is true: tighten the set screw slightly, or check if the joint's internal bearings are worn (in which case, replace the joint—don't try to repair it).
Conclusion: Installation = Foundation (Don't Cut Corners)
Parallel rotatory lean pipe joint chrome might seem like a small part of your lean system, but its installation is the foundation of everything it supports. From using the right tools to testing rotation, each step matters. Ignore them, and you're looking at downtime, repairs, and safety risks. But take the time to do it right, and you'll have a joint that works seamlessly for years—keeping your production line moving, your workbench stable, and your team productive.
Remember: lean manufacturing is about efficiency, and efficiency starts with the details. Don't let a simple joint installation derail your system. Grab your torque wrench, clean those threads, align carefully, check the load, and test that rotation. Your future self (and your production schedule) will thank you.