- Company Articles
- Products and Technology
- Product knowledge
- Parallel Rotatory Lean Pipe Joints in Material Racks: Design Tips

Parallel Rotatory Lean Pipe Joints in Material Racks: Design Tips
Related Product
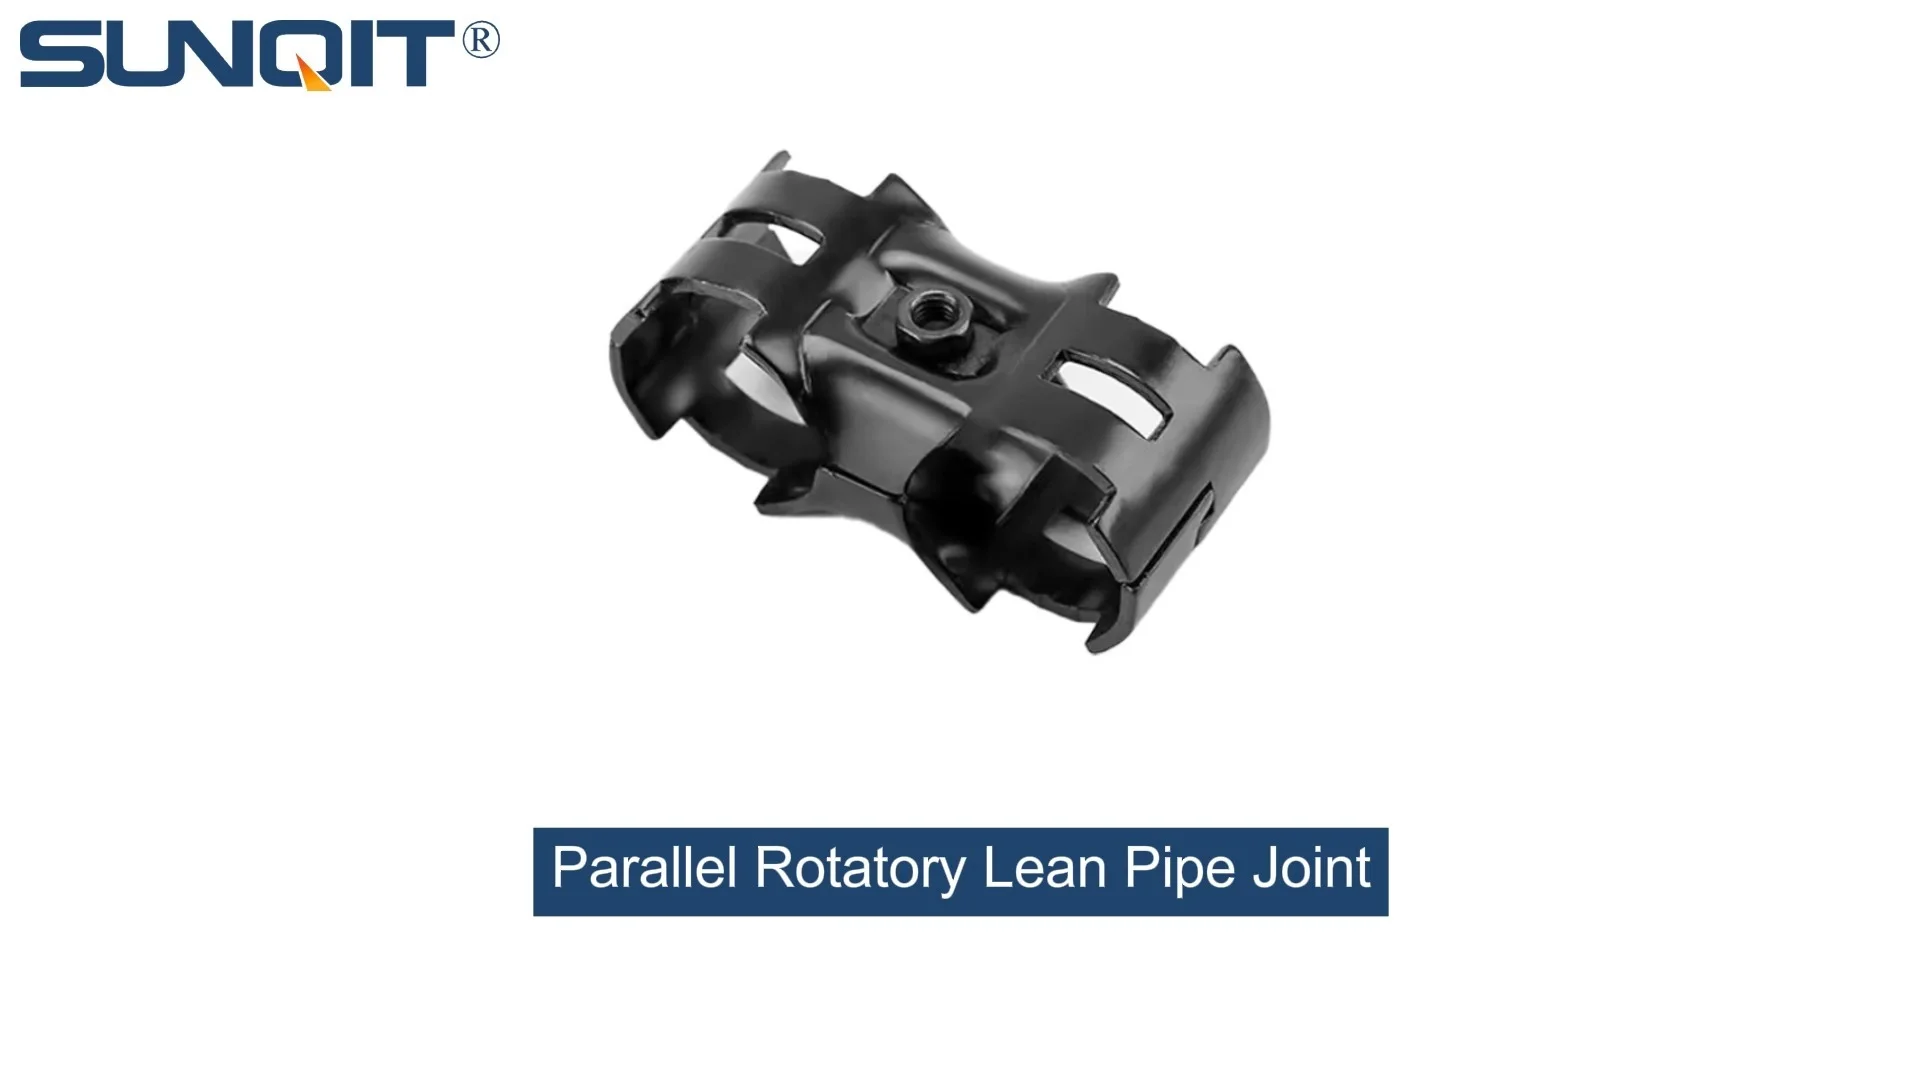
Parallel Rotatory Lean Pipe Joint
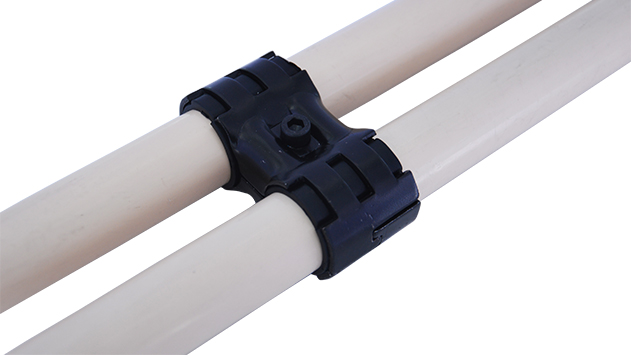
Parallel rotatory lean pipe joint, for 2 pcs pipe conenction in parallel direction with rotatory function.
Walk into any modern manufacturing facility, and you'll notice a quiet revolution happening on the shop floor. It's not just about faster machines or smarter software—it's about the unsung heroes of efficiency: the structures that hold, move, and organize materials. Material racks, workbenches, and flow systems are the backbone of lean manufacturing, and at the heart of many of these systems lies a small but mighty component: the parallel rotatory lean pipe joint. These unassuming connectors are what turn rigid, one-size-fits-all setups into flexible, adaptable workspaces that grow with your needs. In this article, we'll dive deep into how to design material racks using parallel rotatory lean pipe joints, exploring everything from their basic functionality to real-world applications, common pitfalls, and pro tips to maximize their potential.
Understanding Parallel Rotatory Lean Pipe Joints: More Than Just a Connector
Let's start with the basics: What exactly is a parallel rotatory lean pipe joint? At first glance, it might look like any other metal connector—small, metallic, with a few holes and levers. But its magic lies in its name: "parallel rotatory." Unlike fixed joints that lock pipes into a static angle, these joints allow two parallel pipes to rotate relative to each other, all while staying aligned. Imagine two pipes running side by side; with a fixed joint, they're stuck in one position. With a parallel rotatory joint, you can pivot one pipe up, down, or sideways (within a designed range) without breaking their parallel orientation. This flexibility is a game-changer for material racks, where access to stored items, adjustability for different part sizes, and quick reconfiguration are key.
There are a few variations of these joints, but one of the most popular in industrial settings is the parallel rotatory lean pipe joint chrome . The chrome plating isn't just for aesthetics—though it does add a sleek, professional look. Chrome acts as a barrier against corrosion, making these joints ideal for environments where moisture or chemicals might be present, like automotive or food processing plants. It also reduces friction, ensuring smooth rotation even after months of heavy use. For less demanding environments, the standard parallel rotatory lean pipe joint (without chrome) works perfectly, offering the same rotational benefits at a slightly lower cost.
But why does rotation matter in a material rack? Let's say you're storing boxes of varying heights on a multi-tiered rack. With fixed shelves, you're stuck with uniform spacing—either wasting space above shorter boxes or struggling to fit taller ones. A parallel rotatory joint lets you tilt a shelf slightly to create a gentle slope, making it easier to slide items forward (hello, first-in-first-out inventory!). Or, if a new product line requires wider spacing between shelves, you can pivot the joint to adjust the height in minutes, no tools required. This adaptability is why these joints are a cornerstone of lean pipe and accessories systems—they embody the lean principle of "eliminate waste" by ensuring your material storage grows and changes with your production needs, rather than becoming obsolete when your processes evolve.
Design Principles: Building a Material Rack That Works for You
Designing a material rack with parallel rotatory lean pipe joints isn't just about screwing pipes and joints together—it's about intentionality. You need to think about what you're storing, how often you access it, who's using the rack, and how it fits into your overall workflow. Let's break down the key principles that will guide your design.
1. Start with the Load: Know What You're Supporting
The first question to ask is: What's the maximum weight each shelf will hold? Parallel rotatory joints are strong, but they're not indestructible. Most standard joints can handle loads between 50–150 kg per connection, depending on the pipe material (aluminum vs. steel) and the joint's build quality. If you're storing heavy components—like engine parts or metal castings—opt for heavy-duty chrome-plated joints and thicker pipes (1.5mm or 2.0mm wall thickness). For lighter items, like electronics or small plastic parts, a 1.2mm pipe with a standard joint will suffice.
Pro tip: Always factor in dynamic loads, not just static ones. If workers will be sliding boxes onto the shelf or pulling items quickly, the joint will experience sudden stress. Err on the side of overestimating by 20%—it's better to have a joint that's stronger than needed than one that bends under pressure.
2. Accessibility: Rotation Should Enhance, Not Hinder
The beauty of parallel rotatory joints is their ability to make shelves more accessible, but poor placement can turn that advantage into a frustration. When designing your rack, consider the height of the average worker. Shelves at eye level or waist height are easiest to access, so reserve those for frequently used items. For lower shelves (near the floor) or higher shelves (above shoulder height), use the rotatory feature to tilt the shelf upward or downward, reducing the need to bend or stretch. For example, a lower shelf tilted at a 15° angle lets workers slide boxes out without kneeling, while a higher shelf tilted downward makes it easier to reach the back items without a ladder.
Another accessibility consideration is spacing between shelves. The rotatory joint's range of motion (usually 0–90°) means you can adjust the angle, but you still need to leave enough vertical clearance to tilt the shelf without hitting the one above. A good rule of thumb is to add 10–15 cm of extra space between shelves that will be rotated regularly. This prevents items from getting crushed and makes adjustments smoother.
3. Balance and Stability: The Foundation of Safety
A material rack is only useful if it's safe. Parallel rotatory joints add movement, which can affect stability if not balanced properly. Here's how to ensure your rack stays upright:
- Wider base than top: Like a pyramid, your rack should have a broader base to lower the center of gravity. If the base is too narrow, rotating a top shelf could cause the rack to tip.
- Even weight distribution: Avoid overloading one side of the rack. If most of your heavy items are on the left, rotating a right-side shelf might unbalance the structure.
- Locking mechanisms: Many parallel rotatory joints come with a locking lever or bolt that lets you fix the shelf at a specific angle once you've positioned it. Always lock the joint after adjustment—leaving it free to rotate could lead to accidental movement, especially in high-traffic areas.
4. Modularity: Plan for Tomorrow
One of the biggest mistakes in material rack design is thinking "this is how we'll always do it." In manufacturing, change is constant—new products, updated processes, seasonal demand spikes. Your rack should be able to adapt without a complete overhaul. Parallel rotatory joints excel here because they're part of a modular system. Use standardized pipes (like 28mm or 30mm diameter) and compatible accessories (casters, roller tracks, end caps) so you can add shelves, extend the rack, or reconfigure the layout later. For example, if you start with a 3-tier rack and six months later need a fourth tier, you can simply add two more vertical pipes and a few rotatory joints—no need to buy a whole new rack.
Material Selection: Pipes, Joints, and Everything In Between
Now that you have the design principles down, let's talk about the materials that will bring your rack to life. The combination of pipes and joints determines everything from the rack's weight and durability to its cost and aesthetic. Here's how to choose:
Lean Pipes: Aluminum vs. Steel vs. Stainless Steel
The most common pipes used in lean systems are:
- Steel (PE-coated): The traditional choice, steel pipes are strong and affordable. The PE coating (usually blue or white) adds a layer of protection against scratches and corrosion, making them ideal for general manufacturing environments. They're heavier than aluminum, which can be a downside if you need to move the rack frequently, but their weight also adds stability.
- Aluminum: Lightweight and rust-resistant, aluminum pipes are perfect for cleanrooms, food processing, or areas where workers need to reposition the rack often. They're slightly more expensive than steel but offer better longevity in humid or wet conditions. Aluminum lean pipes pair well with parallel rotatory joints because their lighter weight reduces stress on the joint's moving parts.
- Stainless Steel: The premium option, stainless steel pipes are corrosion-proof and easy to clean, making them essential for pharmaceutical, medical device, or chemical industries. They're heavier and costlier than both steel and aluminum, but their durability in harsh environments is unmatched.
For most material racks, aluminum or PE-coated steel pipes are the sweet spot—they balance strength, cost, and versatility. If you're using parallel rotatory lean pipe joint chrome , either material works well; the chrome joint will complement the pipe's finish and add extra corrosion resistance.
Joints: Choosing the Right Rotatory Feature
Not all parallel rotatory joints are created equal. Some offer 360° rotation, while others are limited to 180° or 90°. Some have smooth, friction-free movement, while others require a bit more force to adjust. Here's how to pick:
For most material rack applications, the standard or chrome-plated parallel rotatory joint will do the job. The multi-angle version is useful if you need shelves at specific, repeatable angles (like a 45° slope for gravity-fed flow), but it's often pricier and overkill for simple storage.
Accessories: The Little Things That Make a Big Difference
No material rack is complete without the right accessories. Here are a few must-haves to consider:
- Casters: If you need to move the rack, add lockable casters to the base. Look for heavy-duty casters (50mm+ wheel diameter) to handle the rack's weight plus contents.
- Roller tracks: For shelves where you slide items in and out (like bins or boxes), attach roller tracks to the shelf surface. This reduces friction, making it easier to access items, especially when the shelf is tilted.
- End caps: Plastic or rubber end caps for pipe ends prevent scratches, protect workers from sharp edges, and keep dust out of the pipes.
- Label holders: Keep your rack organized with label holders that attach to the front of shelves. This saves time when searching for items and reduces errors.

Case Study: Optimizing Material Rack B (3 Row and 3 Floor) with Rotatory Joints
Challenge: A Busy Electronics Plant Struggles with Static Storage
A mid-sized electronics manufacturer was using a standard material rack b (3 row and 3 floor) to store circuit board components. The rack had fixed wooden shelves, and workers spent 15–20 minutes per hour searching for parts, bending to reach lower shelves, or struggling to fit larger component boxes on the rigid upper shelves. The plant manager wanted to reduce wasted time and make the rack more adaptable to new component sizes coming in with a product line expansion.
The solution? Retrofitting the existing rack with aluminum lean pipes and parallel rotatory lean pipe joints. Here's how they did it, and the results they saw:
Step 1: Assessing the Existing Rack
First, the team measured the existing rack's dimensions (width: 120cm, depth: 60cm, height: 180cm) and cataloged the components stored: small bins (5kg each), medium boxes (15kg each), and large trays (30kg each). They noted that the lower shelf was rarely used because workers hated kneeling, while the top shelf was underutilized because it was hard to reach.
Step 2: Retrofitting with Rotatory Joints
The team replaced the wooden shelves with aluminum pipes and parallel rotatory lean pipe joint chrome (chosen for the plant's air-conditioned but slightly humid environment). They made three key changes:
- Lower shelf: Tilted the lower shelf upward at a 15° angle using the rotatory joints, so bins slide forward when accessed. Workers now stand comfortably to reach items.
- Middle shelf: Added a second row of parallel pipes with rotatory joints, creating adjustable dividers. This let them split the shelf into sections for different component types, reducing search time.
- Top shelf: Installed a pull-down mechanism using rotatory joints and gas springs, allowing workers to lower the shelf to waist height, access items, then lift it back up. No more ladders!
Step 3: Adding Roller Tracks and Labels
To further boost efficiency, the team added yellow plastic roller tracks to the middle and lower shelves, making it even easier to slide bins. They also attached magnetic label holders to each section, so workers could quickly identify where each component belonged.
Results: 30% Less Time Spent on Material Handling
After the retrofit, the plant tracked metrics for two weeks. The results were clear:
- Time spent searching for components dropped by 25% (from 20 minutes to 15 minutes per hour).
- Worker complaints about ergonomic strain (kneeling, stretching) decreased by 40%.
- The top shelf utilization increased from 30% to 85%, as it was now easy to access.
- When the new product line launched with larger component boxes, the team simply rotated the middle shelf's dividers outward, creating wider sections—no need to buy a new rack.
This case study shows how even a simple upgrade with parallel rotatory joints can transform a static, frustrating storage system into a dynamic, worker-friendly tool that supports lean manufacturing goals.

Common Mistakes to Avoid: Lessons from the Shop Floor
Even with the best intentions, design missteps can turn your material rack into a liability instead of an asset. Here are the most common mistakes we've seen, and how to steer clear of them:
Mistake #1: Overlooking Environmental Factors
A food processing plant once installed standard parallel rotatory joints in a refrigerated area, only to find them seized with rust after three months. The cold, moist air corroded the unplated joints, making rotation impossible. The fix? Replacing them with parallel rotatory lean pipe joint chrome, which resisted the rust. Moral of the story: Always consider your environment—humidity, temperature, chemicals, and even cleaning agents (like harsh disinfectants) can affect joint performance. When in doubt, go with chrome-plated or stainless steel components.
Mistake #2: Overloading Joints to "Save Money"
Trying to cut costs by using fewer joints or pipes is a false economy. A manufacturer once built a shelf with only two rotatory joints per side (instead of the recommended three) to save $20 on parts. Six weeks later, the shelf sagged under the weight of 100kg boxes, bending the joints and damaging the contents. The repair cost $300 and downtime. Always follow the manufacturer's load ratings for joints and pipes—adding an extra joint or two upfront is cheaper than fixing a collapse later.
Mistake #3: Forgetting About Worker Height and Reach
A rack might look perfect on paper, but if the average worker can't reach the top shelf without a ladder, it's not functional. When designing, measure the height of your shortest and tallest workers, and aim for shelves between 60cm (knee height) and 160cm (shoulder height) for easy access. Use rotatory joints to tilt lower shelves upward or add pull-down mechanisms for higher shelves, as in the case study above.
Mistake #4: Ignoring Assembly Tightness
Parallel rotatory joints work best when they're tight enough to hold position but loose enough to rotate smoothly. Overtightening the bolts can strip the threads or jam the joint, while undertightening leads to wobbling shelves. Use a torque wrench (set to the manufacturer's recommended torque, usually 15–20 Nm) to get the perfect fit. A good rule of thumb: Tighten until the joint doesn't slip under light pressure, then back off a quarter-turn to ensure rotation isn't restricted.
Maintenance: Keeping Your Rack in Top Shape
A well-designed material rack with parallel rotatory joints will last for years—if you take care of it. Maintenance doesn't have to be complicated, but a little regular attention goes a long way.
Weekly Checks: Quick Visual Inspections
Once a week, have a team member walk through and check:
- Are any joints bent or cracked? Damaged joints should be replaced immediately.
- Do the rotatory joints move smoothly, or are they sticking? A little dry lubricant (like silicone spray) can fix minor sticking.
- Are shelves level and secure, or do they wobble? Tighten loose bolts or locking levers.
- Are labels still clear and accurate? update or replace labels as needed to keep the rack organized.
Monthly Deep Clean: Removing Dust and Debris
Dust, oil, and debris can build up in the rotatory joint's moving parts, causing friction and wear. Once a month, wipe down the joints with a clean, dry cloth. For chrome-plated joints, use a mild soap and water solution to remove grime, then dry thoroughly to prevent water spots. Avoid harsh chemicals (like bleach or solvents) that can damage the plating or pipe coating.
Quarterly Adjustments: Reassessing Your Needs
Every three months, take a step back and ask: Is the rack still working for us? Are there new components we're storing that don't fit? Has production volume increased, requiring more shelf space? Use the modularity of your lean pipe system to make adjustments—add a shelf, reposition rotatory joints, or even move the entire rack to a new location if workflow has changed. This quarterly check ensures your rack stays aligned with your needs, not just how things were six months ago.
Final Thoughts: The Power of Flexible Storage
Material racks might not be the most glamorous part of manufacturing, but they're critical to keeping your operation running smoothly. By incorporating parallel rotatory lean pipe joints into your design, you're not just building a rack—you're building a system that adapts, grows, and evolves with your business. These small, versatile connectors turn static storage into dynamic, worker-friendly spaces that reduce waste, save time, and boost morale.
Whether you're retrofitting an existing material rack b (3 row and 3 floor) or building a new system from scratch, remember the key principles: start with the load, prioritize accessibility, embrace modularity, and choose quality materials. And don't forget the little things—like chrome-plated joints for durability or roller tracks for easy sliding—that make a big difference in day-to-day use.
In the end, the goal of lean manufacturing is to create value for your customers by eliminating waste in every process. Your material rack is a frontline soldier in that battle. With parallel rotatory lean pipe joints, you're arming yourself with the flexibility to win—today, tomorrow, and for years to come.