- Company Articles
- Products and Technology
- Application Cases
- Plastic Pipe Cover for DIY Lean Workstations: Home Workshop Applications

Plastic Pipe Cover for DIY Lean Workstations: Home Workshop Applications
Related Product
Plastic Pipe Cover
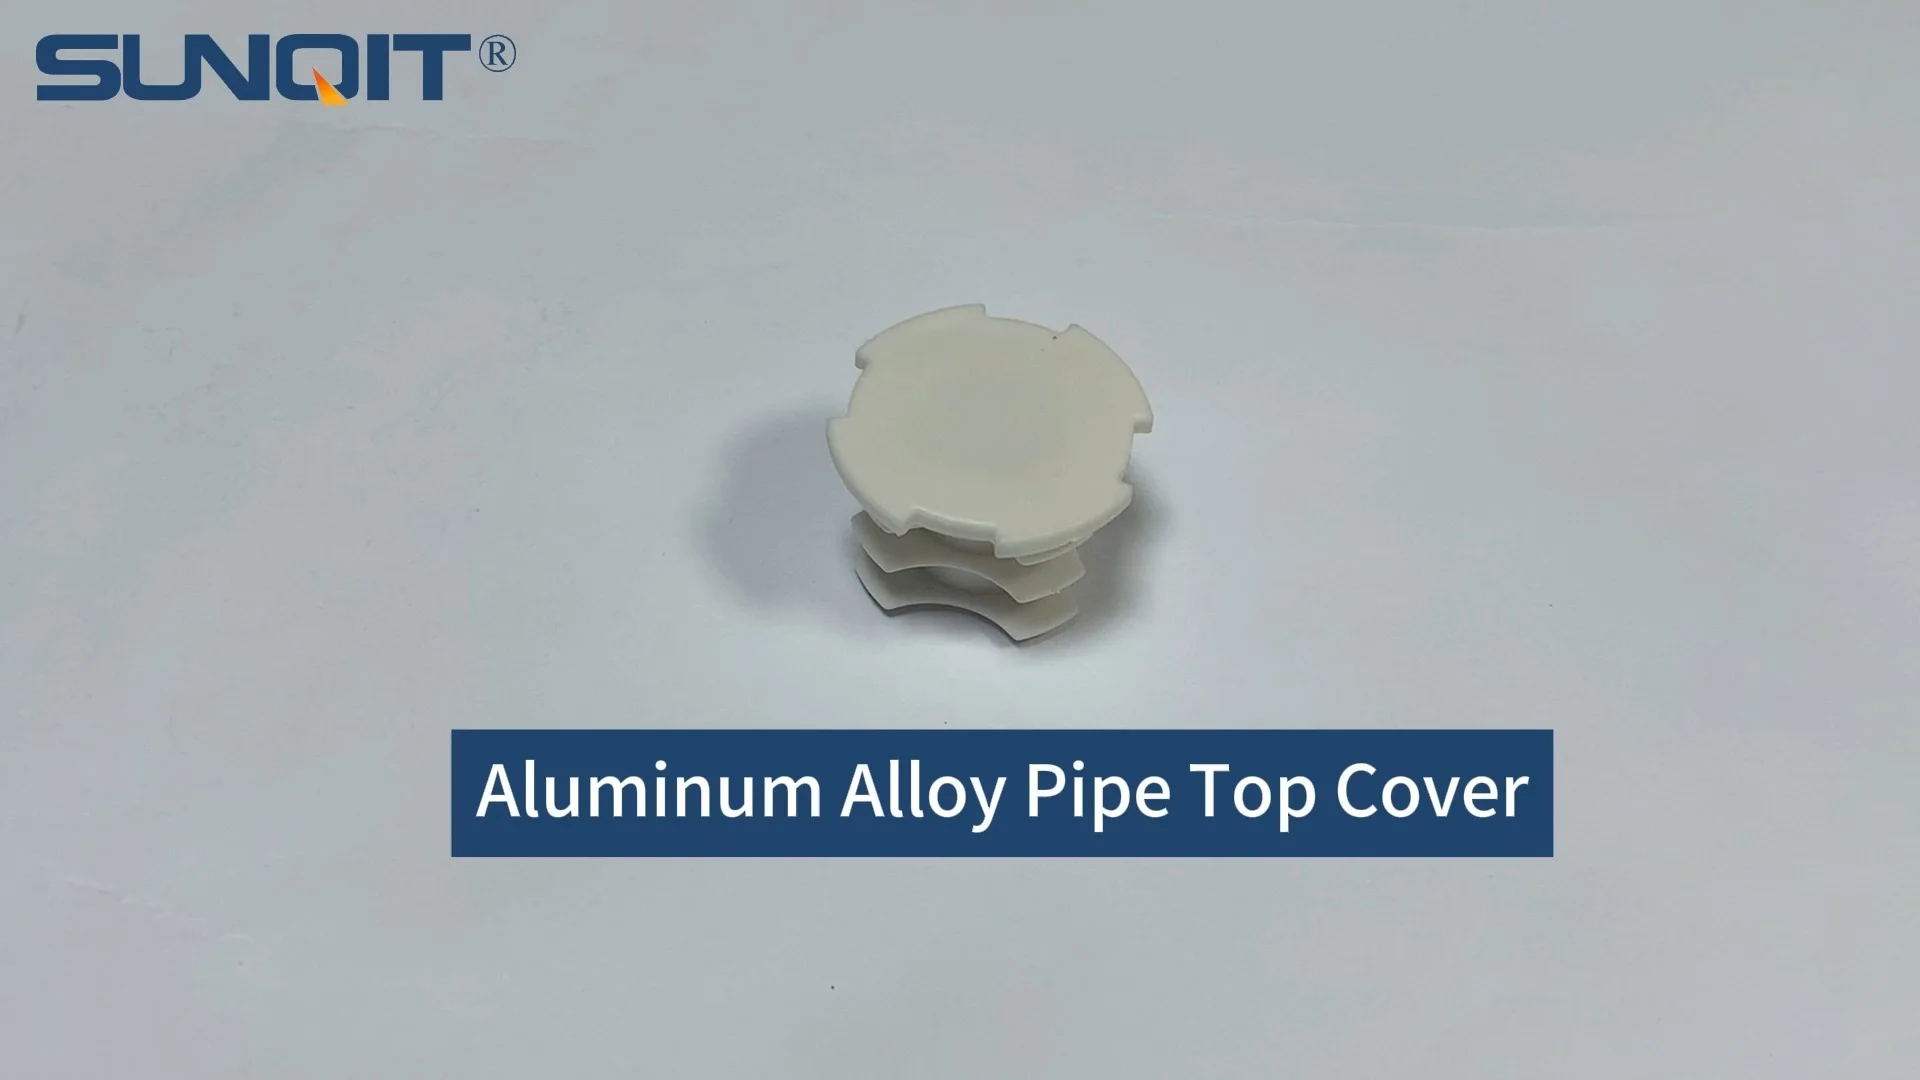
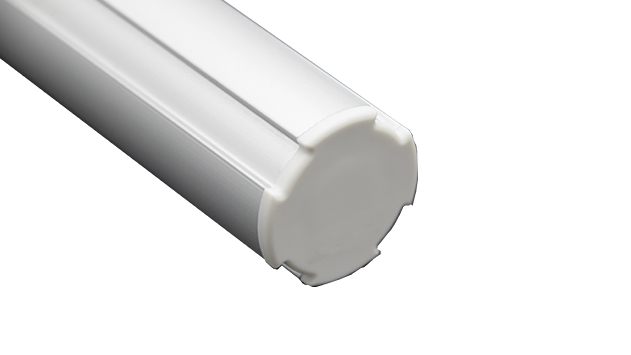
Plastic pipe cover to cover dia 28MM aluminum pipe end at workbench, flow rack, to prevent metal surface scratch material or worker.
It's 10 PM on a Tuesday, and I'm knee-deep in a weekend project that's spilled into the week. My workbench—if you can even call it that—is a cluttered mess of tools, half-finished parts, and coffee mugs that should've been washed hours ago. I reach for a wrench, knock over a jar of screws, and watch them scatter like confetti across the floor. Sound familiar? For anyone who's ever tried to turn a garage corner or spare room into a functional workshop, this chaos isn't just frustrating—it's a creativity killer. But what if there was a way to build a space that adapts to your projects, keeps tools within arm's reach, and actually makes you excited to tinker? Enter the world of DIY lean workstations, and at the heart of this transformation? The humble plastic pipe cover.
Why Lean Workstations Matter for Home Workshops
Lean principles aren't just for factory floors or big businesses. At their core, they're about making the most of what you have—cutting waste, streamlining processes, and creating spaces that work with you, not against you. For home workshops, this translates to less time hunting for tools, fewer trips across the room to grab materials, and a setup that can grow or shrink as your projects change. And while terms like "lean system" or "flow optimization" might sound intimidating, building a lean workstation at home is surprisingly accessible—especially when you start with simple components like lean pipe workbenches, aluminum profiles, and yes, plastic pipe covers.
I'll admit, when I first heard about "lean pipe workbenches," I pictured industrial-grade setups that cost a fortune and required a engineering degree to assemble. But that couldn't be further from the truth. These workstations are built using modular components—think pipes, joints, and accessories—that snap together like grown-up Legos. And the plastic pipe cover? It's the unsung hero that turns a rickety frame into a polished, functional surface. No welding, no fancy tools, just a little patience and a lot of problem-solving. Which, let's be honest, is half the fun of DIY.
The Basics: What You Need to Know About Lean Workstation Components
Before diving into the nitty-gritty of plastic pipe covers, let's break down the key components that make up a typical DIY lean workstation. Think of it as your shopping list for workshop freedom:
| Component | Role in Your Workstation | Why It Matters |
|---|---|---|
| Lean Pipe (or Aluminum Profile) | The "bones" of your workstation—frames, shelves, and supports. | Lightweight but sturdy; aluminum profiles add durability without rust. |
| Plastic Pipe Cover | Covers the metal pipes to protect tools, reduce noise, and add grip. | Prevents scratches on delicate parts; softens edges for safety. |
| Joints & Connectors | Link pipes together to form angles, shelves, or custom shapes. | Modular design means you can reconfigure anytime. |
| Roller Track | Mounted on shelves or tables to slide materials smoothly. | Turns static storage into dynamic "flow racks" for easy access. |
| Caster Wheels | Attached to the base for mobility. | Move your workstation (or just a shelf) where you need it—no heavy lifting. |
Notice how plastic pipe cover is right there in the mix? It's not just a cosmetic add-on. Imagine sliding a wooden project across a bare metal pipe—chances are, you'd scratch the wood or leave metal marks. With a plastic cover, the surface becomes smooth but grippy, protecting both your materials and the pipes themselves from dents or rust. Plus, they come in colors—like the yellow and grey plastic roller track guide rails I'll talk about later—so you can add a pop of personality to your setup. (Pro tip: Yellow covers are great for high-visibility areas, like tool hooks, so you can spot what you need at a glance.)
Plastic Pipe Cover: More Than Just a "Cover-Up"
Let's zoom in on the star of the show: the plastic pipe cover. At first glance, it's a simple tube of plastic, often made from durable polyethylene, that slips over metal or aluminum pipes. But its benefits go way beyond aesthetics. Here's why it's a must-have for any DIY lean workstation:
1. Protection for Your Tools and Materials
I learned this the hard way. Early in my workshop journey, I built a basic shelf using bare aluminum profile. It looked sleek, but when I placed a wooden toolbox on it, the metal edges left deep scratches in the wood. Ouch. A plastic pipe cover eliminates that risk. The soft, non-abrasive surface acts like a buffer, whether you're setting down power tools, glassware, or delicate electronics. It also protects the pipes themselves—no more rust spots from water spills or nicks from dropped tools.
2. Noise Reduction (Your Neighbors Will Thank You)
Ever dropped a wrench on a metal workbench? The clang could wake the dead (or at least the neighbor three houses down). Plastic pipe covers dampen that noise, turning sharp, ear-piercing sounds into dull thuds. I noticed the difference immediately when I added covers to my roller track—a setup that used to rattle like a freight train when I slid bins across it now glides quietly, even at 6 AM on a Saturday. Small change, big peace of mind.
3. Grip and Stability
Slippery surfaces are the enemy of a productive workshop. Whether you're clamping a project to the table or stacking bins on a shelf, you need things to stay put. Plastic pipe covers add just enough friction to prevent sliding—no more chasing rolling jars or watching a stack of plywood teeter and topple. I even use them on the legs of my workbench (paired with caster wheels, of course) to keep the whole setup steady when I'm sawing or drilling.
4. Easy Maintenance (Because Who Has Time for Fuss?)
Workshops get dirty. Sawdust, grease, paint splatters—they're all part of the fun. But cleaning bare metal pipes? That means scrubbing off rust or polishing away stains. Plastic pipe covers? Wipe them down with a damp cloth, and they look good as new. I've had mine for over a year, and aside from a few paint splatters (which I kind of like, as battle scars), they still look fresh. Plus, if one gets too beat up, you can just slide it off and replace it—no need to rebuild the entire frame.

Building Your DIY Lean Workstation: A Step-by-Step Guide
Ready to stop daydreaming and start building? Let's walk through how to create a basic lean pipe workbench with plastic pipe covers. I'll focus on a simple setup—perfect for small workshops or beginners—but remember: the beauty of modular components is that you can expand or tweak it later.
Step 1: Plan Your Space (Measure Twice, Cut Once)
Before you buy a single pipe, grab a tape measure and sketch out your workshop area. Ask yourself: How much space do I really have? Will the workstation need to roll (hello, caster wheels) or stay stationary? What's the tallest item I'll store on it? For my first setup, I wasted money on pipes that were too long, forcing me to cram the workstation into a corner. This time, I measured the width of my garage door (so I could still park my car!) and the height of my tallest toolbox. The result? A workstation that fits like it was built for the space—because it was.
Step 2: Gather Your Materials
For a basic 4-foot by 2-foot workbench, here's what you'll need (adjust quantities based on your size):
- 4 pieces of aluminum profile (32mm diameter works well for home use), cut to your desired height (I went with 36 inches for standing work).
- 4 pieces of aluminum profile for the tabletop frame (2 pieces at 48 inches, 2 at 24 inches).
- 8 plastic pipe covers (one for each pipe; choose a color that matches your workshop vibe—yellow for energy, grey for neutrality).
- 16 corner joints (to connect the tabletop frame and legs).
- 4 caster wheels (lockable, for stability when you're working).
- 1 sheet of plywood or MDF for the tabletop (I used ¾-inch plywood, sanded smooth).
- Optional: Roller track for a material shelf underneath (great for sliding bins of screws or tools).
Step 3: Assemble the Frame (It's Like Building with Giant Tinkertoys)
Lay out your tabletop frame first: connect the 48-inch and 24-inch aluminum profiles using corner joints. Tighten the joints with a hex key—you want them snug, but not so tight that you can't adjust later. Once the frame is square, attach the legs (the 36-inch pipes) to each corner. Now, slide the plastic pipe covers onto all the pipes—this is easier to do before attaching the legs to the frame! Trust me, trying to stretch a cover over a joint is a frustrating waste of time.
Step 4: Add Caster Wheels and Level the Workbench
Screw the caster wheels into the bottom of the legs. Once they're on, roll the frame to its permanent spot and lock the wheels. Now, check if it wobbles—if it does, use adjustable feet (or even shims) to level it. A wobbly workbench is a disaster waiting to happen, especially when you're using power tools. I spent an extra 10 minutes here, and it's saved me from countless "oops, that's crooked" moments.
Step 5: Attach the Tabletop and Add Extras
Lay your plywood sheet on top of the frame and secure it with screws (predrill holes to avoid splitting the wood). If you're adding roller track underneath for storage, attach it to the lower frame using brackets. I mounted mine about 12 inches from the ground, perfect for sliding plastic bins full of nails, sandpaper, and other odds and ends. Finally, step back and admire your handiwork—you just built a custom workstation!

Troubleshooting Common DIY Lean Workstation Hiccups
Even with careful planning, things can go wrong. Here are a few issues I ran into (and how I fixed them):
Problem: The Frame Feels Wobbly
Solution: Check your joints—they might be loose. Tighten them with a hex key, but don't overdo it (you don't want to strip the plastic). If that doesn't work, add diagonal braces using extra pipes and joints. I added braces to the back of my workbench, and it's now sturdy enough to stand on (not that I recommend that… unless you need to reach a high shelf).
Problem: Plastic Pipe Covers Keep Slipping
Solution: A little friction goes a long way. I applied a tiny dot of super glue (just on the inside of the cover, near the top) to keep it in place. Alternatively, wrap a small piece of electrical tape around the pipe before sliding the cover on—it adds grip without damaging the pipe.
Problem: Roller Track Isn't Sliding Smoothly
Solution: Dust and debris love to clog roller tracks. Wipe them down with a dry cloth every week, and add a drop of lubricant (like WD-40) to the wheels if they start sticking. I also learned the hard way that uneven tracks cause jams—use a level when installing to make sure they're straight.
From Chaos to Creativity: The Impact of a Lean Workstation
Six months after building my lean workstation, I can honestly say it's changed how I approach projects. What used to take hours (digging through toolboxes, rearranging materials) now takes minutes. I no longer dread tackling messy projects because I know the space will bounce back quickly. And yes, the plastic pipe covers? They're still there, doing their job quietly—protecting my tools, reducing noise, and adding a pop of color to an otherwise utilitarian space.
The best part? This isn't a one-and-done setup. Last month, I added a second shelf using extra aluminum profiles and roller track, and next week, I'm installing a pegboard on the side for hanging tools—all without rebuilding the entire workbench. That's the power of lean: it grows with you.
Final Thoughts: Your Workshop Deserves to Work for You
You don't need a fancy budget or a professional setup to have a workshop you love. With modular components like lean pipe workbenches, aluminum profiles, and plastic pipe covers, you can build a space that's functional, flexible, and uniquely yours. And while it might seem intimidating at first, remember: every expert was once a beginner with a tape measure and a dream.
So grab your tools, measure your space, and start small. Add plastic pipe covers to a basic frame, see how it transforms your workflow, and then expand from there. Trust me—you'll wonder how you ever worked without it. And the next time you're up at 10 PM on a Tuesday, knee-deep in a project, you'll smile as you reach for that wrench… and actually find it, right where it belongs.