- Company Articles
- Products and Technology
- Installation And Maintenance
- Plastic Pipe Cover Installation Time: How Long Does It Take?

Plastic Pipe Cover Installation Time: How Long Does It Take?
Related Product
Plastic Pipe Cover
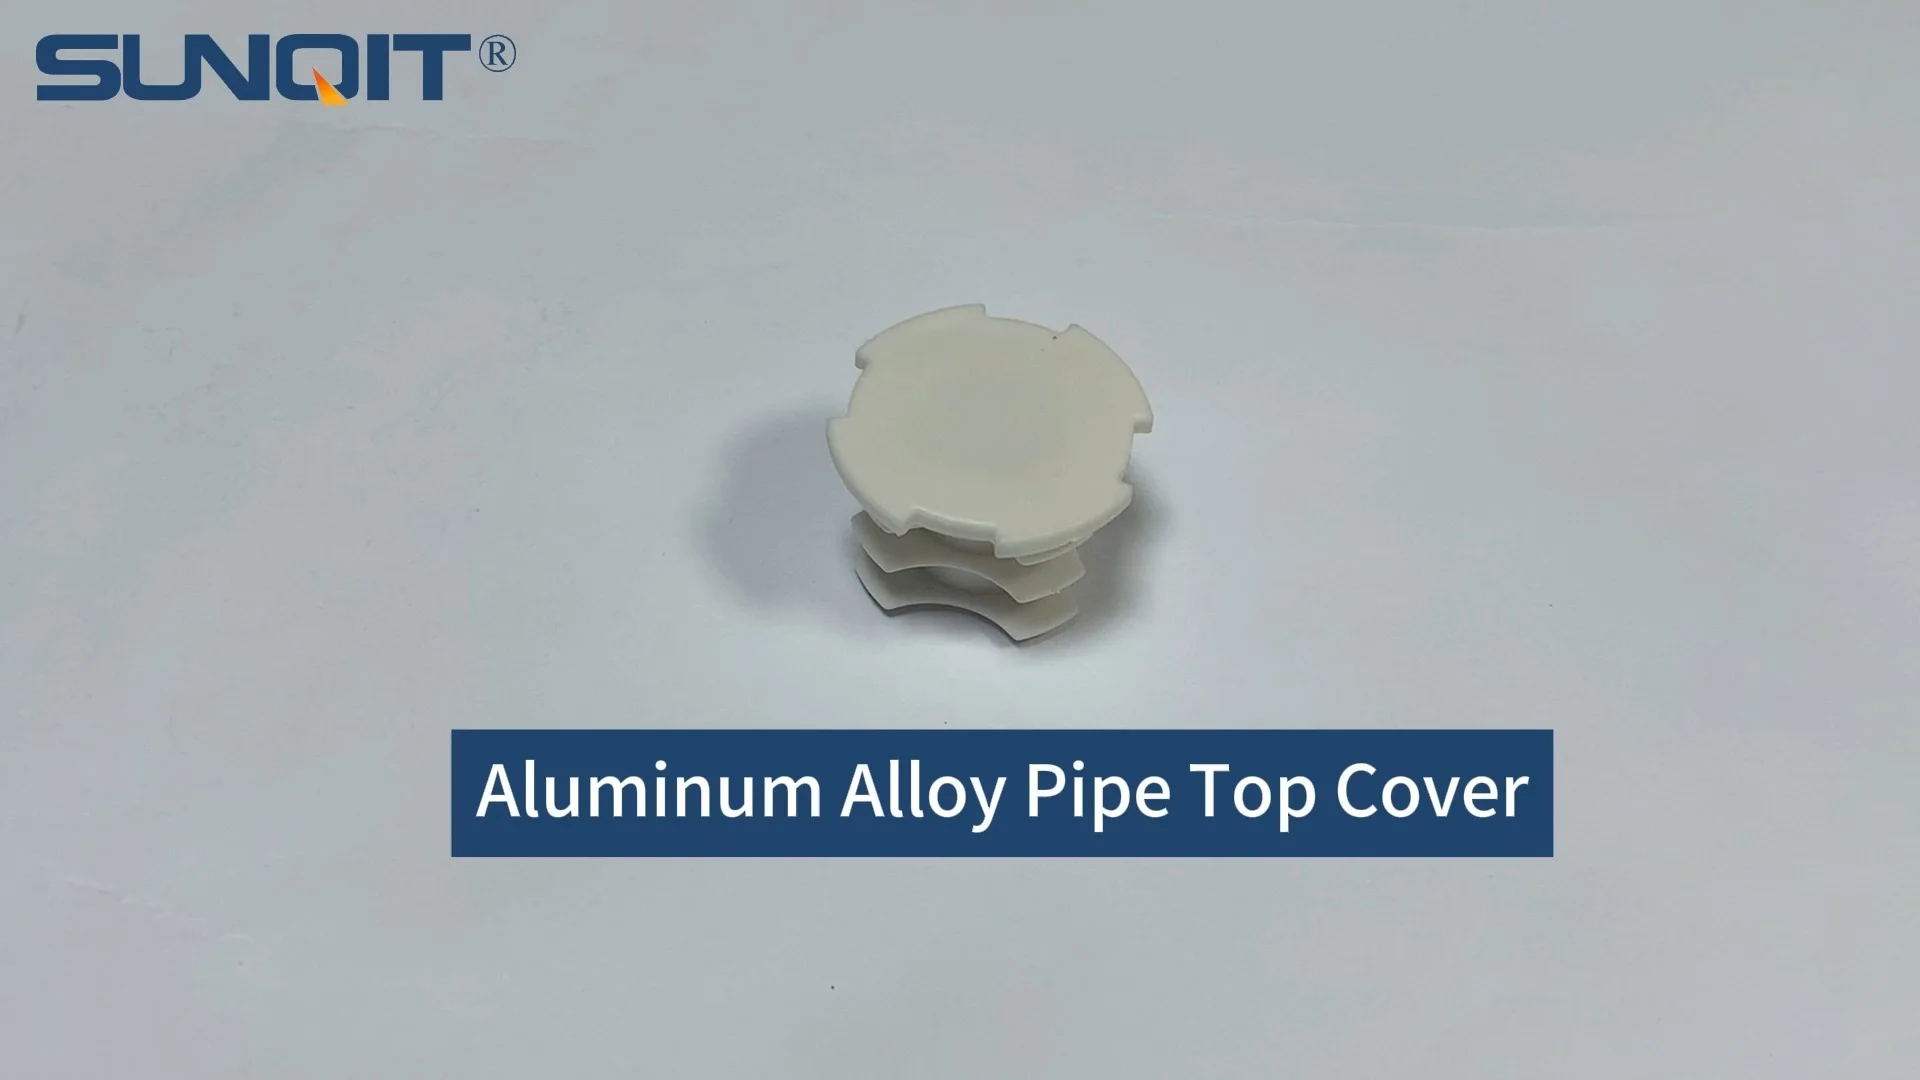
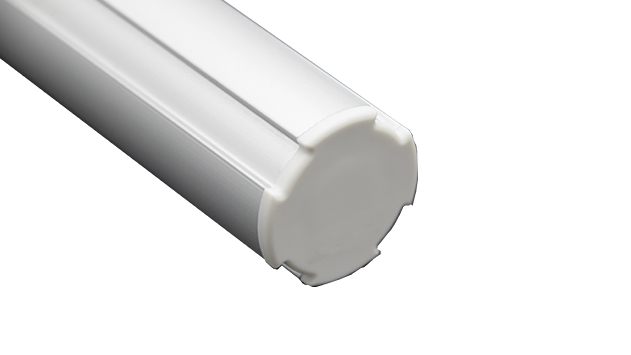
Plastic pipe cover to cover dia 28MM aluminum pipe end at workbench, flow rack, to prevent metal surface scratch material or worker.
Walk into any workshop, factory, or even a well-organized garage, and you'll likely spot pipes snaking along walls, under workbenches, or supporting equipment. These pipes—whether part of a lean pipe system, a conveyor setup, or just basic structural supports—do the heavy lifting, but they're often left bare. That's where plastic pipe covers come in. They're the unsung heroes that protect pipes from dents, scratches, and corrosion, while also softening edges to prevent workplace injuries. But if you've ever wondered, "How long does it take to install one of these covers?" you're not alone. Whether you're a DIY enthusiast sprucing up your home workshop or a facility manager coordinating a maintenance project, understanding installation time can help you plan better, avoid delays, and ensure the job gets done right.
In this article, we'll break down everything that influences plastic pipe cover installation time, from your skill level to the tools you use, and even the type of pipes you're working with. We'll also share real-world examples, common pitfalls to avoid, and tips to speed things up—because let's face it, no one wants to spend all day wrestling with a piece of plastic. By the end, you'll have a clear idea of how to estimate time for your project, whether it's a single pipe under your workbench or a full lean pipe system with dozens of covers.
What Are Plastic Pipe Covers, Anyway?
Before we dive into installation time, let's make sure we're all on the same page about what plastic pipe covers are. Simply put, they're protective sleeves made from materials like PVC, polyethylene, or rubber, designed to slide over or wrap around metal, aluminum, or lean pipes. They come in two main types: slit (with a long, lengthwise cut that lets you slip them over pipes without disconnecting anything) and solid (which require the pipe to be open at one end to slide on). Some are plain, while others come in colors to match your workspace—like the yellow or grey plastic roller track guide rails you might see in factories, but for pipes instead of tracks.
Why bother with them? For starters, they protect pipes from wear and tear. If you've got a lean pipe workbench in a busy shop, the pipes take a beating from tools, parts, and people bumping into them. A plastic cover acts as a buffer, extending the life of the pipe. They also improve safety: bare metal pipes can have sharp edges or get hot/cold enough to cause burns or frostbite. Covers soften those edges and insulate against temperature extremes. And let's not forget aesthetics—bare pipes look industrial, but a clean, colored cover can make a workspace feel more put-together, which can boost morale (yes, really!).
Now, the star of the show here is the plastic pipe cover itself. But to install it, you'll often be working with other components, like lean pipe joints (the connectors that hold lean pipes together) or even navigating around caster accessories if the pipes are part of a mobile setup. These elements can either speed up installation or slow it down, depending on how you approach them.
Pre-Installation Prep: The Key to Saving Time Later
Here's a little secret: the time you spend before installing the first plastic pipe cover will make or break how long the whole project takes. Rushing into installation without prep is like baking a cake without preheating the oven—you'll end up with a mess and wasted time. Let's walk through the essential prep steps.
1. Gather Your Tools
You don't need a workshop full of gadgets, but having the right tools on hand will save you from running back and forth to the toolbox. Here's what you'll need:
- Tape measure : To measure the length of the pipe and the cover. A retractable one with a lock is easiest.
- Marker or pencil : To mark where to cut the cover. A fine-tipped marker works best on plastic.
- Cutting tool : For slit covers, a sharp utility knife or box cutter will do. For thicker covers or solid sleeves, a pipe cutter (manual or electric) will make cleaner cuts. Avoid using scissors—they'll crush the plastic instead of cutting it.
- Sandpaper or a deburring tool : To smooth rough edges after cutting. Trust us, you don't want to leave jagged plastic lying around—it's a safety hazard.
- Cleaning cloth : To wipe down the pipe before installing the cover. Dust, grease, or grime can prevent the cover from fitting snugly.
- Adhesive (optional) : Some covers come with adhesive strips, or you might need a spray adhesive to keep the cover in place, especially if the pipe is vertical or in a high-traffic area.
Pro tip: Lay out your tools on a workbench before you start. Having everything within arm's reach means you won't waste time hunting for a missing marker halfway through.
2. Measure Twice, Cut Once (Yes, It's a Cliché for a Reason)
Nothing derails an installation faster than a cover that's too short or too long. Grab your tape measure and measure the pipe from end to end. If the pipe has lean pipe joints , measure between the joints—you don't want the cover to overlap with the joint unless the joint is designed to accommodate it (most aren't). Write down the measurement, then add ¼ inch to ½ inch to be safe—you can always trim excess, but you can't add length.
Next, measure the diameter of the pipe. Plastic pipe covers are sized by pipe diameter, so a 1-inch cover won't fit a 1.5-inch pipe. If you're not sure, take a quick photo of the pipe and ask at the hardware store—they'll help you pick the right size. Trust us, returning a cover because it's the wrong diameter is a time-killer.
3. Check the Pipe Condition
Take a close look at the pipe you're covering. Is it rusty? Bent? Covered in stickers or old tape? Any of these issues can make installation harder. Scrape off old tape residue with a plastic scraper (metal might scratch the pipe). Sand down light rust to smooth the surface. If the pipe is severely bent, you might need to straighten it first or replace it—trying to force a cover over a kink will tear the plastic and waste your time.
4. Clear the Area
Last but not least, make sure you have space to work. If the pipe is under a workbench, move any tools or boxes out of the way. If it's part of a conveyor system with caster accessories nearby, lock the casters so the setup doesn't roll while you're working. The more room you have to maneuver, the faster and safer the installation will be.
Step-by-Step Installation: Let's Get That Cover On
Now that you're prepped, let's walk through installing a plastic pipe cover. We'll focus on slit covers here since they're the most common (and easiest for DIYers), but we'll touch on solid covers too.
Step 1: Clean the Pipe
Take your cleaning cloth and wipe down the entire length of the pipe. Even a little dust can create friction, making it harder to slide the cover on. If there's grease or oil (common in factory settings), use a mild degreaser—just make sure it's dry before moving on.
Step 2: Cut the Cover to Length
Lay the plastic pipe cover flat on your workbench. Use the measurements you took earlier to mark the cover with your marker. For straight cuts, use a straightedge (like a ruler or a piece of scrap wood) to keep the line even. If you're using a utility knife, score the cover along the line first—press firmly but don't cut all the way through. Then, bend the cover along the score line; it should snap cleanly. For thicker covers, repeat the scoring a few times until it breaks.
If you're using a pipe cutter, position the cutter over the mark, tighten the blade, and rotate the cutter around the cover. Tighten a little more with each rotation, and the cover will snap off. Sand any rough edges with sandpaper—this takes 30 seconds and prevents snags later.
Step 3: Fit the Cover (Slit Style)
Slit covers have a long opening along one side. Gently pry the slit open with your fingers (or a flathead screwdriver, if it's tight) and slide the cover over the pipe. Start at one end and work your way down, making sure the cover sits evenly. If the pipe has lean pipe joints , stop the cover just before the joint—overlapping can make the joint hard to access later if you need to adjust the pipe.
For vertical pipes, start at the bottom and work up—this prevents the cover from sliding down as you install it. If it's loose, you can add a small strip of adhesive tape along the slit to hold it in place, but most slit covers stay put on their own thanks to friction.
Step 4: Secure (If Needed)
Most plastic pipe covers don't need extra securing, but if the pipe vibrates (like on a conveyor) or is in a high-traffic area, a little adhesive can help. Apply a thin line of adhesive along the inside of the slit, then press the cover closed. Wipe away any excess adhesive with a cloth—dried glue is hard to remove and looks messy.
Step 5: Inspect and Adjust
Take a step back and check the cover. Is it straight? Are there any gaps? If it's crooked, gently pull it off and reposition. If there's a gap at the slit, pinch it closed or add a dab of adhesive. That's it—you're done with one cover!
Solid Covers: A Quick Note
Solid covers don't have a slit, so you'll need to slide them over the end of the pipe. This means you might have to disconnect the pipe from its lean pipe joints first—definitely a bigger job. If you're installing solid covers, factor in extra time for disconnecting and reconnecting the pipe. They're more secure than slit covers, but they're best left for pipes that don't need frequent adjustments.

Factors That Affect Installation Time: It's Not One-Size-Fits-All
So, how long does it take? The short answer: it depends. A pro might zip through 10 covers in an hour, while a beginner could take 30 minutes for one. Let's break down the biggest factors that influence time.
1. Skill Level: Practice Makes (Faster) Perfect
If you've never installed a plastic pipe cover before, you'll spend time figuring out how to cut straight, how hard to press with the knife, and how to get the cover to slide on smoothly. That's normal! A first-timer might take 20–30 minutes for a single 10ft cover (including prep). But by the second or third cover, you'll start to get the hang of it, and that time could drop to 10–15 minutes per cover.
Professionals, on the other hand, do this day in and day out. They've got the tools dialed in, they know how to measure quickly, and they can cut and fit a cover in 5–10 minutes flat. It's like typing—when you first learn, you hunt and peck; after a while, you're flying.
2. Number of Covers and Pipe Length
Installing one cover on a short pipe is a quick job. Installing 20 covers on a 100ft lean pipe system? That's a half-day project, even for a pro. But here's the thing: there's a "learning curve bonus" with multiple covers. The first one takes the longest, but each subsequent cover gets faster because you're not stopping to re-measure tools or rethink steps.
Pipe length matters too. A 5ft pipe might take 5 minutes to cover; a 50ft pipe could take 20–25 minutes (plus cutting time for multiple covers if the pipe is longer than the cover).
3. Pipe Type and Obstacles
Not all pipes are created equal. A smooth, straight PVC pipe is a dream to cover—slide it on and go. But a rusty, bent steel pipe with lean pipe joints every few feet? That's going to take longer. Joints mean stopping and starting the cover, which adds time. Pipes with valves, brackets, or caster accessories nearby (like a mobile workbench with casters) require extra care to avoid damaging the accessories or the cover.
Vertical pipes are trickier than horizontal ones—gravity works against you, and the cover might slide down as you install it. You might need to hold it in place with one hand while securing it with the other, which slows you down.
4. Tools and Prep
We mentioned this earlier, but it's worth repeating: good tools save time. Using a dull utility knife means jagged cuts that need extra sanding. Forgetting to measure the pipe diameter means a trip to the store and wasted time. A well-prepped workspace with tools on the workbench? That's a shortcut to faster installation.

Average Installation Time: A Handy Reference Table
To give you a better idea of what to expect, we've put together a table of common scenarios. These are estimates based on real-world experience, so your time might vary—but they'll help you plan.
| Scenario | Skill Level | Pipe Details | Average Time (Per Cover) |
|---|---|---|---|
| Single 10ft PVC pipe, slit cover, no joints | Beginner (first time) | Smooth, horizontal, 1-inch diameter | 25–35 minutes (including prep) |
| Two 15ft lean pipes with lean pipe joints, slit covers | Intermediate (some experience) | Steel, horizontal, 1.5-inch diameter, 3 joints total | 15–20 minutes per cover (4 covers total: ~1 hour) |
| Five 20ft pipes on a workbench, solid covers | Professional | Aluminum, mixed horizontal/vertical, 2-inch diameter, caster accessories nearby | 10–12 minutes per cover (5 covers total: ~50–60 minutes) |
| Ten 8ft pipes in a factory, slit covers | Team of 2 (1 pro, 1 helper) | Mixed steel/lean pipe, horizontal, various diameters, multiple lean pipe joints | 5–8 minutes per cover (10 covers total: ~1 hour) |
Notice that as the number of covers increases, the time per cover decreases. That's the learning curve in action! Also, having a helper (even an extra set of hands to hold the pipe steady) can cut time significantly.
Speeding Up Installation: Pro Tips to Save Time
Whether you're installing covers for a small project or a large facility, these tips will help you work faster without sacrificing quality.
1. Batch Your Work
Instead of measuring, cutting, and installing one cover at a time, batch the steps. Measure all your pipes first, then cut all the covers at once, then install them. This way, you're not switching between tools and tasks, which saves mental energy and time. For example, cutting 10 covers takes less than 10 times cutting 1 cover—you'll get into a rhythm.
2. Use the Right Cutting Tool
Invest in a good pipe cutter if you're installing more than a few covers. Manual pipe cutters cost $10–$20 and make clean, fast cuts. For larger projects, an electric cutter (like a reciprocating saw with a plastic-cutting blade) will save even more time.
3. Pre-Cut Covers for Common Sizes
If you're in a workshop or factory that frequently installs pipe covers, pre-cut covers to your most common pipe lengths. Store them in a labeled bin, and when you need one, just grab it and go. No more measuring and cutting each time!
4. Mark Pipes Before Disconnecting (for Solid Covers)
If you're using solid covers and need to disconnect pipes from lean pipe joints, mark the joints with tape or a marker first. This way, you'll know exactly how to reconnect them, avoiding trial and error later.
5. Keep a "Installation Kit" Ready
Put together a toolkit with all the essentials: tape measure, marker, cutter, sandpaper, cloth, and adhesive. Store it in a portable caddy so you can grab it and go—no more searching for tools.
Common Mistakes to Avoid (Because Time Wasted is Time Lost)
Even with the best prep, mistakes happen. Here are the ones that cost the most time—and how to steer clear.
Mistake 1: Incorrect Size
Buying a cover that's too small or too large is the biggest time-waster. A small cover won't fit, and a large one will slide around. Always measure the pipe diameter twice before buying. If you're unsure, bring a sample of the pipe (or a photo) to the supplier.
Mistake 2: Cutting Crooked Lines
A crooked cut means the cover won't sit flush, and you'll have to trim it again (or start over with a new cover). Use a straightedge when marking, and take your time cutting. It's better to spend 2 extra minutes on a straight cut than 10 minutes fixing a bad one.
Mistake 3: Forcing the Cover
If the cover won't slide on, don't yank or bend it—you'll tear it. Check if the pipe is dirty, if there's a burr, or if the cover is the wrong size. A little soap and water (for plastic-on-plastic) can act as a lubricant to help it slide on.
Mistake 4: Ignoring Lean Pipe Joints
Covering over lean pipe joints might seem like a time-saver, but it'll cost you later when you need to adjust or repair the pipe. Leave a small gap (¼ inch) between the cover and the joint—you'll thank yourself later.
Real-World Example: A Small Workshop's Experience
To bring this all to life, let's hear from Mike, the owner of a small electronics repair shop. Mike's shop has a lean pipe workbench that's been in use for a year, and the bare pipes were starting to scratch the delicate circuit boards his team works on. He decided to install plastic pipe covers to protect both the pipes and the boards.
"I'm pretty handy, but I'd never installed pipe covers before," Mike says. "I watched a quick YouTube video, grabbed my tools, and figured I'd knock it out in an hour. Spoiler: it took longer."
Mike's first mistake? He forgot to measure the pipe diameter. He guessed they were 1-inch pipes and bought 1-inch covers, but the actual pipes were 1.25 inches. "I had to drive back to the supplier, which cost me an hour," he laughs. "Lesson learned: measure first!"
Once he had the right covers, Mike set up his workbench with his tape measure, a utility knife, and a marker. He had three pipes to cover, each about 6ft long. "The first cover took me 25 minutes—cutting was tricky, and I kept scoring too lightly, so it didn't snap cleanly. The second one took 15 minutes, and the third? Maybe 10. By then, I had a system."
The pipes had lean pipe joints at each end, so Mike had to make sure the covers stopped short of the joints. "I used a pencil to mark where the joint started, then cut the cover ½ inch before that. It was easy once I got the hang of it."
Total time? About 2 hours, including the trip to the store. "If I'd measured the diameter first, I could've done it in an hour," Mike says. "But even with the mistake, it was worth it. The covers look great, and we haven't scratched a board since."
Mike's takeaway? "Prep is everything. And don't be afraid to take your time on the first one—you'll get faster."
Conclusion: Time Well Spent
Installing plastic pipe covers isn't the most glamorous task, but it's a small investment of time that pays off in protection, safety, and a more professional-looking workspace. So, how long does it take? It depends on your skill level, the number of covers, the tools you use, and a little thing called preparation.
For a beginner, plan for 20–35 minutes per cover (including prep). For a pro, it's more like 5–15 minutes. And if you're working with a team or have prepped well, you can zip through even large projects in no time.
Remember, the goal isn't to rush—it's to do it right. A well-installed plastic pipe cover will last for years, protecting your pipes and keeping your workspace safe. So grab your tools, measure twice, and take pride in the job. Before you know it, you'll be a pipe cover pro.