- Company Articles
- Products and Technology
- Installation And Maintenance
- Plastic Pipe Cover Maintenance Schedule: Weekly vs Monthly Checks

Plastic Pipe Cover Maintenance Schedule: Weekly vs Monthly Checks
Related Product
Plastic Pipe Cover
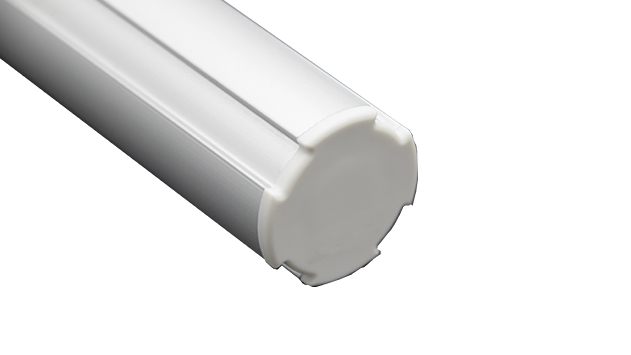
Plastic pipe cover to cover dia 28MM aluminum pipe end at workbench, flow rack, to prevent metal surface scratch material or worker.

Let's start with a story I hear all too often: A production supervisor walks into their facility on a Monday morning to find the assembly line at a standstill. The culprit? A cracked plastic pipe end cap that had gone unnoticed over the weekend. Water had seeped into the lean pipe structure overnight, rusting a joint and jamming the workflow. By the time repairs were done, the team had lost three hours of production—and the cost of replacement parts and labor added up to far more than a few minutes of preventive maintenance would have. Sound familiar? If you work with lean pipe systems, chances are you've seen how small, overlooked components like plastic pipe covers can derail even the most efficient operations.
Plastic pipe covers—often called plastic pipe end caps—might seem like afterthoughts in the grand scheme of industrial equipment. They're small, unassuming, and easy to take for granted. But here's the truth: These little caps are the first line of defense for your lean pipe structures, protecting exposed pipe ends from moisture, dust, debris, and even accidental impacts. Neglecting them isn't just a minor oversight; it's a direct threat to the reliability of your entire lean system. That's why having a clear maintenance schedule—distinguishing between quick weekly checks and deeper monthly inspections—is non-negotiable.
In this article, we're going to break down exactly what weekly and monthly maintenance for plastic pipe covers entails, why each is critical, and how to execute them effectively. Whether you're a plant manager, a maintenance technician, or someone just getting started with lean pipe setups, this guide will help you keep those small but mighty components in top shape—saving you time, money, and headaches down the line.
Understanding Plastic Pipe Covers: More Than Just a "Cap"
Before we dive into maintenance schedules, let's make sure we're all on the same page about what plastic pipe end caps actually do. These are the small, often cylindrical or flat pieces of plastic that fit snugly over the open ends of lean pipes, aluminum pipes, or stainless steel pipes in your workstation setups, material racks, or conveyor systems. Think of them as the "shoes" for your pipes—they keep the elements out and the structural integrity in.
Most plastic pipe end caps are made from durable materials like polyethylene (PE) or polypropylene (PP), chosen for their resistance to impact, chemicals, and temperature fluctuations. They come in various sizes to match different pipe diameters—from 0.5-inch caps for mini aluminum roller tracks to 2-inch caps for heavy-duty lean pipes. Some are even designed with extra features, like ribbed interiors for a tighter grip or UV-resistant coatings for outdoor use.
But here's what really matters: Their job isn't just cosmetic. A properly fitted plastic pipe end cap prevents water from pooling inside pipes, which can lead to rust (especially in steel or iron pipes) or mold growth. It stops dust and debris from clogging internal channels, which is crucial if your pipes are part of a fluid or air system. And in high-traffic areas—like around workbenches or turnover trolleys—it acts as a buffer, reducing the risk of scratches, dents, or even injuries from sharp, exposed pipe edges.
In short, plastic pipe end caps are the unsung heroes of lean pipe systems. And like any hero, they need a little care to keep doing their job.
Weekly Checks: The "Quick Scan" for Immediate Risks
Weekly checks are all about speed and efficiency. Think of them as a "health pulse" for your plastic pipe covers—you're not doing a deep dive, but you're looking for red flags that could turn into bigger problems by next week. These checks should take no more than 15-20 minutes per workstation or material rack, and they're best done at the start or end of a shift when the line is quiet.
What to Look For (And How)
1. Loose or Missing Caps : Walk the perimeter of each lean pipe structure and visually inspect every exposed pipe end. Are all caps securely in place? A loose cap might wiggle when you gently tug it; a missing cap leaves the pipe end completely exposed. I've seen facilities where caps vibrate loose from constant machine movement—especially near conveyors or roller tracks—and no one notices until water or debris gets in. Make a habit of giving each cap a light twist or push to test its fit.
2. Cracks or Chips : Sunlight, temperature changes, and accidental bumps can cause plastic caps to crack over time. Hold a flashlight at an angle to the cap's surface—this makes even small cracks more visible. Pay extra attention to caps near floor level (they're prone to being kicked or hit by trolleys) and those exposed to direct sunlight (UV rays degrade plastic faster). A tiny chip might not seem urgent, but it's a weak point that will only grow with time.
3. Debris Buildup : Dirt, grease, or product residue can accumulate around the base of the cap, where it meets the pipe. This isn't just unsightly—it can trap moisture, leading to corrosion under the cap. Use a dry cloth or a soft brush to wipe away any buildup. While you're at it, check if the cap is seated evenly; debris can sometimes push it out of alignment, creating gaps.
4. Color Fading or Brittle Texture : Pinch the edge of the cap gently (wear gloves if the plastic is cold or sharp). Does it feel flexible, or is it stiff and brittle? Faded color—especially in outdoor or sun-exposed areas—is a sign of UV damage, which weakens the plastic. Brittle caps are more likely to crack under even minor pressure, so note these for closer inspection during monthly checks.
Quick Fixes for Weekly Issues
The goal of weekly checks is to address small problems before they escalate. Here's what to do on the spot:
- Loose caps : Press them firmly back into place. If they won't stay, add a small dab of industrial-grade adhesive (avoid super glue, which can damage plastic over time). For caps that keep coming loose, mark the pipe with a pencil and note it for monthly checks—you might need a larger size or a replacement cap with a tighter grip.
- Minor cracks : Cover small cracks (less than 1/4 inch) with a temporary patch, like electrical tape, to keep moisture out until you can replace the cap. Label the patch with a date so you remember to follow up.
- Debris : Wipe away dirt or grease immediately. If residue is sticky (like oil), use a mild detergent and a damp cloth—just dry the area thoroughly afterward to prevent water damage.
Pro Tip:
Keep a small "emergency kit" near each workstation with spare plastic pipe end caps (in common sizes), adhesive, tape, and a cloth. This way, you can fix loose or missing caps on the spot without hunting down supplies.
Why Weekly Checks Matter
Skipping weekly checks is like ignoring a check engine light—you might get away with it for a while, but eventually, you'll pay the price. A loose cap today could be a missing cap tomorrow; a tiny crack could split open during a weekend rainstorm. One facility I worked with skipped weekly checks for two months, and by the time they did an inspection, 12 caps were cracked or missing. The cost to replace the caps was minimal, but the rusted pipes underneath? That ran them over $500 in repairs.
Monthly Checks: The "Deep Dive" for Long-Term Health
If weekly checks are the "quick scan," monthly checks are the "full" (physical exam). These are more thorough, time-consuming (30-45 minutes per structure), and focused on catching issues that develop slowly—like hidden corrosion, material degradation, or misaligned caps that weekly checks might miss. Monthly checks are best scheduled on a quiet day, like a Friday afternoon, when you can take parts apart if needed.
What to Look For (And How)
1. Hidden Damage Under Caps : This is the big one. For monthly checks, you'll need to remove a sample of caps (aim for 10-15% of total caps per structure) to inspect the pipe ends underneath. Why only a sample? Removing every cap every month would take too long, but sampling helps you spot trends. Twist the cap gently to remove it—if it's stuck, use a flathead screwdriver to pry it loose (be careful not to scratch the pipe). Once off, check the pipe end for rust, corrosion, or moisture. Even a small amount of water inside the pipe is a red flag—it means the cap wasn't sealing properly, even if it looked fine from the outside.
2. Cap Fit and Wear Patterns : Examine the interior of the removed caps. Are there signs of uneven wear? For example, if the inner rim is cracked or compressed on one side, it might mean the cap was the wrong size to begin with. I once found a facility using 1-inch caps on 0.75-inch pipes—they'd forced the caps on, but over time, the plastic stretched and cracked. Also, check if the cap's grip ribs (the raised plastic inside) are worn down; these are what keep the cap tight, so worn ribs mean the cap will keep coming loose.
3. Environmental Stressors : Step back and consider the conditions around the caps. Are they near a water source (like a cleaning station)? Exposed to chemicals (like oil or solvents)? In direct sunlight for 8+ hours a day? These factors (accelerate) wear. For example, caps near cleaning stations might absorb moisture and swell; those near solvents might become discolored or brittle. Note these high-stress areas—you might need to replace caps there more frequently.
4. Alignment with Lean Pipe Joints : Sometimes, caps get damaged not because of the cap itself, but because the pipe is misaligned. If a lean pipe joint is loose, the pipe might wobble, putting extra pressure on the cap. Gently shake the pipe—if it moves more than 1/4 inch, the joint might need tightening. A wobbly pipe will wear out caps quickly, so this is a problem that needs fixing even if the cap looks fine.
Monthly Maintenance Tasks
Unlike weekly checks, monthly checks often involve repairs or replacements. Here's what to add to your to-do list:
- replace damaged caps : Any cap with cracks larger than 1/4 inch, severe brittleness, or worn grip ribs should be replaced immediately. Keep a log of which caps you replace and where—this helps you track wear patterns (e.g., "Caps near the south window need replacing every 3 months").
- Clean pipe ends : If you find rust or corrosion under a cap, sand the pipe end lightly with fine-grit sandpaper, then wipe it clean and dry. Apply a thin coat of anti-rust spray before reattaching the new cap.
- Adjust misaligned pipes : Tighten loose lean pipe joints with a wrench. If the pipe still wobbles, add a reinforcement bracket—this reduces stress on the cap.
- Upgrade caps in high-stress areas : If caps in a specific spot (like near a conveyor) keep failing, switch to a heavier-duty material or a larger size. For example, UV-resistant caps work better in sunny areas, while chemical-resistant caps are better near solvents.

Weekly vs. Monthly Checks: A Side-by-Side Comparison
| Aspect | Weekly Checks | Monthly Checks |
|---|---|---|
| Purpose | Catch immediate risks (loose/missing caps, small cracks) before they escalate. | Identify long-term issues (hidden corrosion, material degradation, misalignment) that weekly checks miss. |
| Frequency | Once per week (best on the same day, e.g., Monday mornings). | Once per month (schedule during a slow shift to avoid disrupting production). |
| Time Investment | 15-20 minutes per workstation/rack. | 30-45 minutes per workstation/rack (includes removing caps and repairs). |
| Key Tools Needed | Flashlight, dry cloth, mild detergent (for debris), temporary patch (e.g., tape). | Flashlight, screwdriver (to remove caps), sandpaper, anti-rust spray, replacement caps, wrench (for joint tightening). |
| Common Issues Found | Loose/missing caps, small cracks, debris buildup, faded color. | Hidden corrosion, worn grip ribs, misaligned pipes, cap-size mismatches, environmental damage. |
| Outcome | Immediate fixes to keep the system running safely until next week. | Long-term reliability—extends cap lifespan and prevents costly pipe repairs. |

Real-World Impact: When Maintenance (or Lack Thereof) Speaks for Itself
Numbers tell the story best. Let's look at two facilities I've worked with—both using similar lean pipe systems, both with plastic pipe end caps, but with very different maintenance habits.
Case Study 1: Facility A (Weekly + Monthly Checks)
This automotive parts plant implemented weekly and monthly checks for their plastic pipe covers two years ago. They assigned a dedicated technician to do weekly scans every Monday and monthly deep dives on the last Friday of each month. In the first year, they replaced 12 caps (mostly due to UV damage in sun-exposed areas). In the second year, they reduced that number to 8 by switching to UV-resistant caps in high-stress zones. During this time, they reported zero production halts due to pipe-related issues, and their lean pipe repair costs dropped by 40% compared to before the schedule was in place.
This automotive parts plant implemented weekly and monthly checks for their plastic pipe covers two years ago. They assigned a dedicated technician to do weekly scans every Monday and monthly deep dives on the last Friday of each month. In the first year, they replaced 12 caps (mostly due to UV damage in sun-exposed areas). In the second year, they reduced that number to 8 by switching to UV-resistant caps in high-stress zones. During this time, they reported zero production halts due to pipe-related issues, and their lean pipe repair costs dropped by 40% compared to before the schedule was in place.
Case Study 2: Facility B (No Regular Checks)
This electronics assembly plant skipped formal maintenance, relying on "if it ain't broke, don't fix it." For six months, things seemed fine. Then, during a summer rainstorm, water seeped into multiple exposed pipe ends (missing caps) and rusted lean pipe joints. The rust caused two material racks to collapse, damaging $2,000 worth of components. Repairs took three days, and the total cost (parts, labor, lost production) hit $15,000. Afterward, they implemented weekly and monthly checks—but the lesson was costly.
This electronics assembly plant skipped formal maintenance, relying on "if it ain't broke, don't fix it." For six months, things seemed fine. Then, during a summer rainstorm, water seeped into multiple exposed pipe ends (missing caps) and rusted lean pipe joints. The rust caused two material racks to collapse, damaging $2,000 worth of components. Repairs took three days, and the total cost (parts, labor, lost production) hit $15,000. Afterward, they implemented weekly and monthly checks—but the lesson was costly.
The takeaway? Maintenance isn't an expense—it's an investment. Facility A spent ~$100/year on replacement caps and saved $10,000+ in repairs and downtime. Facility B saved $100 in caps but lost $15,000. Which math makes sense for your operation?
Pro Tips for Making Maintenance Stick
Even the best schedule fails if your team doesn't follow it. Here's how to turn maintenance from a chore into a habit:
1. Create a Checklist (And Make It Visible)
A simple checklist posted near each workstation reminds everyone what to look for. Include photos: a "good cap" vs. a "cracked cap," a "secure fit" vs. a "loose fit." I've seen facilities laminate checklists and attach them to workbenches—no more "I forgot what to check" excuses.
2. Train the Team (Not Just Maintenance)
Your frontline workers—those using the workstations every day—are your best eyes. Train them to spot loose or cracked caps during their shifts. Offer a small reward (like a gift card) for reporting issues—this turns everyone into a maintenance partner.
3. Track and Analyze Data
Keep a log of every cap replaced, every crack found, and every repair made. Over time, you'll see patterns: "Caps near the east conveyor need replacing every 3 months" or "Cracks are most common in winter when temperatures drop." Use this data to adjust your schedule—maybe check high-wear areas twice a week instead of once.
4. Stock Smart
Nothing kills momentum like running out of replacement caps. Keep a inventory of plastic pipe end caps in all sizes you use, plus a few extras for high-stress areas. Store them in a labeled bin near the maintenance station—no more digging through drawers to find the right size.
Conclusion: Protecting Your Lean System, One Cap at a Time
Plastic pipe end caps might be small, but their role in keeping your lean pipe system running smoothly is huge. Weekly checks are your first line of defense—quick, easy, and designed to catch problems before they start. Monthly checks go deeper, ensuring that hidden issues (like corrosion or misalignment) don't sneak up on you. Together, they form a maintenance routine that saves time, money, and frustration.
Remember: A lean system is only as strong as its weakest link. You can have the most efficient conveyor, the sturdiest workbench, and the best-trained team—but if a $2 plastic cap fails, the whole line can grind to a halt. So grab your flashlight, print that checklist, and start those weekly checks. Your future self (and your production numbers) will thank you.
And if you're ever tempted to skip a check? Think of Facility B. Or better yet, think of Facility A—sleeping soundly knowing their caps (and their lean system) are in good hands.