- Company Articles
- Products and Technology
- Installation And Maintenance
- Plastic Pipe End Cap Installation Tips: Ensuring Secure and Leak-Proof Fit

Plastic Pipe End Cap Installation Tips: Ensuring Secure and Leak-Proof Fit
Related Product
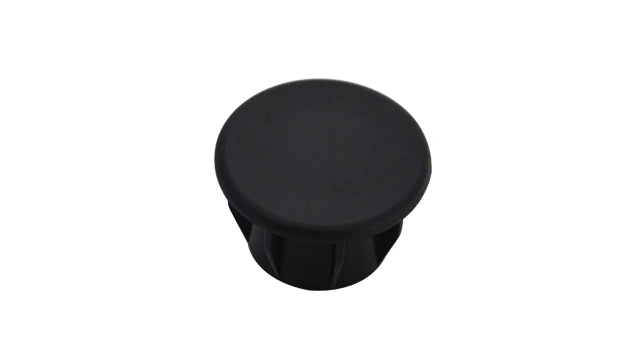
Plastic pipe end cap
Plastic pipe cover, used for 28mm two end cover and protection, to avoid any scratch from sharp metal surface.
Introduction: The Unsung Hero of Industrial Piping
In the bustling world of manufacturing and industrial setups, attention often gravitates toward large machinery, complex conveyor systems, or high-tech workbenches. Yet, some of the most critical components are the smallest ones—quietly holding everything together, preventing mishaps, and ensuring smooth operations. Enter the plastic pipe end cap: a humble yet indispensable part of lean pipe systems, roller tracks, and workbench frames. These unassuming caps seal the ends of pipes, protecting both the infrastructure and the people who interact with it daily. Whether you're assembling a lean pipe workstation, setting up a roller track for material handling, or maintaining a production line, getting plastic pipe end cap installation right is non-negotiable. A loose or poorly fitted cap can lead to leaks, contamination, equipment damage, or even workplace injuries. In this guide, we'll walk through the ins and outs of installing plastic pipe end caps, focusing on creating secure, leak-proof fits that stand the test of time in industrial environments.
What Are Plastic Pipe End Caps, and Why Do They Matter?
Before diving into installation, let's clarify what plastic pipe end caps are and why they're so vital. Simply put, these are protective covers designed to seal the open ends of pipes—typically made from durable plastics like PVC, polyethylene, or polypropylene. They come in various sizes, shapes, and designs to fit different pipe diameters and industrial needs. In lean pipe systems, for example, where aluminum or steel pipes form the backbone of workbenches, material racks, and turnover trolleys, end caps serve multiple roles: they shield workers from sharp, unfinished pipe edges, prevent dust, debris, or liquids from entering the pipes (which could cause corrosion or blockages), and maintain the structural integrity of the entire setup. On roller tracks, end caps act as barriers, stopping products from sliding off the track ends and ensuring smooth, controlled material flow. Even in basic applications like hand trolleys or storage racks, a well-fitted end cap can extend the lifespan of the equipment by preventing water or chemical intrusion. In short, skimping on end cap installation isn't just a minor oversight—it's a risk to safety, efficiency, and your bottom line.

The Cost of Cutting Corners: Why Proper Installation Matters
You might think, "It's just a plastic cap—how important can it be?" The answer: more important than you'd expect. Improperly installed end caps can lead to a cascade of issues, from minor nuisances to major disruptions. Let's break down the risks:
Safety Hazards: Unsealed pipe ends are sharp. A worker brushing against an exposed pipe edge could get a cut, leading to injury and potential downtime. In high-traffic areas like assembly lines or warehouse floors, this risk multiplies.
Contamination and Corrosion: Pipes left open collect dust, moisture, and even pests. In food processing or pharmaceutical settings, this can contaminate products. In industrial environments with chemicals or oils, moisture inside pipes accelerates corrosion, weakening the structure over time.
Leakage and Waste: If pipes are used to transport liquids (even non-critical ones like coolant or cleaning solutions), a loose end cap can cause leaks. This wastes resources, damages flooring, and creates slip hazards.
System Instability: In modular setups like lean pipe workbenches, every component relies on the next. A wobbly end cap on a support pipe can throw off the entire structure's balance, leading to (shaking) or even collapse under heavy loads.
The good news? These issues are entirely preventable with careful installation. By taking the time to do it right, you'll save on repair costs, reduce downtime, and keep your workspace safe and efficient.
Safety Hazards: Unsealed pipe ends are sharp. A worker brushing against an exposed pipe edge could get a cut, leading to injury and potential downtime. In high-traffic areas like assembly lines or warehouse floors, this risk multiplies.
Contamination and Corrosion: Pipes left open collect dust, moisture, and even pests. In food processing or pharmaceutical settings, this can contaminate products. In industrial environments with chemicals or oils, moisture inside pipes accelerates corrosion, weakening the structure over time.
Leakage and Waste: If pipes are used to transport liquids (even non-critical ones like coolant or cleaning solutions), a loose end cap can cause leaks. This wastes resources, damages flooring, and creates slip hazards.
System Instability: In modular setups like lean pipe workbenches, every component relies on the next. A wobbly end cap on a support pipe can throw off the entire structure's balance, leading to (shaking) or even collapse under heavy loads.
The good news? These issues are entirely preventable with careful installation. By taking the time to do it right, you'll save on repair costs, reduce downtime, and keep your workspace safe and efficient.

Tools and Materials: Gathering What You Need
Like any job, installing plastic pipe end caps requires the right tools and materials. Here's a checklist to ensure you're prepared before starting:
| Tool/Material | Purpose |
|---|---|
| Measuring Tape/Ruler | To confirm pipe diameter and ensure the end cap fits snugly. |
| Deburring Tool or Sandpaper | To smooth rough or sharp edges on the pipe end, preventing damage to the cap and ensuring a tight seal. |
| Cleaning Cloth (Lint-Free) | To wipe away dust, oil, or debris from the pipe end—dirt can prevent proper adhesion and create gaps. |
| Rubber Mallet | For gently tapping the end cap into place without cracking it (avoid metal hammers, which can damage plastic). |
| Adhesive/Sealant (Optional) | For extra security in high-pressure or wet environments (choose a plastic-compatible formula like PVC cement or silicone sealant). |
| Lubricant (Mild Soap Solution or Silicone Spray) | To ease installation of press-fit end caps (avoid petroleum-based lubricants, which can degrade plastic). |
| Plastic Pipe End Caps | The star of the show—ensure they're the correct size and material for your pipe (check diameter and compatibility with pipe material). |
Pro tip: Always verify that your end caps match the pipe's diameter. A cap that's too small won't fit, while one that's too large will slide off. Most end caps list the compatible pipe size (e.g., "1-inch plastic end cap")—double-check this against your pipe before buying.
Step-by-Step Installation Guide: From Prep to Perfection
Now, let's walk through the installation process step by step. Follow these instructions closely, and you'll achieve a secure, leak-proof fit every time.
-
Step 1: Prepare the Pipe End
Start by preparing the pipe itself. If the pipe is newly cut, it will likely have sharp burrs or rough edges—these must be removed. Use a deburring tool to gently shave off any protrusions, or wrap sandpaper around a finger and smooth the edge in a circular motion. Next, clean the pipe end thoroughly with a lint-free cloth. Even a small amount of oil or dust can prevent the end cap from seating properly. For extra cleanliness (e.g., in medical or food-grade settings), wipe the end with a mild solvent like isopropyl alcohol and let it dry completely. -
Step 2: select the Right End Cap
Not all end caps are created equal. Ensure yours is designed for your pipe type—for example, a cap meant for aluminum lean pipe might not fit a stainless steel pipe of the same diameter due to differences in wall thickness. Check the cap's specifications: most list the compatible pipe outer diameter (OD). If you're unsure, test-fit the cap loosely before applying any adhesive. It should slide over the pipe end with slight resistance—too loose, and it will fall off; too tight, and you risk cracking the cap when forcing it on. -
Step 3: Test the Fit (Dry Run)
Before committing, do a dry test: align the end cap with the pipe end and push gently. It should grip the pipe without sliding off easily. If it's too tight, try warming the cap slightly with a hair dryer (plastic becomes more flexible when heated) or applying a tiny amount of lubricant (like soapy water) to the pipe end. If it's too loose, you may need a smaller cap or to wrap a thin layer of Teflon tape around the pipe end (though this is a temporary fix—better to get the right size). -
Step 4: Apply Adhesive or Sealant (If Needed)
For most standard applications (e.g., dry environments, low-stress setups like workbench legs), a press-fit alone is sufficient. But for high-stress or wet environments (e.g., roller tracks in a washdown area, pipes carrying liquids), add adhesive or sealant. Apply a thin, even bead of plastic-compatible adhesive (like PVC cement) to the inside of the end cap, focusing on the rim. Avoid over-applying—excess adhesive can squeeze out and create a messy seal or block drainage holes (if the cap has them). Alternatively, use a silicone sealant for a flexible, waterproof bond—this is ideal for pipes exposed to temperature fluctuations, as silicone expands and contracts with plastic. -
Step 5: Secure the End Cap
Align the end cap with the pipe end, ensuring it's straight (crooked caps can leak or crack). Push firmly with your hands first—apply even pressure around the cap's edge to avoid warping. If it's still tight, tap the cap gently with a rubber mallet. Place a scrap piece of wood between the mallet and cap to prevent dents. Stop when the cap is fully seated—you should feel resistance, and the pipe end should not be visible beyond the cap. Never hammer directly on the cap, as plastic is brittle and can shatter. -
Step 6: Allow for Curing (If Using Adhesive)
If you used adhesive, let it cure fully before putting the pipe into use. Check the adhesive's instructions—most take 24 hours to reach full strength, though some quick-set formulas work in 30 minutes. Avoid touching or stressing the cap during this time; even a small bump can break the bond. -
Step 7: Inspect for Gaps or Leaks
Once installed, inspect the cap for gaps. Run a finger around the seam between cap and pipe—there should be no visible space. For liquid-carrying pipes, test for leaks by filling the pipe with water (or air, using a pressure gauge) and letting it sit for an hour. If you notice drips or a drop in pressure, the cap may be loose or cracked—remove it, clean the pipe, and try again with a new cap if necessary.
Common Challenges and How to Overcome Them
Even with careful preparation, you might encounter hiccups. Here are solutions to the most common installation challenges:
-
Problem: Pipe End is Irregular (Warped or Oval)
Pipes cut with dull tools or bent during handling may have uneven ends. Solution: Use a pipe cutter to trim the end straight, then deburr again. For slightly oval pipes, warm the cap and stretch it gently as you press it on—plastic's flexibility can accommodate minor irregularities. -
Problem: End Cap Cracks When Installing
This usually happens due to over-tightening or using a cap that's too small. Solution: replace the cracked cap with a larger size. If the pipe end is sharp, deburr more thoroughly. When tapping with a mallet, hit the cap's edge, not the center—this distributes force evenly. -
Problem: Cap Slips Off After Installation
Likely causes: dirty pipe, wrong cap size, or insufficient friction. Solution: Clean the pipe with alcohol, dry, and reapply with adhesive. If the cap is the right size but still slips, roughen the pipe end slightly with sandpaper to create more grip before pressing the cap on. -
Problem: Leaks in Wet Environments
Even a press-fit cap may leak if submerged or exposed to high humidity. Solution: Use a waterproof sealant (like marine-grade silicone) in addition to adhesive. Apply a bead inside the cap and around the pipe end before pressing together, then wipe away excess sealant with a damp cloth.
Integration with Lean Systems: End Caps in Action
Now that you know how to install end caps, let's look at their real-world applications in lean pipe systems—one of the most common industrial setups where these caps shine. Lean pipe systems (also called "flexible pipe systems") use modular pipes and joints to build custom workbenches, material racks, and production lines. They're popular in lean manufacturing for their adaptability and low cost. In these systems, end caps are everywhere: on the legs of aluminum workbench K, the crossbars of material rack B, and the rails of roller tracks. For example, on a workbench with a single deck (without casters), end caps on the support pipes prevent workers from catching their sleeves on sharp edges. On a 3-row, 3-floor material rack, end caps on the vertical pipes stop dust from collecting inside, which could otherwise fall onto stored products. Even on roller tracks, end caps on the track ends work with swivel roller balls to keep items moving forward without slipping off—critical for maintaining flow in assembly lines. By ensuring end caps are properly installed in these systems, you're not just protecting pipes; you're preserving the efficiency and safety that make lean manufacturing so effective.
Maintenance: Keeping End Caps Secure Over Time
Installation is just the first step—regular maintenance ensures your end caps stay secure for years. Here's what to do:
- Inspect Regularly: During routine equipment checks, give end caps a quick tug to ensure they're tight. Look for cracks, discoloration (a sign of UV damage), or brittleness—these mean it's time to replace the cap.
- Clean Around the Cap: Wipe away dust and debris that can build up between the cap and pipe, which can weaken the seal over time.
- replace Proactively: Plastic end caps have a lifespan—typically 3–5 years in industrial environments. If you notice signs of wear, replace them before they fail.
- Adjust for Temperature Changes: In extreme heat or cold, plastic expands and contracts. Check end caps seasonally—they may need to be re-tightened or replaced if the fit becomes loose.
Conclusion: Small Part, Big Impact
Installing plastic pipe end caps might seem like a minor task, but it's a critical one. These small components protect your equipment, keep your workspace safe, and ensure the smooth operation of lean pipe systems, roller tracks, and workbenches. By following the steps outlined here—preparing the pipe, selecting the right cap, testing the fit, and securing it properly—you'll create a seal that stands up to the demands of industrial life. Remember: in manufacturing and industrial settings, efficiency and safety often hinge on the details. A well-installed end cap is more than just a cover—it's a commitment to quality, reliability, and care for your team and equipment. So the next time you reach for that plastic cap, take a moment to do it right. Your future self (and your bottom line) will thank you.