- Company Articles
- Products and Technology
- Installation And Maintenance
- Quick Replacement Tips for Worn 2020 Aluminum Profile End Caps

Quick Replacement Tips for Worn 2020 Aluminum Profile End Caps
Related Product
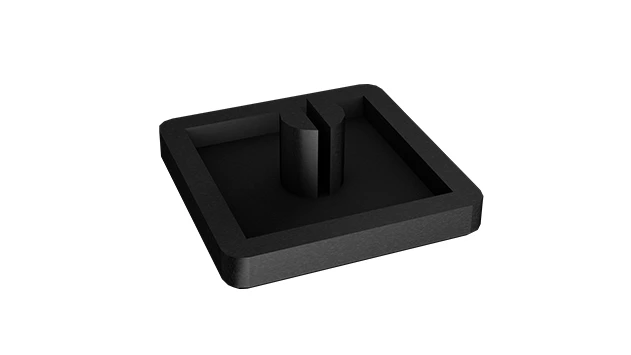
2020 Aluminum Profile End Cap
The aluminum profile end cap adds a finishing touch to your project and closes off profile ends to limit dust and debris buildup, also it can avaid some scratch for material and labor during the assemble work.
If you've ever stepped into a busy workshop, a bustling factory floor, or even a well-organized home garage, you've likely encountered aluminum profiles hard at work. These sleek, modular structures are the unsung heroes of modern workspaces, forming the backbone of everything from workbenches and material racks to assembly lines and storage systems. They're durable, versatile, and designed to adapt to almost any need—but like any hardworking component, they rely on small details to perform their best. Today, we're zooming in on one of those details: the 2020 aluminum profile end cap. It's easy to overlook these tiny caps, but when they wear out, the consequences can range from minor frustrations to genuine safety risks. Let's dive into why these small accessories matter, how to spot when they need replacing, and a step-by-step guide to getting the job done quickly and effectively.
Why 2020 Aluminum Profile End Caps Deserve Your Attention
First, let's clarify what we're talking about. The "2020" in 2020 aluminum profile refers to its dimensions: 20mm by 20mm, a common size favored for its balance of strength and flexibility. It's a staple in industries like manufacturing, electronics, and automotive, where precision and adaptability are key. The end cap, as the name suggests, is the small cover that fits over the exposed end of the profile. At first glance, it might seem like a trivial add-on, but its roles are surprisingly critical.
For starters, end caps protect the aluminum profile itself. Without a cap, the open end of the profile acts like a magnet for dust, dirt, and debris. Over time, these particles can build up inside the T-slot (the groove that runs along the profile's length), gumming up the works and making it harder to attach accessories like brackets or shelves. Moisture is another enemy—even a small amount of water trapped inside the profile can lead to corrosion, weakening the aluminum and shortening its lifespan.
Safety is an even bigger concern. Aluminum profiles are cut to length during installation, and those cut ends can be surprisingly sharp. A worn or missing end cap leaves that sharp edge exposed, turning a harmless workbench or rack into a potential hazard. Imagine brushing against a profile while rushing to meet a deadline, only to get a painful cut from an uncovered end—that's a risk no workspace should tolerate. End caps also provide a finished, professional look; a workspace with chipped, missing, or mismatched end caps can feel unkempt, which subtly affects morale and attention to detail.
In short, end caps are the unsung guardians of your aluminum profiles. They keep your workspace clean, safe, and functional—all while costing just a few dollars per cap. So when they wear out, replacing them isn't just a "nice-to-do" task; it's an essential part of maintaining a productive, safe environment.
Signs Your 2020 Aluminum Profile End Caps Need Replacing
Now that we know why end caps matter, let's talk about how to tell when yours are past their prime. Worn end caps rarely announce themselves with a loud "replace me!"—instead, they send subtle signals that are easy to miss if you're not paying attention. Here are the key signs to watch for:
Cracks and Splits
Cracks are the most obvious red flag. Over time, exposure to sunlight, temperature changes, and general wear can cause the end cap's material (usually plastic or rubber) to become brittle. You might notice hairline fractures along the edges, or larger splits that go all the way through the cap. Even small cracks are problematic because they let dust and moisture seep into the profile. If you see any cracking, don't wait for it to get worse—replace the cap immediately.
Looseness or Wobbling
A properly installed end cap should fit snugly, with no movement when you gently tug on it. If your end cap shifts, wiggles, or even falls off completely, it's time for a replacement. Looseness often happens when the end cap's internal tabs (the small plastic prongs that grip the inside of the profile) wear down or break. Once those tabs are compromised, the cap can't stay in place, leaving the profile exposed.
Discoloration or Fading
While discoloration alone might not affect function, it's a sign that the end cap is deteriorating. UV rays from sunlight, harsh cleaning chemicals, or exposure to oils and solvents can cause the cap to fade, yellow, or become stained. In some cases, this discoloration is accompanied by brittleness—so even if the cap still fits, it might be weaker and more prone to cracking soon. If your end caps look noticeably different from when they were installed, it's worth checking their condition more closely.
Sharp Edges or Roughness
Run your finger gently over the end cap (wearing gloves, just in case). If you feel any roughness, chips, or sharp edges on the cap itself, that's a problem. Over time, end caps can get scuffed or damaged from contact with tools, materials, or even just regular use. A rough cap won't seal the profile as effectively, and those sharp edges can still cause injuries—even if the aluminum underneath is covered.

Gathering Your Tools and Materials
Replacing end caps is a quick project, but having the right tools and materials on hand will make it even easier. You won't need anything fancy—most of these items are probably already in your toolbox. Here's what you'll need:
| Tools | Materials |
|---|---|
| Work gloves (to protect hands from sharp edges) | 2020 aluminum profile end caps (matching your profile's finish/color) |
| Flathead or Phillips screwdriver (depending on end cap type) | Aluminum profile rubber strip (optional, for extra grip/seal) |
| Needle-nose pliers (for removing stubborn caps or bent tabs) | Aluminum profile fixings (screws or clips, if your end caps require them) |
| Microfiber cloth or alcohol wipes (for cleaning the profile end) | Mild detergent and water (for heavy-duty cleaning) |
| Rubber mallet (optional, for tapping caps into place) | Fine-grit sandpaper or file (for smoothing rough profile edges) |
Let's break this down a bit. The type of screwdriver you need depends on whether your end caps are press-fit (snapped into place) or screw-on (secured with small screws). Most 2020 profile end caps are press-fit, which means no screws—they rely on friction and small plastic tabs to stay in place. If yours are screw-on, check the screw head to see if it's flathead or Phillips. Needle-nose pliers are handy for gripping and pulling off old caps that are stuck, especially if the tabs are broken.
For materials, the star of the show is obviously the new 2020 aluminum profile end caps. It's important to get caps that are specifically designed for 20mm profiles—caps for larger profiles (like 3030 or 4040) won't fit, and smaller ones will be loose. If possible, match the color and finish of your existing caps to keep things consistent. Most end caps come in black, silver, or white, but you can find specialty colors if needed.
Aluminum profile rubber strip is an optional but useful addition. This thin, flexible strip (usually self-adhesive) can be added between the end cap and the profile for a tighter seal, especially if the profile's end has worn slightly over time. It also helps dampen vibrations, which can loosen caps in high-traffic areas. Aluminum profile fixings like small screws or clips might be necessary if your end caps have screw holes—always check the old caps first to see if they were secured with fixings.
Pro Tip: Buy a few extra end caps. It's common to misplace one or accidentally damage a cap during installation, and having spares on hand means you won't have to pause mid-project to order more. They're inexpensive, so stockpiling a small supply is a smart move.

Step-by-Step: Replacing Your 2020 Aluminum Profile End Caps
Now that you've got your tools and materials ready, let's walk through the replacement process. Don't worry—this is a beginner-friendly task that should take no more than 5-10 minutes per end cap, even if you're new to DIY projects.
Step 1: Safety First—Protect Your Hands
Before you start, put on your work gloves. Even if the end cap looks intact, the aluminum profile underneath might have sharp edges, especially if the cap has been worn for a while. Gloves will also protect your hands from any rough plastic on the old end cap or from the tools you'll be using. It's a simple step, but it's easy to skip—and regret later.
Step 2: Remove the Old End Cap
If your end cap is press-fit (the most common type), start by gently prying it loose. Use your fingers first—sometimes a loose cap will pop off with a little wiggling. If it's stuck, slide the flathead screwdriver under the edge of the cap (be careful not to scratch the profile!) and apply gentle pressure to lift it. For extra stubborn caps, use needle-nose pliers to grip the edge and pull straight out. Avoid twisting or bending the cap too much, as this can damage the profile's end.
If your end cap is secured with screws, use the appropriate screwdriver to remove them first. Set the screws aside in a small bowl or container so you don't lose them—you might need them for the new cap (unless the new cap comes with its own screws).
Once the old cap is off, take a moment to inspect the profile's end. Look for any signs of damage, like dents, burrs, or corrosion. If you see rough spots, gently smooth them with fine-grit sandpaper or a file. A smooth end will help the new cap fit better and last longer.
Step 3: Clean the Profile End Thoroughly
With the old cap removed, you'll probably notice some dust, dirt, or grime inside the profile's end. This is normal, but it needs to be cleaned before installing the new cap. Grab a microfiber cloth or alcohol wipe and wipe the inside and outside of the profile end. For heavier buildup, dampen the cloth with a little mild detergent and water, then dry thoroughly—you don't want any moisture trapped under the new cap.
Pay special attention to the T-slot opening at the end of the profile. Use the corner of the cloth or a dry toothbrush (old, soft-bristled) to dislodge any debris stuck in the slot. A clean surface ensures the new end cap will seal properly and stay in place.
Step 4: Prepare the New End Cap
Take your new 2020 aluminum profile end cap and inspect it for any defects. Check that the plastic tabs (if it's press-fit) are intact and not bent—these tabs are what grip the inside of the profile. If the cap has screw holes, make sure they're aligned with the holes in the profile (if your profile has pre-drilled holes for fixings).
If you're using aluminum profile rubber strip for extra grip or sealing, now's the time to apply it. Cut a small piece of rubber strip to fit the inner circumference of the end cap (it should be slightly shorter than the cap's inner edge to avoid overlapping). Peel off any adhesive backing (if your strip has it) and press the strip firmly into the cap, making sure it's smooth and even. The rubber will add a slight cushion, helping the cap stay snug and improving its seal against dust and moisture.
Step 5: Install the New End Cap
For press-fit caps: Align the cap with the profile's end, making sure any tabs or notches are positioned correctly (some caps have a specific orientation to fit the T-slot). Hold the cap firmly and press it straight onto the profile. You should feel a slight "pop" as the tabs engage with the inside of the profile. If it's tight, gently tap the cap with a rubber mallet (wrapping the cap in a cloth first to avoid marring the finish) until it's flush with the profile end. Don't force it—if it won't go on easily, check for debris or misalignment.
For screw-on caps: Place the cap on the profile end, aligning the screw holes. insert the screws (either the old ones or new aluminum profile fixings) and tighten them with your screwdriver until they're snug—but don't overtighten, as this can strip the threads or crack the cap.
Step 6: Test the Fit and Make Adjustments
Once the new cap is installed, give it a gentle tug to make sure it's secure. It should feel firm, with no wobbling or movement. Run your hand over the cap to check for sharp edges or gaps. If the cap feels loose, try adding a rubber strip (if you didn't already) or gently bending the plastic tabs (on press-fit caps) outward slightly to increase friction. If it's too tight and won't sit flush, check if the profile end is smooth—you might need to sand it a bit more.
Take a step back and admire your work! That new end cap should look clean, secure, and ready to protect your profile for years to come.
Troubleshooting Common End Cap Replacement Hiccups
Most end cap replacements go smoothly, but occasionally, you might run into a snag. Here are some common issues and how to fix them:
Problem: The Old End Cap Breaks When Removing It
If the old cap is brittle, it might crack or break during removal, leaving pieces stuck inside the profile. Don't panic—use needle-nose pliers to carefully pull out the remaining. If there are small plastic bits stuck in the T-slot, use a toothpick or the tip of your screwdriver to dislodge them. Once all pieces are removed, clean the end thoroughly before installing the new cap.
Problem: The New Cap Is Too Loose (Even After Cleaning)
Over time, the inside of the profile can wear slightly, making press-fit caps feel loose. As mentioned earlier, aluminum profile rubber strip is your best friend here. Cut a strip to fit, apply it to the cap's inner edge, and reinstall—the rubber will fill the gap and create a tight seal. If rubber strip isn't available, you can also wrap a small piece of electrical tape around the profile end (sticky side out) before installing the cap. The tape adds thickness, helping the cap grip better.
Problem: The New Cap Is Too Tight to Install
If the cap won't slide on, check if the profile end is bent or has burrs (small metal flakes from cutting). Use a file or sandpaper to smooth the edge, focusing on any high spots. You can also gently sand the inside of the end cap (very lightly!) to reduce friction. Avoid using oil or lubricants—they'll attract dust and make the cap slip later.
Problem: The Cap Doesn't Match the Profile's Finish
Oops—we've all been there. If you accidentally bought caps that don't match (e.g., silver instead of black), don't stress too much. Functionally, the color doesn't matter, but it can bug you aesthetically. Keep the mismatched caps as spares and order the correct ones for a later date. In the meantime, they'll still protect the profile and keep your workspace safe.
Extending the Life of Your New End Caps: Maintenance Tips
Now that you've replaced your worn end caps, you'll want to keep them in good shape for as long as possible. With a little maintenance, you can extend their lifespan and avoid frequent replacements:
Make Inspection a Habit
Add end cap checks to your regular workspace maintenance routine. Every month or so, take a quick walk around and inspect all your 2020 profiles. Look for cracks, looseness, or discoloration. Catching issues early means you can replace a single cap instead of dealing with multiple failures down the line.
Keep Them Clean
Dust and grime can degrade end caps over time, especially if they're made of plastic. Wipe them down with a damp cloth during your weekly cleanup to remove buildup. For tougher stains, use a mild detergent—avoid harsh chemicals like acetone or bleach, as they can break down the plastic or rubber.
Avoid Excessive Force or Impact
End caps are sturdy, but they're not indestructible. Try to avoid hitting or dropping heavy objects on them, and be careful when moving tools or materials around profiles. A little extra care goes a long way in preventing cracks or breaks.
replace Proactively
If you notice a cap starting to show signs of wear (like small cracks or looseness), replace it before it fails completely. Waiting until it falls off or breaks means your profile is exposed in the meantime, and removing a damaged cap is more likely to leave behind.
Final Thoughts: Small Changes, Big Impact
Replacing worn 2020 aluminum profile end caps might seem like a minor task, but it's a perfect example of how small details make a big difference in a workspace. These tiny aluminum profile accessories protect your equipment, keep your team safe, and maintain a professional, organized environment—all for just a few minutes of work and a minimal cost.
Whether you're a seasoned facility manager, a small business owner, or a DIY enthusiast setting up a home workshop, taking the time to care for your aluminum profiles and their accessories pays off. You'll reduce downtime from equipment issues, avoid costly repairs, and create a space where people can focus on what matters: getting the job done right.
So, the next time you're in your workspace, take a minute to check those end caps. If you spot one that's worn, cracked, or missing, grab your tools and replace it—your future self (and your aluminum profiles) will thank you.