- Company Articles
- Products and Technology
- Installation And Maintenance
- Quick Tips for Installing Suction Cup Anti-Slip Foot Adjusters on Industrial Trolleys

Quick Tips for Installing Suction Cup Anti-Slip Foot Adjusters on Industrial Trolleys
Related Product
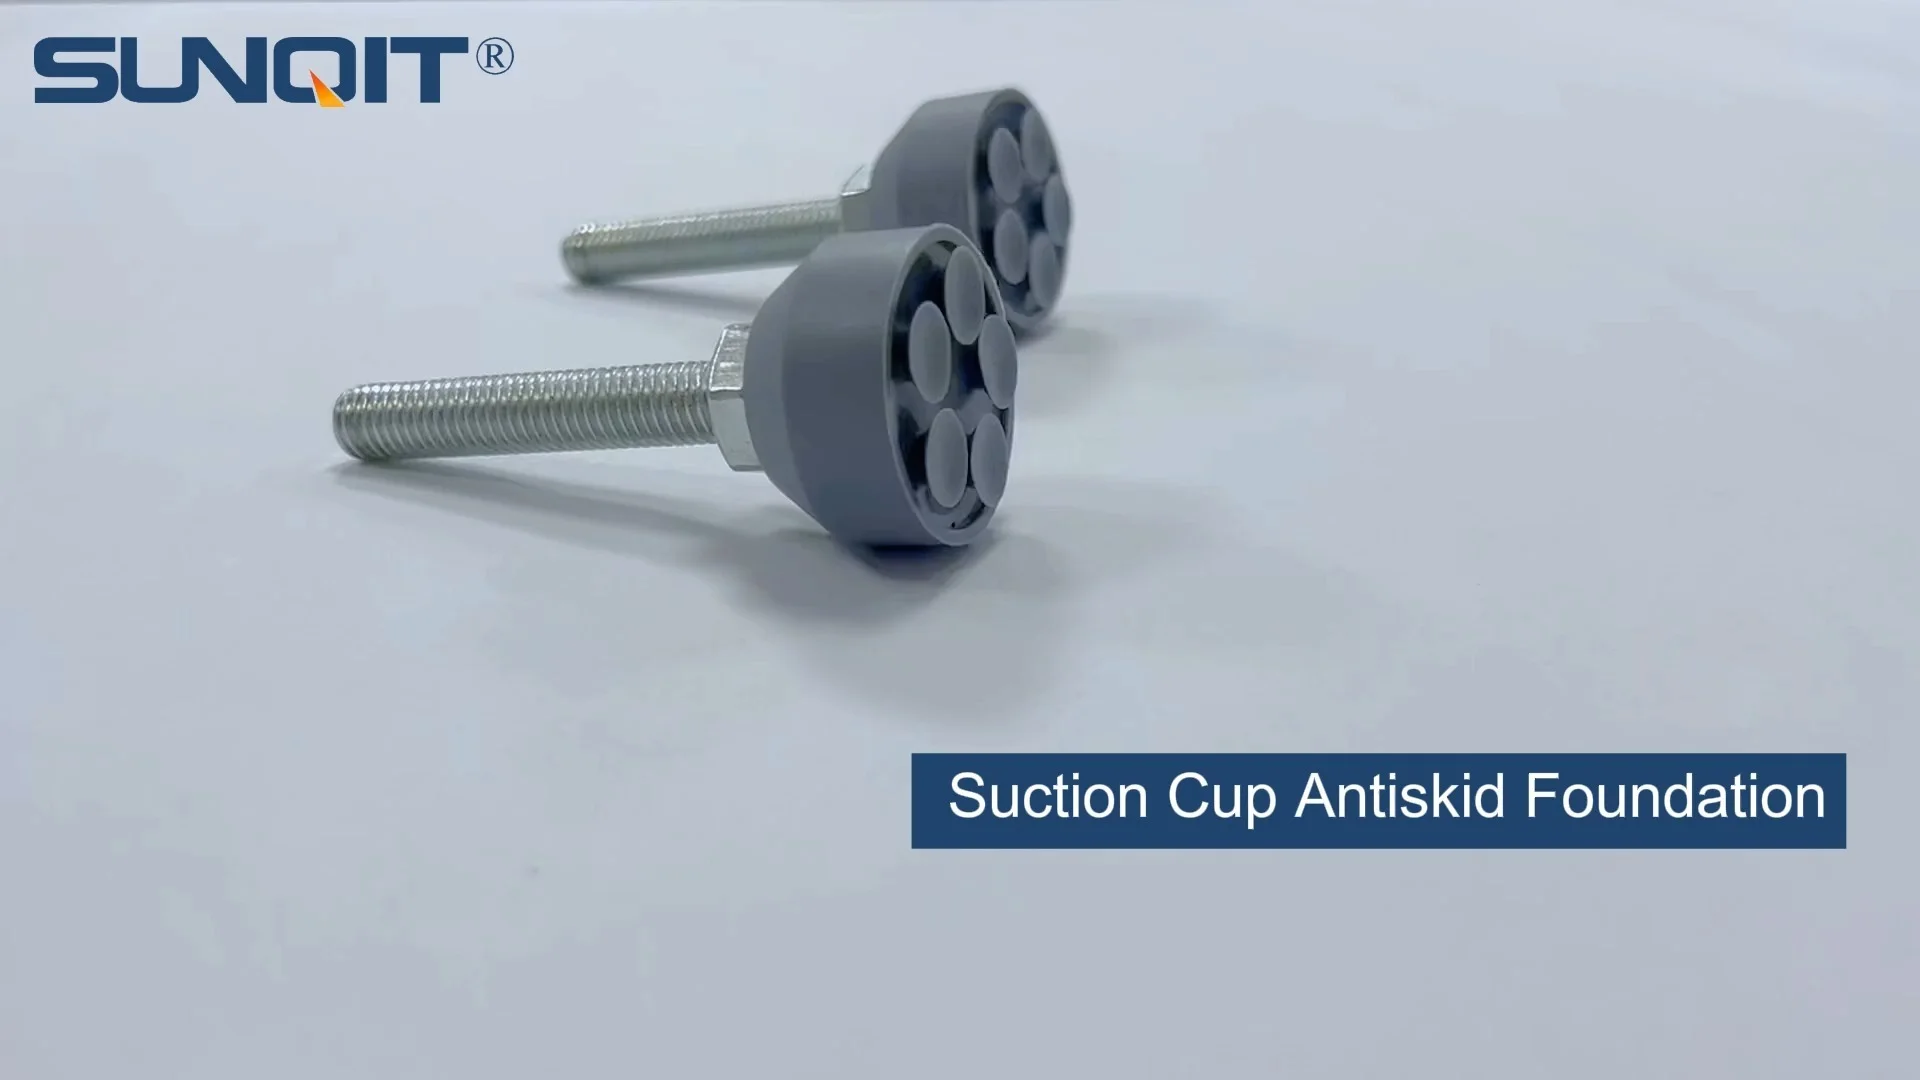
Suction Cup Anti-slip Foot Adjuster
D=35mm suction cup anti-slip foot adjusterï¼screw M10*55ï¼with a blot, used for workbench, flowrack pipe contact with groud.
Let's start with a scenario we've all seen (or maybe even experienced) in busy factories: A worker pushes a loaded hand trolley across the shop floor, only to have it suddenly slide sideways as it hits a slightly uneven patch of concrete. Boxes teeter, tools clatter, and for a heart-stopping moment, everyone holds their breath. More often than not, these close calls boil down to one overlooked component: the trolley's foot adjusters. Enter the suction cup anti-slip foot adjuster—a small but mighty part that can turn wobbly, accident-prone trolleys into steady, reliable workhorses. Whether you're working with a nimble hand trolley A for light parts or a heavy-duty model hauling machinery, getting these adjusters right isn't just about convenience—it's about keeping your team safe and your operations running smoothly. In this guide, we'll walk through everything you need to know to install suction cup anti-slip foot adjusters like a pro, from prepping your tools to troubleshooting common headaches. Let's dive in.
Understanding the Star of the Show: Suction Cup Anti-Slip Foot Adjusters
Before we grab our wrenches, let's make sure we know what we're working with. A suction cup anti-slip foot adjuster might sound technical, but it's actually a cleverly simple device. At its core, it's designed to do two things: keep your trolley from sliding around when it's stationary, and let you adjust its height to compensate for uneven floors. Let's break down its key parts:
- The Suction Cup: Usually made of durable rubber or silicone, this is the "anti-slip" hero. When pressed against a smooth surface (like concrete or tile), it creates a vacuum seal that grips tightly, even under heavy loads. Think of it like a mini plunger for your trolley—no air bubbles, no slipping.
- The Adjuster Screw: A threaded rod that lets you raise or lower the foot. Twist it clockwise, and the foot extends; counterclockwise, it retracts. This is crucial for leveling the trolley on bumpy floors—no more rocking back and forth like a seesaw.
- The Base Plate: The sturdy foundation that attaches the adjuster to your trolley. Many models use an aluminum foot base here because aluminum is lightweight, rust-resistant, and strong enough to handle daily wear and tear. It's like the backbone of the adjuster—without it, everything falls apart.
- The Locking Nut: Once you've set the perfect height, this nut tightens against the base plate to keep the adjuster from unscrewing on its own. Trust us, you don't want to skip this step—there's nothing worse than coming back to a trolley that's "sunk" an inch overnight.
Now, why choose a suction cup design over other foot adjusters (like basic rubber pads or metal spikes)? For starters, it's versatile. Rubber pads wear out quickly on rough floors, and metal spikes scratch delicate surfaces (looking at you, polished factory floors in electronics plants). Suction cups, though, work on everything from concrete to vinyl, and their grip only gets stronger under heavier loads. Plus, that adjustable screw means you can fine-tune the height to match your workspace—no more shimming with scraps of wood to stop the trolley from wobbling.
Prep Work: Getting Ready to Install (Because Rushing Leads to Regrets)
Installing foot adjusters isn't rocket science, but skipping prep work is a surefire way to end up with a wonky, unsafe trolley. Let's walk through what you'll need to gather and check before diving in. We'll use hand trolley a as our example here—it's a common lightweight model used in warehouses and assembly lines, but these steps apply to most industrial trolleys.
Tools You'll Need (Don't Skimp on the Basics)
Grab these before you start—running back and forth to the toolbox mid-installation is a mood-killer (and a time-waster):
- Adjustable wrench (or socket set, depending on your trolley's bolt size)
- Spirit level (the longer, the better—this ensures the trolley is flat from all angles)
- Lint-free cleaning cloth (for wiping down the trolley's base and the floor)
- Mild detergent (dish soap works!) and warm water (to clean greasy or dusty surfaces)
- Thread locker (blue is best for this job—red is permanent and might make future adjustments a nightmare)
- Pencil or marker (to mark mounting holes if needed)
- Rubber mallet (for gently tapping the adjuster into place if it's a tight fit)
Safety First: Don't Be That Guy (or Gal)
Factories are busy places, but taking 2 minutes to stay safe is always worth it. Here's what to do:
- Park the trolley on a flat, level surface. If you're working near machinery, turn it off or put up a "work in progress" sign to keep others from bumping into you.
- Wear gloves! The edges of the trolley's frame or aluminum foot base can be sharp, and no one wants a cut mid-install.
- Empty the trolley. Installing adjusters on a loaded trolley is a recipe for back strain (and the load might shift, throwing off your alignment).
- Check the floor for hazards. Grease, oil, or loose debris can make the trolley slide while you're working—wipe it clean first.
Inspect Your Trolley (Because Surprises Suck)
Before installing new adjusters, take 5 minutes to check out your hand trolley a. Look for:
- Damaged mounting points: Are the holes where the old feet attached stripped or rusted? If so, you might need to tap new threads or use a larger bolt (ask your maintenance team for help if this is beyond your skill level).
- Bent frame: Place the spirit level on the trolley's deck. If it's not level even when the wheels are locked, the frame might be bent. A bent frame will make adjusters useless—you'll need to straighten it first or replace the trolley.
- Worn casters: Wait, casters? Yes! Your trolley's caster wheels work with the foot adjusters—if the casters are wobbly or seized, the trolley won't roll smoothly even after adjusters are installed. Give them a spin; if they grind or don't turn freely, clean and lubricate them before starting.
Pro tip: If your trolley has old foot pads (rubber or plastic), remove them now. Use the wrench to loosen the bolts—if they're stuck, spray a little penetrating oil (like WD-40) and let it sit for 5 minutes. Once they're off, clean the mounting area with soap and water to remove rust, grease, or dirt. A clean surface ensures the aluminum foot base of the new adjuster attaches tightly—no gaps, no slipping.

Step-by-Step Installation: Let's Get This Adjuster On
Now that we're prepped and safe, let's install the suction cup anti-slip foot adjuster. We'll break this down into 6 easy steps—follow along, and you'll have a steady trolley in no time.
Step 1: Align the Adjuster with the Mounting Holes
Take your new suction cup anti-slip foot adjuster and hold it up to the trolley's mounting plate (where the old foot was). The aluminum foot base should have holes that line up perfectly with the holes on the trolley—if they don't, double-check that you have the right model (adjusters come in different sizes, so mixing them up is easy!). If the holes are close but not exact, use the pencil to mark where you need to drill new ones (only do this if the trolley's frame is metal—plastic frames might crack). For hand trolley a, the holes are usually 4 inches apart, so measure twice to avoid mistakes.
Step 2: Attach the Aluminum Foot Base (Tight, but Not Too Tight)
Place the adjuster's aluminum foot base against the trolley's mounting plate. insert the bolts through the holes (use the ones that came with the adjuster—they're sized to fit the threads). Tighten them by hand first to avoid cross-threading (this happens when the bolt is crooked, and it strips the threads—total nightmare). Once they're hand-tight, grab the adjustable wrench and snug them up. How tight? You want them firm enough that the base doesn't wiggle, but not so tight that you bend the aluminum. A good rule: tighten until you feel resistance, then give a quarter-turn more. If you're using thread locker (you should be!), apply a drop to each bolt before tightening—it prevents them from loosening due to vibrations.
Step 3: Set the Height with the Adjuster Screw
Now, it's time to adjust the height. Place the spirit level on the trolley's deck. If the bubble is off-center, twist the adjuster screw to raise or lower the foot. For example, if the left side is higher, lower the left adjuster (twist counterclockwise) until the bubble is in the middle. Do this for all adjusters (most trolleys have 4—one at each corner). Pro tip: Adjust one foot at a time, and check the level after each turn. Going too fast can make the trolley lopsided, and you'll end up chasing the bubble back and forth.
How high should the suction cup be? It should just barely touch the floor when the trolley is loaded. When unloaded, the caster wheels should still carry most of the weight—you don't want the adjusters dragging when you push the trolley. A good test: lift one corner of the trolley slightly. The adjuster should lift off the floor, and the caster wheel should stay down. If the adjuster stays stuck, it's too low—raise it a little.
Step 4: Lock It In with the Locking Nut
Once the height is set, tighten the locking nut against the aluminum foot base. Hold the adjuster screw with one wrench and turn the nut with another—this keeps the screw from spinning while you tighten. If you skip this, the vibration from moving the trolley will loosen the screw, and you'll be back to square one. Trust us, we've seen it happen.
Step 5: Test the Suction Grip (The Moment of Truth)
Now, let's make sure that suction cup works. Push the trolley to a smooth, clean part of the floor and lock the caster wheels (if your trolley has brakes). Stand behind the trolley and push it gently sideways—there should be no sliding. If it moves, check two things: Is the suction cup clean? Wipe it with a damp cloth to remove dust. Is the floor dry? Water or oil breaks the vacuum seal, so dry the area first. If it still slides, press down firmly on the trolley's deck—the weight will help the suction cup seal tighter. You should hear a faint "snap" as the air is pushed out—that's the sound of a good grip.
Step 6: Load It Up and Re-Test (Because Empty Trolleys Lie)
The real test is when the trolley is loaded. Grab some boxes or parts (similar to what you'd normally carry) and stack them on the trolley—don't go over the weight limit (check the trolley's manual if you're unsure). Push it around, then stop and try to slide it sideways again. The suction cups should hold even better under load (the extra weight increases the vacuum seal). If it still slips, double-check the adjuster height—maybe it's too high, and the suction cup isn't making full contact. Lower it by a turn or two and test again.

Troubleshooting: When Things Go Wrong (And They Will)
Even with careful installation, you might run into issues. Here's how to fix the most common problems:
Problem: Suction Cup Won't Stick to the Floor
This is the most frustrating one. Possible causes and fixes:
- Dirty suction cup or floor: Grease, dust, or even hair can break the seal. Wipe the suction cup with warm, soapy water and dry it with a lint-free cloth. Do the same for the floor where the trolley sits.
- Damaged suction cup: Check for cracks, tears, or hardening (rubber gets brittle over time). If it's damaged, replace the suction cup—most suppliers sell them as separate parts (no need to buy a whole new adjuster).
- Adjuster is too high: If the suction cup only touches the floor with the edges, it won't seal. Lower the adjuster screw until the entire cup makes contact.
Problem: Adjuster Screw Keeps Unscrewing
You set the height, locked the nut, but a week later, the adjuster has sunk. Why?
- Locking nut wasn't tight enough: Go back and tighten the locking nut with two wrenches (one on the screw, one on the nut) to ensure it's secure.
- No thread locker: If you skipped thread locker, vibrations from the trolley moving will loosen the bolt. Disassemble, apply thread locker, and retighten.
- Worn threads: If the adjuster screw or trolley's threads are stripped, the bolt won't hold. replace the screw or use a helicoil insert to repair the threads (ask maintenance for help with this).
Problem: Trolley Rocks Like a Boat
Uneven floors are a fact of life, but your trolley shouldn't feel like it's about to tip over. Fixes:
- Misaligned adjusters: Use the spirit level to check each corner. If one adjuster is higher than the others, lower it until the bubble is centered.
- Floor dips: If the floor has a permanent dip, place a thin metal shim between the aluminum foot base and the trolley's mounting plate (this raises that corner slightly). Shims are cheap and easy to cut to size.
- Bent aluminum foot base: If the base is bent (maybe from dropping the trolley), replace it. Bent bases cause uneven weight distribution, no matter how you adjust the screw.

Maintenance: Keep Your Adjusters Working for Years
Installing the adjuster is just the start—regular maintenance keeps it working like new. Here's what to do:
Weekly Checks (5 Minutes Tops)
- Wipe the suction cups with a damp cloth to remove dust and debris.
- Give the adjuster screws a quick twist to make sure they're still tight (no wiggling).
- Test the grip by pushing the trolley sideways—if it slides, clean the cups and recheck the height.
Monthly Deep Clean
Once a month, take 10 minutes to do a deeper dive:
- Remove the adjusters and clean the mounting holes with a small brush (to remove dirt that might prevent a tight fit).
- Inspect the aluminum foot base for rust or cracks—aluminum rarely rusts, but it can corrode in humid environments. If you see white spots, wipe them with a vinegar-soaked cloth.
- Lubricate the adjuster screw with a drop of silicone oil (this keeps it turning smoothly).
When to replace Parts
Even the best adjusters wear out. replace these parts when you notice:
- Suction cup: Cracks, tears, or loss of flexibility (it feels hard instead of rubbery).
- Adjuster screw: Stripped threads or difficulty turning (even after lubrication).
- Aluminum foot base: Bends, cracks, or severe corrosion (you can't straighten it).
Why Suction Cup Anti-Slip Foot Adjusters Are Worth It
| Adjuster Type | Grip Strength | Best For | Lifespan | Cost |
|---|---|---|---|---|
| Suction Cup Anti-Slip | Excellent (vacuum seal under load) | Smooth floors (concrete, tile, vinyl) | 1–2 years (replace suction cup yearly) | $15–$30 per adjuster |
| Rubber Pad | Good (friction-based) | Rough concrete, wood | 6–8 months (wears quickly) | $5–$10 per pad |
| Metal Spike | Fair (punctures surface) | Dirt, gravel, uneven ground | 3–5 years (no moving parts) | $8–$15 per spike |
As the table shows, suction cup anti-slip foot adjusters strike the best balance between grip, versatility, and lifespan—especially for indoor industrial settings. They might cost a bit more upfront than rubber pads, but they last twice as long and save you from constant replacements. And when you factor in the reduced risk of accidents (no more slipping trolleys spilling parts or injuring workers), they're a no-brainer investment.
Conclusion: Small Adjustments, Big Impact
Installing suction cup anti-slip foot adjusters on your industrial trolley might seem like a small task, but it's one that pays off in big ways: fewer accidents, smoother workflows, and trolleys that last longer. By taking the time to prep properly, align carefully, and maintain regularly, you'll ensure your trolley stays steady—whether you're using a lightweight hand trolley a or a heavy-duty model with caster wheels. Remember, safety in the workplace starts with the little things, and a stable trolley is one of those things that makes every day a little easier (and a lot safer).
So grab your wrench, clean those suction cups, and give your trolley the upgrade it deserves. Your team (and your bottom line) will thank you.