- Company Articles
- Products and Technology
- Product knowledge
- Replacement Timeline: How Often to Change Suction Cup Anti-Slip Foot Adjusters

Replacement Timeline: How Often to Change Suction Cup Anti-Slip Foot Adjusters
Related Product
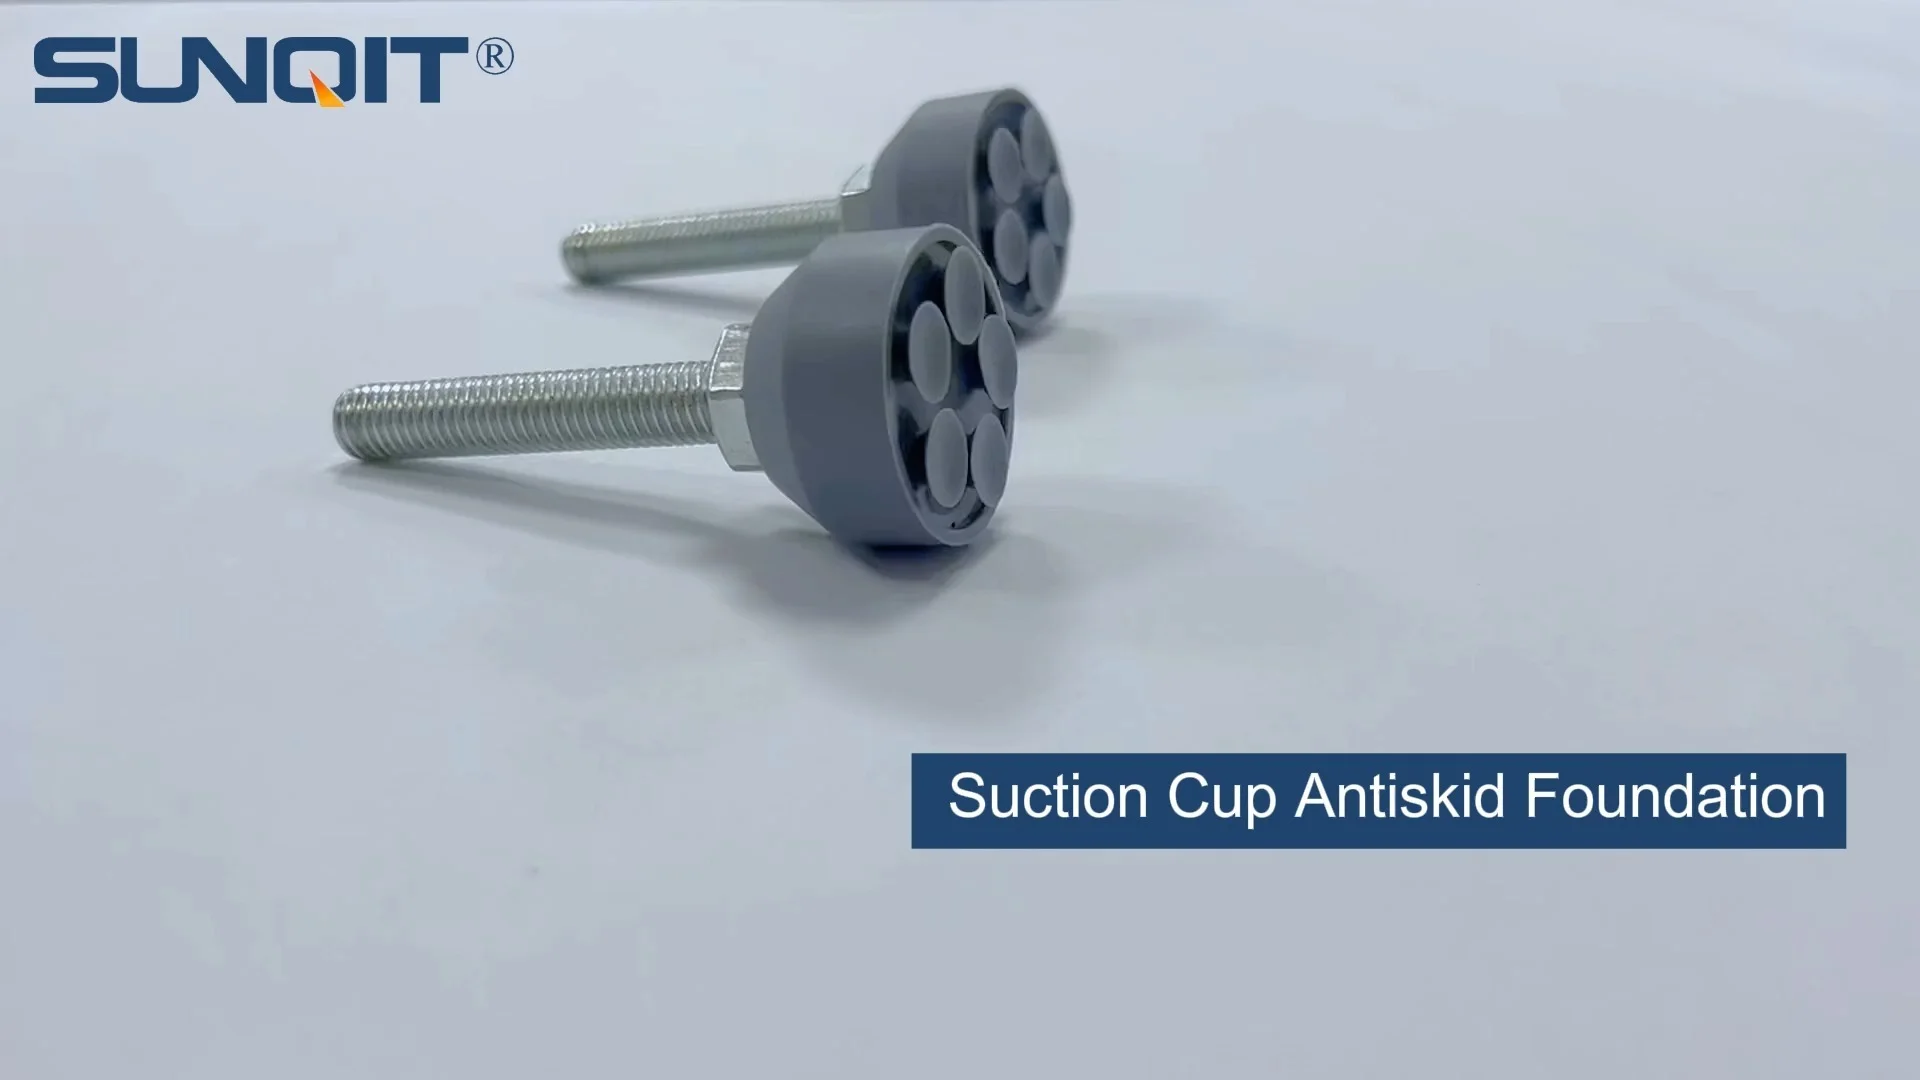
Suction Cup Anti-slip Foot Adjuster
D=35mm suction cup anti-slip foot adjusterï¼screw M10*55ï¼with a blot, used for workbench, flowrack pipe contact with groud.
Introduction: The Unsung Heroes of Workplace Stability
Walk into any manufacturing plant, warehouse, or assembly line, and you'll likely spot rows of workbenches, material racks, and production stations humming with activity. These workhorses of the industrial world keep operations running smoothly—but have you ever stopped to think about what keeps them steady? Tucked beneath many of these setups, often out of sight and out of mind, are small but critical components: suction cup anti-slip foot adjusters . These unassuming devices play a vital role in maintaining stability, preventing slips, and ensuring that workbenches and equipment stay level, even on uneven floors. But like any hardworking tool, they don't last forever. In this article, we'll dive deep into when and why you should replace these foot adjusters, how to spot signs of wear, and how proper maintenance can extend their lifespan. Whether you're a facility manager, a maintenance technician, or someone who relies on a sturdy workbench daily, understanding the replacement timeline for these components is key to keeping your workspace safe, efficient, and productive.
Why Suction Cup Anti-Slip Foot Adjusters Matter: More Than Just "Feet"
Before we get into when to replace them, let's first clarify what suction cup anti-slip foot adjusters are and why they're so important. These devices are typically made of a durable rubber or plastic suction cup base attached to a threaded metal rod. They screw into the bottom of equipment like workbenches, material racks, or even lean pipe -built stations, allowing users to adjust the height slightly to level the equipment. The suction cup base creates a strong grip on the floor, preventing the equipment from sliding or wobbling during use. This might sound simple, but their impact is far-reaching.
Imagine a busy assembly line where a workbench wobbles every time an operator tightens a bolt. Over time, that instability could lead to misaligned parts, slower production, or even mistakes that require rework. Worse, a workbench that slips could cause tools or materials to fall, risking injury to workers or damage to products. In environments where precision matters—like electronics manufacturing, where delicate components are handled—even a tiny wobble can ruin a batch of products. Suction cup anti-slip foot adjusters eliminate these risks by keeping equipment firmly rooted. They also protect floors from scratches and dents, as the soft suction cup base acts as a buffer between the metal equipment and the ground. In short, these small components are the unsung guardians of workplace safety, efficiency, and equipment longevity.

Factors That Affect Lifespan: Not All Foot Adjusters Age the Same
So, how long do suction cup anti-slip foot adjusters actually last? The answer isn't one-size-fits-all. Their lifespan depends on a mix of factors, from the environment they're in to how heavily they're used. Let's break down the key variables that influence how quickly these foot adjusters wear out:
| Factor | Description | Impact on Lifespan |
|---|---|---|
| Material Quality | Foot adjusters are made from various materials; rubber cups are common, but some use higher-grade silicone or polyurethane. Cheaper rubber may harden or crack faster. | High-quality materials can extend lifespan by 2–3 years; low-quality materials may fail in 6–12 months. |
| Environmental Conditions | Moisture, chemicals, extreme temperatures, or exposure to oils/grease can degrade the suction cup material over time. | Harsh environments (e.g., factories with oil spills) can reduce lifespan by 50% compared to dry, clean areas. |
| Usage Intensity | Equipment that's moved frequently (even if just adjusted) or supports heavy loads puts more stress on the foot adjusters. | Heavy-use equipment (e.g., workbenches with 500+ lbs of tools) may need replacement every 1–2 years; light-use setups (e.g., small material racks) can last 3–5 years. |
| Floor Type | Rough concrete floors can abrade the suction cup base, while smooth tiles may reduce friction, causing the cup to wear faster as it adjusts to movement. | Rough floors can shorten lifespan by 1–2 years; smooth floors may require more frequent checks for suction loss. |
| Maintenance Habits | Regular cleaning, lubrication of the threaded rod, and inspection can prevent debris buildup and corrosion. | Proper maintenance can extend lifespan by 30–50% compared to neglected foot adjusters. |
For example, a workbench in a food processing plant, where floors are regularly cleaned with harsh detergents, will subject foot adjusters to more chemical exposure than a workbench in a dry office warehouse. Similarly, a material rack loaded with heavy metal parts will stress the foot adjusters more than one holding lightweight plastic components. Understanding these factors will help you estimate how often you'll need to replace your foot adjusters.

Signs It's Time to replace: How to Spot Wear and Tear
Even with the best maintenance, suction cup anti-slip foot adjusters will eventually wear out. The key is to catch the signs early, before they lead to bigger problems. Here are the most common red flags to watch for:
1. Visual Cracks or Tears in the Suction Cup
The first thing to check is the condition of the suction cup itself. Over time, the rubber or plastic can dry out, leading to cracks, tears, or splits in the cup. These flaws break the seal between the cup and the floor, reducing suction and stability. If you notice even small cracks, it's a sign that the material is degrading—don't wait for them to grow larger. In severe cases, the cup may even start to crumble or peel away from the metal rod.
2. Loss of Suction or Grip
A healthy suction cup should stay firmly attached to the floor, even when the equipment is jostled. If you find that the workbench or rack slides easily when pushed, or if it rocks back and forth despite being adjusted, the foot adjusters may have lost their grip. This can happen when the suction cup hardens (losing flexibility) or when debris like dirt or oil builds up on the cup, preventing a tight seal. Try cleaning the cup first—if the problem persists, replacement is needed.
3. Thread Damage or Corrosion
The threaded metal rod that allows height adjustment can also wear out. If you notice rust, corrosion, or stripped threads, the adjuster may no longer tighten securely. A rod that spins freely without raising or lowering the equipment is a clear sign of thread damage. Corrosion is especially common in humid environments or where floors are frequently wet, as moisture can seep into the threads and cause rust to form. Once threads are damaged, the adjuster can't be properly secured, making the equipment unstable.
4. Hardened or Brittle Rubber
Rubber suction cups rely on flexibility to create suction. Over time, exposure to heat, sunlight, or chemicals can cause the rubber to harden and become brittle. To test this, press your finger into the cup—if it feels stiff and doesn't bounce back, or if it cracks when bent slightly, it's time for a new adjuster. Hardened rubber can't conform to the floor's surface, so it loses its anti-slip properties, even if there are no visible cracks.

General Replacement Timeline: When to Plan for New Foot Adjusters
Now that we know the factors and signs, let's outline a general replacement timeline. Remember, this is a starting point—your specific situation may vary based on the factors we discussed earlier. Use this as a guide, but always pair it with regular inspections.
Light-Use Environments: 3–5 Years
In settings where equipment is rarely moved, supports light loads (under 100 lbs), and is kept in dry, clean conditions—like a small workshop or office storage rack—suction cup anti-slip foot adjusters can last 3–5 years. For example, a lean pipe bookshelf in a back office that holds manuals and office supplies would fall into this category. In these cases, annual inspections are sufficient to catch early wear.
Moderate-Use Environments: 1–3 Years
Most industrial workbenches, material racks, and assembly stations fall into the moderate-use category. These setups are used daily, support moderate loads (100–500 lbs), and may be adjusted occasionally to level the equipment. Environments here are generally clean but may have some dust or occasional moisture (e.g., a warehouse with concrete floors). In these cases, foot adjusters typically last 1–3 years. For example, a workbench used for packaging small parts would need replacement every 2 years on average, assuming regular maintenance.
Heavy-Use or Harsh Environments: 6–12 Months
In high-stress environments—think manufacturing plants with heavy machinery, food processing facilities with frequent chemical cleaning, or outdoor workshops exposed to rain and temperature extremes—foot adjusters take a beating. Equipment here may support loads over 500 lbs, be moved or adjusted daily, or sit on rough, uneven floors. In these cases, expect to replace foot adjusters every 6–12 months. A prime example is a workbench in an auto repair shop, where oil spills are common and tools are constantly being dropped, causing vibrations that stress the foot adjusters.
Pro Tip: Create a maintenance log for each piece of equipment, noting when foot adjusters were last replaced and any signs of wear observed during inspections. This log will help you spot patterns (e.g., "Workbench A needs replacements every 8 months due to oil exposure") and plan replacements proactively, avoiding unexpected failures.
Step-by-Step Replacement Guide: How to Swap Out Worn Foot Adjusters
Replacing suction cup anti-slip foot adjusters isn't complicated, but it does require a few basic tools and careful attention to detail. Here's a step-by-step guide to ensure the job is done safely and correctly:
Tools You'll Need:
- Adjustable wrench or pliers
- Clean cloth or rag
- Thread locker (optional, for securing new adjusters)
- New suction cup anti-slip foot adjusters (match size and thread type to the old ones)
- Level (to check alignment after replacement)
Step 1: Prepare the Equipment
Start by clearing the equipment of all tools, materials, or products. If it's a heavy workbench, enlist a helper to stabilize it while you work—you don't want it tipping over when you remove the foot adjusters. If possible, raise the equipment slightly using a jack or blocks to take pressure off the foot adjusters (this makes them easier to unscrew).
Step 2: Remove the Old Adjusters
Using an adjustable wrench or pliers, grip the metal rod of the foot adjuster and turn it counterclockwise to unscrew it from the equipment. If the threads are stuck due to rust or debris, spray a small amount of penetrating oil (like WD-40) and let it sit for 5–10 minutes before trying again. Avoid using excessive force, as this can strip the threads in the equipment. Once removed, inspect the old adjuster—note any signs of wear (cracks, hardening, etc.) to help you identify patterns for future maintenance.
Step 3: Clean the Threaded Holes
Before installing the new adjuster, use a clean cloth to wipe out the threaded hole in the equipment. Remove any dirt, rust, or debris that could prevent the new adjuster from screwing in smoothly. If there's heavy rust, you can use a small wire brush to clean the threads—this ensures a tight, secure fit for the new adjuster.
Step 4: Install the New Adjuster
Screw the new suction cup anti-slip foot adjuster into the threaded hole by hand first, turning clockwise. This prevents cross-threading (stripping the threads). Once it's hand-tight, use the wrench to tighten it a quarter-turn more—don't over-tighten, as this can damage the threads or crack the equipment's base. If the equipment is prone to vibration (like a workbench near a machine), apply a small amount of thread locker to the threads before installation to keep the adjuster from loosening over time.
Step 5: Level the Equipment and Test
Once all foot adjusters are replaced, lower the equipment back to the floor. Use a level to check if it's even—adjust the height of the new foot adjusters as needed by turning them clockwise (to raise) or counterclockwise (to lower). Once level, test the stability by pushing gently on different corners of the equipment. It should not rock or slide. Finally, press down on the suction cups to ensure they're making full contact with the floor—you should feel a slight "squish" as the rubber conforms to the surface.
Extending Lifespan: Maintenance Tips to Keep Foot Adjusters Working Longer
While replacement is inevitable, proper maintenance can significantly extend the lifespan of your suction cup anti-slip foot adjusters. Here are some simple habits to incorporate into your regular facility upkeep:
Clean the Suction Cups Regularly
Dirt, dust, oil, and debris can build up on the suction cup base, reducing its grip. Wipe the cups with a damp cloth every 2–4 weeks to remove grime. For stubborn stains or oil, use a mild soap and water solution—avoid harsh chemicals like bleach or solvents, which can degrade the rubber. After cleaning, dry the cups thoroughly to prevent mold or mildew growth.
Lubricate Threads Annually
The threaded metal rod can seize up over time, making adjustment difficult. Once a year, apply a small amount of silicone-based lubricant to the threads (avoid oil-based lubricants, which can attract dirt). Turn the adjuster up and down a few times to distribute the lubricant evenly. This keeps the threads smooth and makes future adjustments (and replacements) easier.
Inspect Monthly
Make monthly inspections part of your routine. Walk around the equipment and check each foot adjuster for cracks, hardening, or loss of suction. Test the stability by pushing on the equipment—if it moves, tighten or replace the adjuster immediately. Catching issues early can prevent accidents and extend the life of the adjusters by addressing small problems before they worsen.
Protect from Extreme Conditions
If possible, keep equipment with foot adjusters away from direct sunlight, extreme heat, or standing water. For outdoor use (e.g., a workbench in a covered patio), choose foot adjusters made from UV-resistant materials to prevent hardening. In wet environments, consider placing a mat under the equipment to reduce moisture exposure to the foot adjusters.
Case Study: The Cost of Ignoring Replacement
To illustrate why timely replacement matters, let's look at a real-world example. A mid-sized electronics manufacturer in the Midwest relied on a series of lean pipe workbenches for assembling circuit boards. The facility manager, focused on cutting costs, delayed replacing the suction cup anti-slip foot adjusters on these workbenches, even though they were over 3 years old and showed signs of cracking. Six months later, during a busy production run, one workbench began to wobble severely. An operator, trying to steady it, knocked over a tray of small capacitors, scattering them across the floor. The line was shut down for 2 hours while workers searched for and sorted the components. Worse, several capacitors were damaged, costing the company $1,500 in wasted materials and lost production time. After the incident, the manager ordered new foot adjusters for all workbenches, a $300 expense. The lesson? Investing in timely replacement is far cheaper than dealing with the consequences of failure.
Conclusion: Prioritize Small Components for Big Results
Suction cup anti-slip foot adjusters may be small, but their impact on workplace safety and efficiency is enormous. By understanding the factors that affect their lifespan, recognizing signs of wear, and following a proactive replacement timeline, you can avoid costly downtime, injuries, and equipment damage. Remember: there's no one-size-fits-all answer to "how often to replace them," but with regular inspections and maintenance, you can tailor the timeline to your specific environment. Whether you're managing a large factory or a small workshop, don't overlook these unsung heroes. Your workbench (and your bottom line) will thank you.